


There may be times when you might have a custom attribute for an artifact where users can choose more than one value. The Report Builder in Jazz Reporting Service (JRS) displays by default these custom attributes with multiple values in separate lines. But, what if you want to streamline your report display by showing the values in a single line? This blog post will show you how.
Before you begin
You’ll need Report Builder version 6.0.4 (available with Collaborative Lifecycle Management 6.0.4) in order to add a custom expression column to your report (these instructions apply to IBM DB2 only). Create your custom attribute in your Collaborative Lifecycle Management (CLM) application if it’s not already created. In this example, we’ll use a custom attribute for a requirement called “OriginList.” For this attribute, users can pick more than one option to specify where the requirement originated, for example Customer, Market Analyst, or Partner. Run the data collection jobs for the application and check to see if the data is refreshed.
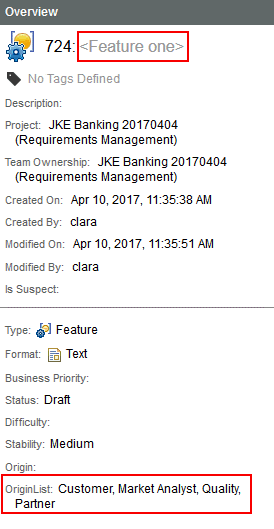
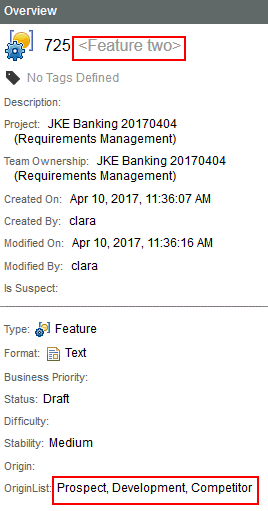
Here is what the original requirements look like with the OriginList custom attribute:
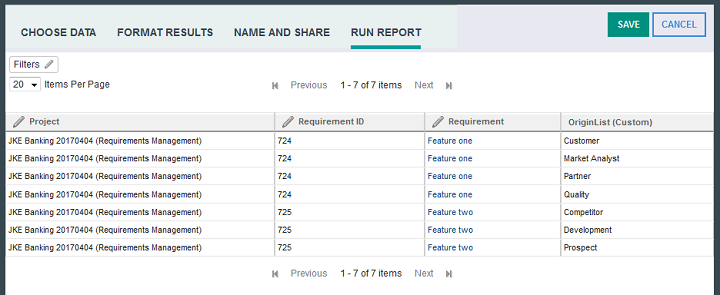
Here is the default report that will be displayed if you simply add the custom attribute to a basic Requirements report. Each value for the custom attribute is displayed as a separate entry in the table, even though it’s for the same requirement:
Part 1: Adding a custom expression column
In Report Builder, you’ll start by building a new report. Pick an artifact to report on, in this case Requirement. Add any conditions to include the requirements that you want in your report. When you reach the Format section of your report, click Custom Expression.
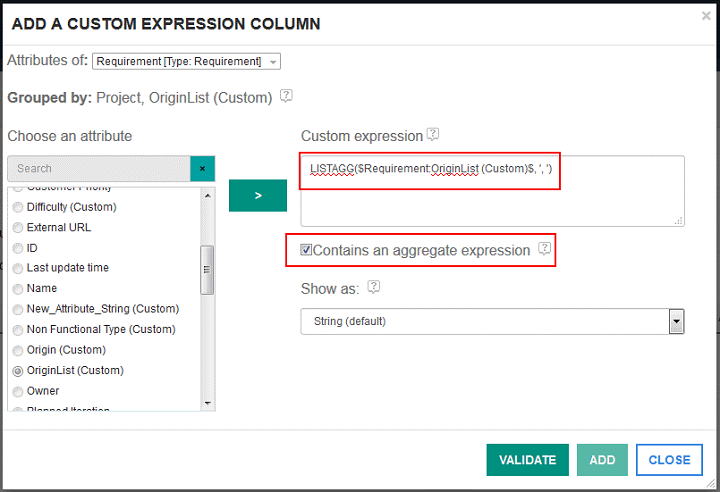
In the Add a Custom Expression window, choose the custom attribute and click the > arrow to add the expression. Now surround the default text with parentheses and add the function LISTAGG to the beginning of the attribute and a comma at the end, for example:
LISTAGG($Requirement:OriginList (Custom)$,’,’)
The comma will separate the attributes on a single line so that they don’t run into each other. Select the Contains an aggregate expression check box. Validate the expression and then click Add.
Part 2: Reorganizing the report columns
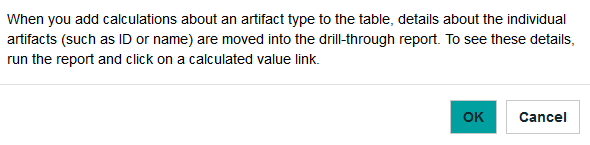
Note that because you added an aggregate expression, the fields related to the details will be removed from the report. You can click OK to dismiss this message.
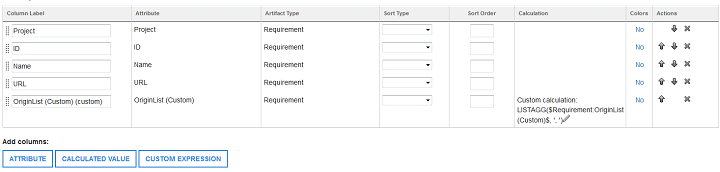
You can see that your custom expression now appears in the Calculation column. The fields referred to in the previous message no longer appear in your report so you’ll need to add them back.

Click Attribute to add the detail fields back to the report, for example ID, Name and URL. Let’s reorganize the fields so that our custom expression displays at the end of the report:
Part 3: Run the report
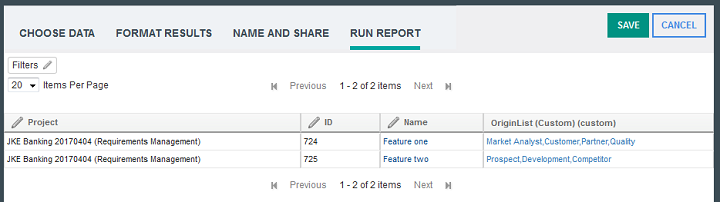
Now you can run the report. The OriginList custom attribute column now displays the selected values on a single line, making your report more compact and easier to read.
You’ll also see that both the name of the requirement and the custom attribute have hyperlinks. The requirement link will show the original artifact. The custom attribute link will display the requirement and each of the selected values on a separate line.
Conclusion
When you’ve finished working with the report, you can add it to a CLM dashboard or export it to another format. Now that the report takes up less space, you might even have room on your dashboard to add another report!
Clara Forero
Advisory Software Developer, Persistent Systems

This seems like exactly what I need to do, but I am unable to validate. I get a CRRGW5628E error that LISTAGG is not a recognized built-in function name. I am using version 6.0.4 as recommended. Do I need to do anything else to enable this to work? Thanks
We are delivering Jazz 6.0.5 next week. However, the JRS reports are crashing.
We have Three project areas, three artifact types (one with an extra attribute). Support said that it should work. Then, they said Derby is not supported for JRS. What?
I figured you knew the answer.
Cheers,
Link
Are there any limitations for what kind of attributes this method would work with?
I am delighted to find this answer – this is exactly what I have been trying to do for some time.
Using v6.0.6.1 iFix 010.
I have followed the instructions to the letter:
The LISTAGG formula validates perfectly and the new hyperlinked attribute is included in the Report.
However the report displays exactly as before with one row per value of the multi–valued enumerated custom attribute.
[Interestingly the existing attributes are all still present and NOT removed – if that is a clue].
Is there some other magic required??
Andy Lapping of IBM provided me a different SPARQL function, to be used as a Custom Expression, which works perfectly:
GROUP_CONCAT(DISTINCT $$; SEPARATOR=”, “)