IBM Quick Deployer environment construction
Authors: ThomasPiccoli, KennethThomson, JenniferLiu, KenTessier, ClareCartyBuild basis: CLM 6.0, CLM 6.0.x, CE 6.0.x
This topic guides you through creating and populating the UCD environment to represent the system you are going to install. By following this topic you will
This is the simplest method for creating an environment in UCD. However, being the simplest also means that it is the least dynamic method. UCD supports many other methods for creating and managing environments, which are not be described here. You might want to review of the options described in the Knowledge Center for the version of UCD that you are running. You can find the version by navigating the Help link from the UCD web UI. For an example of how to leverage the blueprints included with Quick Deployer to create an environment, see How to use the topology blueprints included with Quick Deployer
- create the environment
- attach agents to connect UCD to each target server
- map UCD components to each agent
- add tags to each agent
This is the simplest method for creating an environment in UCD. However, being the simplest also means that it is the least dynamic method. UCD supports many other methods for creating and managing environments, which are not be described here. You might want to review of the options described in the Knowledge Center for the version of UCD that you are running. You can find the version by navigating the Help link from the UCD web UI. For an example of how to leverage the blueprints included with Quick Deployer to create an environment, see How to use the topology blueprints included with Quick Deployer
Environment construction (overview)
You can create environments with different application distributions than the example below depicts. The rules for how to control application distribution are described on the mapping and tagging rules wiki page. The general process is described in this section and more detailed example follows.- Open the Resource Tree tab on the Resources page and select Create Top-Level Group.
Provide a name for the resource and press Save. - Open application Rational_QD_60x and select Create Environment.
Provide a name for the environment and press Save. - Open the environment and add the top level resource created above
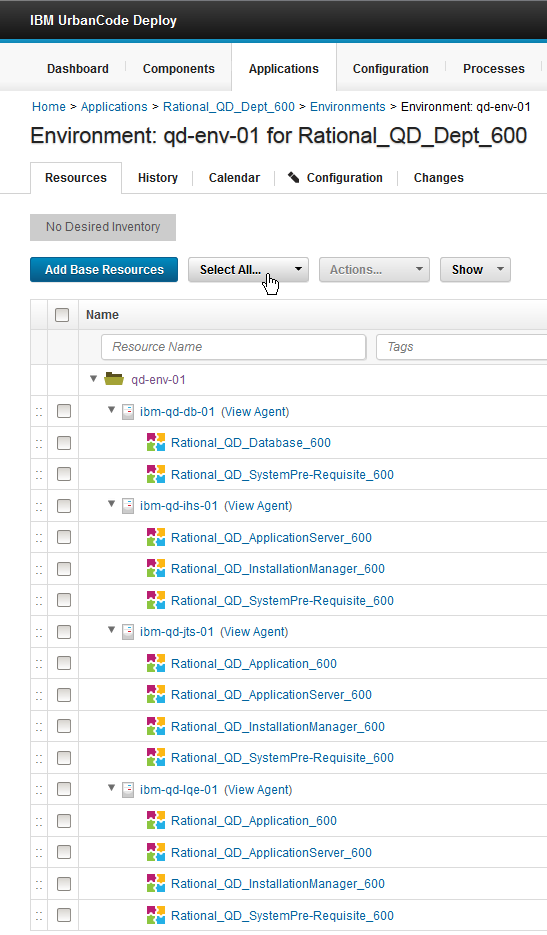
- Add the UCD agents that were installed on the target VMs, as described in the system requirements, to the base resource just added to the environment.
Instructions for installing agents on the target VMs can be found on the UCD Installing Agents online documentation.
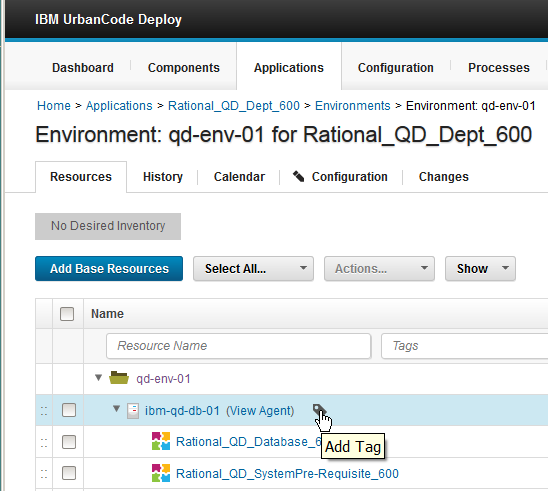
If you are using your own Database Server ensure that a UCD agent is also installed on it. - Add Tags and map components to the agents.
Environment construction (example)
- To continue creating an environment as described here you must have already deployed the VMs that meet the requirements described on the System Requirements page. Note: all the VMs in an environment must be running the same operating system, either all RHEL or all Windows.
- Open the Resource Tree tab on the Resources page and select Create Top-Level Group.
Provide a name for the resource and press Save.
- Open application Rational_QD_60x and select Create Environment.
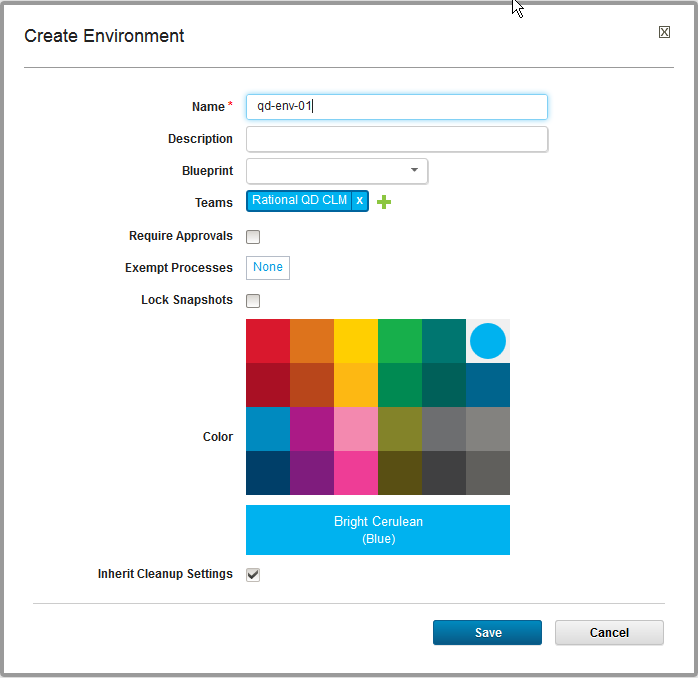
Provide a name for the environment and press Save.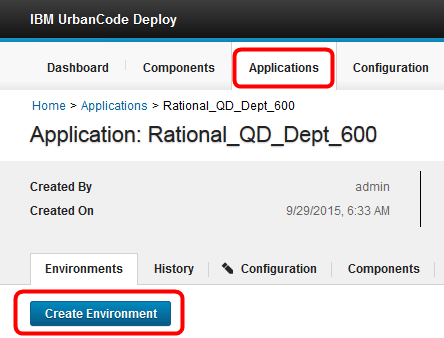
- Open the environment and add the top level resource created above
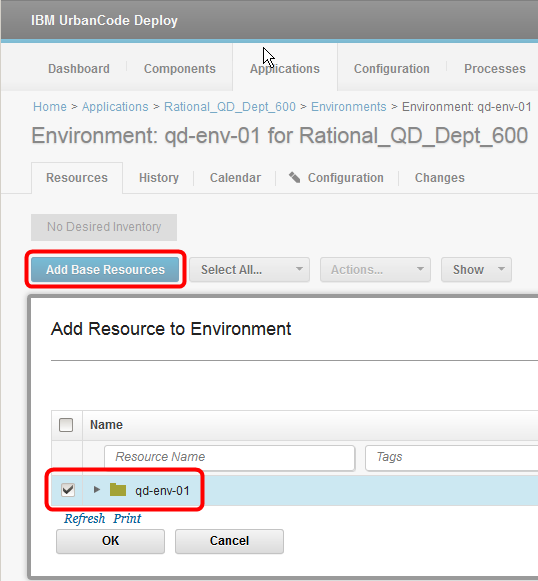
- Add the 4 UCD agents that were installed on the target VMs, as described in the system requirements, to the base resource just added to the current environment above. Instructions for installing agents on the target VMs can be found on the UCD Installing Agents online documentation. If you are using your own Database Server ensure that a UCD agent is also installed on it.
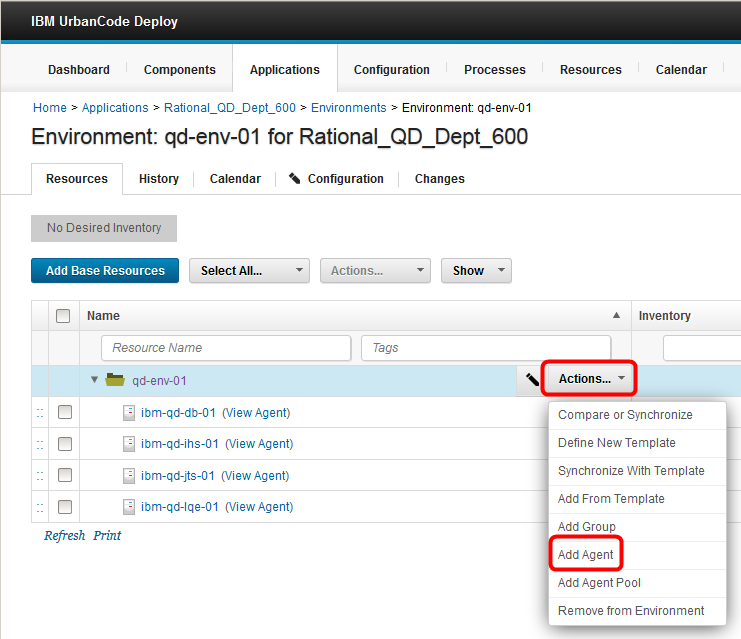
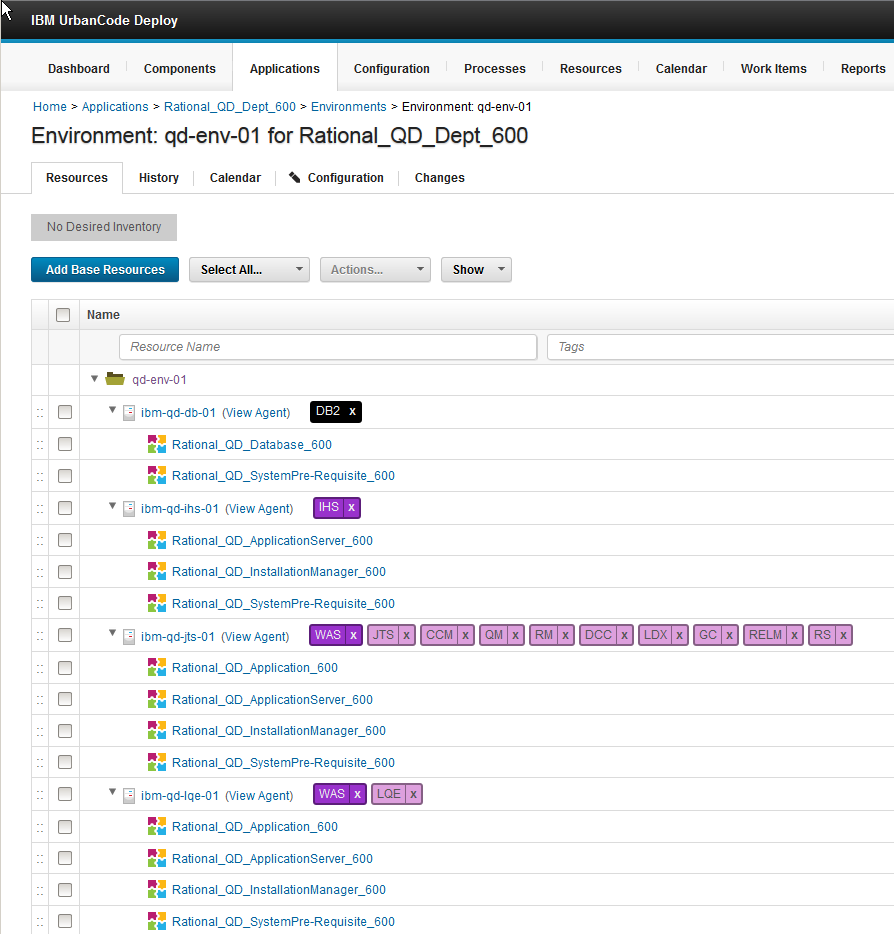
- Map components to the agents as follows: Select a resource, then click Actions > Add Component. If you are using your own database server ensure that the correct components are mapped to it.
- Add tags to the agents as shown below. To install Rhapsody Model Manager add the AM tag and to install Rhapsody Design Manager add the DM tag. In QD 1.3 the DB2 tag has been changed to DB.
Miscellaneous
Notes:
- Throughout the IBM Quick Deployer wiki the screen captures are for reference only.
In some cases if the functionality they display has not changed in the latest release they will be from a previous release
Related topics:
External links:
Additional contributors: MichelleCrane, NathanBak, ChristianLopez
Contributions are governed by our Terms of Use. Please read the following disclaimer.
Dashboards and work items are no longer publicly available, so some links may be invalid. We now provide similar information through other means. Learn more here.