How to use the topology blueprints included with Quick Deployer
Authors: ThomasPiccoli, KennethThomson, JenniferLiu, KenTessier, ClareCartyBuild basis: CLM 6.0, CLM 6.0.x, CE 6.0.x
Quick Deployer ships with a set of sample blueprints which are pre-set templates that distribute the components and application tags across the available nodes based on the Recommended ALM topologies. This page describes a method for using Quick Deployer to install CE/CLM environments using these blueprints.
 Select one of the templates and drill down to explore in more detail. For example, the Departmental Continuous Engineering template:-
 You can select Expand all to see more detail.
 As you can see, the applications are distributed over 5 nodes or VMs; a database node, an ihs or reverse proxy node and three Application Server nodes denoted as os-1, -2 and -3.
 If you edit the agent prototype for each node it will show the naming convention to be used for the target VM names. For instance,
 Here the agent name for the DB server must include the environment name and end in '-db'.
So if we decide the environment is going to be called win16qd21, the DB server name should be win16qd21-db
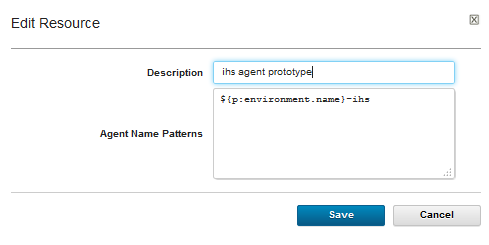
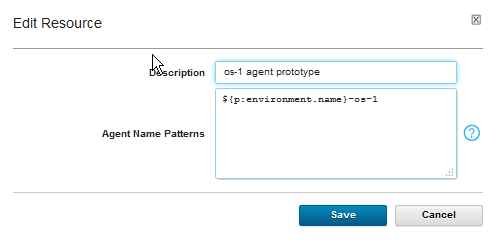
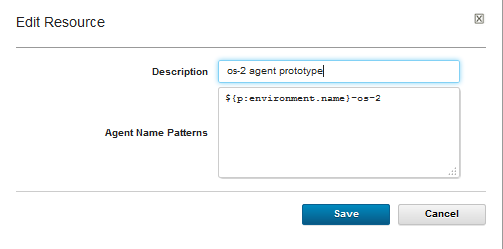
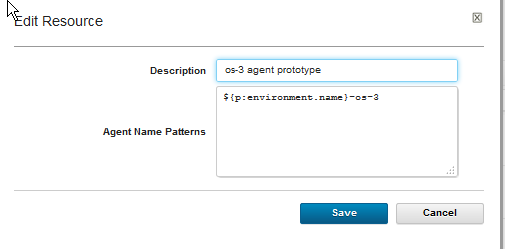
Similarly, the agent prototypes for the IHS and other nodes:-
Here the agent name for the DB server must include the environment name and end in '-db'.
So if we decide the environment is going to be called win16qd21, the DB server name should be win16qd21-db
Similarly, the agent prototypes for the IHS and other nodes:-
 Again if we use win16qd21 as our environment name, this nets out to agent names as follows:-
 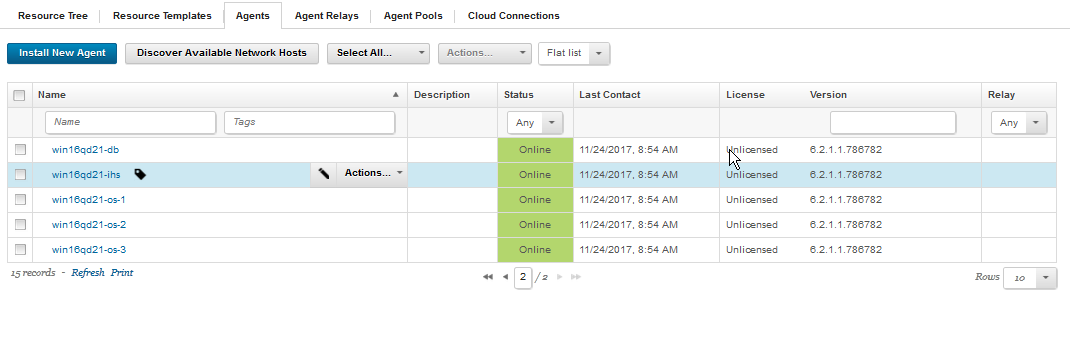 Note that you can change the naming convention in your agent prototypes if you want and name your environment and agents accordingly.
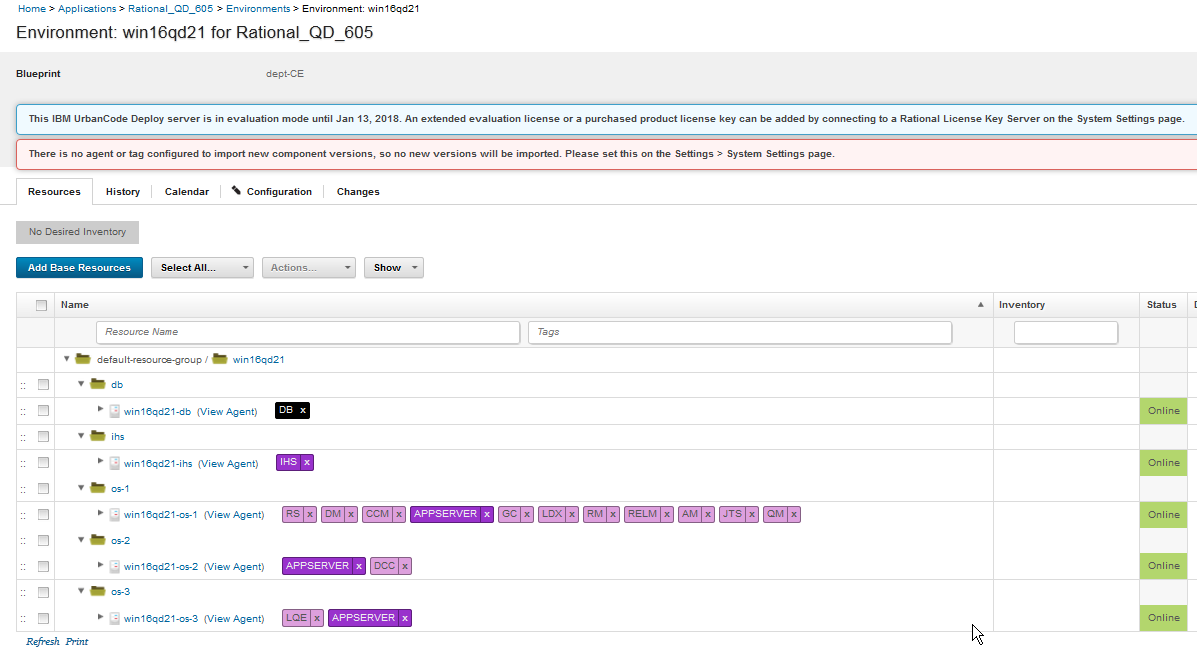 By using the naming convention and the blueprint, the environment and the agents are automatically connected and everything mapped automatically for deployment.
You can then run the applications processes to install your CE/CLM applications and the applications will be laid down on the nodes according to the topology defined in the blueprint.
By using the naming convention and the blueprint, the environment and the agents are automatically connected and everything mapped automatically for deployment.
You can then run the applications processes to install your CE/CLM applications and the applications will be laid down on the nodes according to the topology defined in the blueprint.
Standard Topology Blueprints installed by Quick Deployer
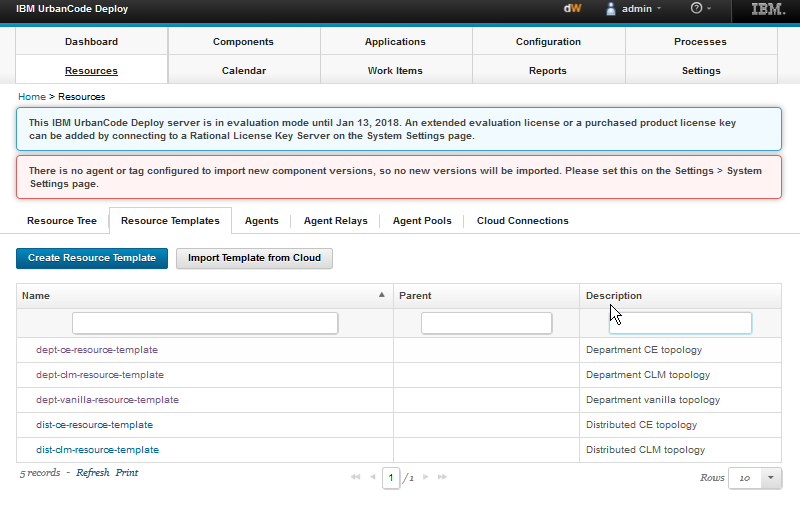
Once Quick Deployer is installed, the user can select the Resources tab and explore the available Resource Templates.
Select one of the templates and drill down to explore in more detail. For example, the Departmental Continuous Engineering template:-
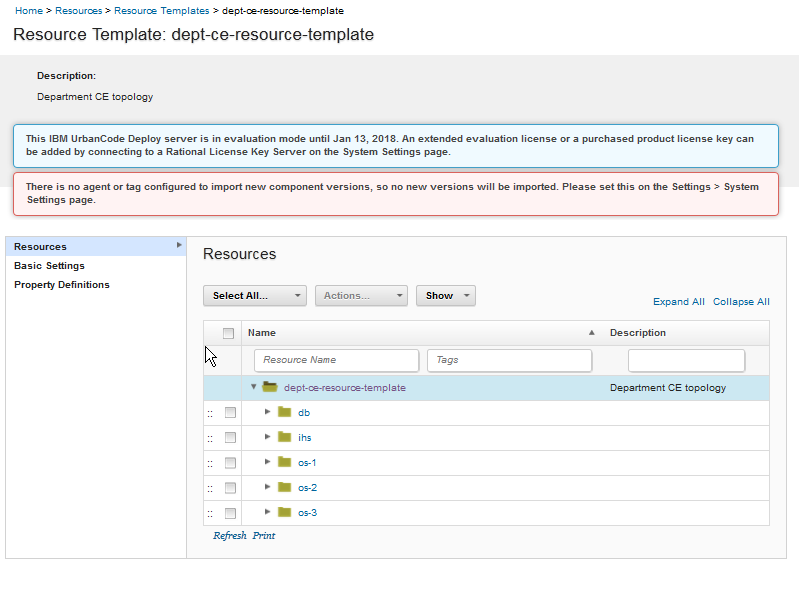
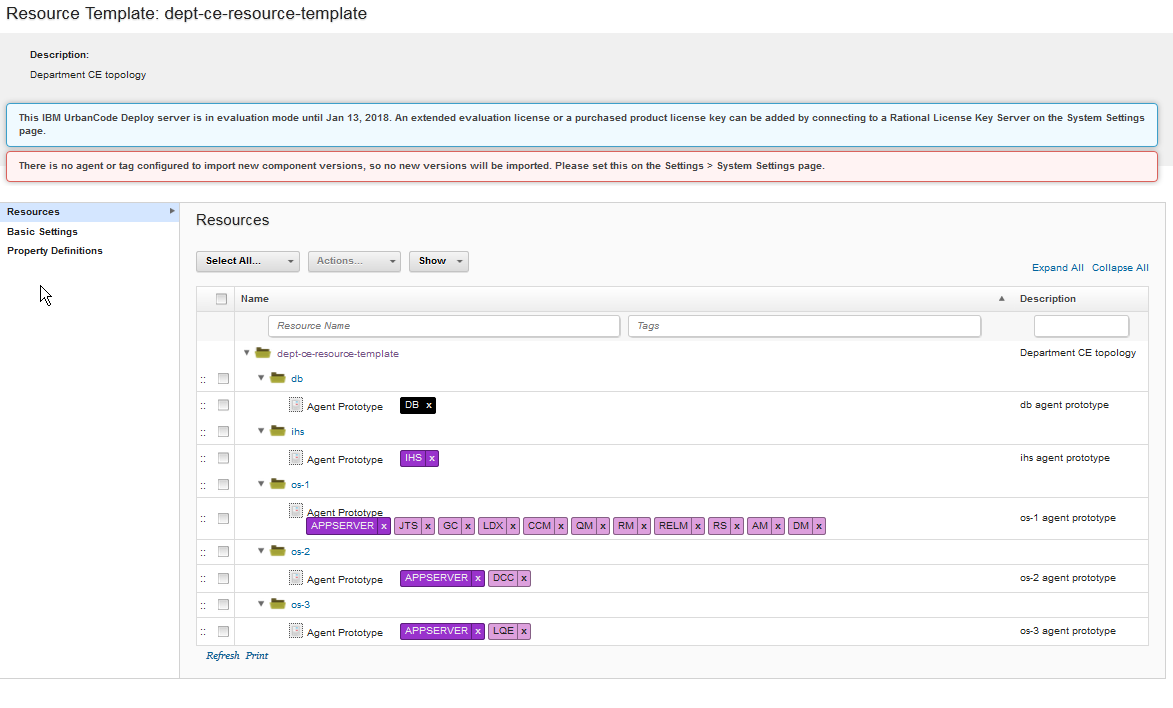
You can select Expand all to see more detail.
As you can see, the applications are distributed over 5 nodes or VMs; a database node, an ihs or reverse proxy node and three Application Server nodes denoted as os-1, -2 and -3.
How to leverage the Resource Templates
The resource templates can be leveraged by defining UCD agent prototypes so when a blueprint is derived from the template and a UCD application environment uses that blueprint the naming convention set up in the Agent prototype causes the agents installed on the target VMs to be connected to the environment. Taking a slice from the example above:-
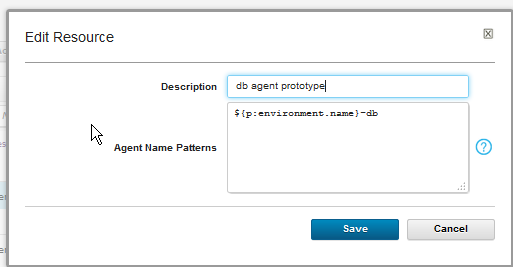
If you edit the agent prototype for each node it will show the naming convention to be used for the target VM names. For instance,
Here the agent name for the DB server must include the environment name and end in '-db'.
So if we decide the environment is going to be called win16qd21, the DB server name should be win16qd21-db
Similarly, the agent prototypes for the IHS and other nodes:-
Again if we use win16qd21 as our environment name, this nets out to agent names as follows:- - db : win16qd21-db
- ihs : win16qd21-ihs
- node 1: win16qd21-os-1
- node 2: win16qd21-os-2
- node 3: win16qd21-os-3
Note that you can change the naming convention in your agent prototypes if you want and name your environment and agents accordingly.
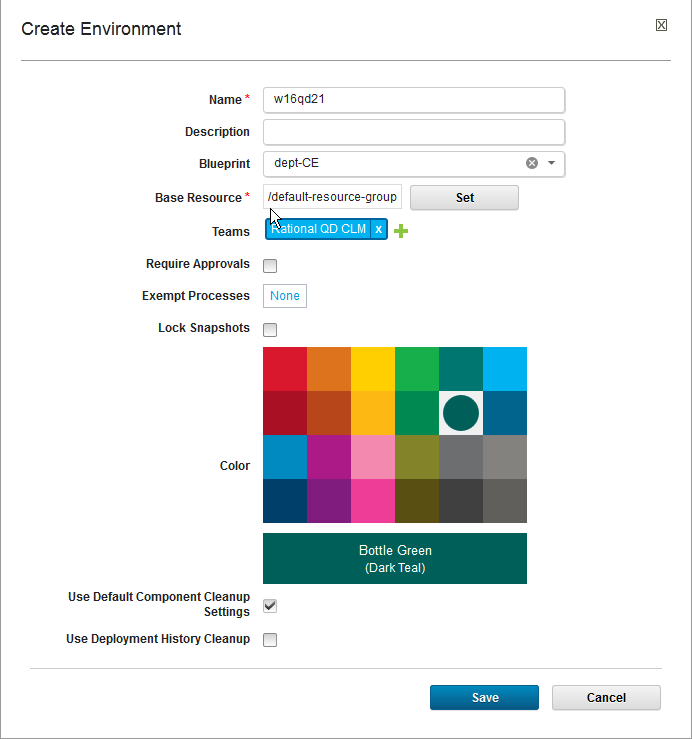
Creating the environment using the blueprint
When you create the environment, you use the environment name already selected, the blueprint you want to use and the default resource group.
By using the naming convention and the blueprint, the environment and the agents are automatically connected and everything mapped automatically for deployment.
You can then run the applications processes to install your CE/CLM applications and the applications will be laid down on the nodes according to the topology defined in the blueprint.
Miscellaneous
Notes:
- Throughout the IBM Quick Deployer wiki the screen captures are for reference only.
In some cases if the functionality they display has not changed in the latest release they will be from a previous release
Related topics:
External links:
Additional contributors: MichelleCrane, NathanBak, ChristianLopez
Contributions are governed by our Terms of Use. Please read the following disclaimer.
Dashboards and work items are no longer publicly available, so some links may be invalid. We now provide similar information through other means. Learn more here.