OAuth 1.0a - 3 Legged Flow with ELM 
Authors: DineshKumar Build basis: CLM 6.0.6.1, ELM 7.0 and higher
The section for Application to Application authentication in the article https://jazz.net/wiki/bin/view/Main/JFSCoreSecurity shows the typical flow. In this article we demonstrate using OAuth 1.0 to access protected resources of ELM using RESTClient browser addon to Firefox. The article introduces the URLs to use for each Leg of the authentication process and some of the aspects unique to individual ELM applications.
Getting Started
1. Register a Consumer
You will need Admin User Access to the Application for this. Once you login as an Admin user to the application, you can register a consumer from the Admin/Consumers page. You can reach this page using the url of the form:https://<host>:<port>/<appcontextroot>/admin#action=com.ibm.team.repository.admin.configureOAuth Alternatively, one can make use of the additional provisions that were made to Root Services document of ELM applications to provides URLs to register consumers and approve them. For more details, refer to the addendum here: https://jazz.net/wiki/bin/view/Main/RootServicesSpecAddendum2
Once registered, make a note of the consumer key and the secret. We will need them in the Auth flow.
2. URLs for Authentication flow.
The Authentication flow works with specific URLs. These URLs are accessed from thehttps://<host>:<port>/<appcontextroot>/rootservices In the rootservies document, the URLs to look for are:
a.
<jfs:oauthRequestTokenUrl rdf:resource="https://<host>:<port>/jts/oauth-request-token"/> b.
<jfs:oauthUserAuthorizationUrl rdf:resource="https://<host>:<port>/jts/oauth-authorize"/> c.
<jfs:oauthAccessTokenUrl rdf:resource="https://<host>:<port>/jts/oauth-access-token"/> With the Consumer Key and Secret and the URLs, we are ready to begin the 3 legged Authorization flow. This flow starts with getting a Request Token qouting the Consumer Key/Secret. Authorizing the Token using an User's login and finally exchanging the Authorized Request Token for an Access Token. The Access Token can then be used to access Protected resources from the application.
3. Configure the Authentication Signature
Before going for the Authentication Flow using RESTClient, you need to install this add on and configure the Authentication Signature to use. Below are the steps:- Install RESTClient on Firefox as an Extension. You can get the addon here
- Launch RESTClient
- Click Authentication to show the Authentication Types available with RESTClient :
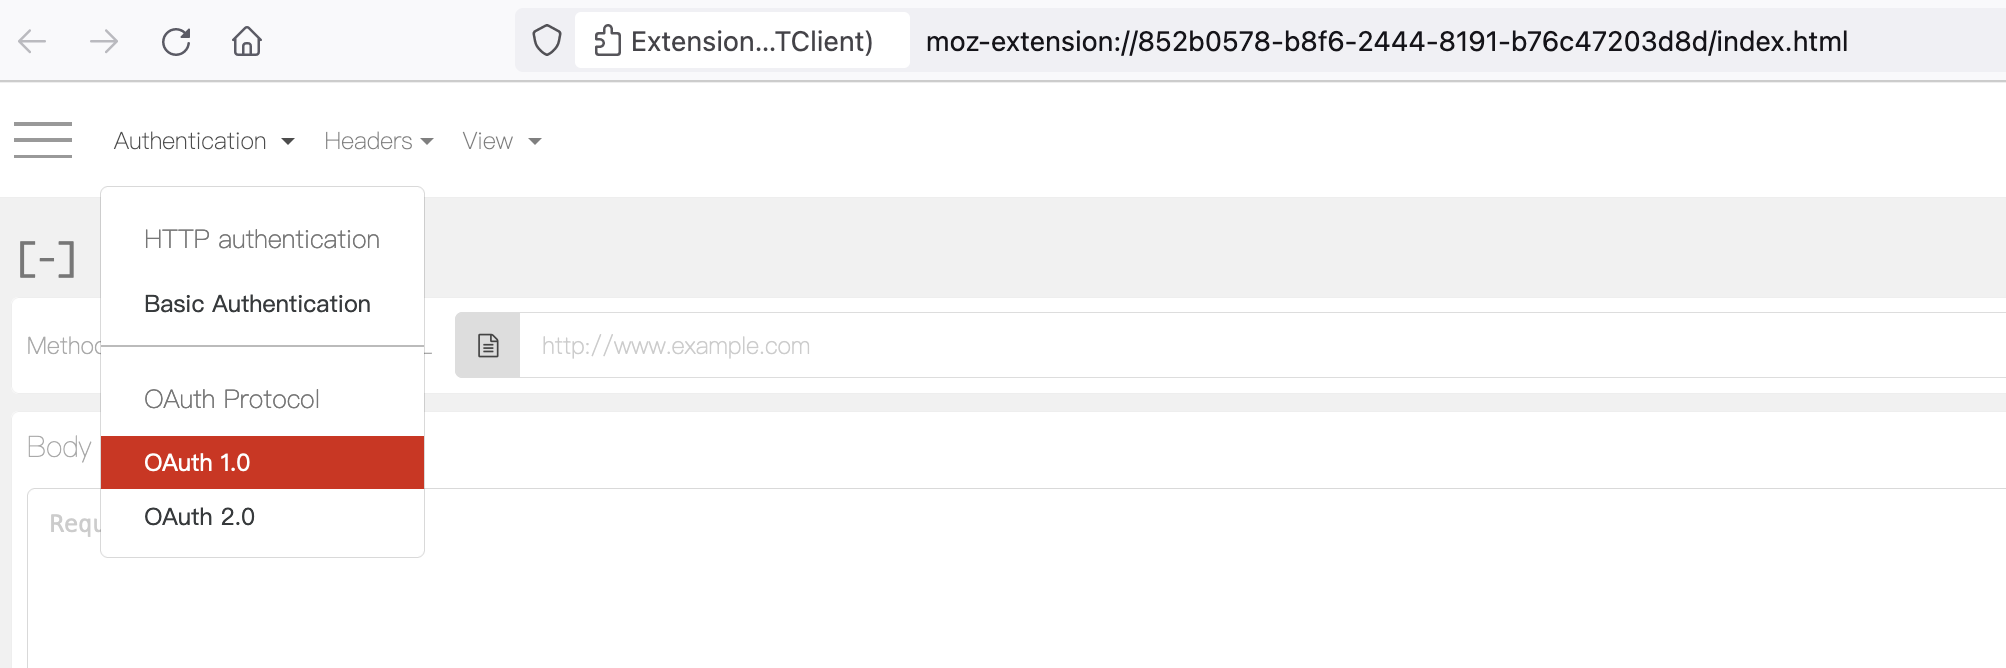
- Select OAuth 1.0 as Authentication. This pops up an UI where the Request Signature and Settings can be configured:
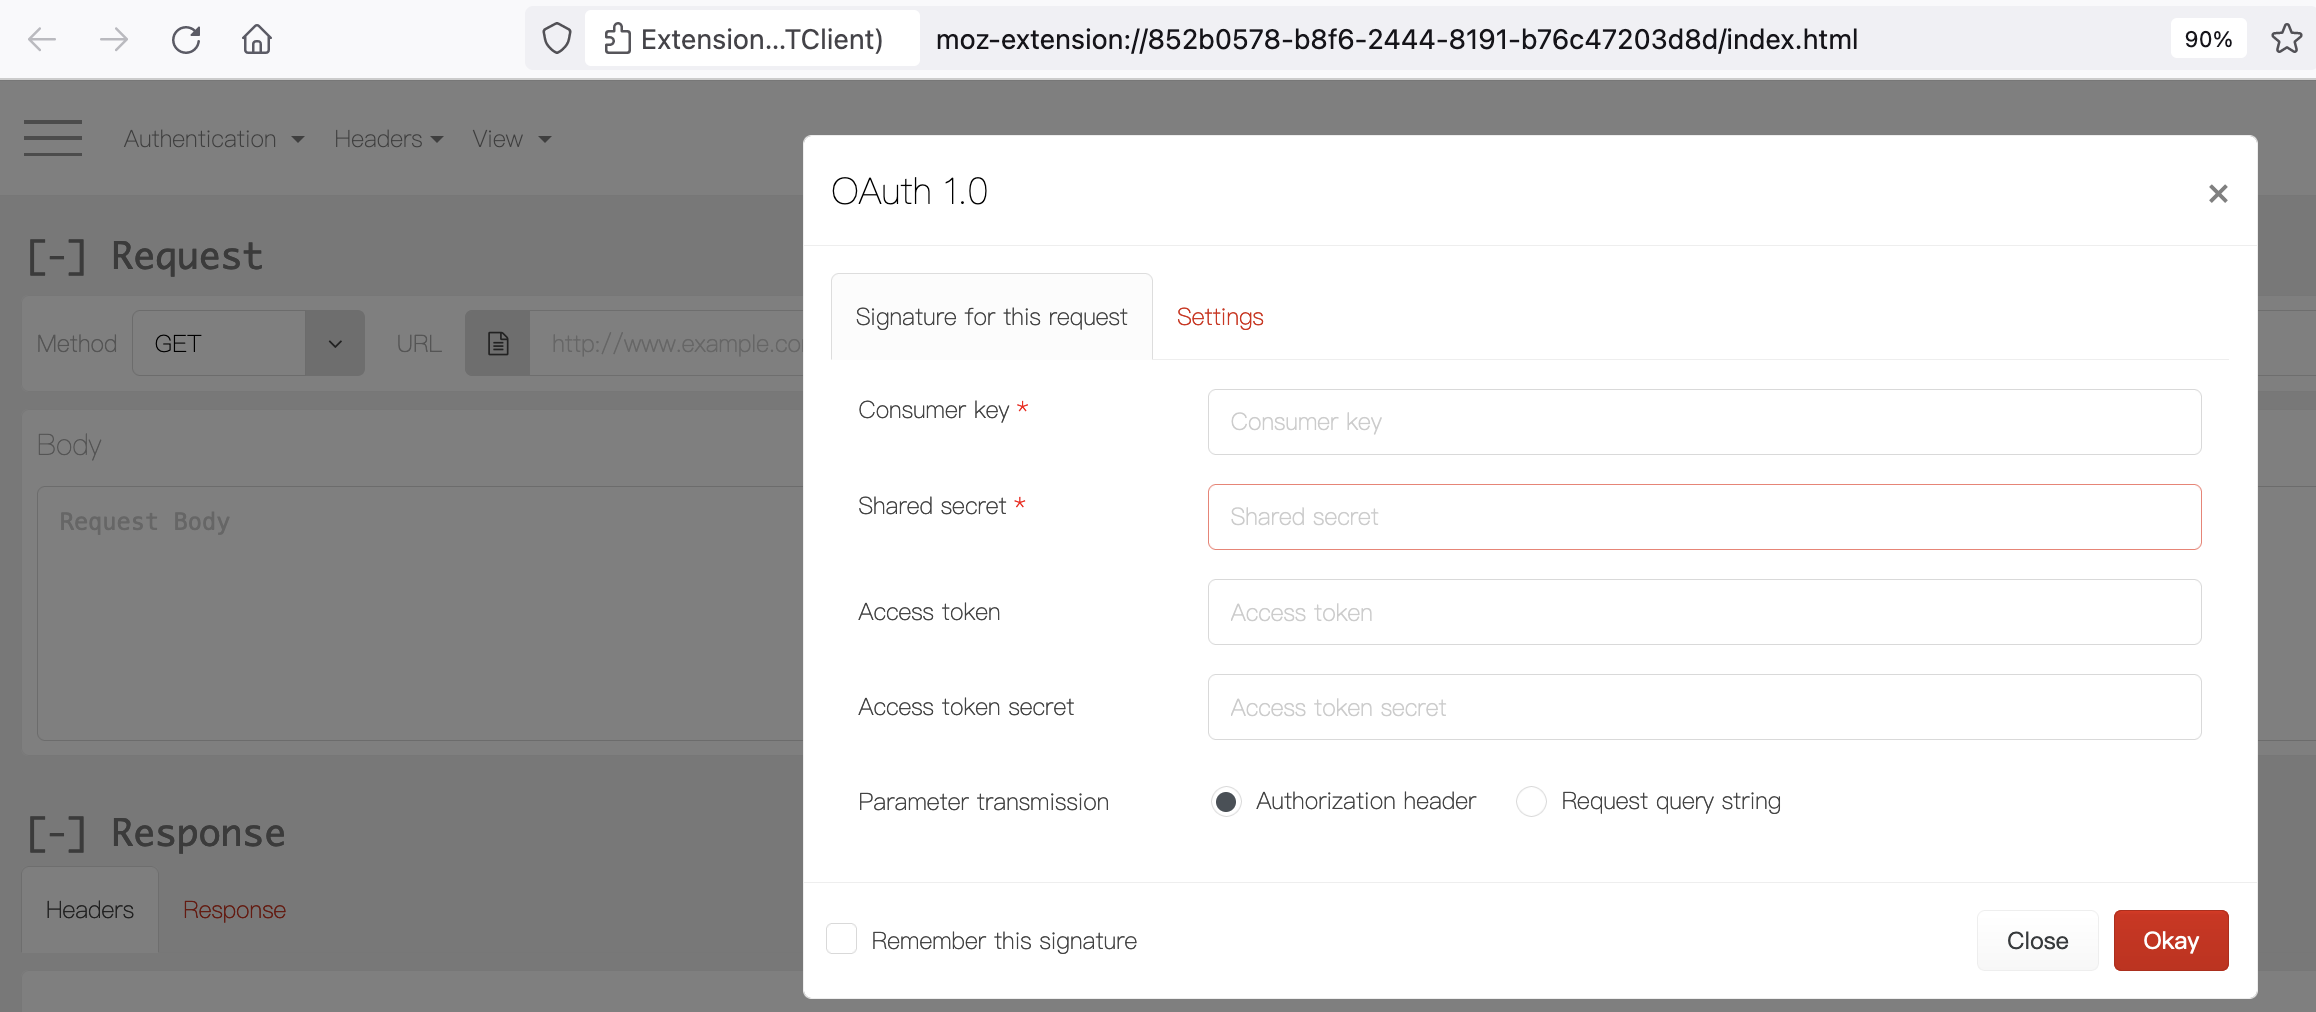
- Enter the Consumer Key and Secret that were created above.
- Switch to Settings Tab and pick "HMAC-SHA1" as Signature Method. Click "Okay"
Perform Oauth 3-Legged flow using RESTClient
1st Leg: Get Request Token
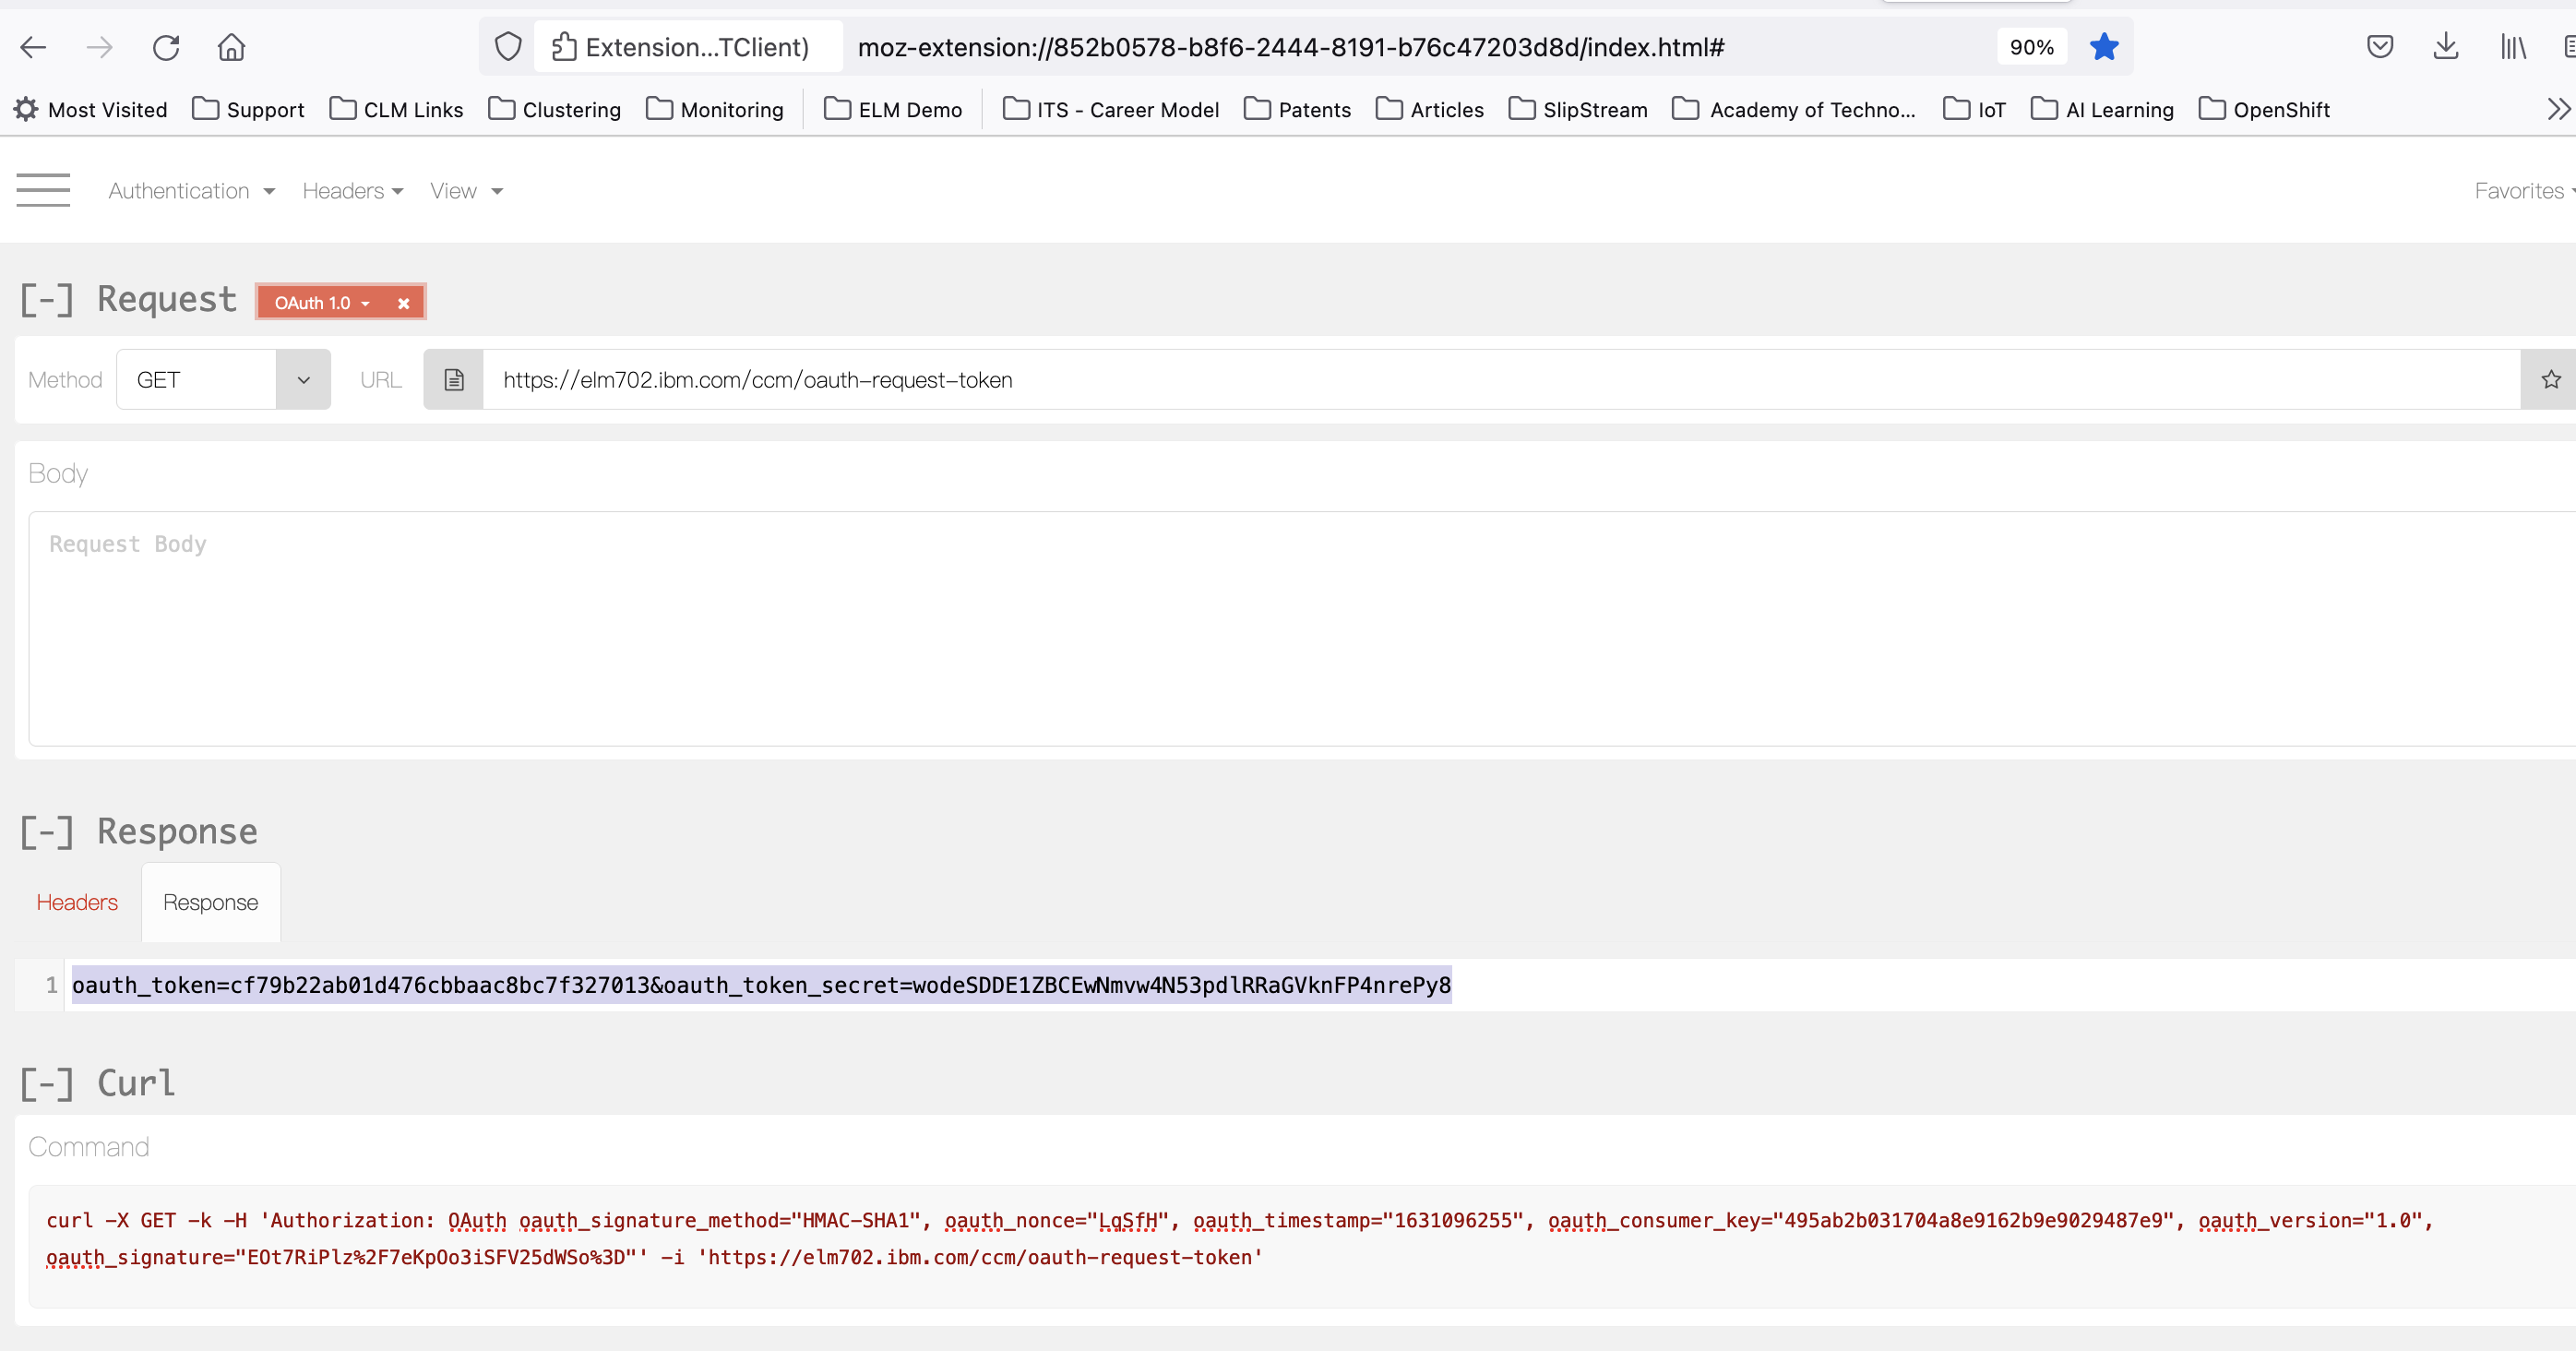
- To get the Request Token, perform a GET against the
oauthRequestTokenUrlvalue from rootservices Document. - Upon Success, Response Body with the Request Token and Secret is returned.
- RESTClient interface showing successful GET request for Request Token, with Request Token and Secret returned in the Response Body:
2nd Leg: Authorise Request Token
- This requires a manual intervention, with a specific users credentials using application login prompt.
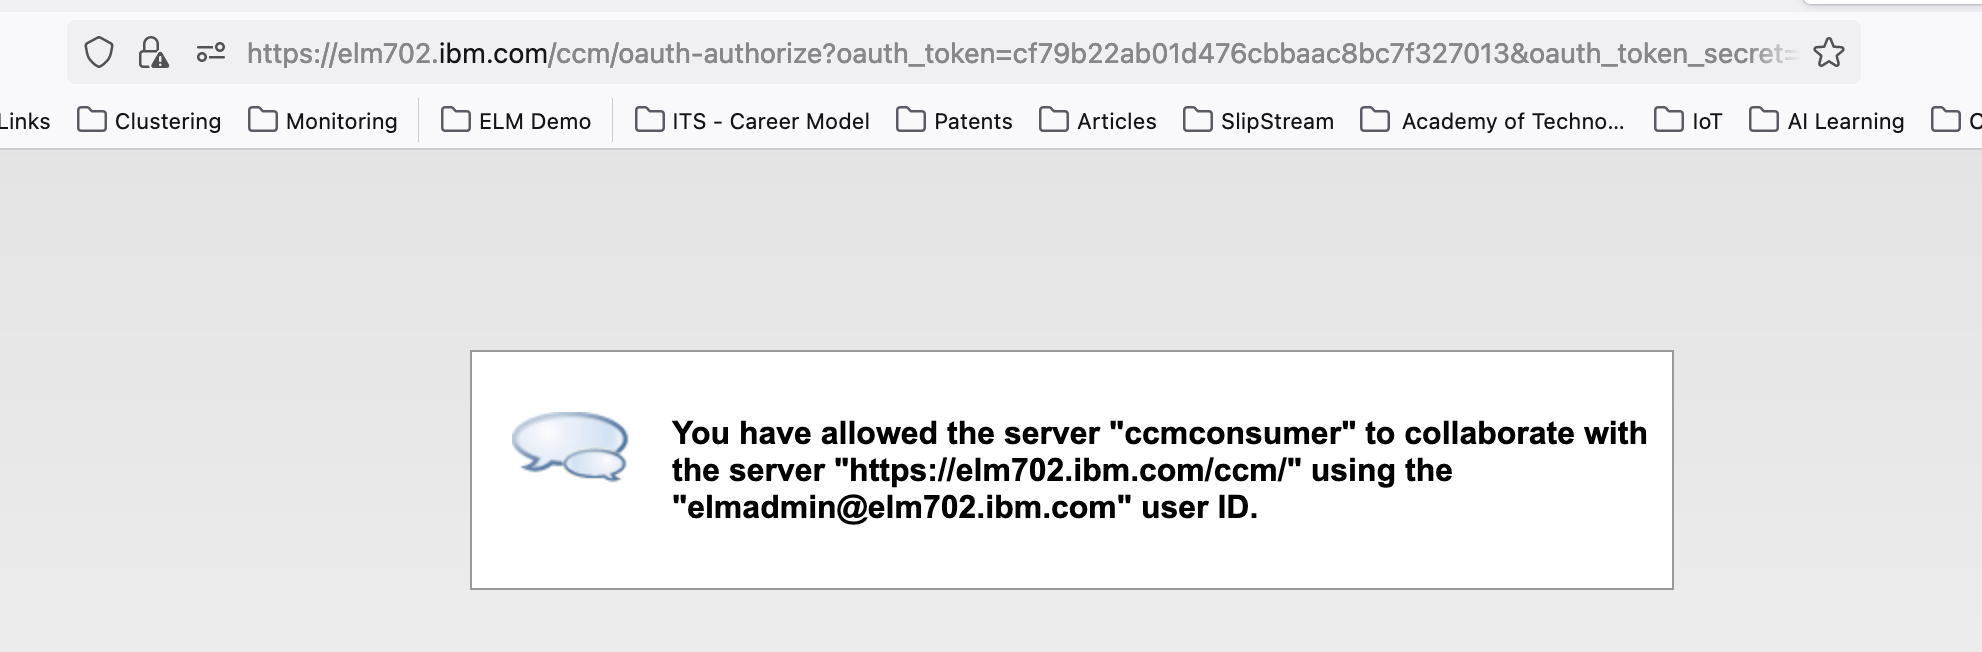
- Construct the Authorization URL by appending the
oauthUserAuthorizationUrlvalue from rootservices document, with?oauth_token=<request token obtained in 1st Leg> - Access this URL in the Browser. A login prompt appears, provide credentials of the user the consumer should use to communicate with ELM Application.
- Screenshot below shows Consumer being authorized to interact with ELM using an Access Token on behalf of the logged in ELM User:
3rd Leg: Get Authorised Access Token
- Update the OAuth Signature Configuration to include the oauth token and secret returned in 1st Leg.
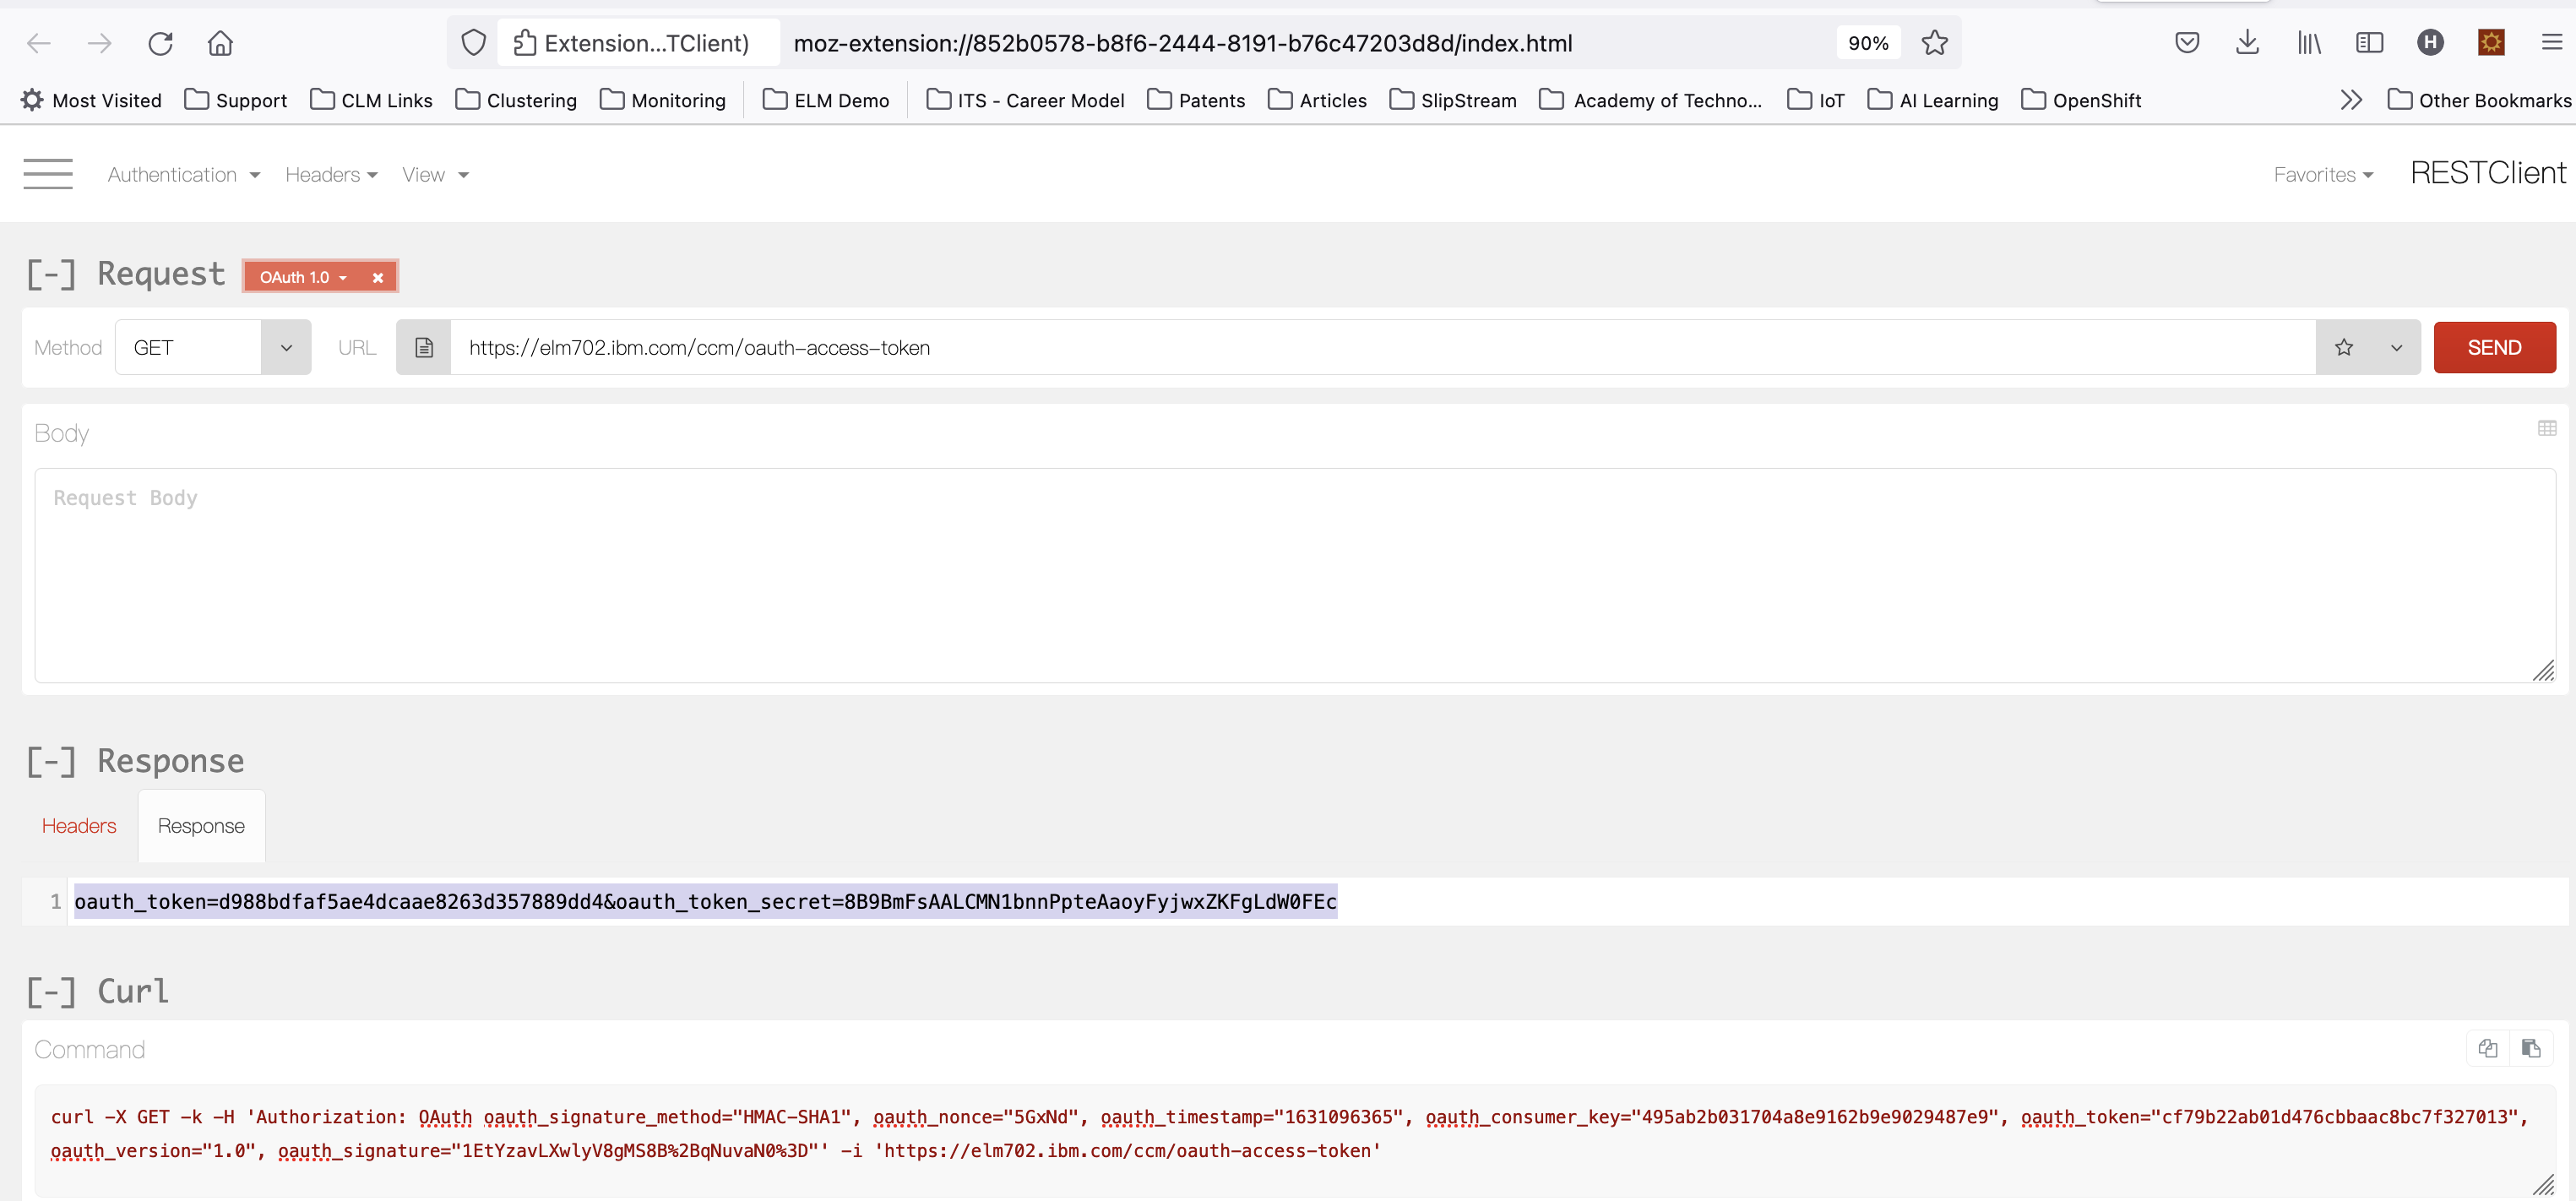
- Finally, to get the Access Token that can be used to perform requests for Protected resources, perform a GET against the
oauthAccessTokenUrlvalue from rootservices document with Updated Token Details in the OAuth Signature Configuration. - If successful, the Response Body has the access token and secret.
- RESTClient interface showing GET request for Access Token:
Accessing protected resource using the Authorised Access Token
- Update the OAuth Signature Configuration to include the oauth_token and oauth_token_secret returned in 3rd Leg.
- You are now ready to fetch content from Protected Resource URL's of the corresponding ELM application where Consumer was registered
Application Specifics
OAuth 1.0 with Jazz Authorization Server (JAS) enabled
- OAuth 1.0 flow works with the JAS enabled setup as well.
- During Authorize (2nd Leg), the User is redirected to JAS and authentication of the user's login credentials is taken care by JAS.
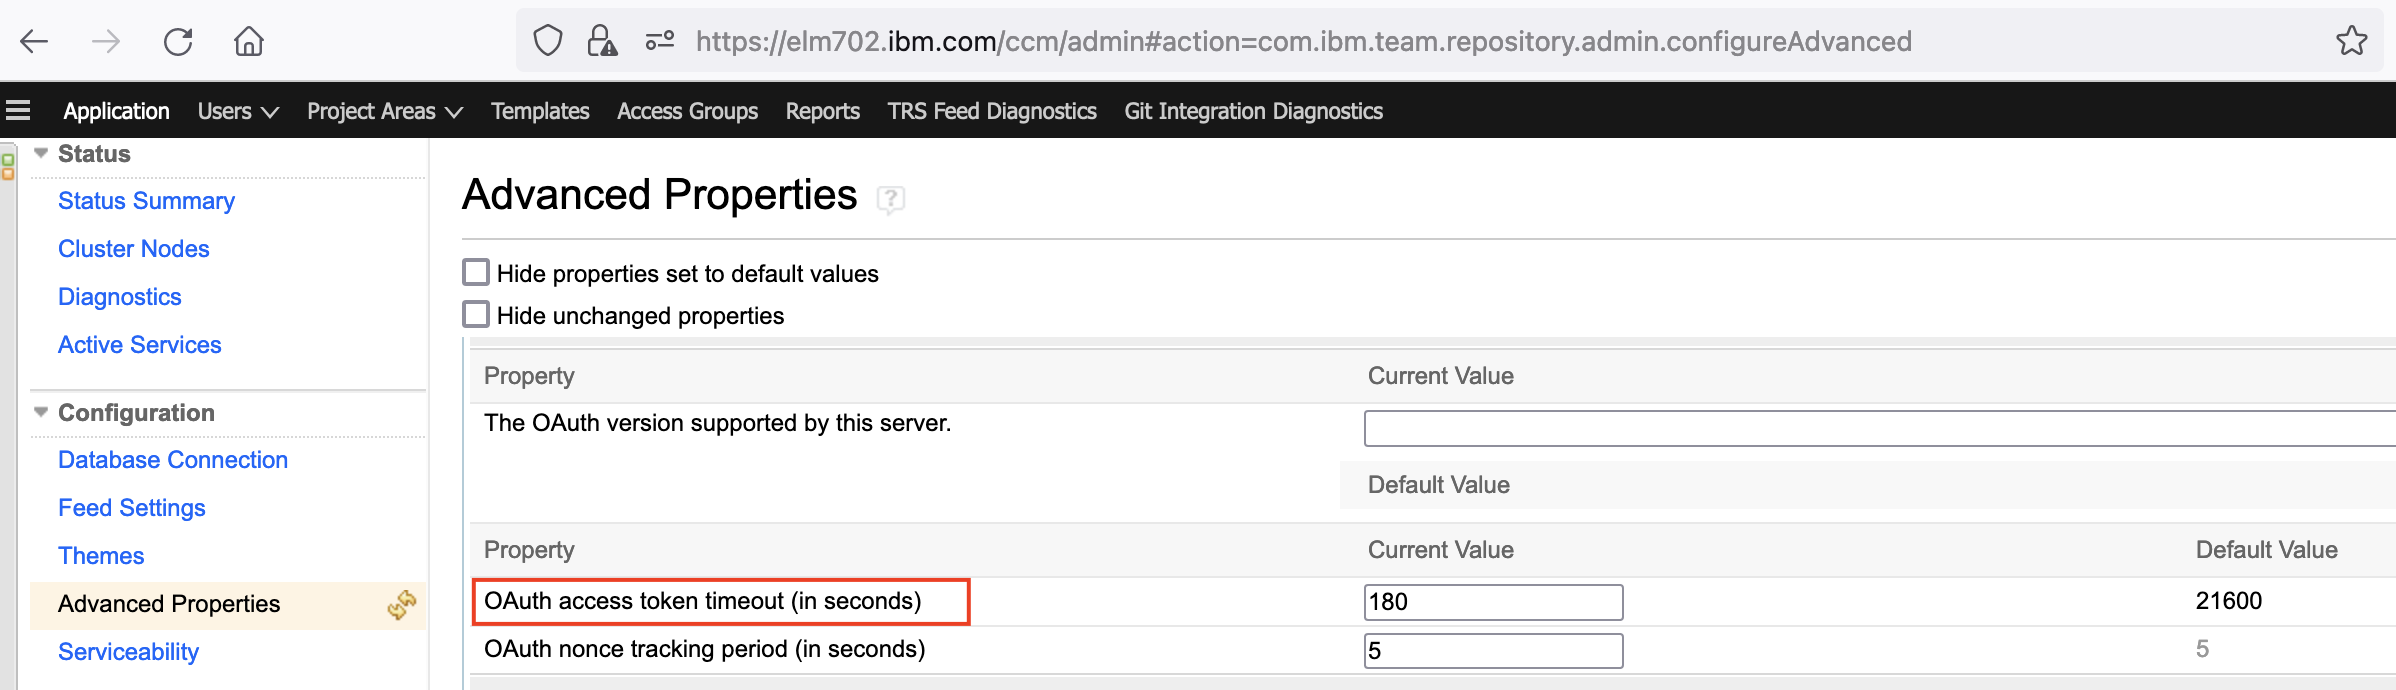
Token Timeout
- Issued token is valid for 21600 seconds by default.
- To revise the timeout, the advanced property "OAuth access token timeout (in seconds)" can be used. The advanced property is accessible through the application's admin page.
ERM Specifics
- ERM Delegates the authentication to JTS. So, unlike in the apps which manage their authentication, for RM the URL's for request token, authorize and access token are JTS based.
- Though OAuth URLs for ERM are JTS based, they can still be obtained directly from RM rootservices document.
Related topics:
- TN0013: Jazz Server Authentication Explained
- Additional OAuth-related Properties in Root Services Documents
- Jazz Foundation Core Security
Additional contributors: Rakesh S
Contributions are governed by our Terms of Use. Please read the following disclaimer.
Dashboards and work items are no longer publicly available, so some links may be invalid. We now provide similar information through other means. Learn more here.