Configuring Enterprise CLM Reverse Proxies: WebSphere 8.5.5 and IHS 8.5.5
Author: Dr. Hans-Joachim ProssBuild basis: Rational solution for Collaborative Lifecycle Management 4.0.5, Websphere Application Server 8.5.5, IBM HTTP Server 8.5.5
note: Support removed for IBM WebSphere Application Server (Traditional WAS) with ELM version 7.0.3. Use WebSphere Liberty, either embedded and installed with ELM applications, or separately installed
This guide outlines how to setup and configure a CLM environment using WebSphere Application Server (WAS) with IBM HTTP Server (IHS) as a reverse proxy to support a consistent Public URL in a flexible deployment topology using a single-server setup. By hosting the public URL via a proxy, the underlying deployment is free to change while the external URL remains fixed.
In the documentation center a standard single-server departmental topology without a proxy and the use of Proxy Servers in CLM installations in general are described.
This topology is typically useful for deployments where the initial volume of users is low to medium. As the number of users increases the applications can be redeployed to multiple servers without changing the public URI.
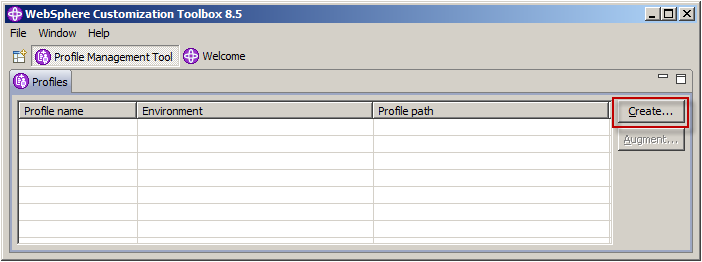
Click Create... to create a new application server profile.
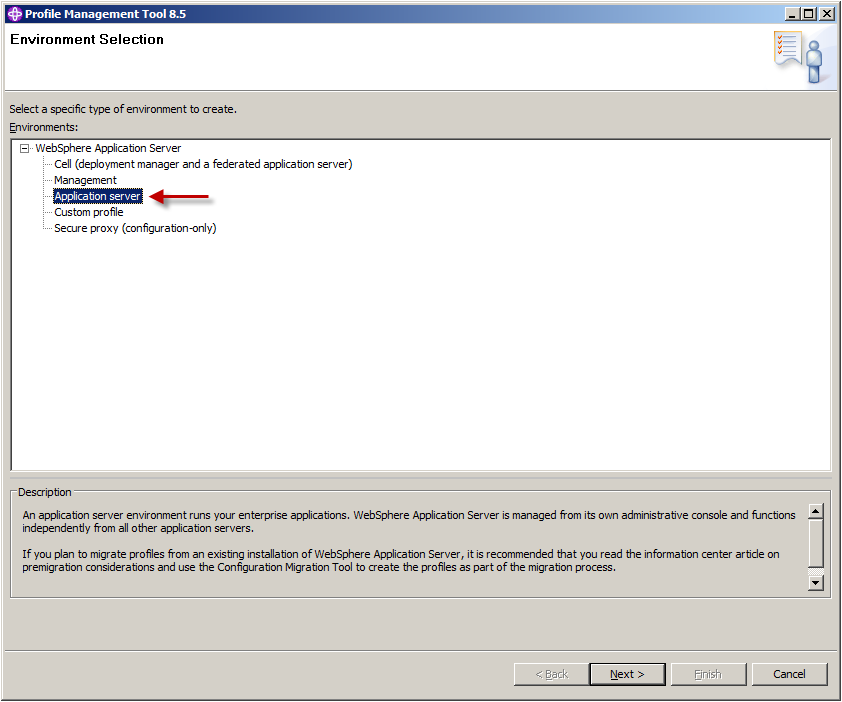
Select Application server and click Next >.
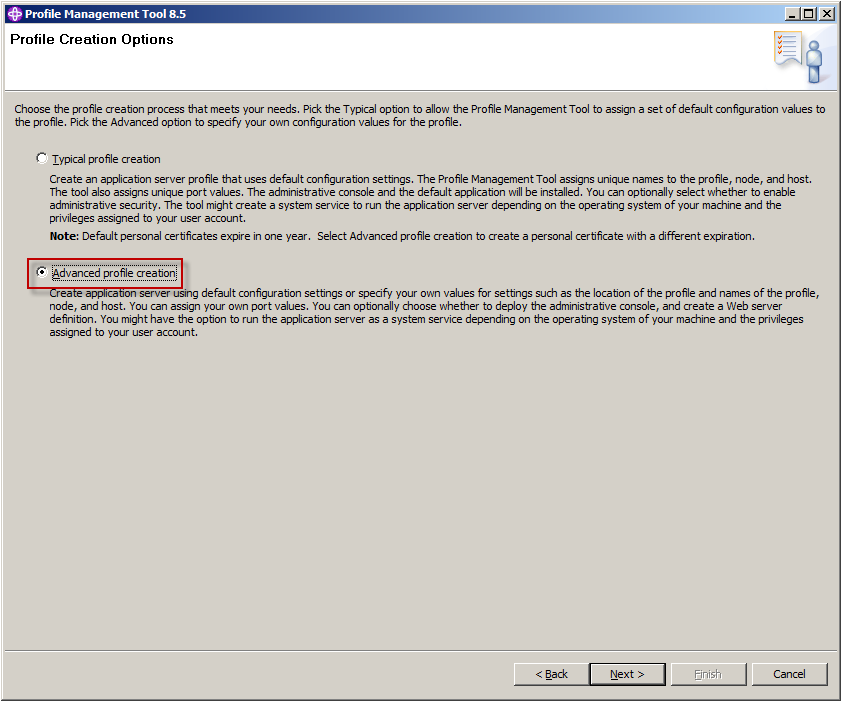
Select Advanced profile creation and click Next >.
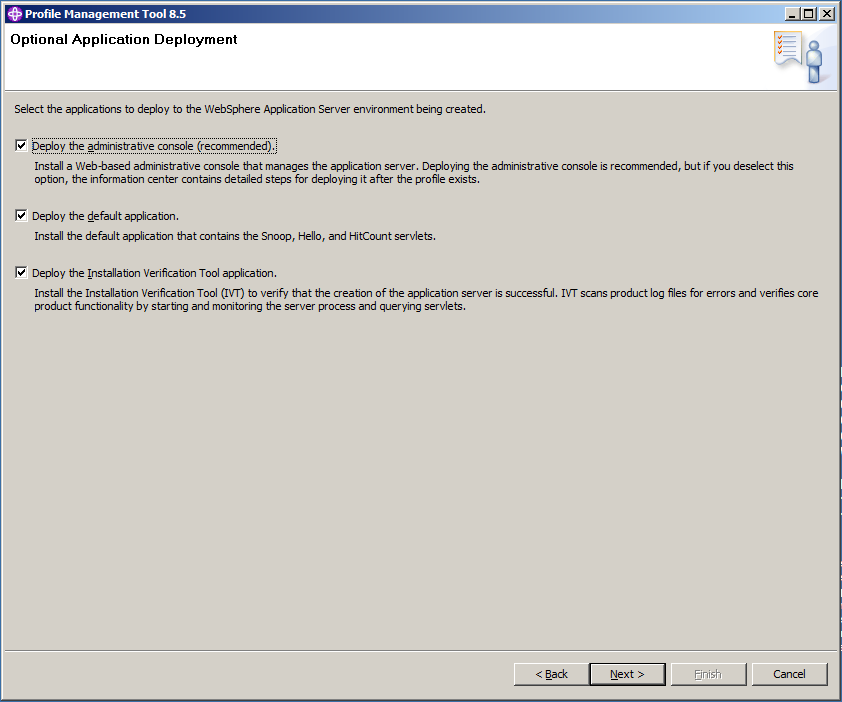
Let all options checked and click Next >.
I suggest to deploy the default application and the Installation Verification Tool application for test purposes. Both are not necessary to run CLM.
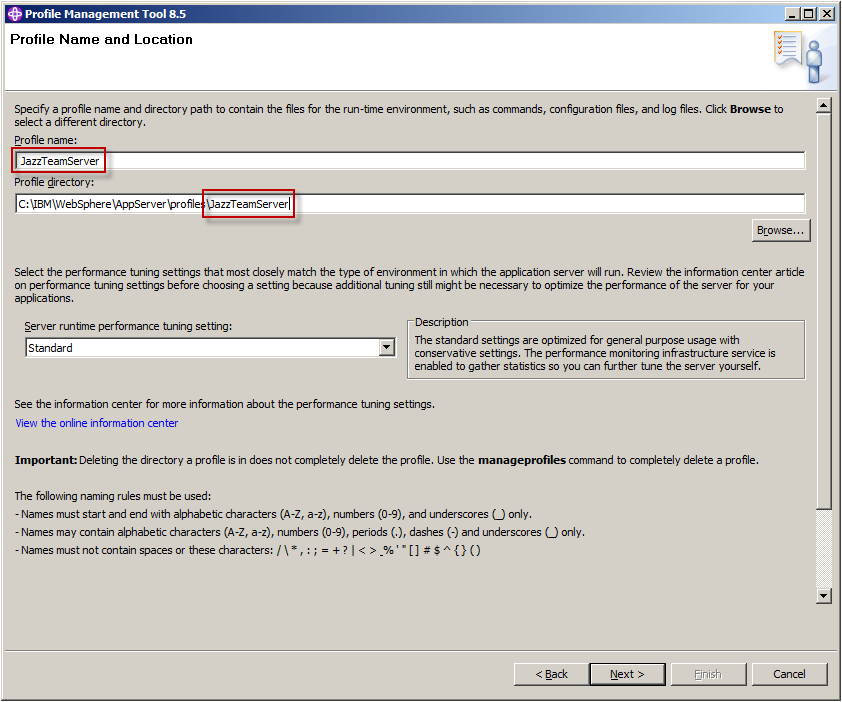
Enter a suggestive Profile Name (i.e. JazzTeamServer) and modify the Profile Directory accordingly. Click Next >.
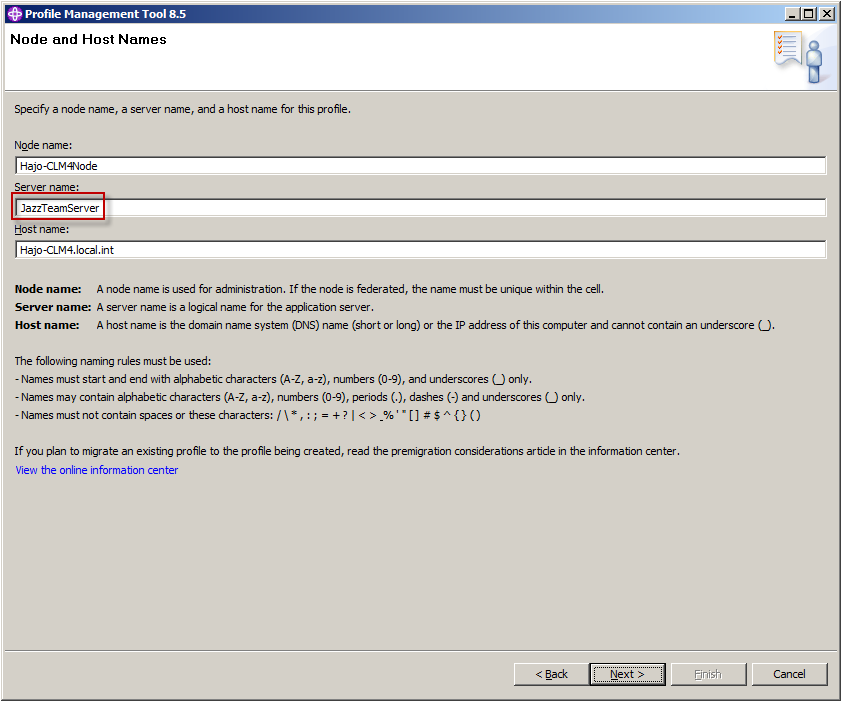
Enter a suggestive Server Name (i.e. JazzTeamServer) and click Next >.
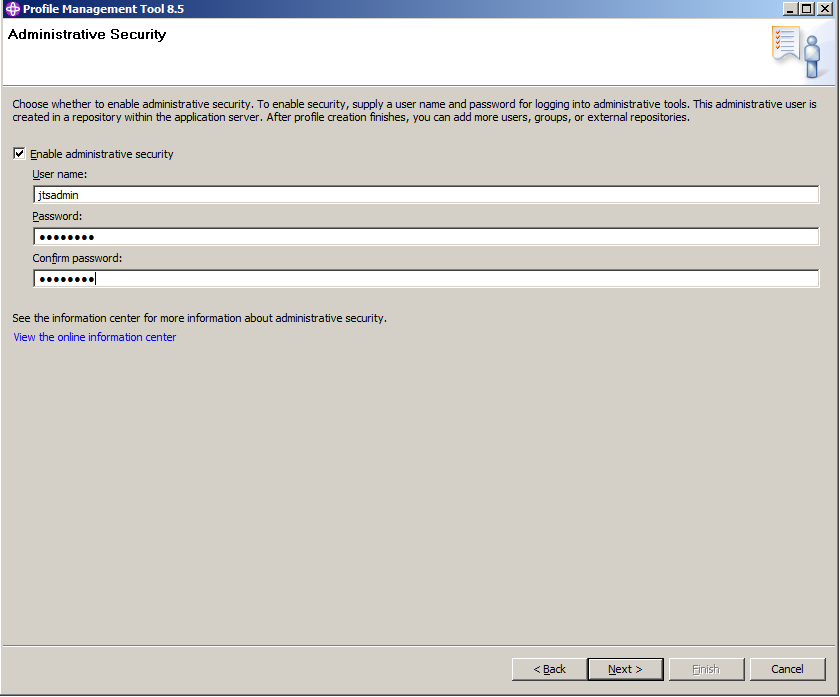
Select Enable administrative security, enter the User Name and Password of the administrative user. This user is created in a repository within the application server. Click Next >.
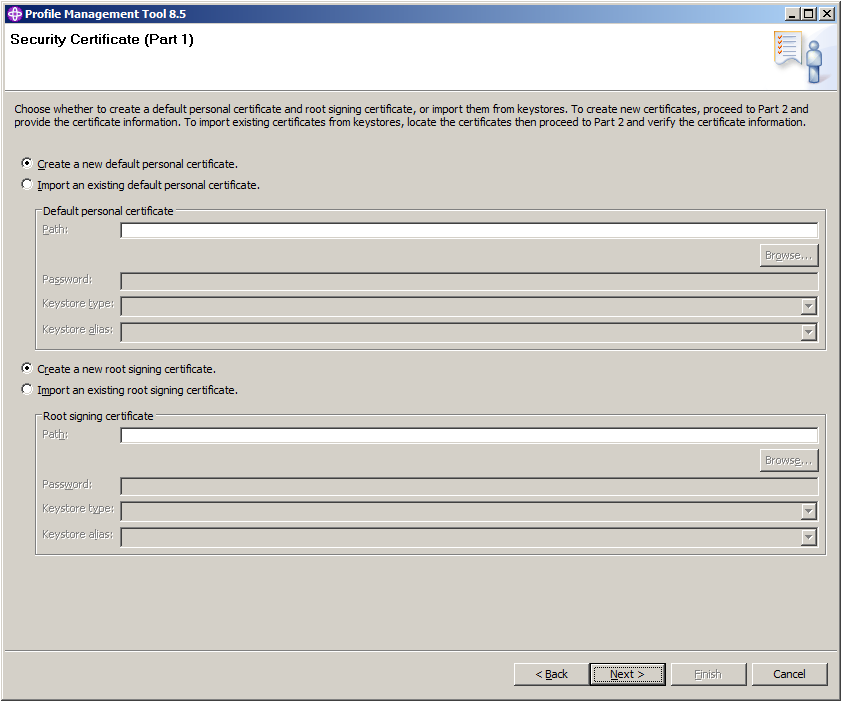
To create new certificates, click Next >.
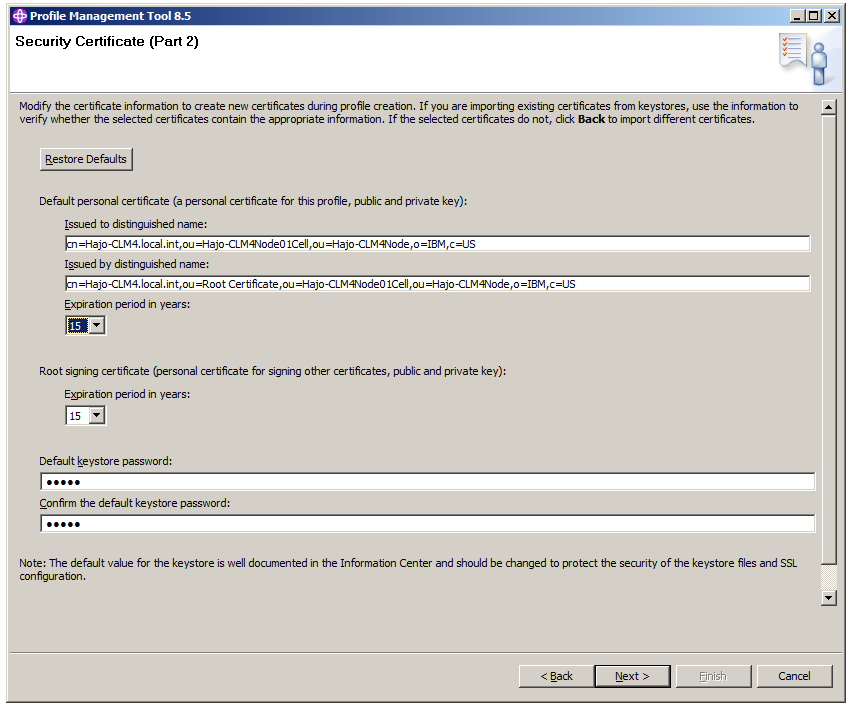
Specify both Expiration period in years and click Next >.
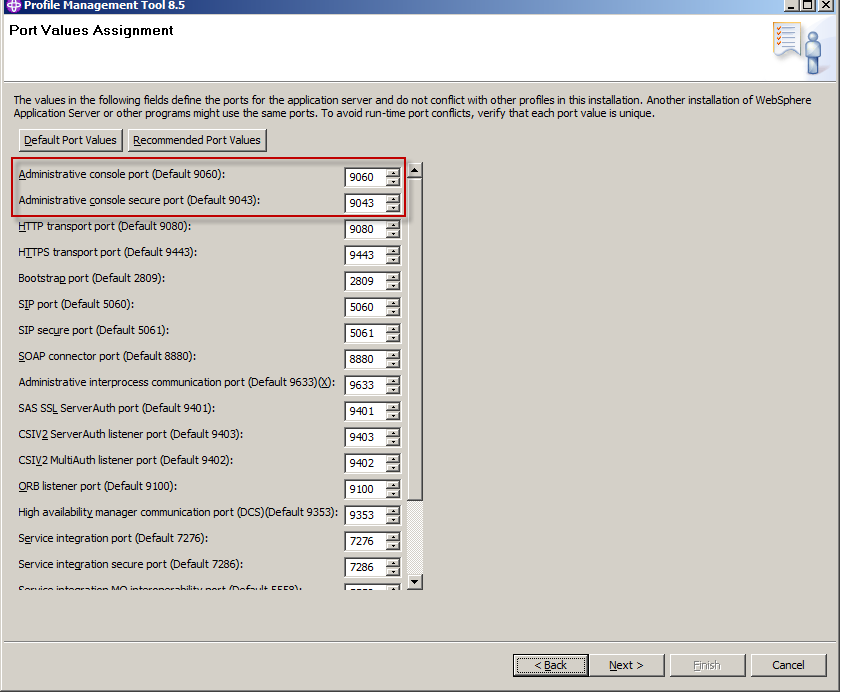
Make sure none of the ports is blocked by firewalls. Note the ports for the administrative console, which are by default 9060 and 9043. Click Next >.
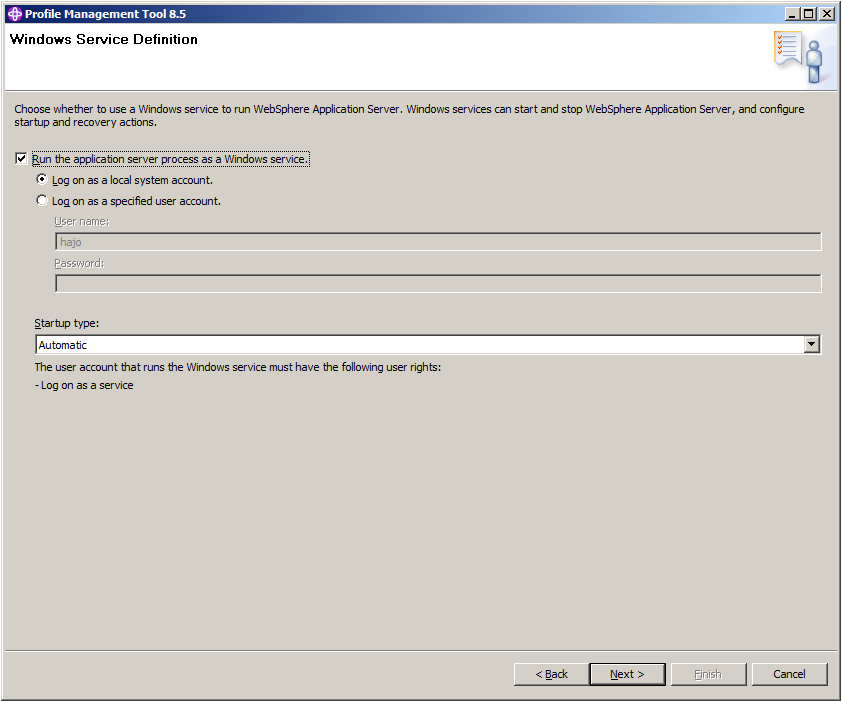
By default the service is started automatically and uses the local system account. Click Next >.
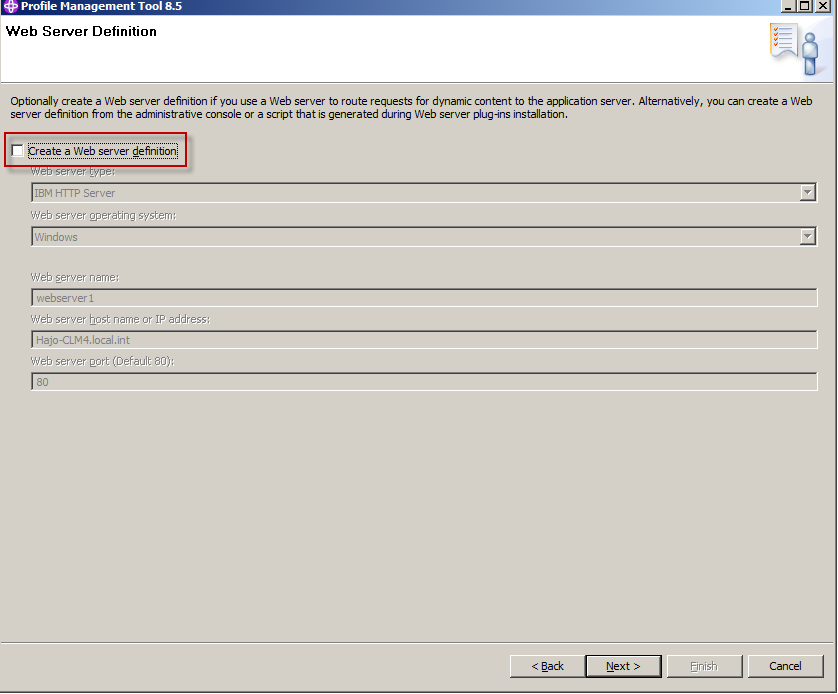
Don't create a Web server definition. Click Next >.
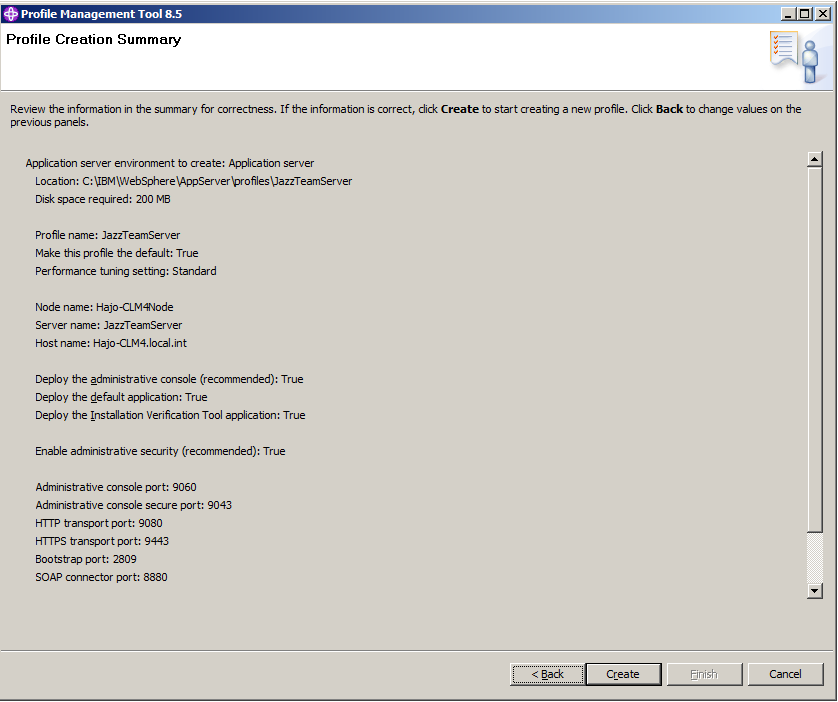
Review the summary and click Create to create the Web Server profile, which take a minute or two. You might want to start the first steps console to check your installation. See Check WAS Installation for further information. Otherwise uncheck Launch the first steps console before clicking Finish.
The profile is created successfully.
Exit the profile management tool.
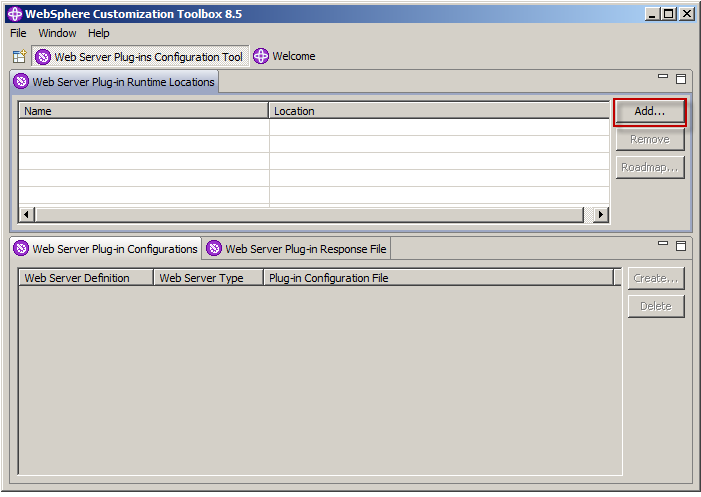
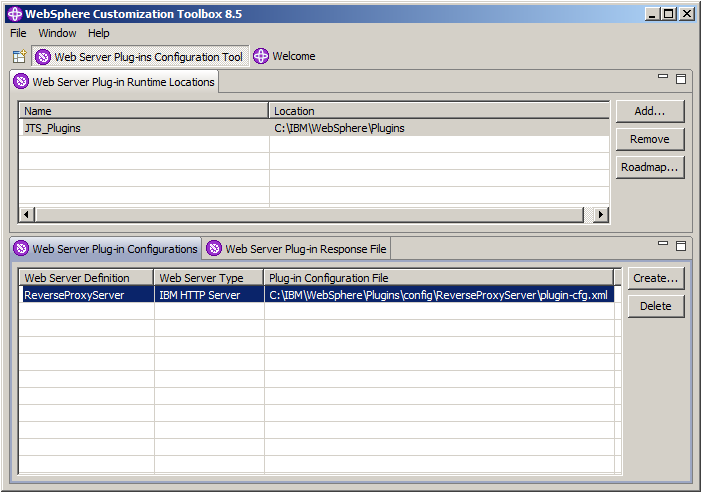
Click Add to add a new web server plug-in location.
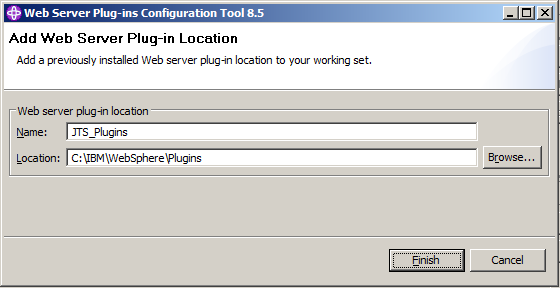
Enter a name (i.e. JTS_Plugins) and a location (C:\IBM\WebSphere\Plugins) and click Finish.
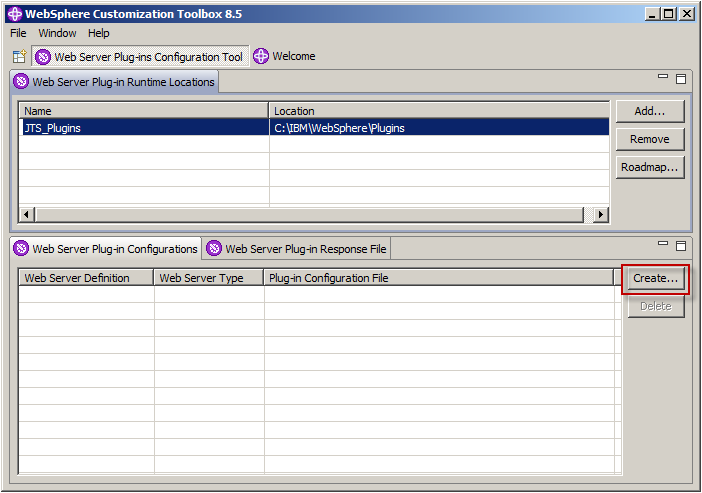
Click Create to create a web server plug-in configuration.
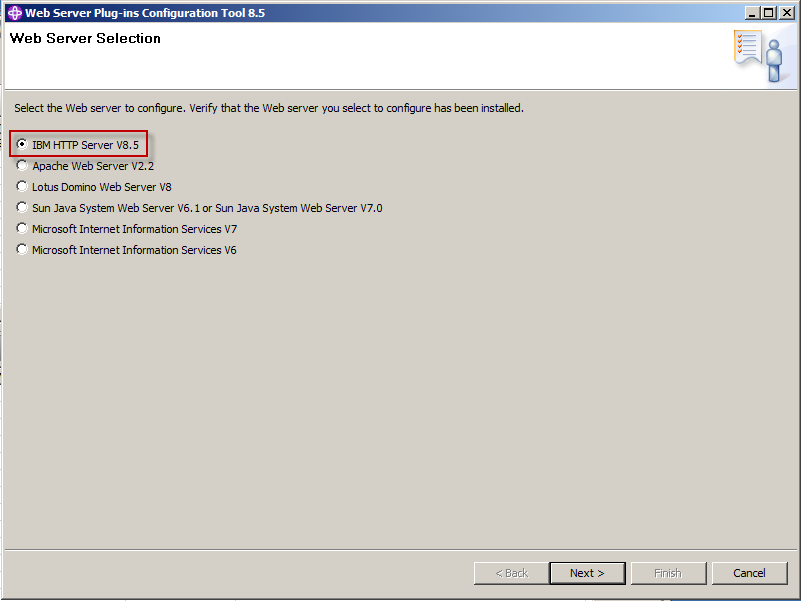
Select IBM HTTP Server V8.5 and click Next >.
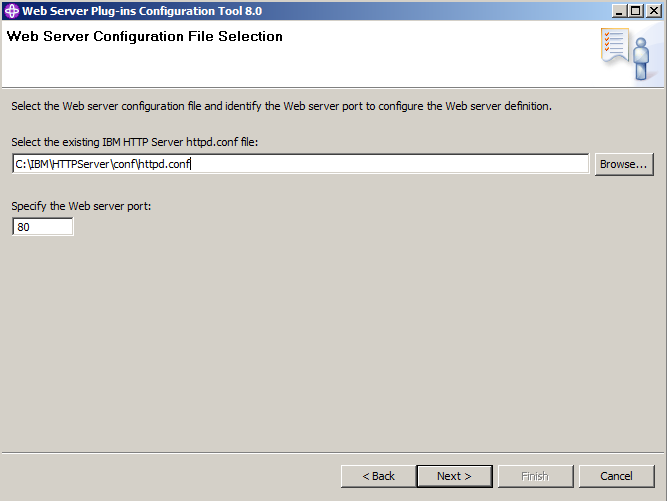
Specify the correct path to the configuration file and click Next >.
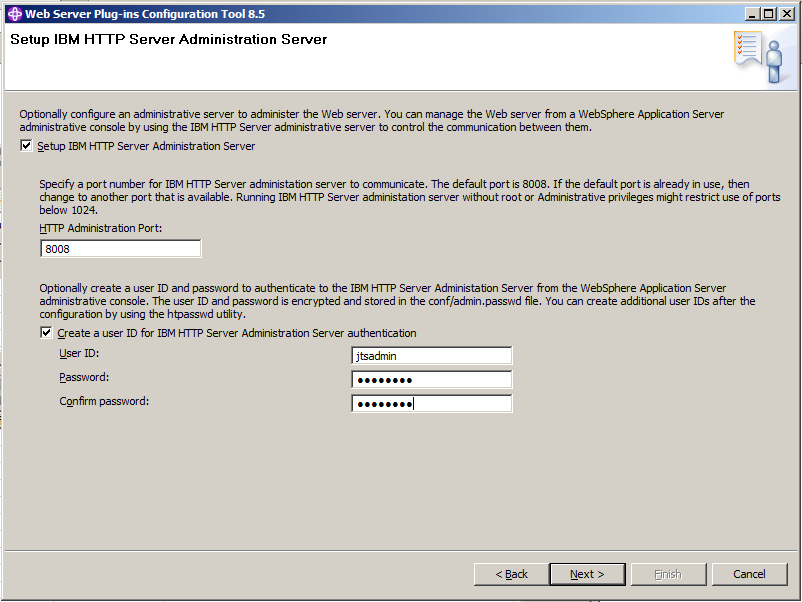
Make sure the port is not used by other applications. Optionally, enter a user ID (i.e. the same you entered in the Enable administrative security above) for for http server authentication. Click Next >.
Click Next >.
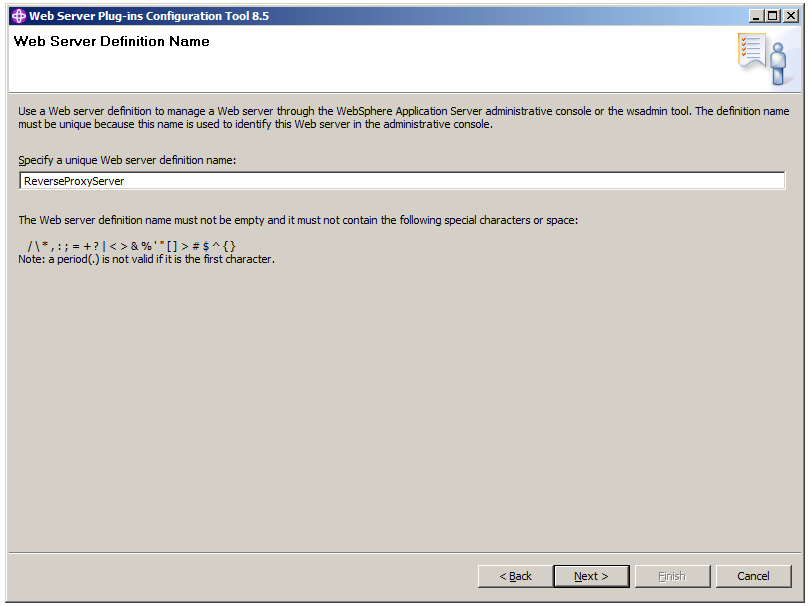
Specify the Web server definition name (i.e. ReverseProxyServer) and click Next >.

In this example, the Application Server is installed on the same host as the web server. Enter the path of the Application Server installation.
If the Application Server is another host, you have to select the first option (Remote) and specify the host name or the IP Address of that application server.
Click Next >.
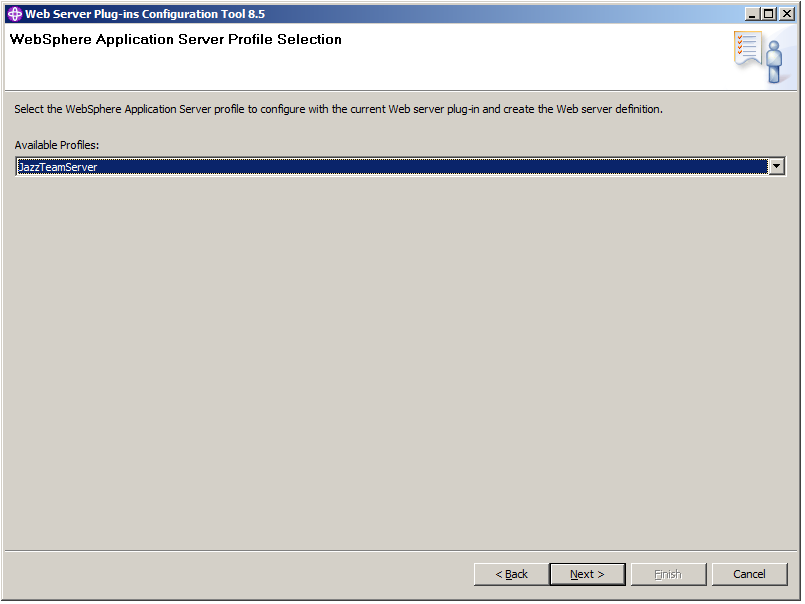
If you have more than one profile on your machine, make sure the correct profile (i.e. JazzTeamServer) is selected. Click Next >.
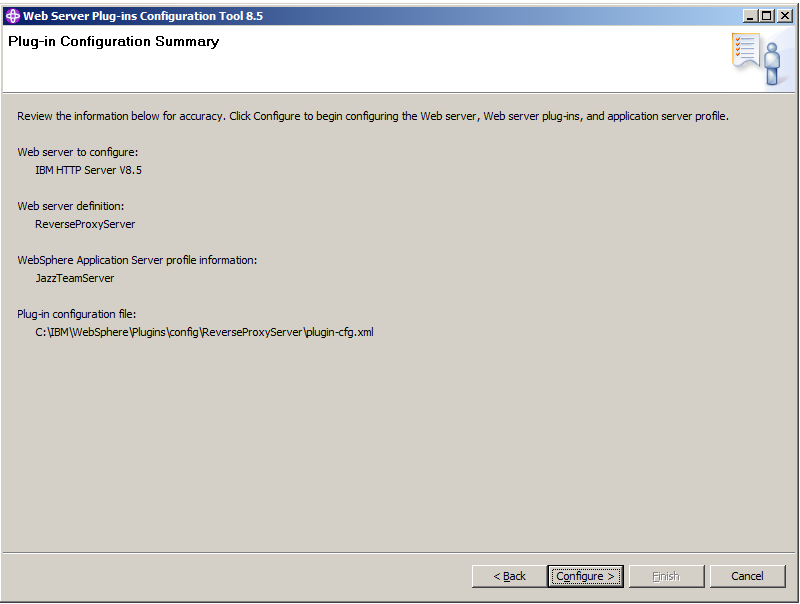
Check the Plug-in Configuration Summary and click Configure >.
If the configuration has successfully finished successfully, click Finish to close the wizard and go back to the toolbox.
Close the toolbox.
Open the WAS Administrative Console by thyping the url http://hajo-clm4.local.int:9060/ibm/console into your browser or open Start / IBM WebSphere / IBM WebSphere Application Server V8.5 / Profiles / JazzTeamServer / Administrative Console. If you open Administrative Console the first time, you might get that This connection is untrusted. Add an exception.
Login with your admin credentials (i.e. jtsadmin) and goto Servers > Server Types > Web servers. and try to stop the HTTP server.
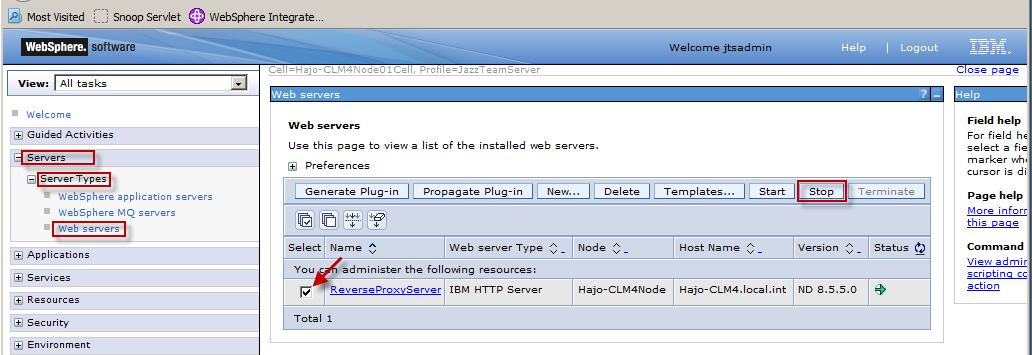
Select your HTTP server and click Stop.
Ensure that the web server and the HTTP server are running.
Open the WAS admin console (https://hajo-clm4.local.int:9043/ibm/console) as described above and goto Security > Global Security.
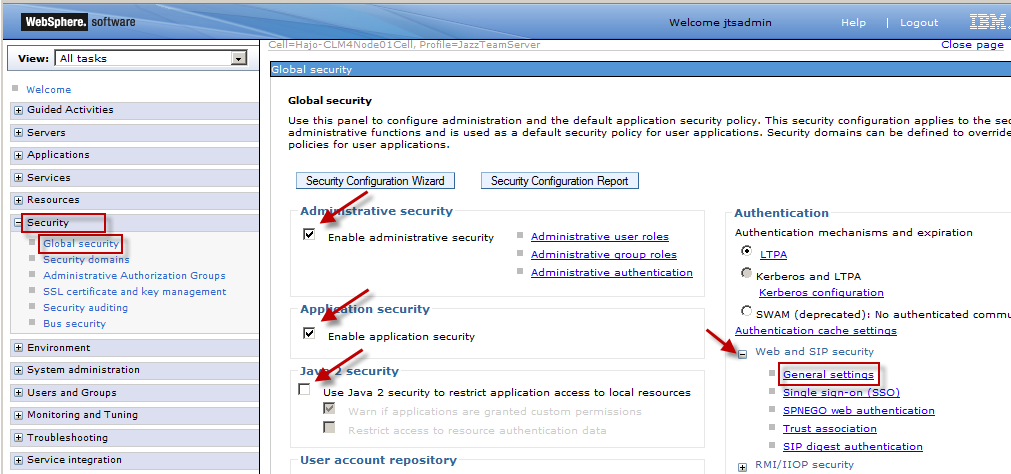
Check Enable application security as well as Enable administrative security.
Clear the check box for Use Java 2 security to restrict application access to local resources and press apply on the bottom of the page.
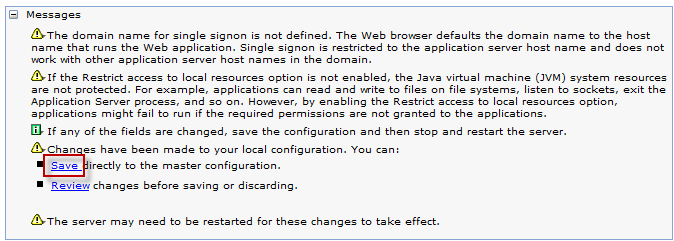
Press Save before navigating to Web and SIP security > General settings.
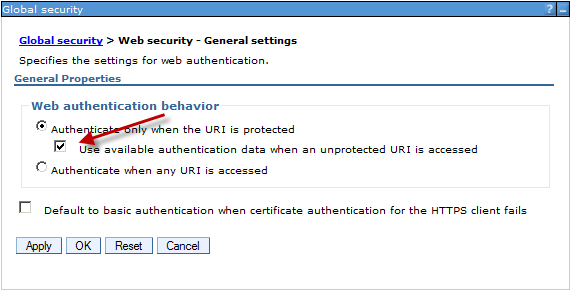
Check the Use available authentication data when an unprotected URI is accessed check box. Press Apply and Save directly to the master configuration.
Test snoop via IHS on port 80 (http://localhost:80/snoop). You should get a login asking for user id and password (use the ones you use for the admin console).
Restart the browser. Test snoop on port 9443 (https://localhost:9443/snoop).
You should get a security warning which you accept. Afterwards a login asking for user id and password should appear, but this time the connection uses https.
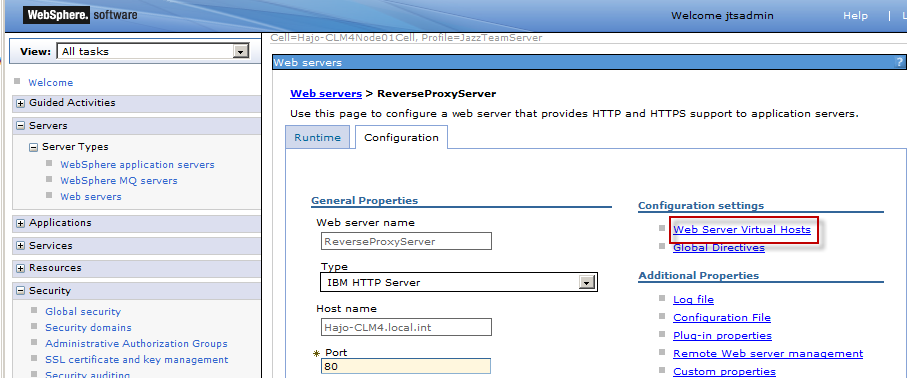
In the WAS admin console goto Servers > Servertypes > Web servers > ReverseProxyServer > Web Server Virtual Hosts.
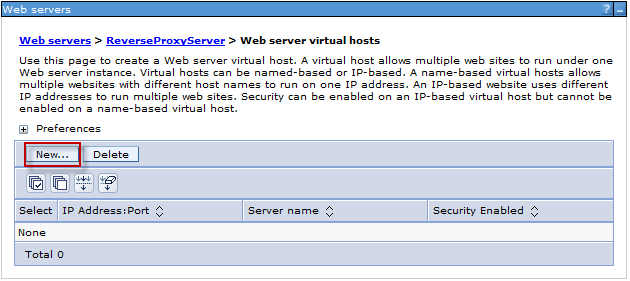
Click on New....
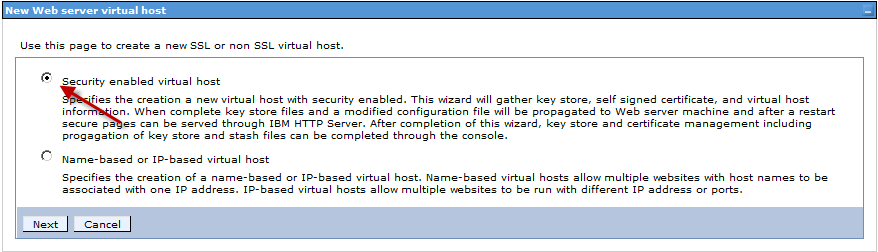
Select Security enabled virtual host and click Next.
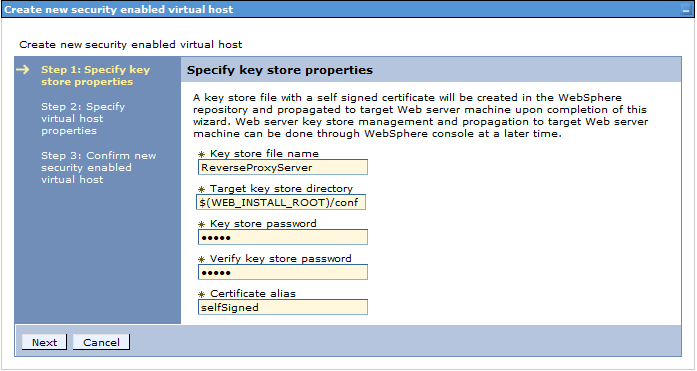
Create a new keystore with name of your IHS server (i.e.: ReverseProxyServer) and a password of choice (here WebAS). Click Next.

For IP address properties specify * instead of a fixed IP address. Click Next and Finish.
Don't forget to Save directly to the master configuration. Restart the HTTP Server.
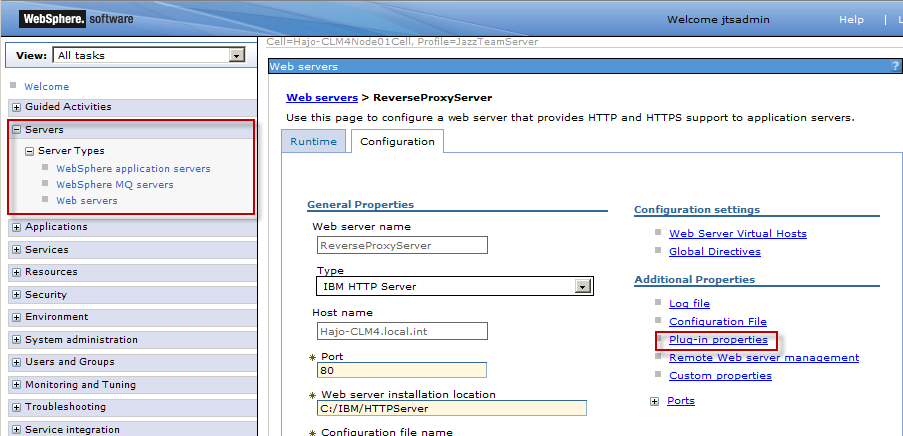
Goto Servers > Servertypes > Web servers > ReverseProxyServer > Plug-in properties.

Press the button Copy to Web server key store directory, restart the http server and open https://hajo-clm4.local.int/snoop to check the connection.
Now we are ready to deploy the CLM applications.
Open the WAS admin console (https://hajo-clm4.local.int:9043/ibm/console) as described above and goto Applications > Application Types > WebSphere enterprise applications.
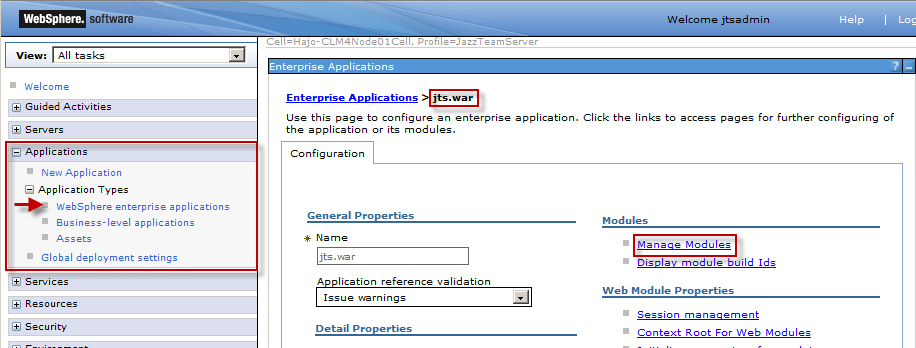
Click on jts.war and than on Manage modules.

Now select both clusters and servers, select the application in the list and press Apply, OK and Save the results. Repeat this step for all applications: admin.war, clmhelp.war and depending of your deployed CLM applications ccm.war, qm.war, rm.war and converter.war.
After having mapped all applications the Plug-ins needs to be regenerated and propagated to the HTTP-server. Additional information in the documentation.
Goto Servers > Server Types > Web Servers.
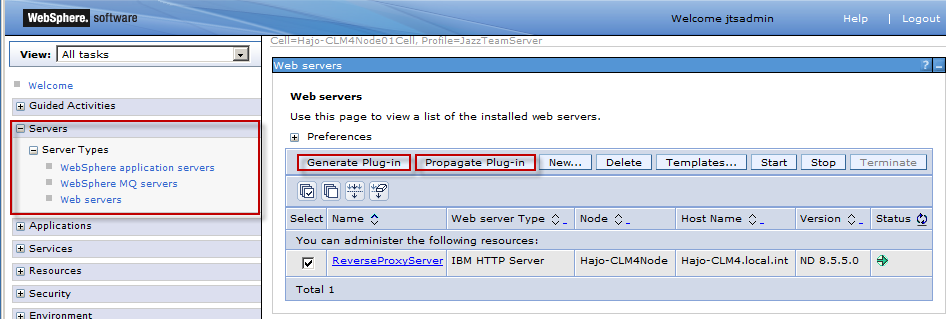
Select your web server, and click Generate Plug-in and than Propagate Plug-in.
Every time you deploy a new application, you need to repeat this Generate and Propagate steps.
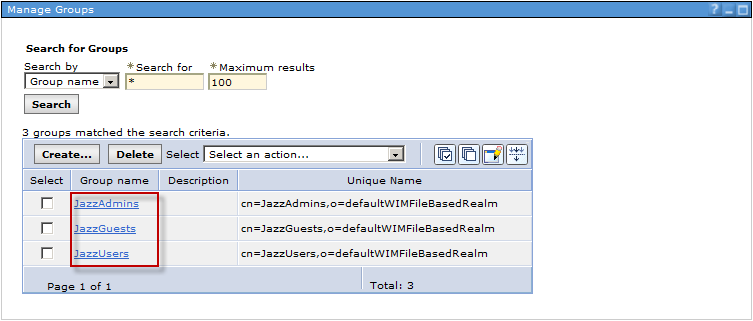
Open the WAS admin console (https://hajo-clm4.local.int:9043/ibm/console) as described above and goto Users and Groups > Manage Groups.
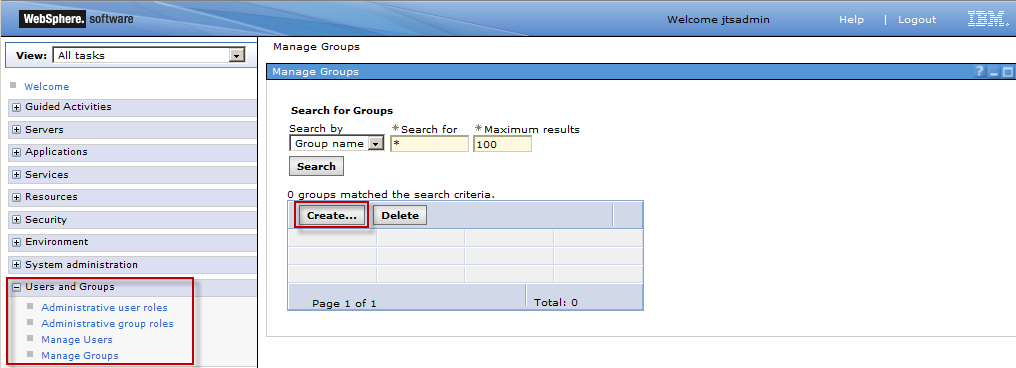
Click Create... to create at least the three groups JazzAdmins, JazzUsers and JazzGuests.
Goto Users and Groups > Manage Users and make the user jtsadmin a member of the group JazzAdmins and JazzUsers. Repeat this step for all your userids.

Click on Security role to user/group mapping.
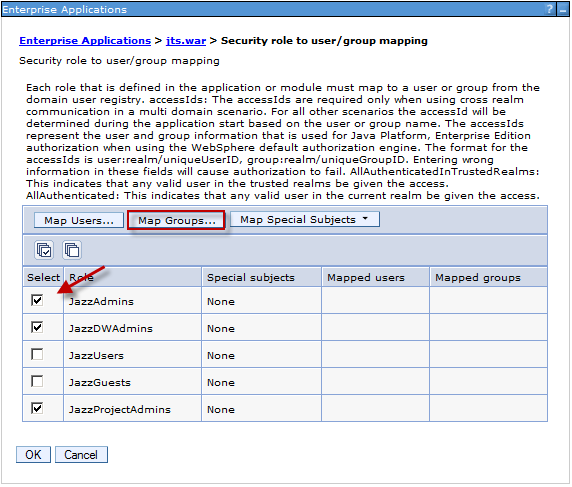
Select the group(s) you want to map and click the button Map Groups.... A simple mapping is
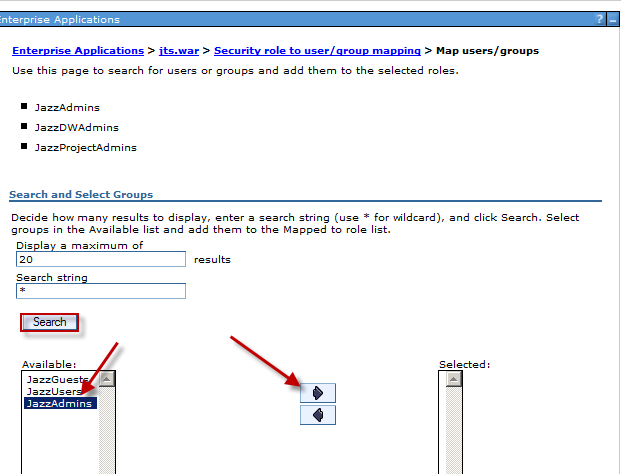
First click the button Search, than select the group to map and click the right arrow and press OK. Repeat this action for all groups.
The result should be similar to this:
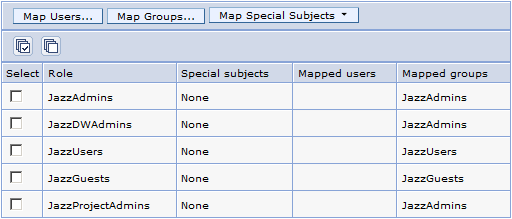
Now press OK and don't forget to save. If you have deployed the *ccm*- or the *qm*-application you need to repeat this step for those.
Now the application server needs to be restarted.
Documentation and other related topics
- Configuring IBM HTTP Server as a reverse proxy for WebSphere Application Server: here
- Migrating and installing IBM HTTP Server: here
- Installing and configuring web server plug-ins: here
- Installing IBM WebSphere Application Server 8.5.5 with IBM HTTP Server 8.5.5: here
Prerequisites and Assumptions
 |
Sofware Versions used * IBM Installation Manager V 1.7.1 * CLM V 4.0.5 * DB2 V 10.1 * IBM WebSphere Application Server V 8.5.5 UserIds and passwords used in this guide jtsadmin → Rat1onal etl_user → Rat1onal Installation Directories It is a good practice, NOT to use the default Installation Directory, because this includes spaces in the name and is a virtual directory. A good choice is to take C:\IBM as root folder. |
- Installation Manager is installed
- DB2 bits are installed.
Databases are created and the jtsadmin user has been granted the DBADM authority.
A valid licenses must be available or the activation for restricted use must be done. - IBM WebSphere Application Server and IHS bits are assumed to be installed, too.
If not, here you can find a small installation instruction. - CLM 4 bits are assumed to be installed
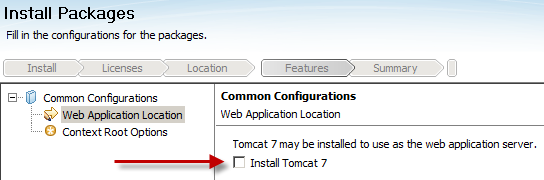
Do NOT select Tomcat 7 to be installed and do NOT execute the setup.

Configuration of WebSphere Application Server 8.5.5
Create an Application Server Profile
If not already running start the Profile Management Tool to create a profile from Start / IBM WebSphere / IBM WebSphere Application Server V8.5 / Tools / Profile Management Tool.
Click Create... to create a new application server profile.
Select Application server and click Next >.
Select Advanced profile creation and click Next >.
Let all options checked and click Next >.
I suggest to deploy the default application and the Installation Verification Tool application for test purposes. Both are not necessary to run CLM.
 |
Caution If the default application and/or the Installation Verification Tool application are deployed, those should be changed from autostart to manual start. |
Enter a suggestive Profile Name (i.e. JazzTeamServer) and modify the Profile Directory accordingly. Click Next >.
Enter a suggestive Server Name (i.e. JazzTeamServer) and click Next >.
Select Enable administrative security, enter the User Name and Password of the administrative user. This user is created in a repository within the application server. Click Next >.
To create new certificates, click Next >.
| |
Remark! If you do have existing certificates, you may import those here. |
Specify both Expiration period in years and click Next >.
| |
Remark! The default keystore password is WebAS. |
Make sure none of the ports is blocked by firewalls. Note the ports for the administrative console, which are by default 9060 and 9043. Click Next >.
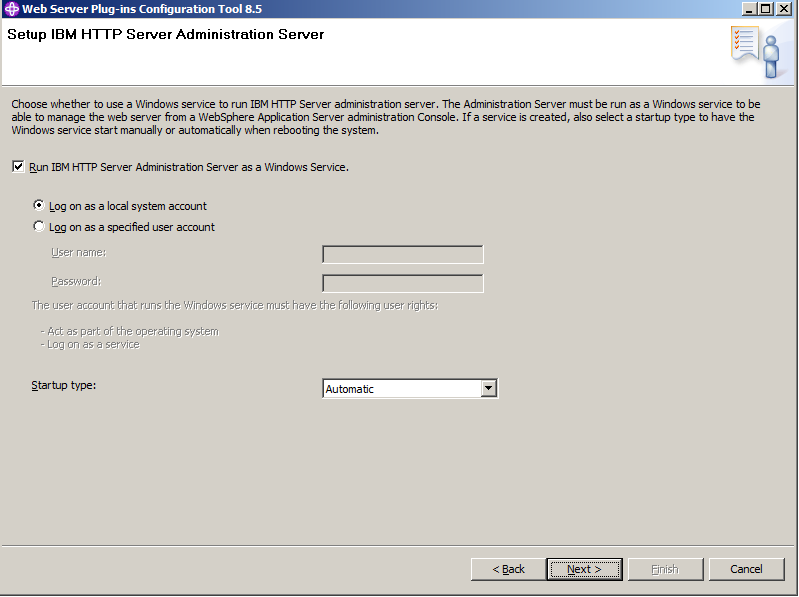
By default the service is started automatically and uses the local system account. Click Next >.
Don't create a Web server definition. Click Next >.
Review the summary and click Create to create the Web Server profile, which take a minute or two. You might want to start the first steps console to check your installation. See Check WAS Installation for further information. Otherwise uncheck Launch the first steps console before clicking Finish.
The profile is created successfully.
Exit the profile management tool.
Configure the Web server Plug-in
Start the Web Server Plug-ins Configuration Tool (Start / IBM WebSphere / WebSphere Customization Toolbox V8.5 / Tools / Web Server Plug-ins Configuration Tool).
Click Add to add a new web server plug-in location.
Enter a name (i.e. JTS_Plugins) and a location (C:\IBM\WebSphere\Plugins) and click Finish.
Click Create to create a web server plug-in configuration.
Select IBM HTTP Server V8.5 and click Next >.
Specify the correct path to the configuration file and click Next >.
Make sure the port is not used by other applications. Optionally, enter a user ID (i.e. the same you entered in the Enable administrative security above) for for http server authentication. Click Next >.
Click Next >.
Specify the Web server definition name (i.e. ReverseProxyServer) and click Next >.
In this example, the Application Server is installed on the same host as the web server. Enter the path of the Application Server installation.
If the Application Server is another host, you have to select the first option (Remote) and specify the host name or the IP Address of that application server.
Click Next >.
If you have more than one profile on your machine, make sure the correct profile (i.e. JazzTeamServer) is selected. Click Next >.
Check the Plug-in Configuration Summary and click Configure >.
If the configuration has successfully finished successfully, click Finish to close the wizard and go back to the toolbox.
Close the toolbox.
Check the Web server Plug-in
Be sure, the Application Server is started and start or restart the HTTP server. Go to the Windows Administration and look for the service IBM HTTP Server V8.5 or run the following commands in a command window.C:\>net stop "IBM HTTP Server V8.5" C:\>net start "IBM HTTP Server V8.5"To check, if the reverse proxy is working, you might open the url http://hajo-clm4.local.int/snoop (without port 9080 in the url). You should see the same picture as you have seen before when opening the snoop application with port. Now check if the HTTP server can be managed via WAS admin console.
Open the WAS Administrative Console by thyping the url http://hajo-clm4.local.int:9060/ibm/console into your browser or open Start / IBM WebSphere / IBM WebSphere Application Server V8.5 / Profiles / JazzTeamServer / Administrative Console. If you open Administrative Console the first time, you might get that This connection is untrusted. Add an exception.
Login with your admin credentials (i.e. jtsadmin) and goto Servers > Server Types > Web servers. and try to stop the HTTP server.
Select your HTTP server and click Stop.
| |
Error stopping HTTP server If the HTTP server can not be stopped this way and you get message regarding missing credentials, goto Web servers > ReverseProxyServer > Remote Web server management and set the userid and password as specified during the setup. 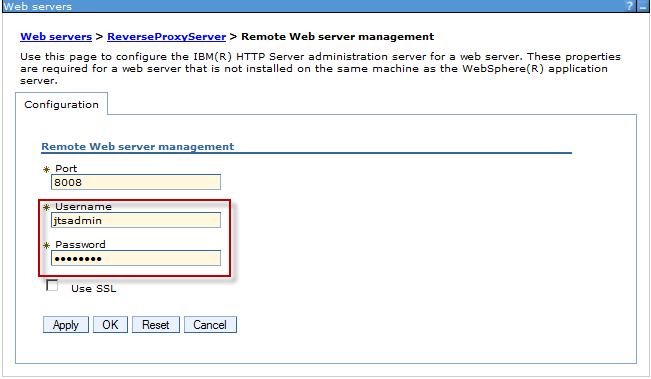 Now try to stop the HTTP server again. |
Enable Java and Application Security
| |
Additional Information about Java 2 Security option Documentation center |
Open the WAS admin console (https://hajo-clm4.local.int:9043/ibm/console) as described above and goto Security > Global Security.
Check Enable application security as well as Enable administrative security.
Clear the check box for Use Java 2 security to restrict application access to local resources and press apply on the bottom of the page.
Press Save before navigating to Web and SIP security > General settings.
Check the Use available authentication data when an unprotected URI is accessed check box. Press Apply and Save directly to the master configuration.
Check Application Security
Restart the Application server and the Web server and restart the browser to drop the cookie created during the admin session.Test snoop via IHS on port 80 (http://localhost:80/snoop). You should get a login asking for user id and password (use the ones you use for the admin console).
Restart the browser. Test snoop on port 9443 (https://localhost:9443/snoop).
You should get a security warning which you accept. Afterwards a login asking for user id and password should appear, but this time the connection uses https.
Create a virtual host on port 443 for the web service
Open the WAS admin console.
In the WAS admin console goto Servers > Servertypes > Web servers > ReverseProxyServer > Web Server Virtual Hosts.
Click on New....
Select Security enabled virtual host and click Next.
Create a new keystore with name of your IHS server (i.e.: ReverseProxyServer) and a password of choice (here WebAS). Click Next.
For IP address properties specify * instead of a fixed IP address. Click Next and Finish.
Don't forget to Save directly to the master configuration. Restart the HTTP Server.
| |
You might want to check if IHS is SSL enabled Open the file httpd.conf which is located in C:\IBM\HTTPServer\conf. At the end you should see the following lines: <VirtualHost *:443> SSLEnable SSLServerCert selfSigned </VirtualHost> KeyFile "C:/IBM/HTTPServer/conf/ReverseProxyServer.kdb" |
Goto Servers > Servertypes > Web servers > ReverseProxyServer > Plug-in properties.
Press the button Copy to Web server key store directory, restart the http server and open https://hajo-clm4.local.int/snoop to check the connection.
Now we are ready to deploy the CLM applications.
Deploy CLM Applications
There are two ways to deploy the JTS and CLM applications:- Deploy using a jython scripts
- Deploy manually using the WebSphere Application Server admin console
Deploy applications using the jython scripts
Open a command line interface and run the following three commands.cd C:\IBM\WebSphere\AppServer\profiles\JazzTeamServer\bin wsadmin.bat -language jython -user jtsadmin -password Rat1onal -f C:/IBM/JazzTeamServer/server/was/clm_was_config.py C:/IBM/JazzTeamServer/server/conf wsadmin.bat -language jython -user jtsadmin -password Rat1onal -f C:/IBM/JazzTeamServer/server/was/clm_deploy.py Hajo-CLM4Node JazzTeamServer C:/IBM/JazzTeamServer/server/webapps/Now you must map the applications to the application server and the HTTP server. More information in the documentation.
Open the WAS admin console (https://hajo-clm4.local.int:9043/ibm/console) as described above and goto Applications > Application Types > WebSphere enterprise applications.
Click on jts.war and than on Manage modules.
Now select both clusters and servers, select the application in the list and press Apply, OK and Save the results. Repeat this step for all applications: admin.war, clmhelp.war and depending of your deployed CLM applications ccm.war, qm.war, rm.war and converter.war.
After having mapped all applications the Plug-ins needs to be regenerated and propagated to the HTTP-server. Additional information in the documentation.
Goto Servers > Server Types > Web Servers.
Select your web server, and click Generate Plug-in and than Propagate Plug-in.
Every time you deploy a new application, you need to repeat this Generate and Propagate steps.
Create Groups
To deploy the CLM application we need at least three groups. For more information regarding users and groups see the documentation.Open the WAS admin console (https://hajo-clm4.local.int:9043/ibm/console) as described above and goto Users and Groups > Manage Groups.
Click Create... to create at least the three groups JazzAdmins, JazzUsers and JazzGuests.
Goto Users and Groups > Manage Users and make the user jtsadmin a member of the group JazzAdmins and JazzUsers. Repeat this step for all your userids.
Map security roles to groups
Goto Applications > Application Types > WebSphere enterprise applications and click on jts.war.
Click on Security role to user/group mapping.
Select the group(s) you want to map and click the button Map Groups.... A simple mapping is
| JazzAdmins, JazzDWAdmins, JazzProjectAdmins | JazzAdmins |
| JazzUsers | JazzUsers |
| JazzGuests | JazzGuests |
First click the button Search, than select the group to map and click the right arrow and press OK. Repeat this action for all groups.
The result should be similar to this:
Now press OK and don't forget to save. If you have deployed the *ccm*- or the *qm*-application you need to repeat this step for those.
Now the application server needs to be restarted.
C:\IBM\WebSphere\AppServer\profiles\JazzTeamServer\bin\stopServer.bat JazzTeamServer
C:\IBM\WebSphere\AppServer\profiles\JazzTeamServer\bin\startServer.bat JazzTeamServer
You might login again to the admin console to check, if the applications are running. If the DefaultApplication is running, you might go to Applications > WebSphere enterprise applications > Enterprise Applications > DefaultApplication > Target specific application status and disable the autostart option for both server (JazzTeamServer and ReverseProxyServer).
The WebSphere Application Server is now configured to run the CLM applications and its time to run the Jazz Team Server setup.
Jazz Team Server Setup
- Open a browser and open the url: https://hajo-clm4.local.int/jts/setup and login with your administrative user (i.e. jtsuser / Rat1onal)
- Custom Setup should be preselected and it should not be possible, to select Express Setup. If Express Setup is enabled that might be caused by the selected Install Tomcat 7 option during installation.
Select Custom Setup and press Next >. - Read the introduction and press Next >.
- Confirm the public uri (i.e.: https://hajo-clm4.local.int/jts) and press Next >.
- Configure the Database for the Jazz Team Server:
Select DB2 as Database Vendor and JDBC as Connection Type.
Specify the password and as JDBC Location is //hajo-clm4.local.int:50000/JTS:user=jtsadmin;password={password};.
Press Test Connection to check your input.
Now press Create Tables.
When the database tables are created successfully click Next > to continue. - Configure E-mail Notification.
- Press Register Applications and Next >.
- As User Registry select Non-LDAP External Registry and create jtsadmin as the new administrative user, assign licenses and press Next >.
- Configure the Data Warehouse:
As above select BD2 and JDBC.
Specify the password and as JDBC Location is //hajo-clm4.local.int:50000/DW:user=jtsadmin;password={password};.
The User ID could be etl_user.
As above, press Test Connection, Create Tables and click Next > to continue.
- Configure the Database for the CCM application:
Procede with the same values as for the jts database except //hajo-clm4.local.int:50000/CCM:user=jtsadmin;password={password}; as JDBC Location. - To finish the CCM setup, press Finalize Application Setup and Next > to continue with the data warehouse.
- Enter the JDBC password and press "Next >" to continue with the next application.
- Configure the Database for the QM application in the same way as before the CCM application. Use //hajo-clm4.local.int:50000/QM:user=jtsadmin;password={password}; as JDBC Location.
- To Finalize Setup Popups must be allowed in the browser settings. Press Authorize and Finalize Application Setup. Now press Next > and Finish.
Now your CLM solution is ready installed and configured.
Related topics: |
External links: |
Additional contributors:
|
Questions and comments:
Warning: Can't find topic Deployment.ConfigureCLMEnterpriseReverseProxy85CommentsDeployment.ConfigureCLMEnterpriseReverseProxy855 moved from Deployment.ConfigureCLMEnterpriseReverseProxy85 on 2013-12-17 - 18:00 by HajoPross -
Contributions are governed by our Terms of Use. Please read the following disclaimer.
Dashboards and work items are no longer publicly available, so some links may be invalid. We now provide similar information through other means. Learn more here.