Install WebSphere Application Server 8.5 and IHS 8.5
Authors: Dr. Hans-Joachim ProssBuild basis: Websphere Application Server 8.5.5, IBM HTTP Server 8.5.5, IBM Installation Manager 1.7.1, ELM 7.0.2
Note: Support removed for IBM WebSphere Application Server (Traditional WAS) starting with ELM version 7.0.3. Use WebSphere Liberty, either embedded and installed with ELM applications, or separately installed
A small introduction, how to install IBM WebSphere Application Server 8.5.5 and IBM HTTP Server 8.5.5 for the IBM Engineering Lifecycle Management Platform. This guide is part of the Configuring Enterprise CLM Reverse Proxies guide.
Prerequisites and Assumptions
For the following the IBM Installation Manager bits are assumed to be installed.  |
Sofware Versions used * IBM Installation Manager V 1.7.1 * IBM WebSphere Application Server V 8.5.5 * IBM HTTP Server V 8.5.5 Installation Directories It is a good practice, NOT to use the default Installation Directory, because this includes spaces in the name and is a virtual directory. A good choice is to take C:\IBM as root folder. |
Installation of WebSphere Application Server and IBM HTTP server
Download and extract the installation files for the WebSphere Application Server, the WebSphere Application Server Supplements and, if available the fix packs. Fix packs have to be at the same level as the WAS itself. Trial downloads can be found at the "Optional Programs" tab of Jazz product download page on www.jazz.net. Downloads to be used for production purposes must be taken from your Passport Advantage site. Fix packs are located at www.ibm.com/support/fixcentral.Start the IBM Installation Manager, connect the package repositories and click Install.
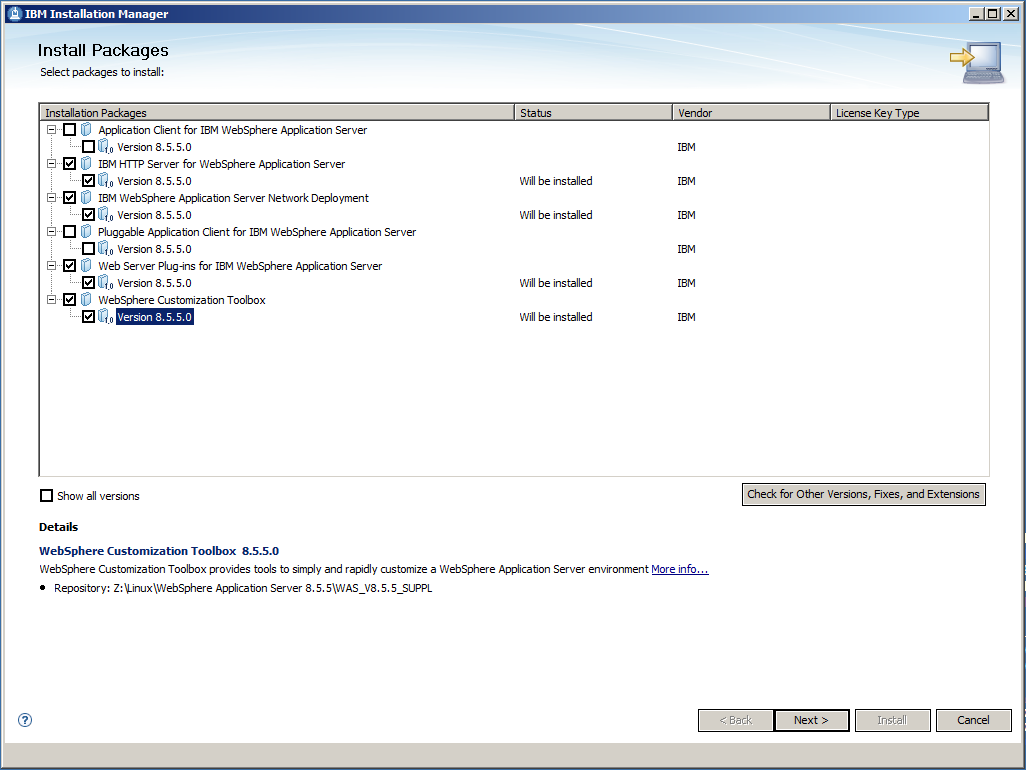
We need to install 4 packages which can be installed at the same time.
Select the 4 packages and click Next >.
After having read and accepted the license agreement, click Next >.
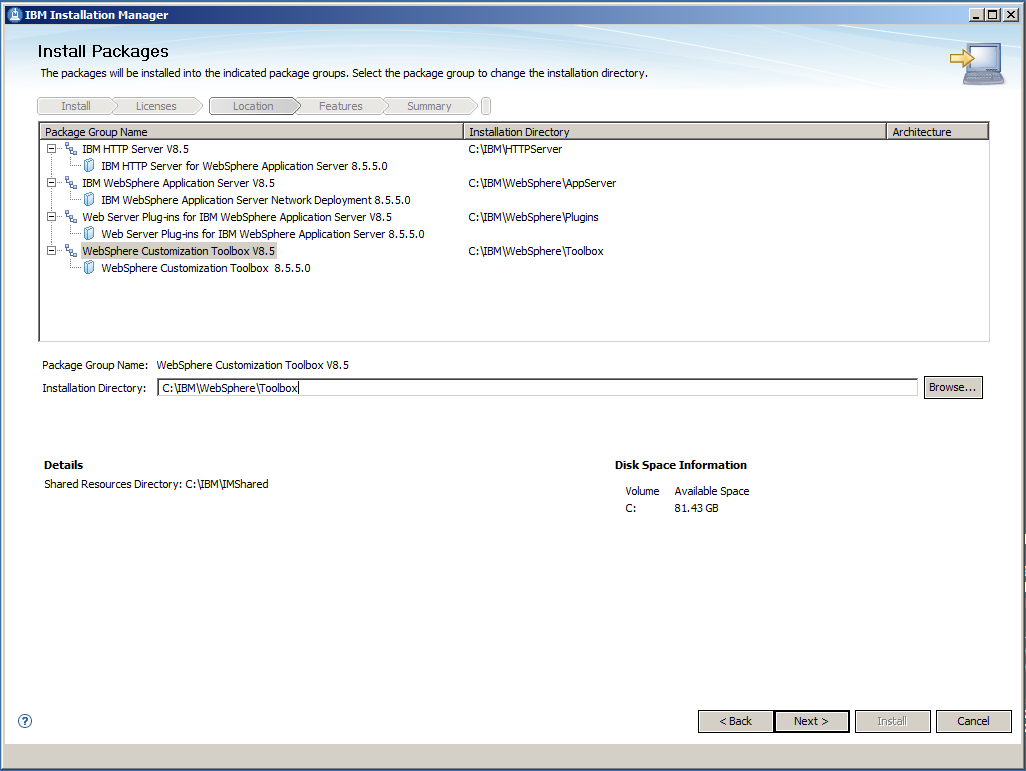
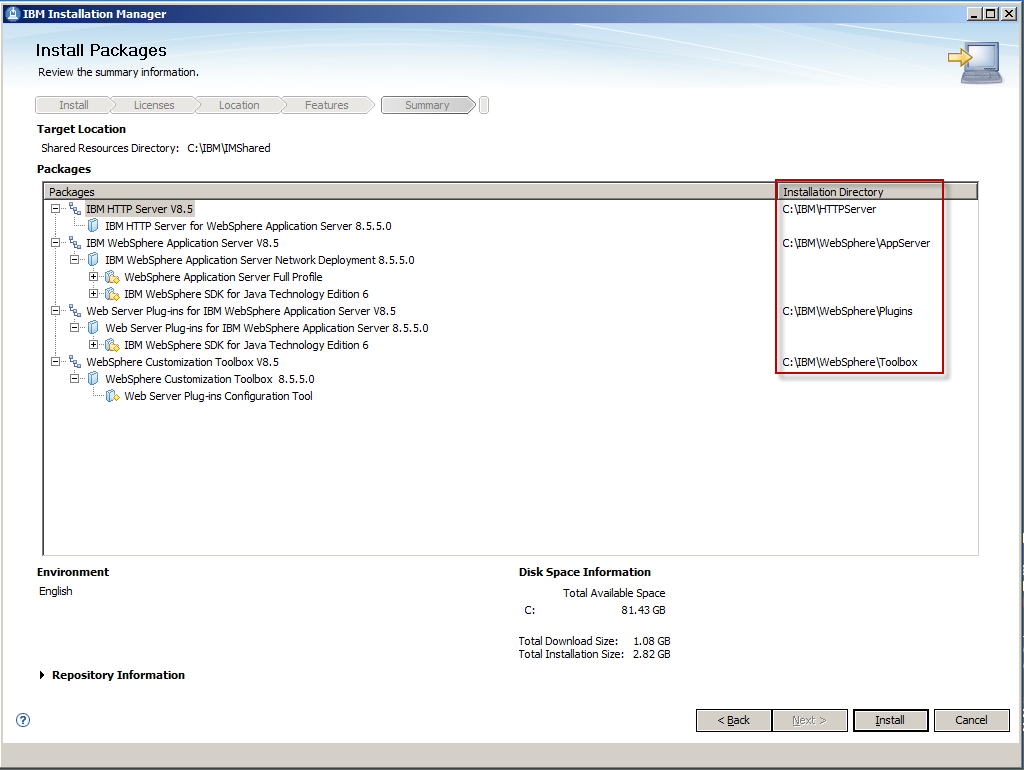
Enter the Installation Directories for each of your 4 packages and click Next >.
It is a good practice, NOT to use the default Installation Directory, because this includes spaces in the name and is a virtual directory on the Windows Server operating systems. A good choice and used in this inroduction is to take C:\IBM as root folder. On the next screen you don't want to install additional languages. At least I don't want, although I'm a German. Just click Next >.
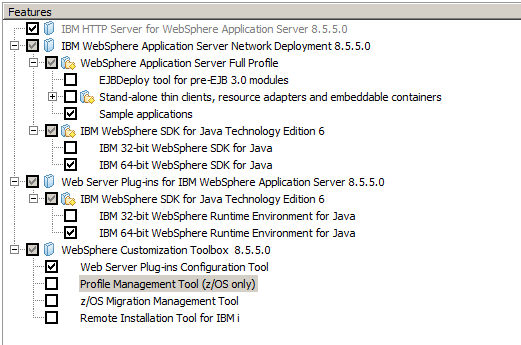
Select the features as shown in the picture above before clicking Next >.
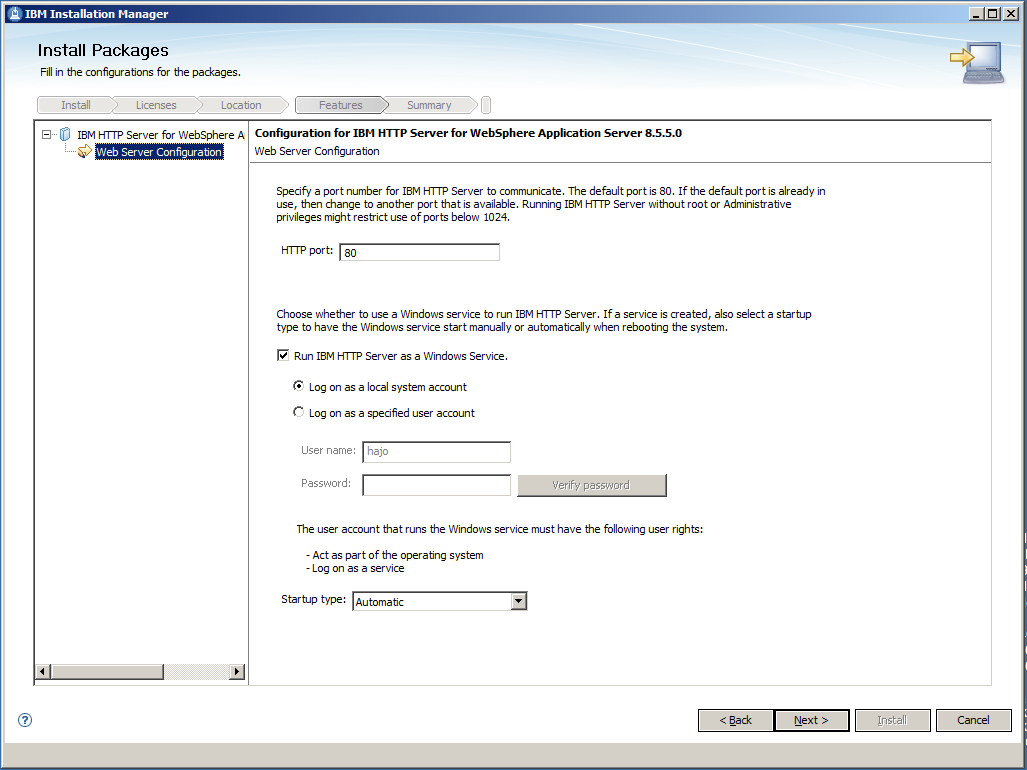
On the Web Server Configuration tab let the default values and click Next >.
If necessary, the HTTP port can be changed later in the WebSphere Integrated Solutions Console.
Double check the installation directories and click Install.
 |
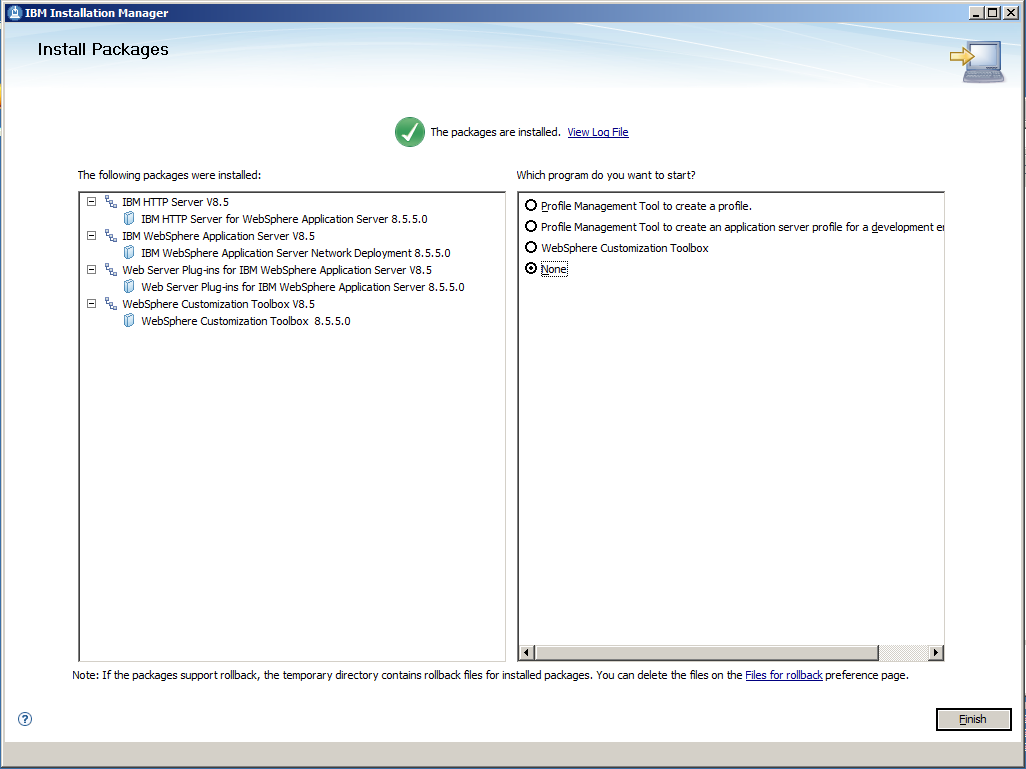
Timing In a Quad Core VMware Image on my 2,70 GHz machine the installation took about 7 minutes. |
Select Finish and close the Installation Manager.
Related topics: Configuring Enterprise CLM Reverse Proxies: WebSphere 8.5 and IHS 8.5
External links:
Contributions are governed by our Terms of Use. Please read the following disclaimer.
Dashboards and work items are no longer publicly available, so some links may be invalid. We now provide similar information through other means. Learn more here.
