r7 - 2024-07-22 - 08:09:35 - ShubjitNaikYou are here: TWiki >  Deployment Web > DeploymentInstallingUpgradingAndMigrating > ELMLibertyProfile
 Distributed Deployment of ELM on Liberty Profile using IBM HTTP Server
Authors: ShradhaSrivastav Build basis: Engineering Lifecycle Management 7.0.x, Websphere Liberty, IBM HTTP Server 9.0.x
Page contents
- Prerequisites and Assumptions
- Example server configuration
- Overview of the Setup
- Install ELM Applications
- Install IBM HTTP Server
- Configure IHS
- Configuring Liberty Profiles with LDAP
- Configuring SSO Across the Liberty Profiles
A common installation topology is a distributed deployment of a IBM Engineering Lifecycle Management (ELM), Enterprise topology, which means each ELM application can be deployed and configured on a separate Liberty Profiles.
We bundle WebSphere Liberty as the default application server with ELM and this article will focus on configuring a distributed deployment of ELM using WebSphere Liberty. Here are a couple of scenarios where we would need a distributed setup.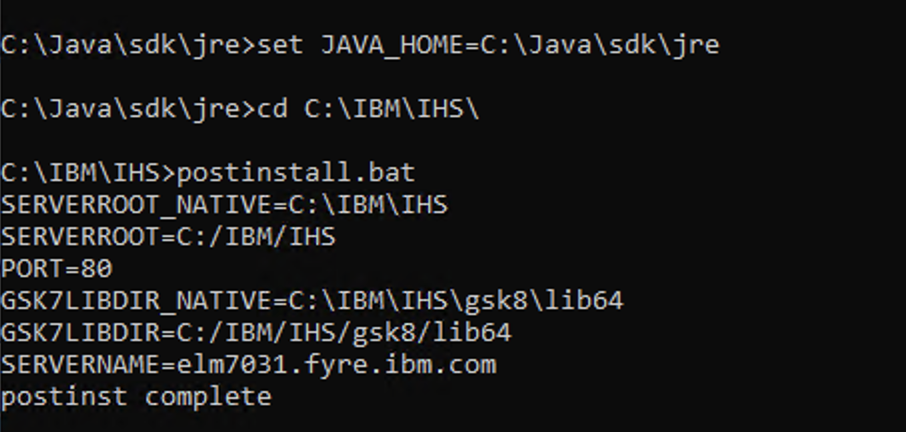 Post install, we have to create a new key database and a self signed certificate, enable SSL directives within the IBM HTTP Server's configuration file (httpd.conf), enable support modules and create a key database for certificates. We then complete the configuration using one of the methods for traffic redirection to the Liberty profiles.

New Keystore
(Note, To enable the CMS provider, add the following phrase to the java.security file.
Verify the default certificate was created.


The steps to configure includes generating plug-ins from each Liberty server hosting ELM applications, Merge the plugins into one and include the path to the merged plugin file in IHS. From version 6.0.5 the plugin-cfg.xml file for each application server instance is auto generated during startup. It would be created in the following location:
Examine the contents of the XML file and look for the following line:
Verify that this entry matches the directory you created for your Liberty plugin
You will also need to make changes to the Plugin config file regarding the Keystore / Certificate you created earlier in Key Database section, Import Jazz Signer Certifact to Web Server section
Modify this to match the certificate information you created for liberty plugin.
Stash the JTS(Application) keystore password
As with ELM 703 ikeyman is no longer shipped you can use the following command to stash the password of default or new keystore created from ELM applications and use the same values while updating the plugin files.
Uncomment it out and add the following:
EXAMPLE
We bundle WebSphere Liberty as the default application server with ELM and this article will focus on configuring a distributed deployment of ELM using WebSphere Liberty. Here are a couple of scenarios where we would need a distributed setup.
- Deploy a distributed setup using WebSphere Liberty where each ELM application is setup on its own Liberty Profile
- Deploy one or a set of applications (example Reporting components LQE, DCC and JRS) on a separate Liberty Profile (This specific scenario will be used in this article)
- Adding additional application instances such as EWM1 / ETM1 / ERM1 with the bundled Liberty Profile connecting to JTS/EWM/ETM residing on a separate Liberty Profile
Prerequisites and Assumptions
- ELM installed with Liberty Profile
- Each of the Liberty profile is configured to use the same LDAP server with domain "example.org" for authentication (We will not consider the basic user registry in this example)
- A separate database server is available and setup for ELM, instructions available on our Infocenter
Example server configuration
For the purposes of this article we will use three separate servers configured as follows:- Server 1 (Hostname: ihs.example.org): IBM HTTP Server (IHS) listening on port 80 / 443 , GC/LDX installed with bundled Liberty Profile_
- Server 2 (Hostname: elm.example.org): JTS/EWM/ETM/ERM installed with the bundled Liberty Profile (Default HTTPS port : 9443)
- Server 3 (Host-name: reporting.example.org): JRS/DCC/LQE installed with bundled default Liberty Profile (Default HTTPS port : 9443)
Overview of the Setup
- Install ELM applications on Server 1, 2 and 3
- Install IHS Server and WebServer Plugins on Server 1
- Configure IHS
- Configure user registry on each Liberty Profile
- Configure SSO across the Liberty Profiles
Install ELM Applications
Install ELM applications on different machines using IBM Installation Manager- Download and Install IBM Installation Manager (IM) on each Server
- Download ELM application installer from Passport Advantage or from jazz.net
- Install JTS/EWM/ERM/RM applications on Server 2 using WAS Liberty
- Edit
[JAZZ_HOME]\server\liberty\servers\clm\conf\application.xmland comment out the application lines for those that were not installed on Server 2
- Edit
- Install GC/LDX applications on Server 1
- Edit
[JAZZ_HOME]\server\liberty\servers\clm\conf\application.xmland comment out the application lines for those that were not installed on Server 1
- Edit
- Install Reporting components, JRS, DCC and LQE on Server 3
- Edit
[JAZZ_HOME]\server\liberty\servers\clm\conf\application.xmland comment out the application lines for those that were not installed on Server 3
- Edit
- Install IBM HTTP Server (IHS), WebSphere Plugins part of WebSphere Supplements and IBM SDK on Server 1
Install IBM HTTP Server
If your organization has a copy of the WebSphere Application Server Supplements repository downloaded via passport advantage, you can use that repo and install IBM HTTP Server and WebSphere Plugins using IBM IM on Server1 OR- Download IHS from following link https://www.ibm.com/support/pages/node/617655
- One you select the Version, scroll down to Archive Packages (example 9.0.5.18) https://www.ibm.com/support/pages/node/7087536#IHSArchive
- Download Web Server Plugins from above link based on version selected
- Download Jave 8 - Archive https://www.ibm.com/support/pages/ibm-sdk-java-technology-edition-version-80-websphere-liberty-using-archives
- set
JAVA_HOME to jre folder
- run
postinstallfrom IHS home
Post install, we have to create a new key database and a self signed certificate, enable SSL directives within the IBM HTTP Server's configuration file (httpd.conf), enable support modules and create a key database for certificates. We then complete the configuration using one of the methods for traffic redirection to the Liberty profiles.
Configure IHS
Configure Certificate for IHS
Create a Keystore and Certificate using Ikeyman for the IHS server (GUI)
- New Key Database
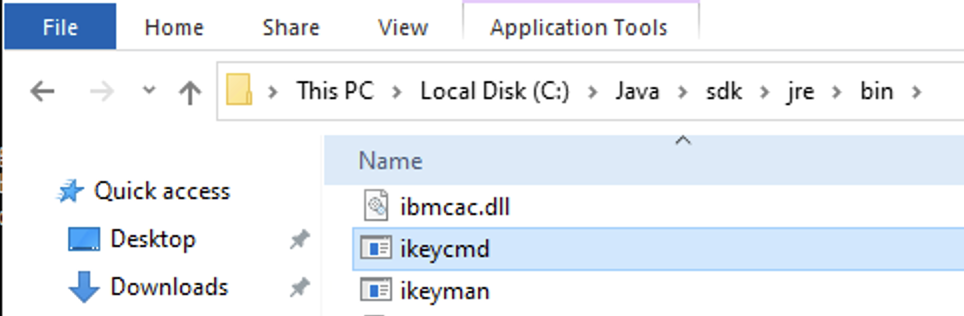
- Locate and start ikeyman
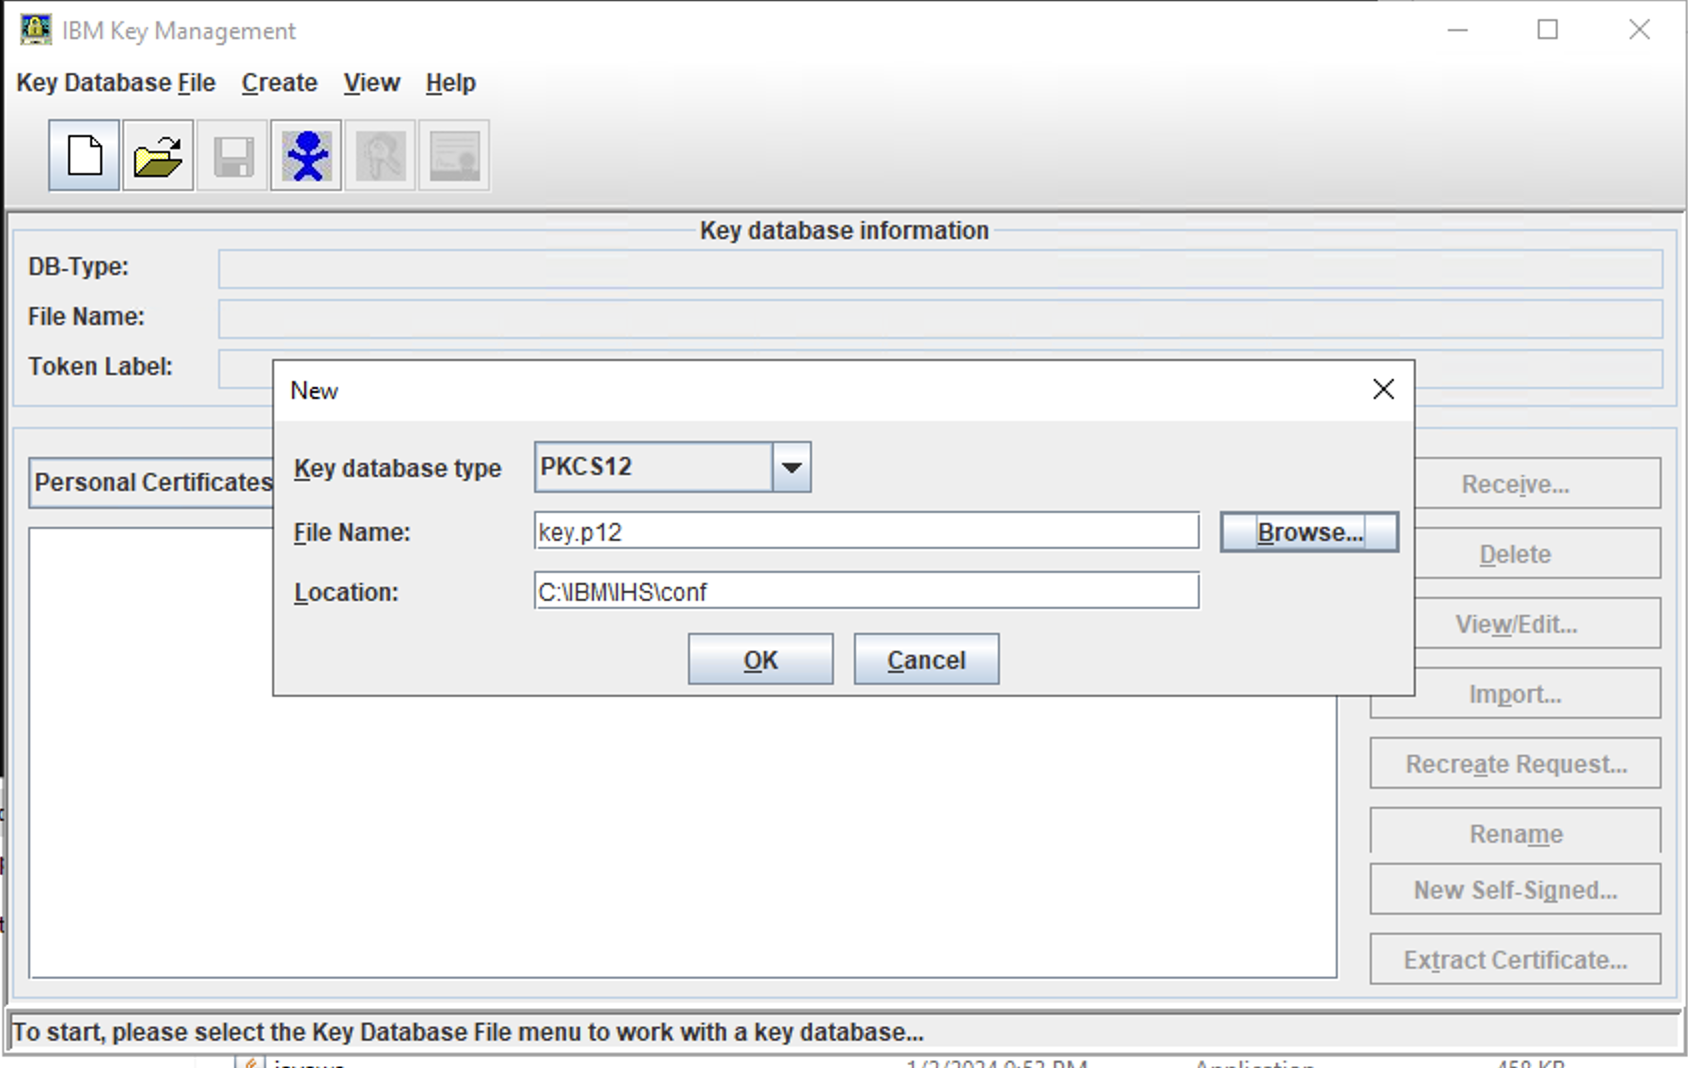
- Create a new Key Database File
New Keystore
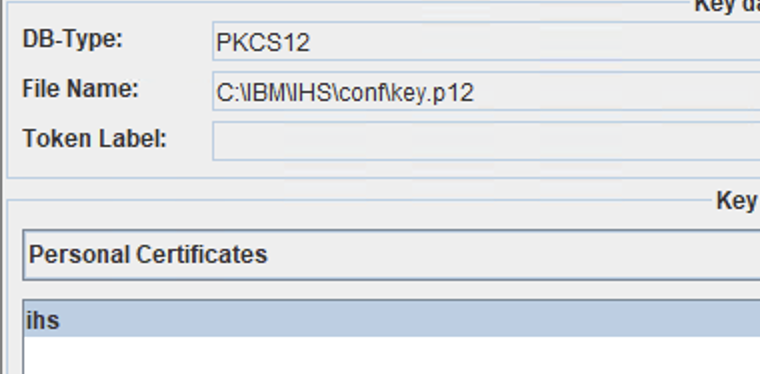
- Select Key database type PKCS12 (To create key database of type CMS, see note below)
- Give a name to your keystore. (Our example: key.p12 for type PKCS12)
- Enter a path for your keystore Recommendation: Put this in the bin or conf directory of the HTTPServer (You will need to remember this for later for the httpd.conf file)
- Click OK
(Note, To enable the CMS provider, add the following phrase to the java.security file.
security.provider.10=com.ibm.security.cmskeystore.CMSProviderIn Java 8, the java.security file is located in this directory:
.../java/8.0/jre/lib/security/java.securityIn Java 11, the java.security file is located in this directory:
.../java/11.0/jre/conf/security/java.security
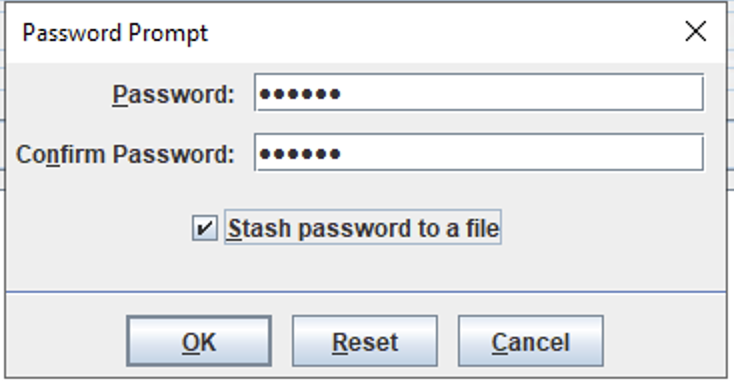
- Enter a password (and confirm)
- Check the box for the Stash Password to a file
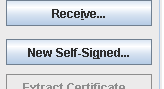
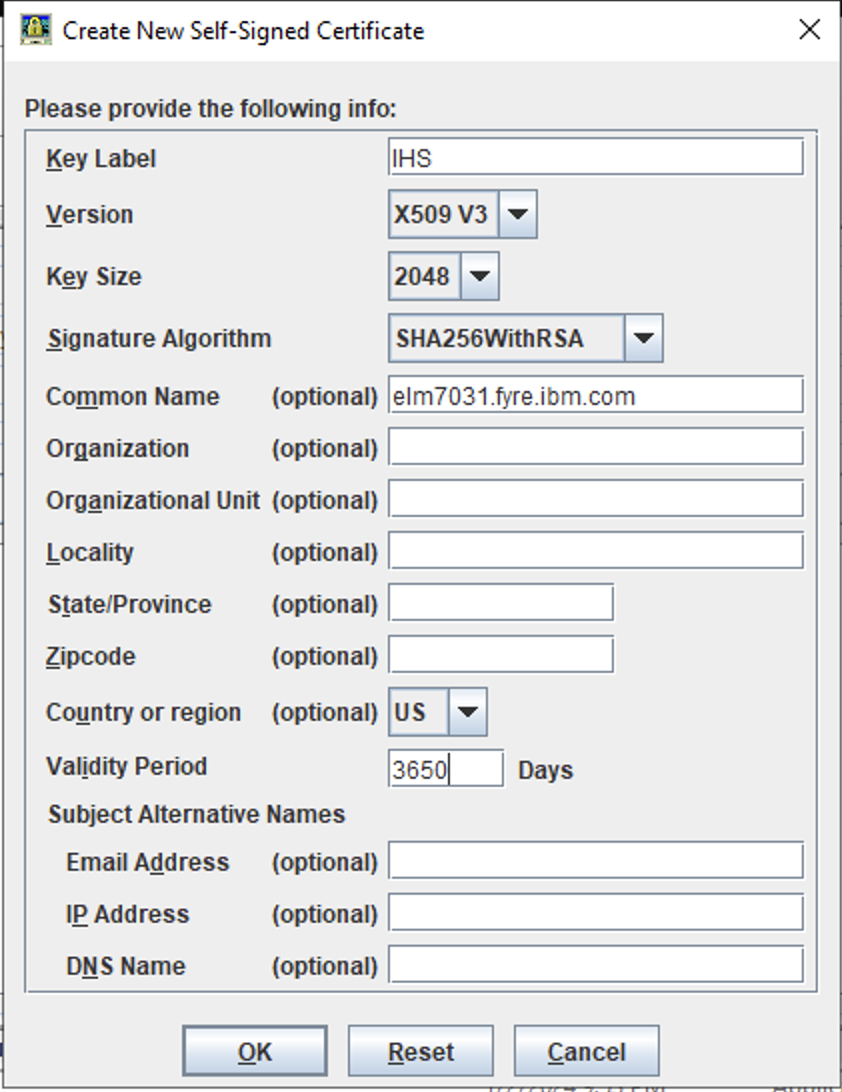
- New Self Signed Certificate for the IHS Keystore
- Create a new Self Signed Certificate
- Enter in information about the server
(We are using 'IHS' as our certificate name) - Enter the WebServer Name (Our server name is 'elm7031.fyre.ibm.com')
- Change the expiration to 3650 (This will avoid coming back in a year to do this again.)
Verify the default certificate was created.
Create a Keystore and Certificate using gskcapicmd for the IHS server (CLI)
- New Key Database
- Run the command from IHS\bin
gskcapicmd.bat -keydb -create -db key.p12 -pw secret -stash -type PKCS12
- New Self-Signed Certificate
gskcapicmd.bat -cert -create -db key.p12 -pw secret -dn CN=elm7031,DC=fyre,DC=ibm,DC=com -label IHS -size 2048
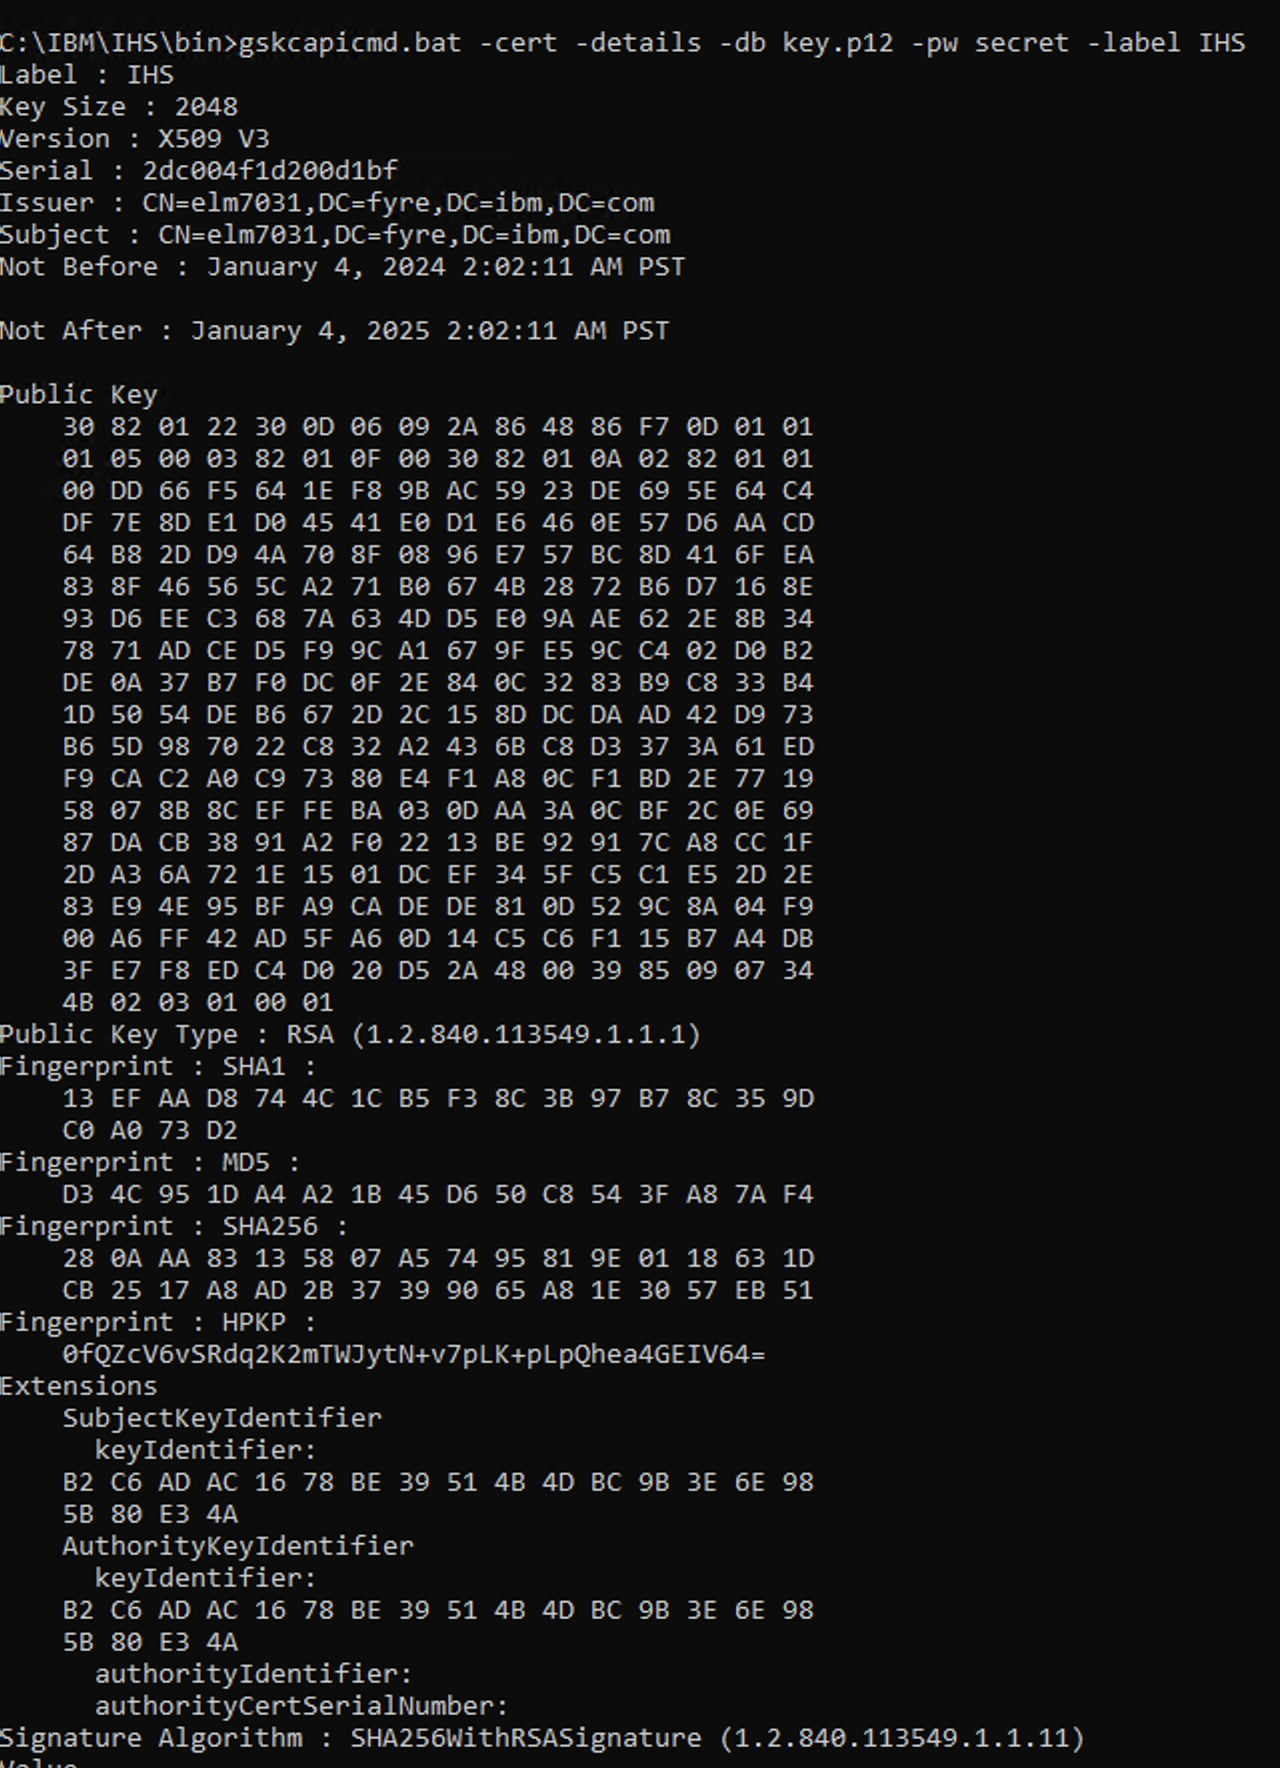
- List/view Certificate
gskcapicmd.bat -cert -list -db key.p12 -pw secret
gskcapicmd.bat -cert -details -db key.p12 -pw secret -label IHS
Configure Web Server Plug-ins
This configuration is to route requests for dynamic content, such as servlets, from web applications. We will look into the web server plugin method to configure reverse proxy.Configure IHS with Web Server Plugins (Recommended)
The Web server plug-in works with a web server to route requests for dynamic content, such as servlets, from web applications. The web servers (IHS), are necessary for directing traffic from browsers to the applications that run on an application server (Liberty profile). The web server plug-in uses the XML configuration file to determine whether a request is for an application server.The steps to configure includes generating plug-ins from each Liberty server hosting ELM applications, Merge the plugins into one and include the path to the merged plugin file in IHS. From version 6.0.5 the plugin-cfg.xml file for each application server instance is auto generated during startup. It would be created in the following location:
[JAZZ_HOME]\server\liberty\servers\clm\logs\state
Follow the steps to copy plugin file and ELM certificate to IHS Server
- Copy the certificate from
[JAZZ_HOME]\server\liberty\servers\clm\resources\security(All Application Servers) to[WebSphere_PluginInstall]\Plugins\config\WebServer1(IHS plugin folder) and rename it.- For example, copy ibm-team-ssl.p12 from JTS and rename it to jts_ibm-team-ssl.p12 on IHS server. Use the updated name when performing changes to Plugin Config file mentioned in step3.
- Copy the plugin file from
[JAZZ_HOME]\server\liberty\servers\logs\state\plugin-cfg.xmlto[WebSphere_PluginInstall]\Plugins\config\WebServer1\plugin-cfg.xmlYou need to run clm once to generate the plugin - Open the plugin-cfg.xml file and verify the contents. You should see something similar to this snippet:
<?xml version="1.0" encoding="UTF-8"?><!--HTTP server plugin config file for WebServer1 generated on 2016.05.17 at 16:14:49 PDT-->
<Config ASDisableNagle="false" AcceptAllContent="false" AppServerPortPreference="HostHeader" ChunkedResponse="false" FIPSEnable="false" IISDisableNagle="false" IISPluginPriority="High" IgnoreDNSFailures="false" RefreshInterval="60" ResponseChunkSize="64" SSLConsolidate="false" TrustedProxyEnable="false" VHostMatchingCompat="false">
   <Log LogLevel="Error" Name="C:\IBM\WebShere\Plugins\logs\WebServer1\http_plugin.log"/>
   <Property Name="ESIEnable" Value="true"/>
   <Property Name="ESIMaxCacheSize" Value="1024"/>
   <Property Name="ESIInvalidationMonitor" Value="false"/>
   <Property Name="ESIEnableToPassCookies" Value="false"/>
   <Property Name="PluginInstallRoot" Value="C:\IBM\WebShere\Plugins"/>
<!-- Configuration generated using httpEndpointRef=defaultHttpEndpoint-->
<!-- The default_host contained only aliases for endpoint defaultHttpEndpoint.
    The generated VirtualHostGroup will contain only configured web server ports:
      webserverPort=80
      webserverSecurePort=443 -->
   <VirtualHostGroup Name="default_host">
      <VirtualHost Name="*:80"/>
      <VirtualHost Name="*:443"/>
   </VirtualHostGroup>
   <ServerCluster CloneSeparatorChange="false" GetDWLMTable="false" IgnoreAffinityRequests="true" LoadBalance="Round Robin" Name="WebServer1_default_node_Cluster" PostBufferSize="0" PostSizeLimit="-1" RemoveSpecialHeaders="true" RetryInterval="60">
      <Server CloneID="8192ea2e-0dc3-4d34-9766-dc7240d46b43" ConnectTimeout="5" ExtendedHandshake="false" MaxConnections="-1" Name="default_node_WebServer1" ServerIOTimeout="900" WaitForContinue="false">
         <Transport Hostname="192.168.199.254" Port="9080" Protocol="http"/>
         <Transport Hostname="192.168.199.254" Port="9443" Protocol="https">
            <Property Name="keyring" Value="keyring.kdb"/>
            <Property Name="stashfile" Value="keyring.sth"/>
            <Property Name="certLabel" Value="LibertyCert"/>
         </Transport>
      </Server>
Changes to the Plugin Config File
You will need to make some changes to this xml file to match your environment.Examine the contents of the XML file and look for the following line:
<Log LogLevel="Error" Name= ************
Verify that this entry matches the directory you created for your Liberty plugin
<Log LogLevel="Error" Name="C:\IBM\WebShere\Plugins\logs\WebServer1\http_plugin.log"/>
You will also need to make changes to the Plugin config file regarding the Keystore / Certificate you created earlier in Key Database section, Import Jazz Signer Certifact to Web Server section
            <Property Name="keyring" Value="keyring.kdb"/>
            <Property Name="stashfile" Value="keyring.sth"/>
            <Property Name="certLabel" Value="LibertyCert"/>
Modify this to match the certificate information you created for liberty plugin.
- Example Windows
            <Property Name="keyring" Value="C:\IBM\WebSphere\Plugins\config\WebServer1\jts_ibm-team-ssl.p12"/>
            <Property Name="stashfile" Value="C:\IBM\WebSphere\Plugins\config\WebServer1\jts_ibm-team-ssl.sth"/>
            <Property Name="certLabel" Value="default"/>
- Example Linux
            <Property Name="keyring" Value="/opt/IBM/WebSphere/Plugins/config/WebServer1/jts_ibm-team-ssl.kdb"/>
            <Property Name="stashfile" Value="/opt/IBM/WebSphere/Plugins/config/WebServer1/jts_ibm-team-ssl.sth"/>
            <Property Name="certLabel" Value="default"/>
Stash the JTS(Application) keystore password
As with ELM 703 ikeyman is no longer shipped you can use the following command to stash the password of default or new keystore created from ELM applications and use the same values while updating the plugin files.
./gskcmd -keydb -stashpw -db ../ibm-team-ssl.p12 -pw ibm-team
Merging Plugins
IHS can only recognize one plugin file. When you have a distributed deployment, you need to merge the plugin files into a single plugin. This can be accomplished either manually or with the Plugin Merge Tool. To merge the plugins from all application server profile instances, you can use the PluginUtility command which is available on the Liberty version bundled with CLM version 6.0.4 onwards. Steps to Merge the Plugins:- Copy all the Plugins into one folder, example
c:/plugins - Navigate to
\server\liberty\wlp\bin - $
pluginUtility merge --sourcePath=C:/plugins --targetPath=C:/targetDir/myMergedPluginCfg.xml
Modify the httpd.conf File
- SSL Module
- Search for the following:
Uncomment it out and add the following:
- The Port you will be listening on (port 443 is the default)
- The virtual host name ( a * means accept all traffic coming in on port 443)
- The path to your Key file (created above)
- The path to the stash file (created above)
EXAMPLE
LoadModule ibm_ssl_module modules/mod_ibm_ssl.so
Listen 0.0.0.0:443
## IPv6 support:

<VirtualHost *:443>
SSLEnable
SSLProtocolDisable SSLv2 SSLv3
 KeyFile C:\IBM\IHS\conf\key.p12
 SSLStashFile C:\IBM\IHS\conf\key.sth
</VirtualHost>
- Plugin Location At the bottom of the httpd.conf file, enter in the path to the plugin file as well as the path to the ap22 module
- Windows
LoadModule was_ap22_module "C:\IBM\WebSphere\Plugins\bin\32bits\mod_was_ap22_http.dll"
WebSpherePluginConfig "C:\IBM\WebSphere\Plugins\config\WebServer1\plugin-cfg.xml"
- Linux
LoadModule was_ap22_module "/opt/IBM/WebSphere/Plugins/bin/32bits/mod_was_ap22_http.so"
WebSpherePluginConfig "/opt/IBM/WebSphere/Plugins/config/WebServer1/plugin-cfg.xml"
- Restart IHS Server
Configuring Liberty Profiles with LDAP
Each instance of WebSphere Liberty Profile should be configured with the same user registry (ideally LDAP). The user registry settings must be identical on all servers for SSO to work. You can complete running JTS Setup during this process. Instructions to configure the Liberty Profile with LDAPConfiguring SSO Across the Liberty Profiles
It is critical to configure Single Sign-On between these application servers such that a user only needs to log into one of the application and subsequent access to the other applications will not require re-authentication. Instructions to configure Single Sign On (SSO) across the Liberty ProfilesRelated topics: Configure Liberty with LDAP, Configure SSO For Liberty, Generating Web server Plug-ins on Liberty Profile, Deployment web home
External links:
-
 Deployment web
-
 Planning and design
- Installing and upgrading
- Migrating and evolving
- Integrating
- Administering
- Monitoring
- Troubleshooting
-
 To do
To do
-
 Under construction
- New
-
 Updated
-
 Constant change
- None - stable page
- Smaller versions of status icons for inline text:
-


Contributions are governed by our Terms of Use. Please read the following disclaimer.
Dashboards and work items are no longer publicly available, so some links may be invalid. We now provide similar information through other means. Learn more here.