Configure Secure LDAP with Liberty and WebSphere for ELM Applications
Authors: BharathRao, ShradhaSrivastavBuild basis: ELM 7.0.1 and higher
LDAP directory servers, mainly used as an authentication repository, are often used to store sensitive information like passwords and other account details. If your ELM environment uses an external LDAP-based user repository, such as IBM Tivoli Directory Server or Microsoft Active Directory, you can configure it to communicate over a secure SSL channel.
This article assumes that you have already an existing connection to an LDAP server set up.
Your LDAP server, must be configured to accept SSL connections and be running on secured port number (636). Refer to your LDAP server documentation if you need to create a signer certificate, which as part of this task, must be imported from your LDAP server into the trust store of the application server.
This article provides step by step instructions on configuring ELM with secure LDAP(LDAPS)
Reference: ConfigureLDAPforLibertyProfile Configure secure LDAP in Liberty
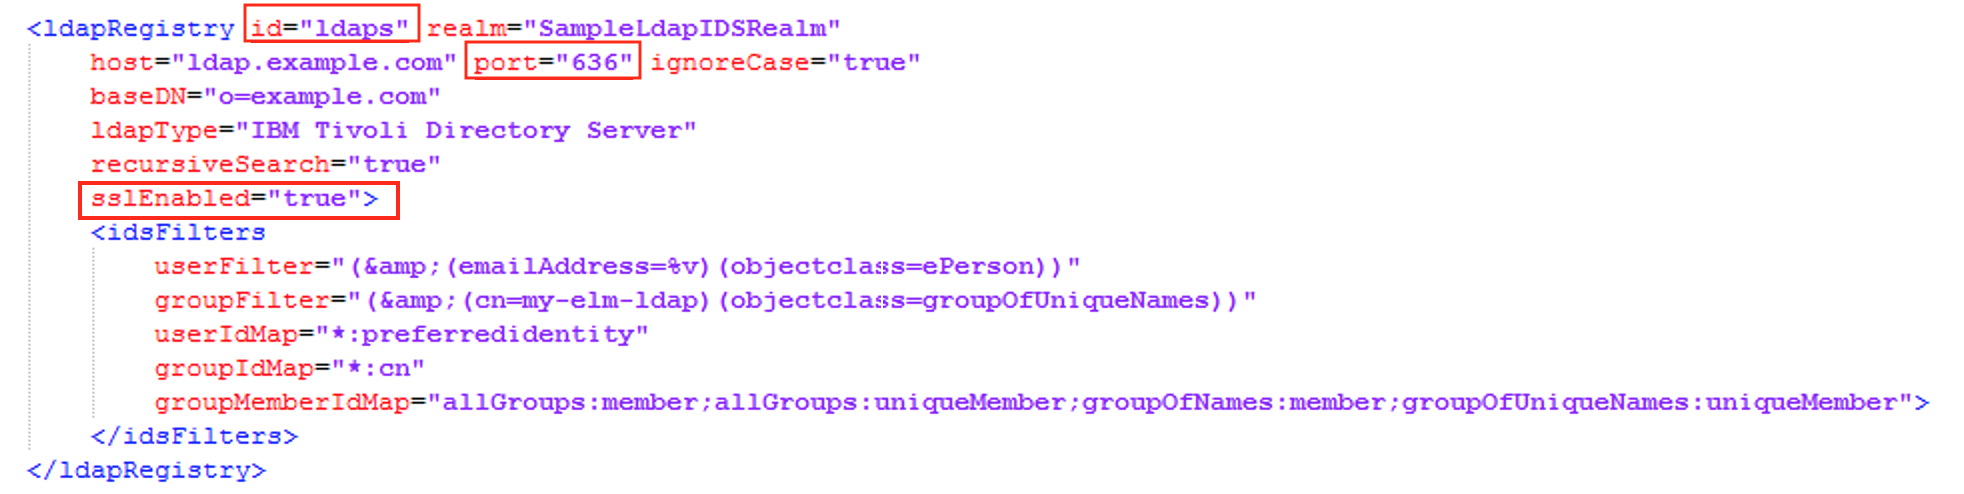
- Enable Require SSL and update the LDAP Port to secure port in the ldapUserRegistry.xml file located in \server\liberty\servers\clm\conf\
NOTE: Any changes to the group / ldap properties if made had to be corrected in the application.xml file located in\server\liberty\servers\clm\conf\
Add LDAP SSL certificate
Configuring secure LDAP In JTS server
NOTE: Any changes to the group / ldap properties if made has to be corrected here
Configure secure LDAP in WAS
Add LDAP SSL certificate
Liberty Server
*NOTE: Ensure you have a working LDAP configuration with CLM before enabling LDAP SSL.*Reference: ConfigureLDAPforLibertyProfile
Configure secure LDAP in Liberty
- Enable Require SSL and update the LDAP Port to secure port in the ldapUserRegistry.xml file located in NOTE: Any changes to the group / ldap properties if made had to be corrected in the application.xml file located in
- Ensure to include the below features in the ldapUserRegistry.xml

- Edit the LDAP configuration in the Liberty server in ldapUserRegistry.xml file
- Proceed with the next section to add LDAP SSL certificate
Add LDAP SSL certificate
- To configuration secure LDAP, obtain the SSL signer certificate from the LDAP server
- From the file explorer, navigate to
\server\jre\bin and double click on ikeyman.exe
- To open an existing keystore file, Click on
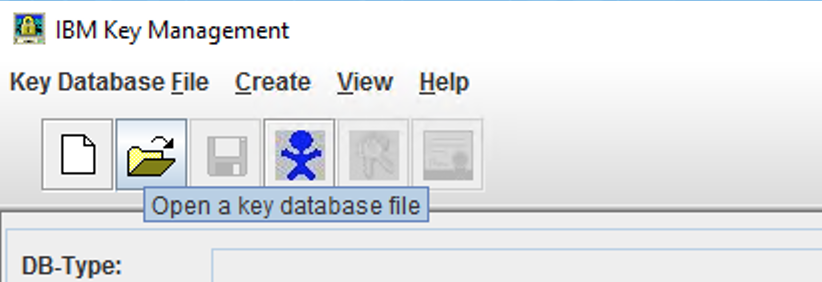
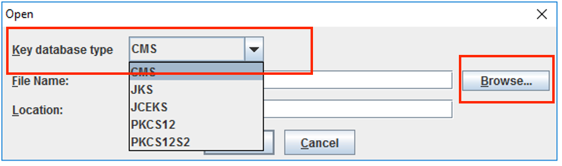
- Choose the Key database type from the drop-down and click on Browse to select the key database file(kdb). Enter the password and click on Ok to open the file
- After the kdb is open, click on the drop-down and choose Signer Certificate
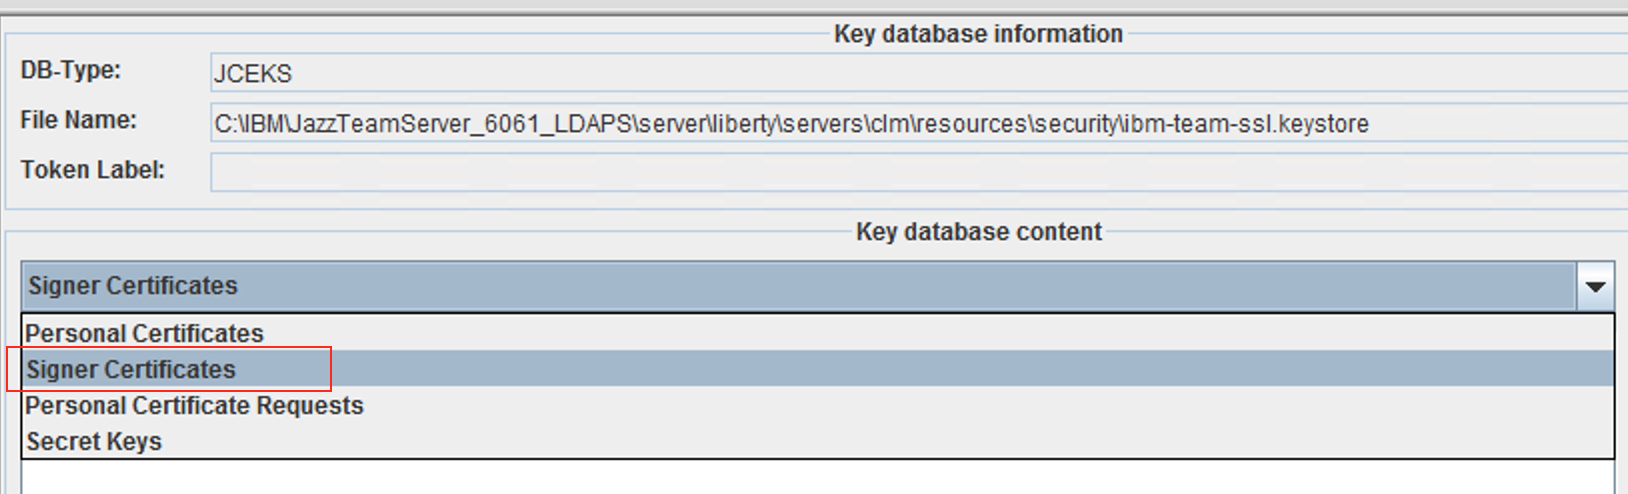
- Click on Add and browse the signer certificate file(.arm) obtained from the LDAP server, then click ok to add the certificate

- Proceed with the next section to configure secure LDAP in JTS server
ikeycmd -cert -add -db -type kdb <dbname.kdb> -file <certfile.arm> -pw
Configuring secure LDAP In JTS server
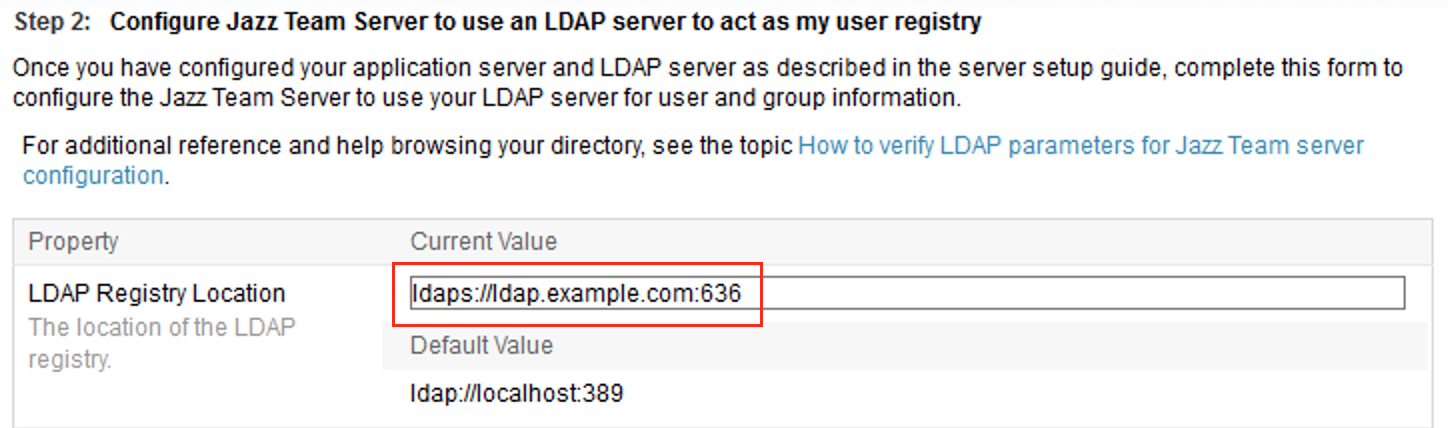
NOTE: Any changes to the group / ldap properties if made has to be corrected here - Login to https://clmexample.com:9443/jts/setup, proceed to the User Registry section
- In the User Registry section, edit the LDAP host configuration to update the LDAP port to secure port
- Perform a test connection and ensure the LDAP configuration succeeds
- Restart the Liberty server
WebSphere Application Server
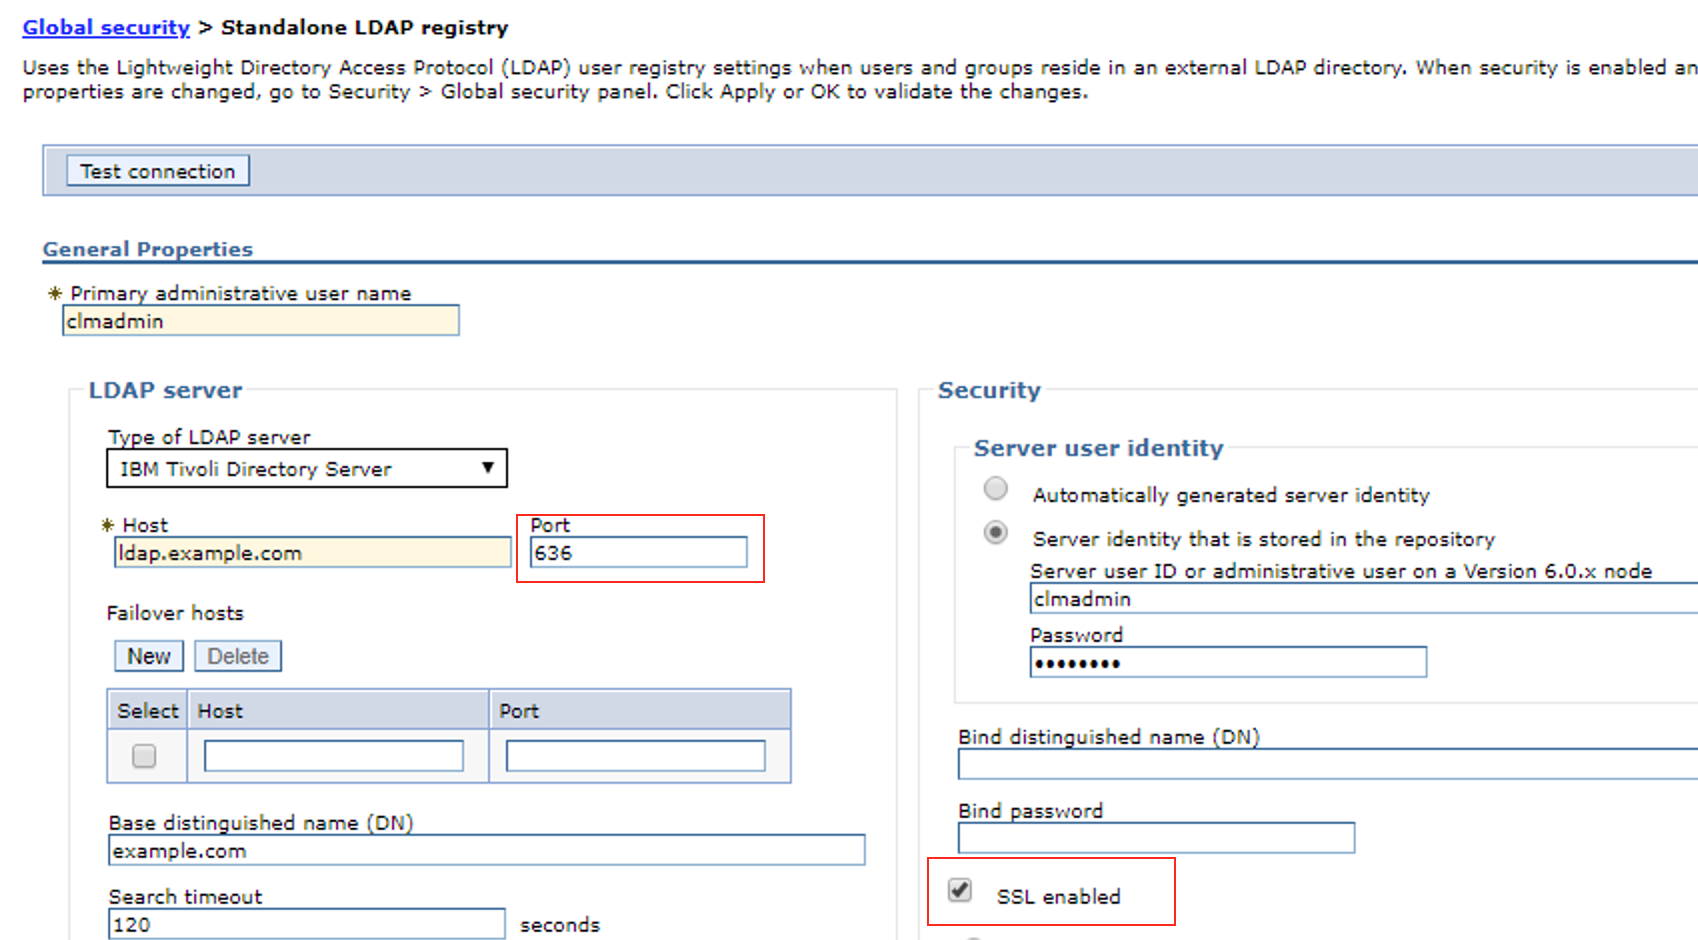
NOTE: Ensure you have a working LDAP configuration with CLM before enabling LDAP SSL. Configure secure LDAP in WAS
- Enable Require SSL
- Change LDAP PORT to secure port
Add LDAP SSL certificate
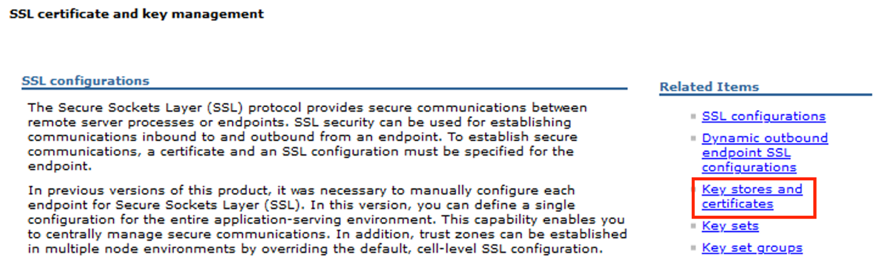
- Login to WebSphere Application Server Administration Console Navigate to Security > SSL certificate and key management

- Click on Key stores and certificates
- Click on NodeDefaultTrustStore
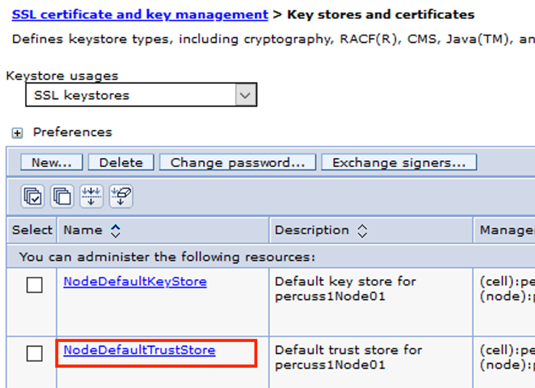
- Click on Signer certificates

- Click Retrieve from port to retrieve the LDAP SSL certificate from the LDAP server

- Enter the LDAPS server details and click on Retrieve signer information

- Confirm the SSL certificate for LDAPS Server is retrieved and then click OK
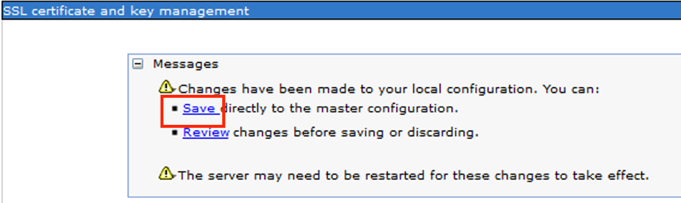
- Click on Save
- Proceed with the next section to configure secure LDAP in JTS Server
Configuring secure LDAP In JTS server
NOTE: Any changes to the group / ldap properties if made has to be corrected here- Login to https://clmexample.com:9443/jts/setup, proceed to the User Registry section
- In the User Registry section, edit the LDAP host configuration to update the LDAP port to secure port
- Perform a test connection and ensure the LDAP configuration succeeds
- Proceed with the next section to remap group mappings in WAS
Remap Security Group Mappings in WAS
- Login to WAS Administration Console
- Remove and re-add the user/group mappings under Security role to user/group mapping for each of the CLM/ELM applications Remap war files
- Restart WAS
Related topics: Configure LDAP for Liberty Profile, Deployment web home
External links:
Contributions are governed by our Terms of Use. Please read the following disclaimer.
Dashboards and work items are no longer publicly available, so some links may be invalid. We now provide similar information through other means. Learn more here.