Configure Proxy Settings for Engineering Lifecycle Management Clients 
Authors: ShubjitNaik, BhagathPB, ArtaChaudhury, DineshKumar Build basis: Engineering Lifecycle Management 7.x
There are instances where IBM ELM Applications are deployed on Secure zones and can only be accessed via a forward Proxy Server. For Web Clients the browser is configurable to connect via a Proxy server. Non-Web clients have different configurations to be able to connect to ELM applications via a Proxy server.
This article focuses on configuring proxy settings for ELM Non-Web Clients.
Engineering Workflow Management
Eclipse Client
Eclipse includes proxy settings under Network connections by default that can be configured.Startup the Engineering Workflow Management Eclipse Client and perform the following steps:
- Click on Window > Preferences
- Select the General > Network Connections category.
- Change Active Provider to Manual, Select HTTPS and the Edit
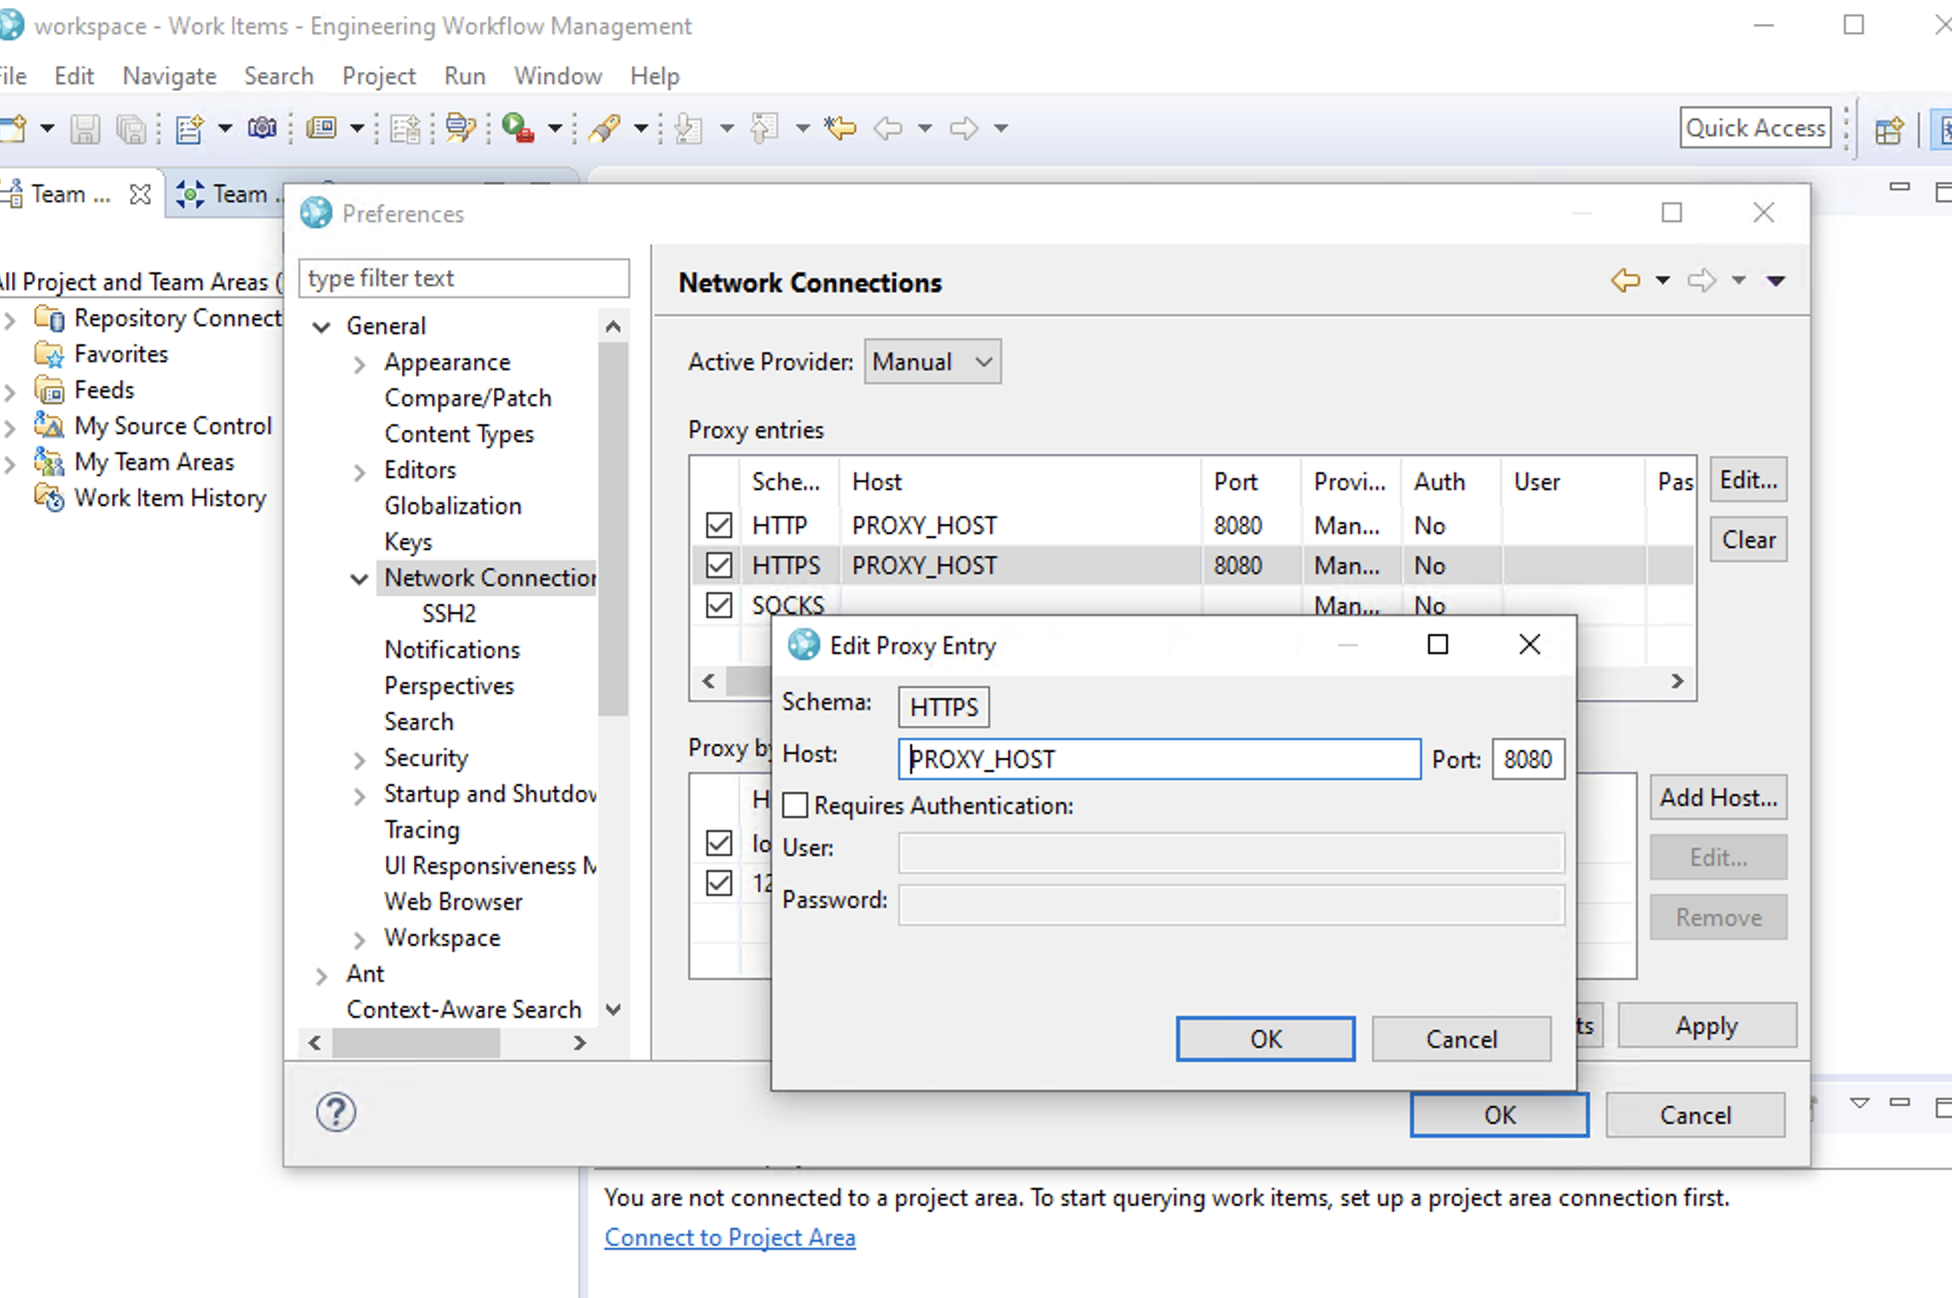
- For password protected Proxy servers check the box "Requires Authentication" and enter the User and password
Shell Client
For EWM Shell Clients to connect to an EWM server via a Forward Proxy server, Enable Microsoft Windows Proxy setup (Or Via Microsoft Internet Explorer)- On Microsoft Windows 10 Click Start > Settings > Network & Internet > Proxy and Click "Use a proxy server" and enter the details

- For password protected Proxy server use the format
[Username]:[Password]@[proxyhost]:[proxyPort]
- In case the client machine connects via VPN, you can change the HTTP Tunneling JVM property for the connection to work.
- Edit
[EWM Shell Install Folder]\3rd Party\jre\lib\net.propertiesand Change
From: jdk.http.auth.tunneling.disabledSchemes=Basic
To: jdk.http.auth.tunneling.disabledSchemes=""
- Edit
SCMTools
For SCM or LSCM executables to connect to a EWM repo via proxy server perform the following- Microsoft Windows : Define System Environment Variables
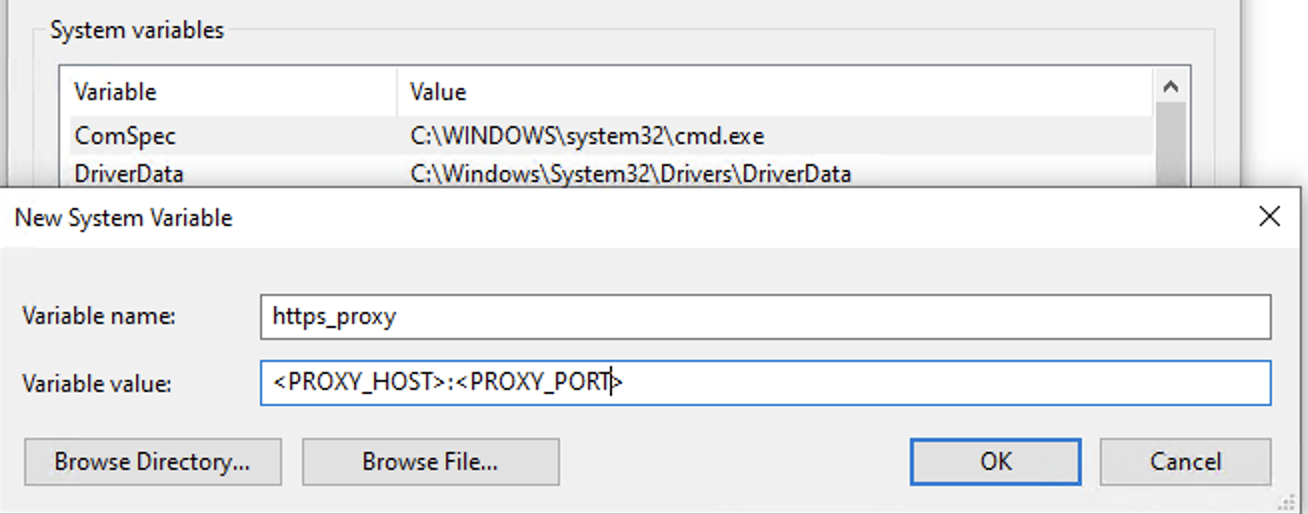
- OR Configure your Terminal / Command window to take advantage of a forward proxy by setting one of two environment variables prior to executing the command line.
Microsoft WindowsSET http_proxy=<proxy_host>:<proxy_Port> SET https_proxy=<proxy_host>:<proxy_Port>
Unix Based Systemsexport http_proxy=<proxy_host>:<proxy_Port> export https_proxy=<proxy_host>:<proxy_Port>
For LSCM there is an alternate way is to configure these variables
- Microsoft Windows : Navigate to scm command line installation directory, search and edit lscm.bat file and add the proxy parameters after PRGPATH as shown below
@echo off
SET PRGPATH=%~dp0
SET http_proxy=<proxy_host>:<proxy_Port>
SET https_proxy=<proxy_host>:<proxy_Port>
....
- Unix based Systems : Navigate to scm command line installation directorym search and edit the lscm file and add the proxy parameters after PRGPATH,
#!/bin/sh
PRGPATH="`dirname "$0"`"
export PRGPATH
export http_proxy=<proxyhost>:<proxyPort>
export https_proxy=<proxyhost>:<proxyPort>
...
For Password protected Proxy servers the syntax is
https_proxy=[Username]:[Password]@[proxyhost]:[proxyPort] Jazz Build Engine
For Jazz Build Engines we can use the JVM Arguments while running the command or include it in the jbe.ini file- Start the Jazz Build Engine with proxy arguments as shown below:
./jbe -repository <EWM Repository URL> -userId <User Id> -pass <Password> -engineId <Build Engine Id> -vmargs -Dhttps.proxyHost=<proxy_host> -Dhttps.proxyPort=<proxy_port>
OR
- Edit the jbe.ini file located under [EWM_Build_Install_Path]\buildsystem\buildengine\eclipse
-Dhttps.proxyHost=<proxy_host>
-Dhttps.proxyPort=<proxy_port>
- For Password protected Proxy servers add the following JVM variables
-Dhttps.proxyUser=<Username>
-Dhttps.proxyPassword=<Password>
Engineering Systems Design Rhapsody
Rhapsody Client
For Rhapsody Clients there are two key settings as there is a browser login as well while accessing ELM applications.1. Edit Rhapsody.ini file and add data to the variable
TakeProxyHostInfoFromFile - First make sure lscm.bat file is updated with the proxy details
- Navigate to scm command line installation directory, search and edit lscm.bat file and add the proxy parameters after PRGPATH as shown below
@echo off
SET PRGPATH=%~dp0
SET http_proxy=<proxy_host>:<proxy_Port>
SET https_proxy=<proxy_host>:<proxy_Port>
....
- Navigate to scm command line installation directory, search and edit lscm.bat file and add the proxy parameters after PRGPATH as shown below
- Then edit the Rhapsody.ini file
C:\ProgramData\IBM\Rhapsody\9.0.1x64\rhapsody.ini - Update the TakeProxyHostInfoFromFile value to
TakeProxyHostInfoFromFile=[EWM_Install_Folder]\scmtools\eclipse\lscm.bat
OR - If you have not updated lscm.bat file , edit the rhapsody.ini file and add the following
[JVM]
Options=ClassPath,LibPath,MaxHeap,MaxStack,ProxyHost,ProxyPort
ProxyHost=-Dhttps.proxyHost=<proxy host>
ProxyPort=-Dhttps.proxyPort=<proxy port>
2. Enable Microsoft Windows Proxy setup (Or Via Microsoft Internet Explorer)
- On Microsoft Windows 10 Click Start > Settings > Network & Internet > Proxy and Click "Use a proxy server" and enter the details
- For password protected Proxy server use the format
[Username]:[Password]@[proxyhost]:[proxyPort]
Engineering Test Management
Microsoft Excel/Word to ETM Import Utility
For Microsoft Excel and Word Import utilities to connect to an ETM server via a Forward Proxy server, Enable Microsoft Windows Proxy setup (Or Via Microsoft Internet Explorer)- On Microsoft Windows 10 Click Start > Settings > Network & Internet > Proxy and Click "Use a proxy server" and enter the details
- For password protected Proxy server use the format
[Username]:[Password]@[proxyhost]:[proxyPort]
Rational Publishing Engine
For Rational Publishing Engine Clients, we have to enable a few JVM Arguments inrpe-studio.ini file.
- Edit the file
[RPE_INSTALL_DIR]\studio\rpe-studio.ini - Add the following parameters
-Dcom.ibm.rational.rrdg.enableProxyConnectionCheck=true   // this is mandatory to add.
-Dhttps.proxyHost=<proxy_host>
-Dhttps.proxyPort=<proxy_port>
- For Password protected Proxy servers add the following JVM variables
-Dhttps.proxyUser=<Username>
-Dhttps.proxyPassword=<Password>
Related topics: Deployment web home
External links:
Contributions are governed by our Terms of Use. Please read the following disclaimer.
Dashboards and work items are no longer publicly available, so some links may be invalid. We now provide similar information through other means. Learn more here.