Configure CA and Self-Signed Certificates in Liberty and IHS for ELM Applications
Authors: ShradhaSrivastav, BharathRaoBuild basis: ELM 6.x - 7.0.2 Sr1
Page contents
- Understanding SSL Certificates
- Using IKEYMAN (Graphical User Interface)
- Using IKEYCMD CLI
Understanding SSL Certificates
All applications which run on HTTPS via the web require a Security Certificate, or Public Key Certificate. This is used to validate that the data is coming from a trusted source. The security certificate bundled with the Jazz Team Server and ELM applications is signed to localhost. As soon as the application is accessed with a URL other than localhost (for example, hostname or IP address), the browser will present the following errors:- The security certificate presented by this website was not issued by a trusted certificate authority.
- The security certificate presented by this website was issued for a different website's address.
- The security certificate was self-signed, meaning that the server being accessed created the certificate, and
- The security certificate was created for localhost, and you are accessing the server using a different hostname, IP address or the appropriate Public URI.
In order to resolve these errors, you can:
- Purchase a certificate from a well-known trusted Certificate Authority and install it.
- If you do not need encryption, configure the server for HTTP rather than HTTPS access.
- Configure the browser to ignore or accept this invalid certificate
Using IKEYMAN (Graphical User Interface)
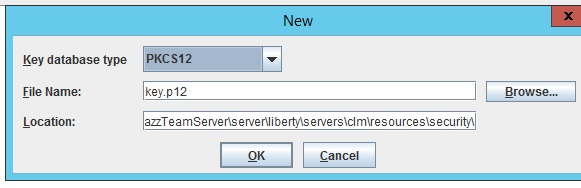
Create Keystore (Optional, if existing keystore is not used)
- Open ikeyman.exe, Key Database File -> New
- Select any Type
- Provide File name and path to the file
Update server.xml (Only for Liberty) to point to new key store (Optional, only if new keystore is created)
- Update server.xml located at JazzTeamServer\server\liberty\servers\clm to point to new database file, type and password
- If type Selected while creating keystore is pk12 Type will be PKCS12, for jks Type will be JKCS
- Restart the server for changes to take effect

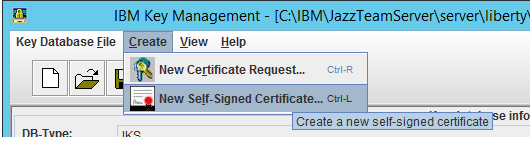
To Create A Self-Signed Certificate
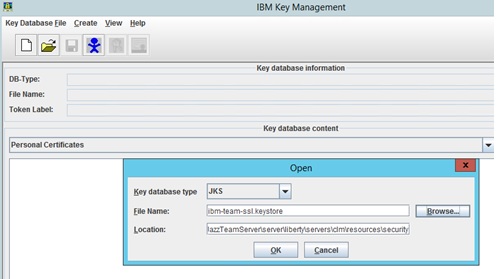
- Open ikeyman (GUI) utility located at JazzTeamServer\server\jre\bin
- Key Database File -> Open -> Browse to keystore file, enter password to open the file
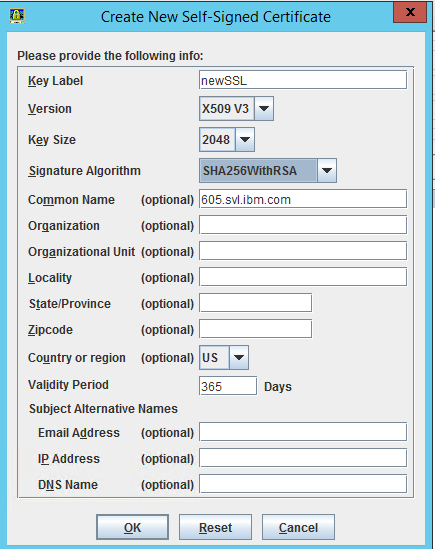
- Click Create -> New Self Signed Certificate and fill the required details
- Restart server for changes to take effect
To Configure A CA Certificate
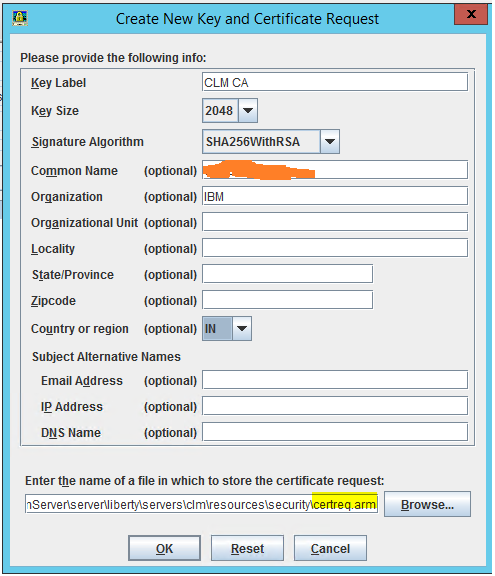
Generate certificate Request
- Open the Keystore database file using ikeyman
- Click Create -> New Certificate request and fill the necessary details

-
Send the certificate request generated to CA authority
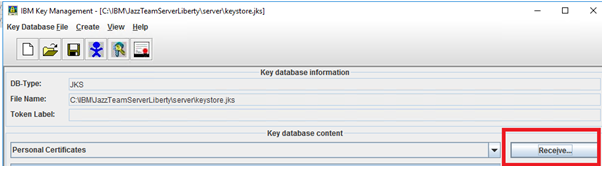
Receive Certificate and Add it to Keystore
- Open the Keystore database file using ikeyman
- Select Personal Certificates
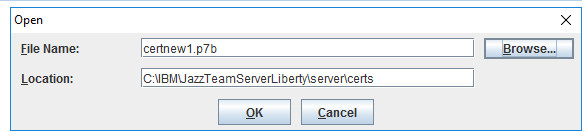
- Click Receive -> Browse to the certificate received
Add Intermediate and Root certificate
(In case the Intermediate certificate is not included in the certificates received or CA is not a trusted (internal CA) , add them explicitly in Signers)- Open the Keystore database file using ikeyman
- Switch to Signer Certificates
- Click Add -> Browse to Intermediate/Root certificate
- Enter a label in dialog box
Using IKEYCMD CLI
Installation Paths for each component will be:
   For CLM Liberty use ikeycmd
           JazzTeamServerInstall\server\jre\bin
   IBM HTTP Server use gskcmd
          IHSinstall_root\bin
Create Keystore (Optional, if existing keystore is not used)
ikeycmd -keydb -create -db.kdb -pw -type cms -expire -stash .sth ./gskcmd -keydb -create -db ihskeys.kdb -pw secret -type cms -expire 365 -stash ihskeys.sth
Win:
Linux:
Update server.xml (Only for Liberty) to point to new key store (Optional, only if new keystore is created)
Create Self-Signed certificate
ikeycmd -cert -create -db-pw -label
Win:
Linux:

Configure CA Certificate
- Generate certificate Request
ikeycmd -certreq -create -db.kdb -pw -label
Win:

Linux:

- Send the certificate request generated to CA authority
- Receive Certificate and Add it to Keystore
ikeycmd -cert -receive -file-db .kdb -pw -format -default_cert
Win:

Linux:

Note: If the CA that issuing your CA-signed certificate is not a trusted CA in the key database, store the CA certificate first and designate the CA as a trusted CA. Then you can receive your CA-signed certificate into the database. You cannot receive a CA-signed certificate from a CA that is not a trusted CA. To add CA to trust store, follow Intermediate and Root certificate section
Intermediate and Root certificate
In case of chain-intermediate certificate add then to Signers in keystoreikeycmd -cert -add -db.kdb -pw -label

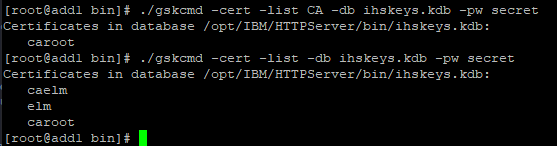
Additional commands To verify that the signer certificates were imported successfully, run the following command:
./gskcmd -cert -list CA -db.kdb -pw
Display a list of certificates in a key database
./gskcmd -cert -list -db.kdb -pw
If the existing certificate in keystore is expired and new certificate request needs to be created, you can use below command to recreate the request which will use details from previously created certificate request
./gskcmd -certreq -recreate -type cms -db.kdb -pw -label
Note: The label needs to be same as original certificate request which can be found using list command Example:
./gskcmd -certreq -recreate -type cms -db ihskeys.kdb -pw secret -label caelm -target newreq.arm
Reference https://www.ibm.com/support/knowledgecenter/SSEQTJ_9.0.5/com.ibm.websphere.ihs.doc/ihs/rihs_ikeycmdsyn.html For Chrome In case of using Internal CA when accessing the application in Chrome it still displays the certificate warning because of stringent security feature added by chrome, to fix that follow the steps from below link https://www.techrepublic.com/article/how-to-resolve-ssl-certificate-warnings-produced-by-the-latest-chrome-update/
Related topics: Configuring CA Certificates in 7.0.3, Deployment web home
External links:
Additional contributors: ShradhaSrivastav, BharathRao
Contributions are governed by our Terms of Use. Please read the following disclaimer.
Dashboards and work items are no longer publicly available, so some links may be invalid. We now provide similar information through other means. Learn more here.