RM browser add-on: Installation and troubleshooting guide
This guide documents the installation and uninstallation procedures for the RM browser add-on. In versions 3.0.1.x and 4.0.1.x of IBM® Rational® Requirements Composer, the RM browser add-on was called the RRC browser add-on. This guide also provides troubleshooting information for common problems.
Installing the add-on
- Installation locations
- Installing on Firefox
- Installing on Internet Explorer
- Installing by using scripts
- Uninstalling on Firefox
- Uninstalling on Internet Explorer 7
- Uninstalling on Internet Explorer 8, 9, 10, or 11
- Uninstalling by using scripts
Troubleshooting common problems
- Problems while trying to open graphical artifacts for editing
- Artifact content seems to be missing
- Problems re-installing the add-on
- Problems on the 64-bit version of Internet Explorer
- Problems uninstalling the add-on from Internet Explorer 11
- Problems re-installing the browser add-on plug-in on Internet Explorer 11
- Problems uninstalling the add-on from Internet Explorer 8 or 9
- Problems installing the add-on on Internet Explorer 7
- Performance in Internet Explorer 7 is sluggish
- Problems downloading the installation component on Firefox
- Installation problem: The add-on does not match the add-on that Firefox expected
- Problems editing graphical artifacts because the MS VCR71.DLL file is missing
Overview
The capabilities that are provided by the Requirements Management (RM) application, which is based on Jazz technology, are licensed as Rational Requirements Composer (RRC) and IBM® Rational® DOORS® Next Generation (RDNG). To edit graphical artifacts in the RM application, you must install the RM browser add-on plug-in for your browser. The plug-in is installed via a web based or scripted installation package that is hosted with the RM application. When you try to edit a graphical artifact, if the browser add-on is not installed, you are presented with the option to install it.
Graphical artifacts can be edited from clients on the Windows platform only. The following table shows the browser versions that are supported for specific versions of the RM application.
| RRC 3.0.1 | RRC 4.0 | RRC 4.0.1 – 4.0.4 | RRC 4.0.5 | RDNG 5.0 | RDNG 6.0 | |
| Internet Explorer 7 | Y | N | N | N | N | N |
| Internet Explorer 8 | Y | Y | Y | Y | N | N |
| Internet Explorer 9 | Y | Y | Y | Y | Y | N |
| Internet Explorer 10 | N | N | N | Y | Y | Y |
| Internet Explorer 11 | N | N | N | N | Y | Y |
| Firefox 3.6 | Y* | Y | N | N | N | N |
| Firefox 4.0 | N | Y* | Y | Y | N | N |
| Mozilla 10 ESR | N | Y | Y | Y | N | N |
| Mozilla 17 ESR | N | Y | Y* | Y | N | N |
| Mozilla 24 ESR | N | N | Y | Y* | Y* | N |
| Mozilla 31 ESR | N | N | N | N | N | Y |
| Mozilla 38 ESR | N | N | N | N | N | Y* |
Notes:
- * Indicates the recommended version for the current release
- The 64-bit versions of Internet Explorer or Firefox are not supported.
- Chrome and Safari browsers are not supported for use with the RM browser add-on.
Installing the add-on
You can install the add-on in a web browser or by using a scripted installation package.
Installation locations
For Rational Requirements Composer V3.0.1.x or V4.0.0.x: Replace RMAddon with RRCAddon.
By default, the RM browser add-on plug-in is installed to this directory: user.home/IBM/RMAddon-version, where version refers to the version of the RM server that is installed. At this time, that location cannot be modified during the installation. However, to address issues with remote profiles and multi-purpose or multi-user machines, you can move the installation files to the Windows common application data directory instead of the users workspace. To do so, you must be able to log in as the system administrator. For Windows XP and Windows 2008, the Windows common application data directory is something like C:Documents and SettingsAll UsersApplication Data. For Windows 7 and Windows Vista, the location is something like C:ProgramData.
Installing on Firefox
Prerequisites
These prerequisites apply to Firefox 22 and earlier.
- Important: Before you try to install the add-on, close all browsers.
- To install and use the graphical editors, ensure that these settings are enabled in the browser options on the Content tab. In Firefox 4 and later, these settings are the default settings.
– Load images automatically
– Enable JavaScript
Procedure
- If you are installing the browser add-on for all users on a multi-user or multi-purpose machine, sign in by using the system administrator account. Otherwise, continue to the next step.
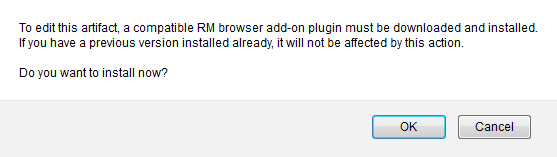
- If the RM browser add-on has not been installed or if the installed version is not compatible with the current RM server, a message is shown when you try to edit a graphical artifact:
If you click OK, the installation process for the add-on starts. Depending on the browser’s security settings, you might see this message in the browser’s toolbar area:

Click Allow to proceed with the installation. When the browser is ready to start the installation, this window is shown:
- Click Install Now. The browser downloads the installation package from the RM server to your local client system. After the download is complete, Firefox will prompt you restart the browser to complete the installation.
- Click Restart Firefox to continue the installation process.
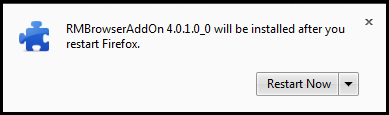
After the browser restarts, a message indicates that the add-ons are currently being installed.
A command prompt window is shown during the installation.

- Wait for the installation to finish. After the add-on is installed, the command prompt window closes and control is returned to the browser. The browser will continue its normal starting procedure. The RM browser add-on is now listed as an Enabled Extension in the Add-on window of the Firefox browser.
- If you are installing the browser add-on for all users on a multi-user or multi-purpose machine, complete these additional steps:
- Close the browser.
- If an IBM directory does not exist in the common application directory, create one. For example,
C:Documents and SettingsAll UsersApplication DataIBM. - Move the
user.home/IBM/RMAddon-versiondirectory to the IBM directory that you created. - Copy the
npRM4Plugin.dllfile, which is in the Firefox profile extensions directory (for example,application data directoryMozillaFirefoxProfilesprofile nameextensionsRMBrowserAddOn-version_0@ibm.complugins), to theC:Program FilesMozilla Firefoxpluginsdirectory.Note: For Rational Requirements Composer version 3.0.1.x and 4.0.0.x, the name of the .dll file is different. For version 3.0.1.x, the name of the .dll file is
npRRC30Plugin.dll. For version 4.0.0.x, the name of the .dll file isnpRRC40Plugin.dll. - Restart the browser.
All users on the system should now be able to edit graphical artifacts by using a common plug-in, and should not need to individually install the plug-in.
Installing on Internet Explorer
Prerequisites
Important: Before you try to install the add-on, close all browsers.
Internet Security Levels:
- In the browser’s internet options, on the Security tab, the default levels of Medium and Medium-high for the Internet zone are acceptable without modification.
- If you are using the default level of High, you must enable the following settings, which you can access by clicking the Custom Level button:
- Run ActiveX controls and plug-ins: Set this to either Enabled or Prompt
- Active Scripting: This setting controls JavaScript
- Script ActiveX Controls marked safe for scripting
- Run ActiveX controls and plugins
- The same acceptable security levels and exceptions also apply to the local intranet zone.
Note: If you add your RM server as a trusted site in both the Intranet and Internet zones of Internet Explorer, you can set Internet security levels in any way you choose, as all sites that are listed in the Trusted category use their own settings.
If the add-on download still fails, try to reset the Internet Explorer security options to their default values, and then try again. You can also temporarily disable “Protected Mode” until the add-on is installed. You can enable that option after the add-on is installed.
Procedure
- If you are installing the browser add-on for all users on a multi-user or multi-purpose machine, sign in by using the system administrator account. Otherwise, continue to the next step.
- If the RM browser add-on has not been installed or if the installed version is not compatible with the current RM server, a windows is shown when you try to edit a graphical artifact:
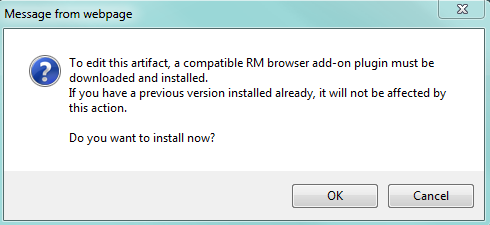
If you click OK, the installation process for the add-on starts. A window opens to show the installation progress.
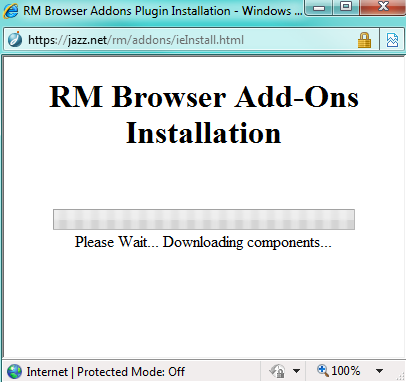
Note: Depending on your network connection, it can take 15 minutes or longer to download the add-on.
During the download, you might see a warning message at the top of the browser, requesting your permission to install the add-on.
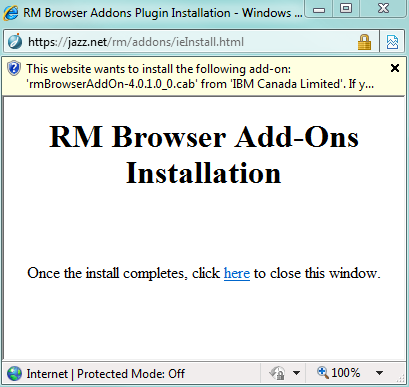
- Click the warning. You have the option to install for all users or install for the current user only. If you are installing the add-on for all users on a multi-user or multi-purpose machine, click the option to install for all users. Otherwise, click the option to install for the current user only.

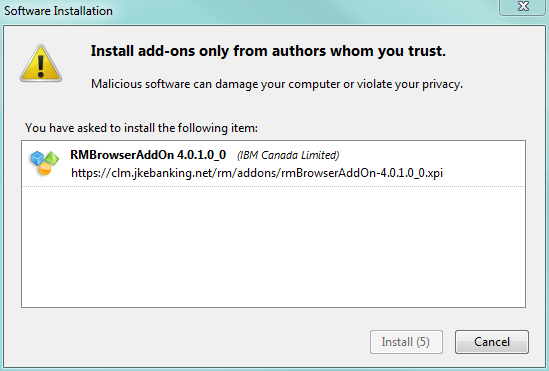
After the installation components are downloaded, you are prompted to start installing the package.
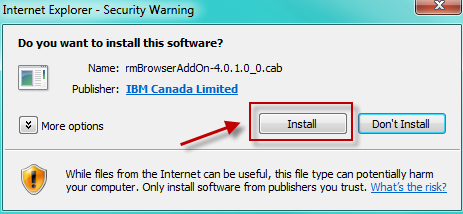
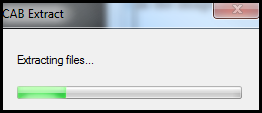
- Click Install to proceed with the installation. A progress window is shown while the CAB file is extracted. After the file is extracted, a command prompt window is shown during the installation.
- Wait for the installation to finish. After the package is installed, the command prompt window closes.
Note: In the above steps, version 4.0.0.1_0 is used. The version might vary depending on what version of RM server is installed. For example, the Add-On version number for RM 4.0.1 is 4.0.1.0_0. On a Tomcat installation, you can find the version number in the following server directory:C:install-dirservertomcatwebappsrmaddons.
Control will be returned to the installation window. - Close the window.
Note: In the main browser window, a message will indicate that the browser must be restarted before you can try to edit the artifact.

- Restart the browser to complete the installation.
- If you are installing the add-on for all users on a multi-user or multi-purpose machine, complete these additional steps:
- Close the browser.
- If an IBM directory does not exist in the common application directory, create one. For example,
C:Documents and SettingsAll UsersApplication DataIBM. - Move the
user.home/IBM/RMAddon-versiondirectory to the IBM directory that you created. - Restart the browser.
Installing by using scripts
New for Rational Requirements Composer 4.0.x and Rational DOORS Next Generation 4.0.x: In some environments, you cannot install software like the browser add-ons on client machines. In those situations, you can manually install the add-ons.
Important:In the following instructions, for Rational Requirements Composer 3.0.1.x or 4.0.0.x, replace rmBrowserAddOn with rrcBrowserAddOn.
Prerequisites
- Your user ID must be for a local user
- Your user ID must not be disabled
- Your user ID must have a valid profile. A profile is created when a user logs onto a system for the first time.
- To run the add-on successfully, you must have full access privileges for the add-on installation directory. On Windows XP, that directory is typically
C:Documents and SettingsAll UsersApplication DataIBMRMAddon-version. For later Windows versions, the location is typicallyC:ProgramDataIBMRMAddon-version
Procedure
Note: In the following steps, version refers to the version of the RM server that is installed. For example, the browser add-on version number for RM 4.0.1 is 4.0.1.0_0.
- After the RM server is installed, find the files that run the scripted installation. You can find the files in two ways: by using a browser or from the server installation directory. If you do not use a browser to find the files, instead of https://server:port/, type Server Install Dirservertomcatwebapps:
- Open a browser and get the script from this location: https://server:port/rm/addons/extra/deploy-rmBrowserAddOn-version.cmd
- Get the CAB file from this location: https://server:port/rm/addons/rmBrowserAddOn-version.cab
- Type one of these commands:
- To execute for the current user, type the following command:
deploy-rmBrowserAddOn-version.cmd path_to_cabinet_file - To execute for another user, you must have administrator rights. Type the following command:
deploy-rmBrowserAddOn-version.cmd path_to_cabinet_file username - To execute for all users, you must have administrator rights. Type the following command:
deploy-rmBrowserAddOn-version.cmd path_to_cabinet_file ALL_USERS
- To execute for the current user, type the following command:
Uninstalling the add-on
If you no longer require the ability to edit graphical artifacts, you can uninstall the plug-in by using the standard features of your browser or by running the undeploy script.
Important:
- If the plug-in is currently in use, you cannot uninstall it. Before you try to uninstall the add-on, log out of the RM application and restart your browser.
- For Rational Requirements Composer 4.0.x and Rational DOORS Next Generation 4.0.x, in the following instructions, replace RRC Browser Add-on with RM Browser Add-on.
Uninstalling on Firefox
- From the Tools menu, click Add-ons.

- In the Add-ons window, click the Extensions tab, and then search for the RRC Browser Add-on plug-in.
- Select the version of the RRC Browser Add-on plug-in that you want to uninstall and click Remove.

After you click Remove, a message will indicate that the plug-in was removed and that the browser must be restarted.

- Do not click Restart now; instead, close all browser windows.
- Delete the add-on installation directory, which is typically found in
C:Usersuser nameIBMRMAddon-version. - Restart the browser.
Uninstalling on Internet Explorer 7
- Log out of the RM application and restart the browser. Then click Tools->Manage Add-ons and click Enable or Disable Add-ons.

- In the Manage Add-ons window, from the Show list, select Downloaded ActiveX Controls. The RRC Extensions Plugin should be listed, as shown in the following image:
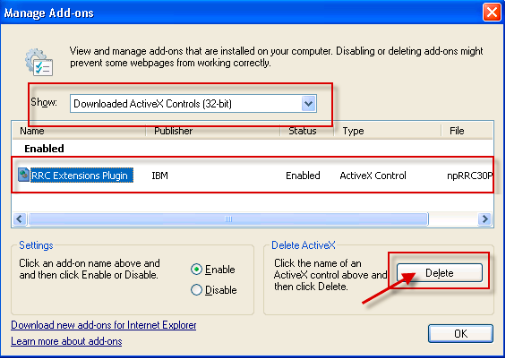
- Select RRC Extensions Plugin and then click Delete to remove the plug-in from the browser.
- Close all browser windows.
- Delete the add-on installation directory, which is typically in
C:Usersuser nameIBMRMAddon-version. - Delete any RM add-on files from
C:WindowsDownloaded Program Files. If you are not sure which files to delete, before you delete files, create backups of them. The RM add-on files in this directory will be like these files:install-rmBrowserAddOn-;version.cmdnpRMversionPlugin.dllrmBrowserAddOn-version.inf
- Restart the browser.
Uninstalling on Internet Explorer 8, 9, 10, and 11
- Log out of the RM application and restart the browser. Then click Tools->Manage Add-ons.

- In the Manage Add-ons window, from the Show list, select Downloaded controls. The plug-in should be listed, as shown in the following image:

- Select the plug-in from the list and click the More information link. A window like the one in the following image will open:
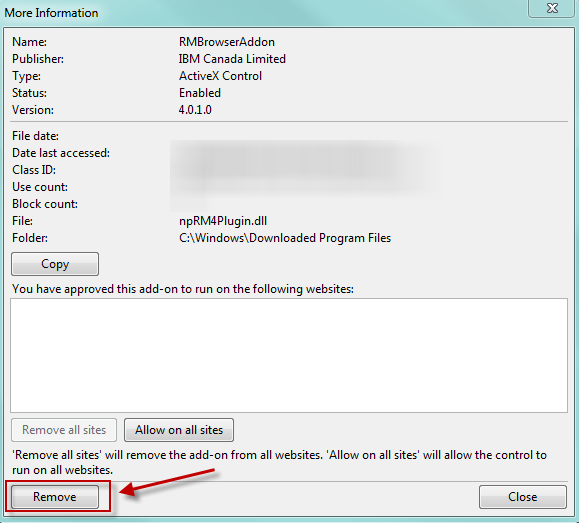
- Click Remove to uninstall the plug-in. In Windows 7, you must use the Run as Administrator option when you start in order to remove the plug-in.
Note: If the plug-in is not removed, it is most likely still in use. See the troubleshooting section for more information about what to do next.
- Close all browser windows.
- Delete the add-on installation directory, which is typically found in
C:Usersuser nameIBMRMAddon-version. - Delete any RM add-on files from
C:WindowsDownloaded Program Files. If you are not sure which files to delete, before you delete files, create backups of them. The RM add-on files in this directory will be like these files:install-rmBrowserAddOn-version.cmdnpRMversionPlugin.dllrmBrowserAddOn-version.inf
- Restart the browser.
Uninstalling by using scripts
Important:
- For Rational Requirements Composer 3.0.1.x and 4.0.0.x, in the following instructions, replace with rrcBrowserAddOn.
- In the following steps, version refers to the version of the RM server that is installed. For example, the browser add-on version number for RM 4.0.1 is 4.0.1.0_0.
To revert the changes that the deployment script made:
- Open a browser and get the undeploy script from this location: https://server:port/rm/addons/extra/undeploy-rmBrowserAddOn-version.cmd
- Get the CAB file from this location: https://server:port/rm/addons/rmBrowserAddOn-version.cab
- Type one of these commands:
- To execute for the current user, type the following command:
undeploy-rmBrowserAddOn-version.cmd path_to_cabinet_file - To execute for another user, you must have administrator rights. Type the following command:
undeploy-rmBrowserAddOn-version.cmd path_to_cabinet_file username - To execute for all users, you must have administrator rights. Type the following command:
undeploy-rmBrowserAddOn-version.cmd path_to_cabinet_file ALL_USERS
- To execute for the current user, type the following command:
After the above command is executed, the RM browser add-on is unregistered from any browsers, and the files are deleted.
Tracing and logging
If you experience problems with editing graphical artifacts, follow these instructions to turn on tracing to assist in troubleshooting the problem.
Sample tracing configuration files are included in the distribution package for the RM browser add-on plug-in.
Important:For Rational Requirements Composer 3.0.1.x or 4.0.0.x, in the following instructions, replace RMAddon with RRCAddon.
Enabling tracing
You can enable tracing by using configuration files that indicate the level of tracing to turn on and which components to include in the tracing. Sample configuration files are in the user home folder, in this subdirectory:
user homeIBMRMAddOn-versionosgiconfiguration
For Windows XP, user home is typically C:Documents and Settingsuser name. For Windows Vista and Windows 7, it is typically C:Usersuser name.
- Copy the sample
native.propertiesandtrace.optionsfiles to the workspace folder that corresponds to your browser. For example, in Firefox, it isuser homeIBMRMAddOn-versionffworkspace. - Open the
native.propertiesfile in a text editor, such as notepad.exe. Uncomment the “osgi.debug” setting by removing the <!– and –> strings, and modify the “val” parameter to be the location of thetrace.optionsfile. For example:<VALUE name="osgi.debug" val="file:C:Documents and Settings<user home>IBMRMAddOn<version>ffworkspacetrace.options"/>
- Restart your browser to activate tracing.
Trace file locations
The trace files are in the .metadata folder of the corresponding browser folder that was previously configured. For example, in Firefox, the location is user homeIBMRMAddOn-versionffworkspace.metadata.
The following trace files are generated by the RM browser add-on plug-in:
RMtimestamp.logcontains the trace statements from the browser plug-in ActiveX Control or Browser Extension plug-in.consoletimestamp.logcontains the trace statements from the graphical editors.errortimestamp.logcontains error messages that are generated by the plug-in and graphical editors. This file is generated regardless of whether tracing is enabled.
Troubleshooting common problems
Problems while trying to open graphical artifacts for editing
When you try to edit a graphical artifact, if a problem occurs, you might see one of the messages that are in the following table.
| Error Code | Message | Explanation |
|---|---|---|
| 7382 | CRRRW7382E The editor could not be started. | The editor could not be started because the Java virtual machine (JVM) did not load. The JVM might not load because another JVM is already loaded in the browser. Disable all browser plug-ins that use a JVM, and restart the browser. For example, in the Firefox browser, click Tools > Add-ons, select each Java plug-in, and click Disable. See also Unable to edit graphical artifact due to missing msvcr71.dll |
| 7383 | CRRRW7383E The artifact cannot be created. | No artifact type is associated with the artifact format that you are trying to create. To use an artifact format, the format must be associated with an artifact type. In the Project Properties of this project, create an artifact type with the artifact format that you are trying to create. |
| 7384 | CRRRW7384W This operating system is not supported. | The operating system you are using is not supported for editing. You might experience unexpected behavior. The editor is supported only on Windows systems. Edit in a browser that is running on a Windows system. |
| 7385 | CRRRW7385W This browser is not supported. | The browser you are using for editing, browsing, or viewing graphical artifacts is not supported. You might experience unexpected behavior. The editor is supported only on Firefox 3.6 and Internet Explorer 7 and 8. When editing, use Internet Explorer 7 or 8 or Firefox 3.6. |
| 7386 | CRRRW7386E The editor could not be started. | The editor could not be started because the Editor Runtime Environment is not available. To resolve the issue, uninstall the browser add-on plug-in, restart the browser, and reinstall the plug-in. |
| 8000 | CRRRW8000E The editor was not able to execute a request. | The editor was not able to execute a request because it encountered an application exception. There may be another instance of the graphical editor running. Close all other browser processes and any other open browser tabs. |
Artifact content seems to be missing
While you are editing a graphical artifact, images and other embedded content might seem to be missing. This is a known issue. In some cases, errors occur when you open a graphical artifact in edit mode. This issue occurs because of the way that Jazz Team Server single sign-on cookies are handled. The graphical editor add-on requires RM-specific authentication cookies to operate properly. However, if you did not directly log in to the RM application, the cookies might be missing.
Solution:
- Close all other browsers.
- Log out of the RM application.
- Close any login windows that open and all other browser tabs that are open.
- Clear your browser cookies.
- Close the browser.
- Reopen the browser.
- Log in to the RM application by using this URL: https://your-JTS/rm/web.
If the above does not resolve the issue, determine if TLS 1.2 is being used, possibly through the deployment of NIST SP 800-131. You can also check the System.out log for a message of the form Unable to initialize SSL connection. Unauthorized access was denied or security settings have expired. Exception is javax.net.ssl.SSLHandshakeException: Client requested protocol TLSv1 not enabled or not supported TLS 1.2 is not currently supported by the browser add-on.
Problems re-installing the add-on
After you uninstall the RM browser add-on plug-in, if you have problems re-installing it, you might have skipped one of the uninstallation steps. One of the symptoms of a partially uninstalled plug-in is the JVM failed to start message when you try to open the editor.
Solution:
For Rational Requirements Composer 3.0.1.x or 4.0.0.x: Replace RMAddon with RRCAddon.
- Revisit the steps for uninstalling the RM browser add-on and make sure that both the ActiveX / Native DLL and the Graphic Editor core files are uninstalled.
- Follow the standard installation instructions for your browser again.
Problems on the 64-bit version of Internet Explorer
If you are using a 64-bit version of Internet Explorer, you cannot install the browser add-on or edit graphical artifacts. Switch to the 32-bit version of the browser and try to edit the artifact again.
Problems uninstalling the add-on from Internet Explorer 11
After you uninstall the browser add-on, you might still see it in the list of add-ons. If you need to remove the add-on, you might need to uninstall and re-install Internet Explorer to remove all references to the RM browser add-on.
Problems re-installing the browser add-on plug-in on Internet Explorer 11
The re-installation of the browser add-on might not work on Internet Explorer 11.
Solution:
Typically, you can solve this problem by completing these steps:
- Remove the add-on from the Add-ons Manager in Internet Explorer 11.
- Close all browsers.
- Delete the add-on installation directory, which is typically in
C:Usersuser nameIBM. - Delete any RM add-on files from
C:WindowsDownloaded Program Files.
If you are not sure which files to delete, before you delete files, create backups of them.
The RM add-on files in this directory will be like these files:install-rmBrowserAddOn-version.cmdnpRMversionPlugin.dllrmBrowserAddOn-version.inf
- Restart Internet Explorer again, return to the Add-ons Manager, and remove the add-on again.
- Without closing Internet Explorer, install the browser add-on by editing a graphical artifact.
- After the add-on is installed, restart Internet Explorer again. The add-on will be re-installed.
Internet Explorer 8 issues
Internet Explorer 8 has a setting that, in some environments, can prevent the installation of the browser add-on. The symptoms of this issue can vary:
- You might see a message stating that Internet Explorer 8 closed the page.
- Internet Explorer 8 might close the browser completely.
- You might be redirected to the following URL: res://ieframe.dll/acr_depnx_error.htm#domain,http://server:port/forms/frmservlet?config=config, which displays the following error:
Internet explorer has closed this web page to help protect your computer. A malfunctioning or malicious add-on has caused Internet Explorer to close this webpage.
Solution:
- In Internet Explorer, click Tools > Internet Options > Advanced.
- Scroll to Security, and clear the Enable memory protection to help mitigate online attacks* check box.
- Close all browser windows and restart the browser. The issue should be fixed.
- After the installation of the browser add-on is complete, in Internet Explorer, click Tools > Internet Options > Advanced.
- Scroll to Security and select Enable memory protection to help mitigate online attacks*.
- Restart your browser to ensure that the changes take effect.
Problems uninstalling the add-on from Internet Explorer 8 or 9
In Internet Explorer 8 and 9, after you click the Remove button to uninstall the add-on plug-in, the plug-in might not be removed because Internet Explorer still considers it to be in use.
Solution:
Internet Explorer might consider the plug-in to be in use in these situations:
- One of the browser tabs that previously accessed the browser add-on plug-in is still open.
In this case, close all Internet Explorer browser windows, and before you try to remove the plug-in, restart Internet Explorer.
- A defunct IE process is running that is holding the plug-in files open.
Start Windows Task Manager and click the Processes tab. End all
iexplorer.exeprocesses and end them. Your existing Internet Explorer session will be closed. Restart Internet Explorer and try to remove the plug-in again.
Problems installing the add-on on Internet Explorer 7
When you install the browser add-on package on Internet Explorer 7, the installation window is empty and nothing seems to be happening. This problem occurs after you give permission to install the ActiveX control.
Solution:
At times, the performance of loading and installing ActiveX controls on Internet Explorer 7 can be very slow. The installation process is not hung; it is processing the unpacking of the ActiveX control for installation. You will eventually be prompted for the next step in the installation process. It can take up to 5 minutes for Internet Explorer 7 to present the window for the next step.
Performance in Internet Explorer 7 is sluggish
Internet Explorer 7 has known performance issues, not only for graphical editors, but also for general navigation and page rendering for JavaScript rich web applications. If possible, use Firefox 3.6 or later or Internet Explorer 8 or 9 instead of Internet Explorer 7.
Problems downloading the installation component on Firefox
When you install the browser add-on package in Firefox, the download does not complete successfully. You might receive a message like this one:
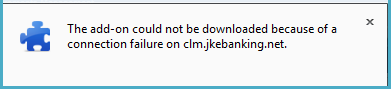
Solution:
This error message might be caused by having the Firefox cache disabled. To re-enable the cache:
- Firefox 2 and later: Click Tools > Options > Advanced > Network.
- Make sure that the cache is at least 1 MB. 50 MB is the default setting.
Firewalls or spyware screeners might also cause this issue. If you use the CA Technologies firewall, Windows Defender, or the resident option of Spybot S&D (“Teatimer” feature), temporarily disable it to see if your system will now allow the extensions or themes to install.
Note: The Download Error -228 message might also be shown if the required .xpi file is not on the server site or if the server site is down. In those cases, try again later.
Installation problem: The add-on does not match the add-on that Firefox expected
If you encounter this error, use the Clear Recent History option in the browser to clear the cache and try again.
Problems editing graphical artifacts because the MS VCR71.DLL file is missing
If you are trying to edit a graphical artifact and see the CRRRW7382E error code, a required DLL might be missing. Normally, the MSVCR71.DLL file is included in Windows installations, but some distributions are missing the file.
Solution:
For Rational Requirements Composer 3.0.1.x or 4.0.0.x: Replace RMAddon with RRCAddon.
The .dll file is included in the browser add-on installation package. You can copy the file from there to the C:Windowssystem32 directory.
- Check whether the
msvcr71.dllfile is in either theC:Windowssystem32orC:WindowsSYSWoW64directories. - If you cannot find the file in those directories, follow the next steps:
- Copy the
user workspaceIBMRMAddon-versionjrebinmsvcr71.dllfile toC:Windowssystem32. - Restart your browser session and try to edit the graphical artifact again.
- Copy the
About the author
Rosa Naranjo is a member of the Jazz Jumpstart team. The Jazz Jumpstart team is a worldwide group of development specialists who bring new and advanced Jazz-based technologies to customers. Please direct feedback and comments to rosy@us.ibm.com.
Jeff Hardy is a member of the Rational DOORS Next Generation team. Please direct feedback and comments to jefhardy@us.ibm.com.
Paul Boney is a developer for Rational DOORS Next Generation. Please direct feedback and comments to paulboney@us.ibm.com.
© Copyright IBM Corporation 2012 – 2016