Best practices: ReqIF round-trip between DOORS Next Generation and DOORS 9.
Authors: RomainBarthBuild basis: DNG V7.0.3 and V7.1. DOORS 9.7.2.x
Page contents
- Before you begin
- Round-trip from DOORS Next -> DOORS 9 -> DOORS Next
- Step 1: create a Mapping Context
- Step 2: create a specific view for ReqIF
- Step 3: create the ReqIF definition
- Step 4: export the ReqIF package
- Step 5: Import in DOORS 9
- Step 6: Editing data in DOORS 9
- Step 7: exporting the data from DOORS 9
- Step 8: Import the DOORS 9 ReqIF package in DOORS Next
- Step 9: Merging data in DOORS 9
- Round-trip from DOORS 9 -> DOORS Next -> DOORS 9
- Appendices
Before you begin
About this document
This document describes the best practices to exchange requirements from DOORS Next to DOORS 9 and from DOORS 9 to DOORS Next. The steps described in that document will help you to minimize issues when exchanging requirement between DOORS Next and DOORS 9DOORS Next and DOORS 9 are different
DOORS Next and DOORS 9 are 2 different tools and exchange data between some 2 tools via ReqIF can be challenging. The main differences are:- The Type System
- The data merge in ReqIF round-trip
- System attributes
- Heading and Requirement
Agreement on the Data structure and the Data to exchange
You MUST agree with your supplier what set of attributes is needed so you only export what is really needed. This will have numerous benefits:- This will limit the size of the ReqIF packages so it will improve performance when importing/exporting data
- This will limit scope for type system distortion.
- This will avoid the issue with the System Attribute Description: if you export the full module that attribute will be included and if you have data in it, this will result in data loss in DOORS 9 as the scope of this attribute is different (module only).
Overview of the steps
- First, we need to pick a feature to limit duplication of attribute or types when importing a ReqIF package. In DOORS 9, you can only use RDF URI mapping. In DOORS next, you can either use RDF URI Mapping or Mapping context.
- Create views for the ReqIF definition in the module(s) you want to export
- Create the ReqIF definition and lock the attributes your supplier should not be editing.
- Export the ReqIF definition
- Import the ReqIF package in the other RM tool.
- Edit the data you can/ are supposed to.
- Export the ReqIF definition and import it back in the original RM tool.
Limitation
When doing a ReqIF round-trip from DOORS 9 to DOORS Next, be aware that Doors 9 pictures objects are not exported in ReqIF packages so they wont be visible in DOORS Next after importing the ReqIF packages. Use OLE object instead.When working with in locks in DOORS 9, the data structure of enumerated attributes must not change. For example, if you have an enumerated attribute named Severity with 3 possible values (low, medium, high), then you cannot change its name nor add or remove a value. If you do so, the merge wont work (for the modified/new values), and the data wont be updated properly in DOORS 9.
Round-trip from DOORS Next -> DOORS 9 -> DOORS Next
Step 1: create a Mapping Context
Once the data structure is decided, create a Mapping context (optional). This feature will limit the proliferation/duplication of artifact and data types in the project areas and components in which the ReqIF packages are imported.To do that, go the Manage Component Properties (or Manage Project Properties if your DOORS Next project is not CM-enabled) and select Mapping Context. Click on New context, give it a name and a description.

Step 2: create a specific view for ReqIF
In the module(s) you want to export, create a view with only the needed discussed attributes: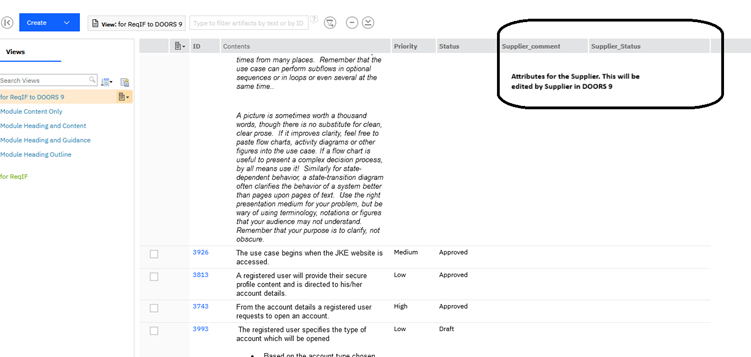
Important: If there are multiple Artifact Types in your module, make sure that all the artifact types have the attributes listed in the view because DOORS 9 does not have the concept of Artifact types, and once imported in DOORS 9, it will allow to set values in attributes that do not belong to the artifact type. Doing that might cause issues when importing it back to DOORS Next (missing data, modification of Artifact Types, etc..)
Step 3: create the ReqIF definition
To do that, go the Manage Component Properties and select ReqIF. Click on New Definition.Give it a name and a description.
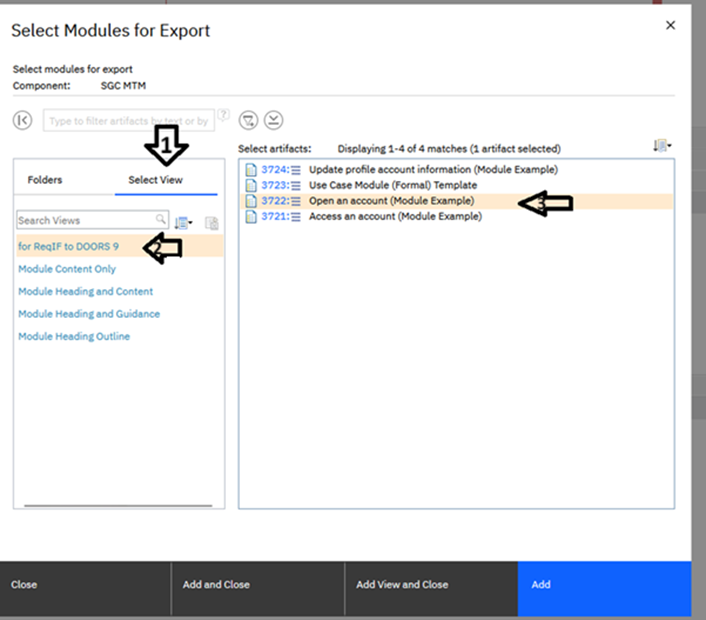
Then add your modules by selecting the view created on step 2:
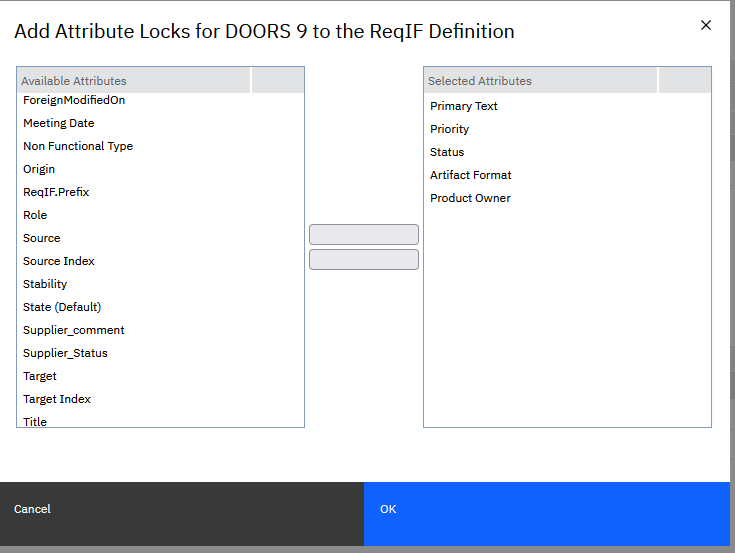
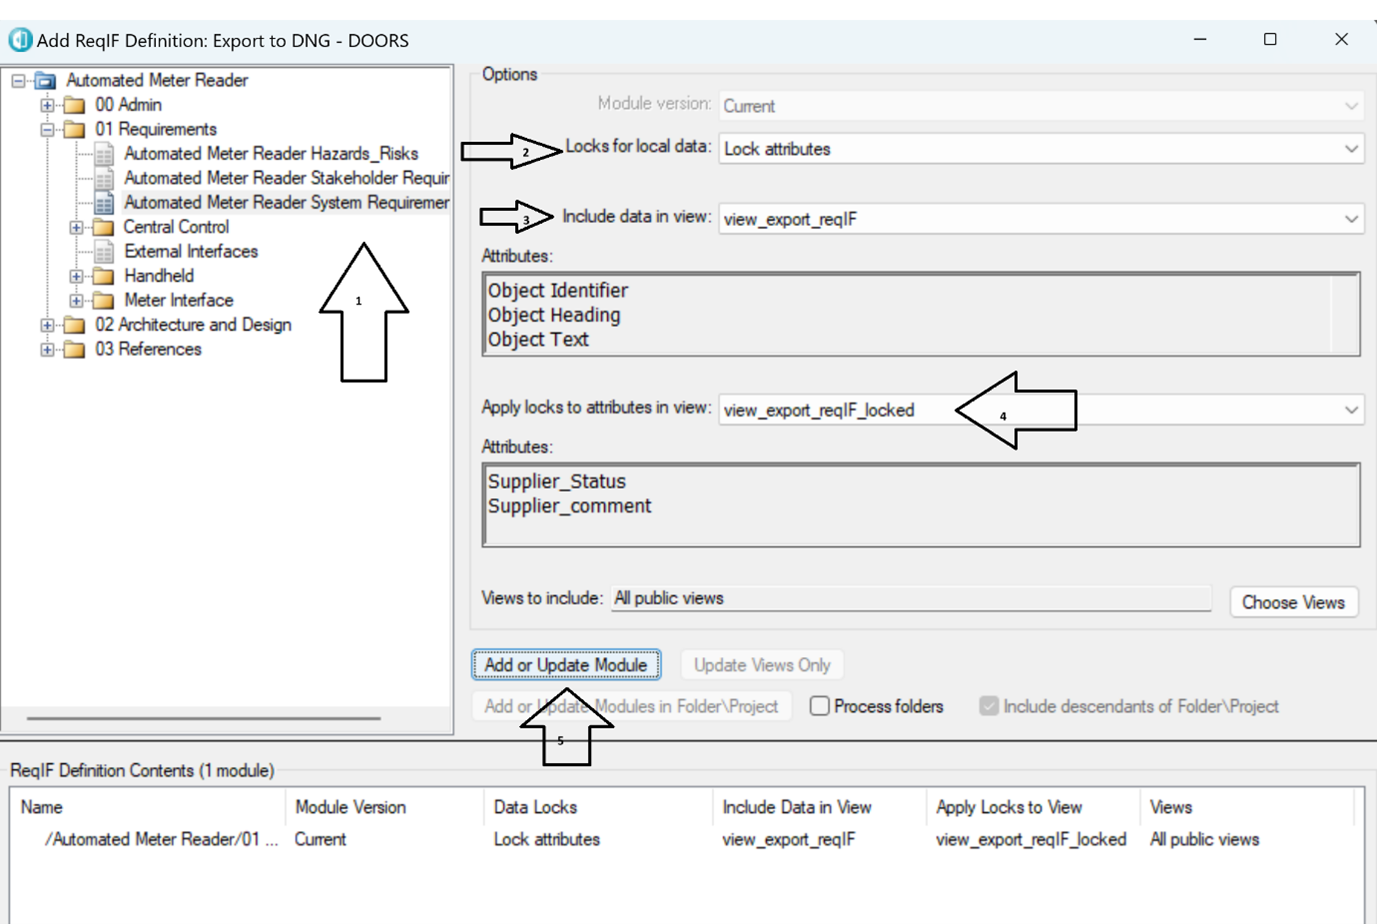
Finally, use the DOORS 9 settings to lock all the attributes except the ones that will be edited by your supplier:
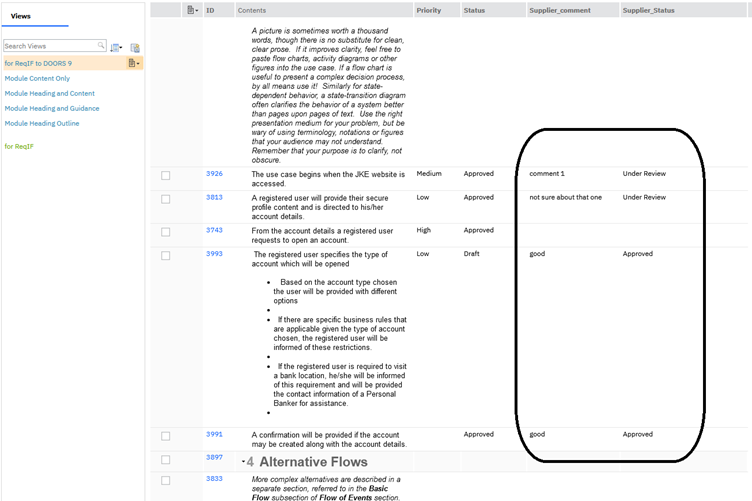
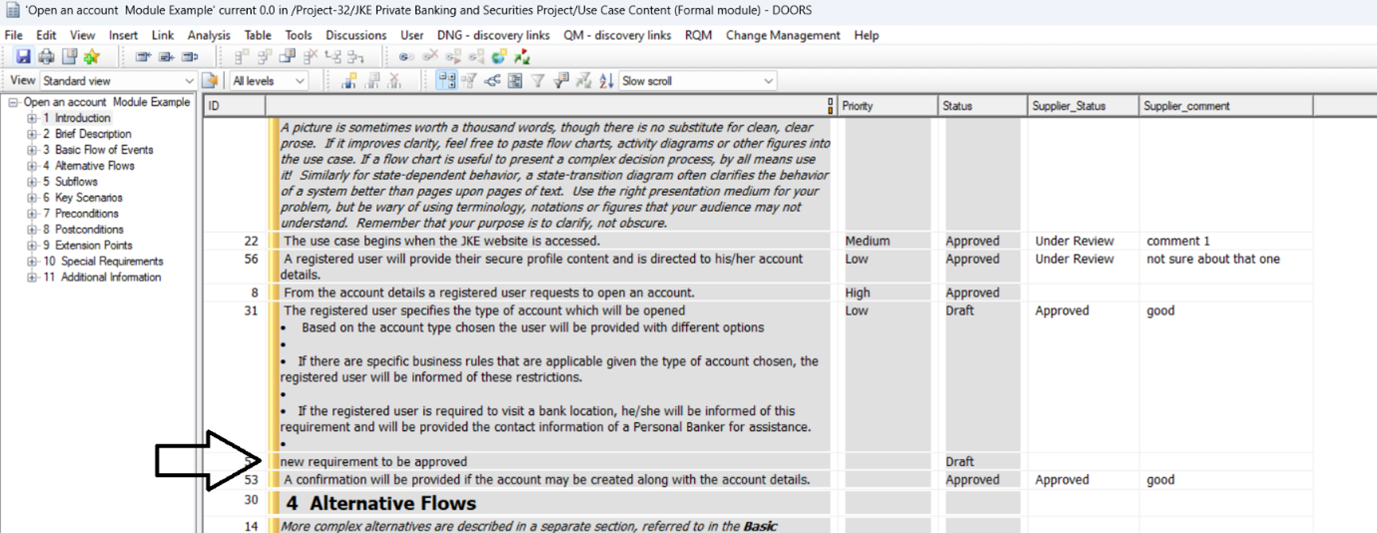
In this example, the attributes listed in the view are the following:
- Primary Text -> need to be locked
- Priority -> need to be locked
- Status -> need to be locked
- Supplier_comment
- Supplier_Status
In this example, the module has a module attribute named Product owner so this will need to be locked too.
In summary, the attributes that need to be locked are the following (see screenshot)
Step 4: export the ReqIF package
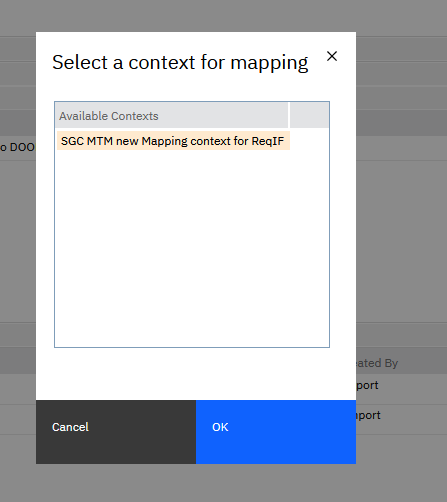
In the drop-down list, select Export with context (if you have created a mapping context).
Then select your mapping context.
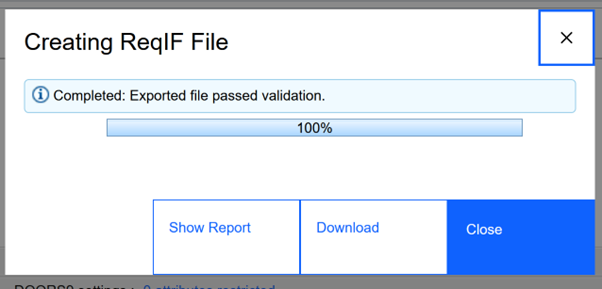
The ReqIF file will be created, once done, click download:
Step 5: Import in DOORS 9
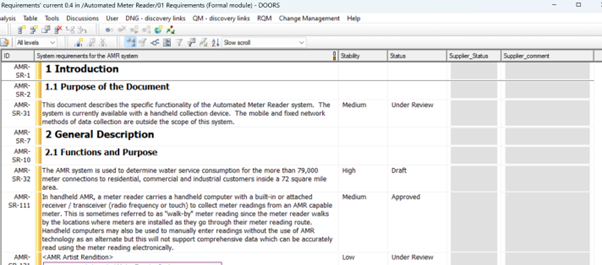
In DOORS 9, select a project, then go to File-> Import ReqIF Package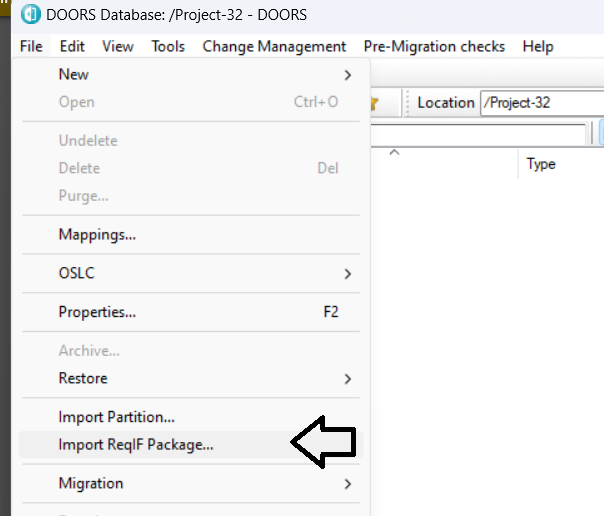
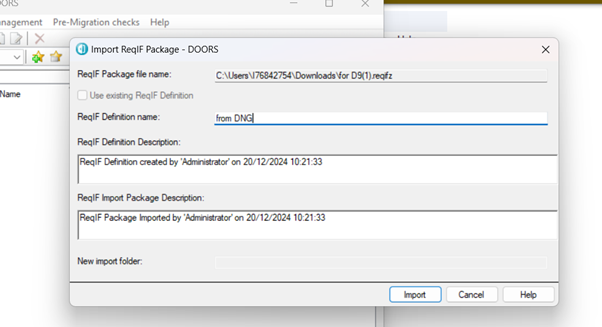
Select the ReqIF file you exported from DOORS Next, then in the dialog give a name to the ReqIF definition that will be created in DOORS 9 and click Import
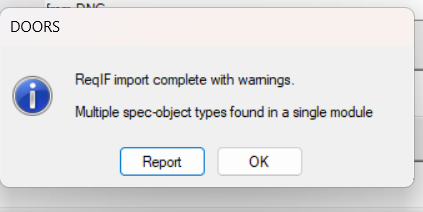
At the end of the import, you might get an information message. It happened when they are multiple Artifact Types in a module but if you have followed the recommendation so far, there will be no issue.
Step 6: Editing data in DOORS 9
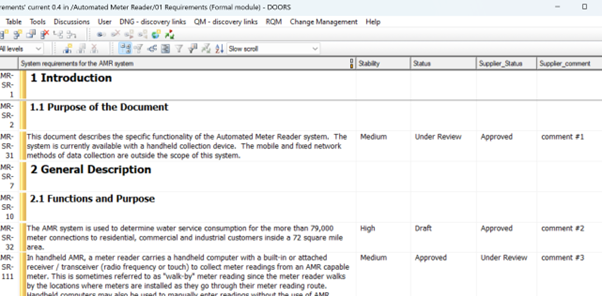
You can see that even by logging in DOORS 9 with the super-user Administrator, only the 2 attributes we set are available for editing. The rest is locked in read-only mode.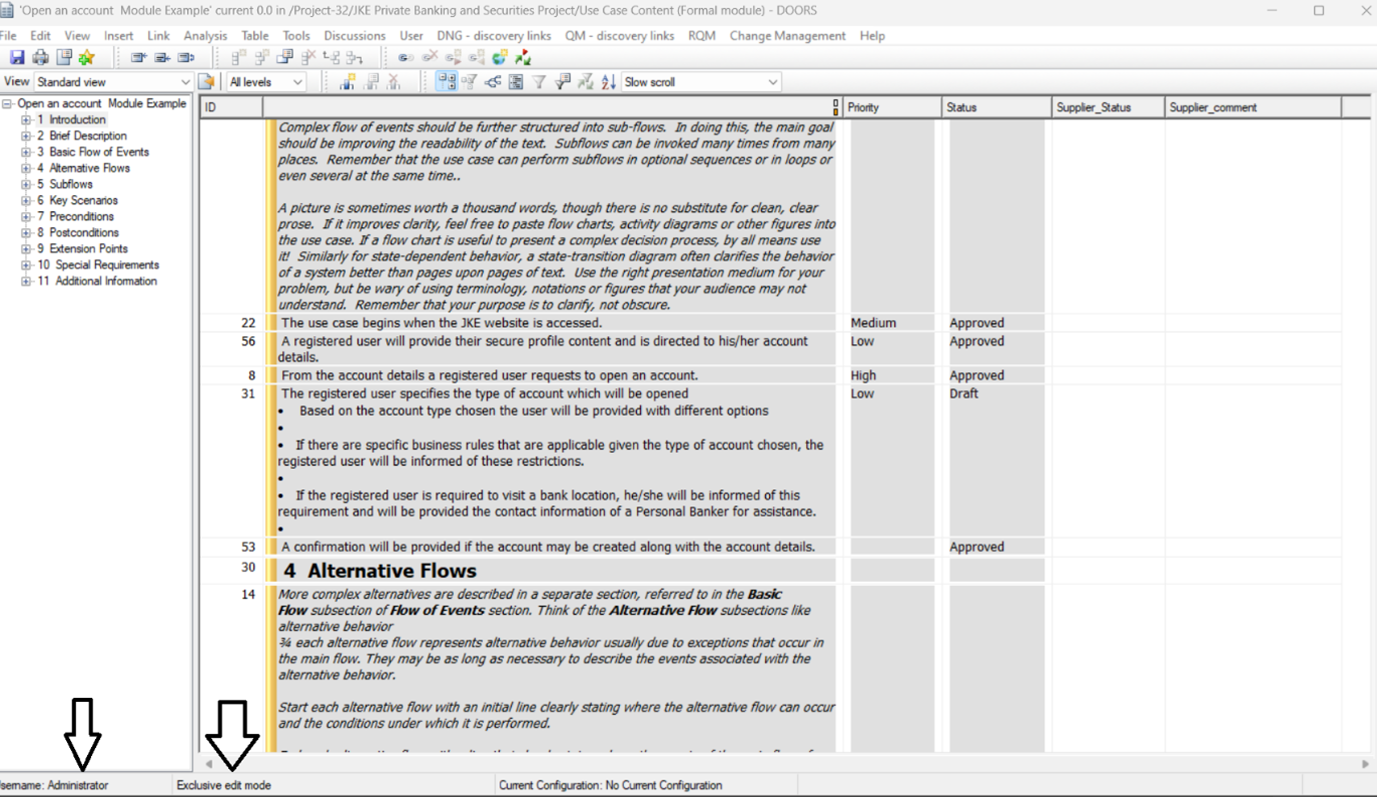
Lets edit the data, add some values in attributes Supplier_comment and Supplier_Status.
Step 7: exporting the data from DOORS 9
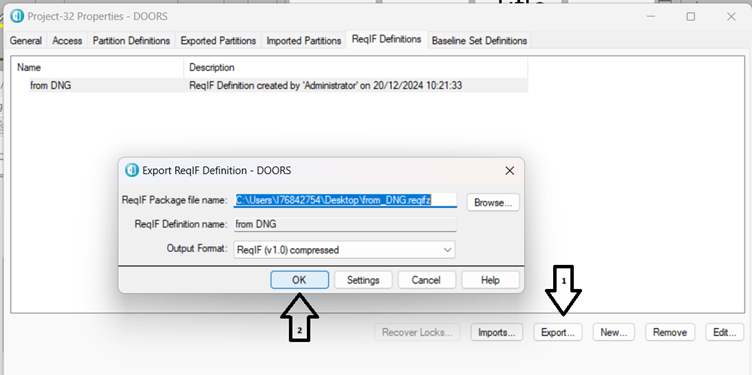
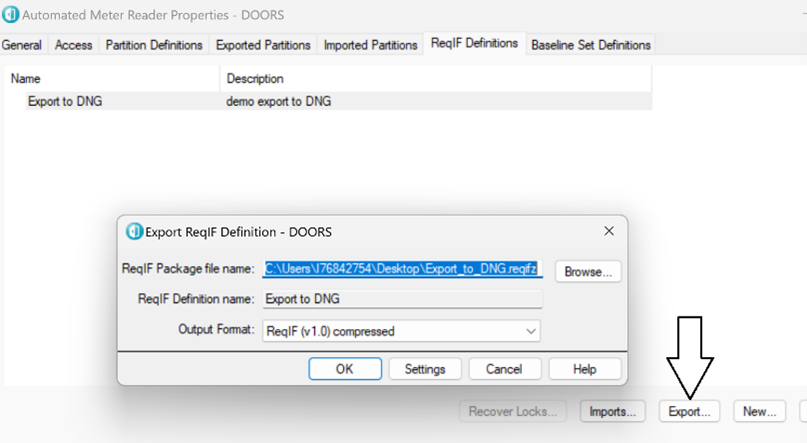
After editing the data in DOORS 9, you must export the ReqIF definition to get a new ReqIF package to import in DOORS Next.Go to the DOORS 9 project Properties and in the ReqIF tab, select the ReqIF definition and then click on export.
Select a path for the ReqIF file and click Ok
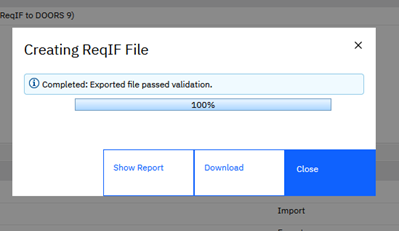
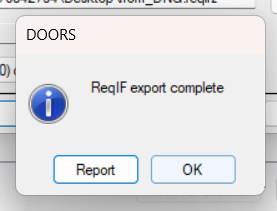
When the export is completed, you will see that dialog box:
Step 8: Import the DOORS 9 ReqIF package in DOORS Next
Go to Artifacts, then click on Create and select Import Artifact 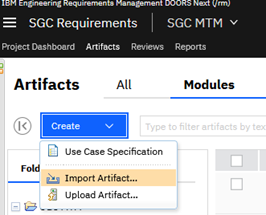
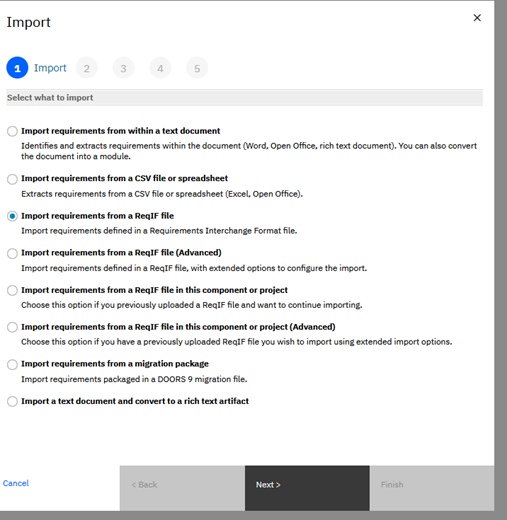
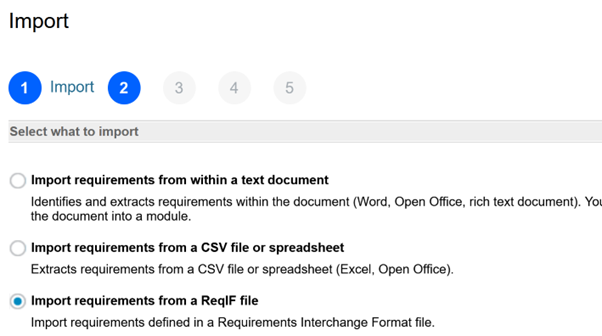
Select Import requirements from a ReqIF file
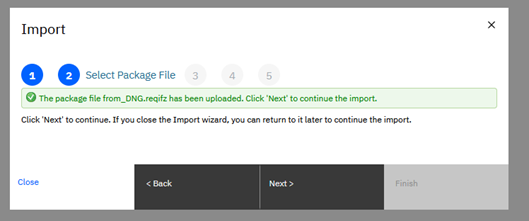
In the next dialog, pick the DOORS 9 ReqIF package and click Upload. If the upload is successful, you will see that screen. Click on Next.
In the Import dialog, apply your Mapping Context (if you have defined one)

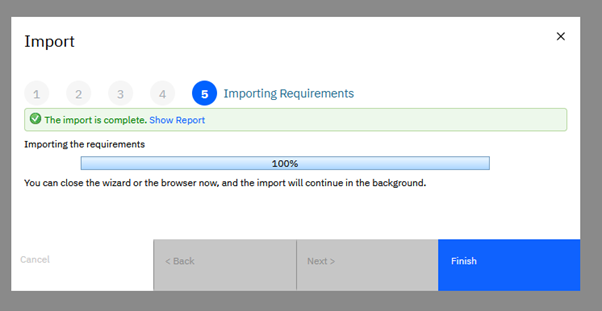
After clicking Next, the import starts
The module data in DOORS Next has been updated:
Lets add a new requirement in DOORS Next and send a new ReqIF package to the supplier. (Re-do Step 4 to export a new ReqIF package)
Step 9: Merging data in DOORS 9
When importing a new ReqIF package from the same ReqIF definition, you will have to specify a temporary folder to store the new data:
To merge, the new package with the existing one, go to the Project Properties, in the ReqIF Definition Tab. Select the ReqIF definition and click Imports:

Click on Merge, if there is a required merge status.
Once done, the dialog box shows that it is completed:

Check the data in the main folder, the new requirement should be present.
Round-trip from DOORS 9 -> DOORS Next -> DOORS 9
Step 1: mapping the attributes
To avoid having duplicated attributes in DOORS Next, it is recommended to map the attributes with RDF URI. If attributes already exist in DOORS Next, map the attributes with the same RDF URI.DOORS 9 mapping feature documentation
In your module, select the attributes you want to map with RDF URIs:

Click the "Suggest" button to map all the attributes with RDF URIs then in the "General" tab click the "Publish" button.

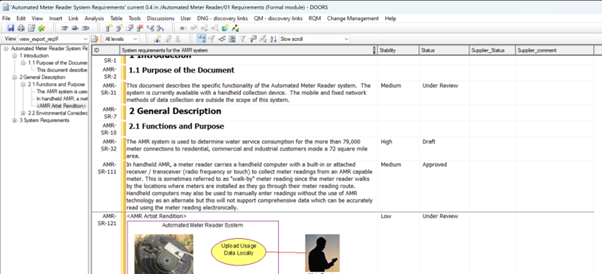
Step 2: create the views for the export
The best practice in DOORS 9 to export data to ReqIF is to create a view with all the attributes you want to share with your supplier.Then you also need to create a view to lock the attributes you want your supplier to edit.
View with all the attributes I want to export to my supplier:
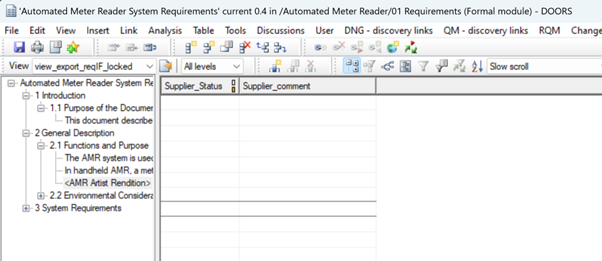
View to lock the attributes in DOORS 9. Those attributes will be edited by the supplier in DOORS Next:
Step 3: create the ReqIF definition
In the Project properties, go the !ReqIF Definitions tab and click New. Give it a Name and a Description, then click ok.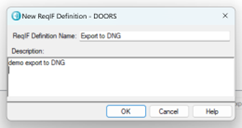
In the next Dialog, select your module, then select lock attributes, select the 2 views you created and click Add or update module. Repeat the operation if you have other modules.
Once the ReqIF definition is created, export the ReqIF package:
Step 4: import the ReqIF package in DOORS Next
Go to Artifacts, then Create -> import artifacts
Select Import requirements from a ReqIF file
Upload the ReqIF file:

Select a folder where to import the data. Then you can also select the attributes to import, by default, all the attributes will be imported.
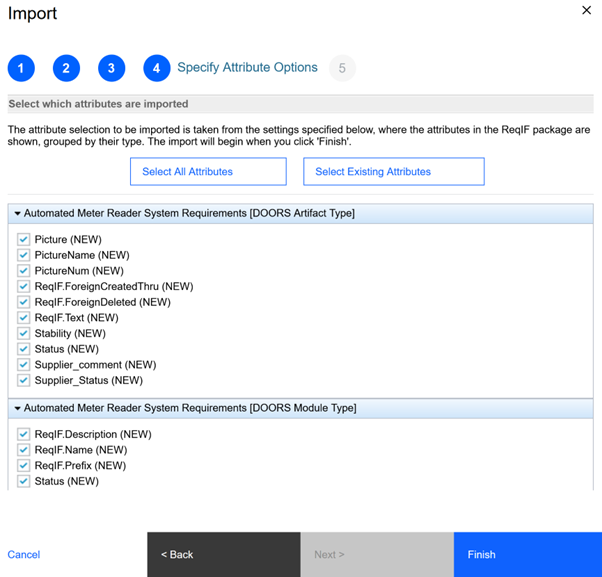
Click Finish to start importing the data.

Step 5: edit the data imported in DOORS Next
Edit only the 2 attributes specified: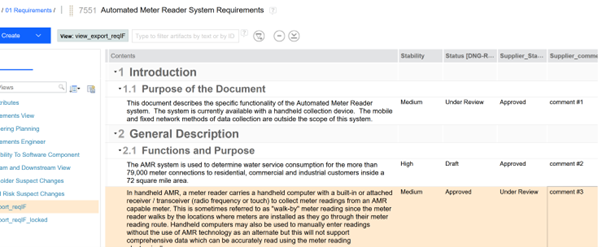
It is possible to edit the other attributes BUT as there are ReqIF locks in DOORS 9 only for the 2 attributes specified, the other ones wont be merged in DOORS 9.
In DOORS 9, ReqIF locks present only for the 2 attributes specified:
Step 6: export the ReqIF package in DOORS Next
Go the Manage Component Properties and select ReqIF. Select the ReqIF definition and export it: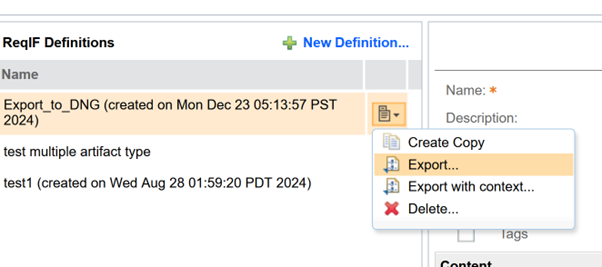
Click on Download:
Step 7: Import and merge the changes in DOORS 9
When importing a new ReqIF package from the same ReqIF definition, you will have to specify a temporary folder to store the new data: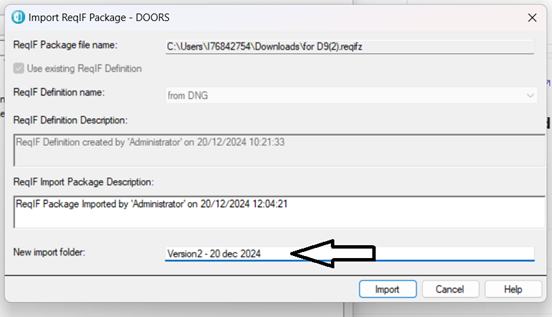
To merge, the new package with the existing one, go to the Project Properties, in the ReqIF Definition Tab. Select the ReqIF definition and click Imports:
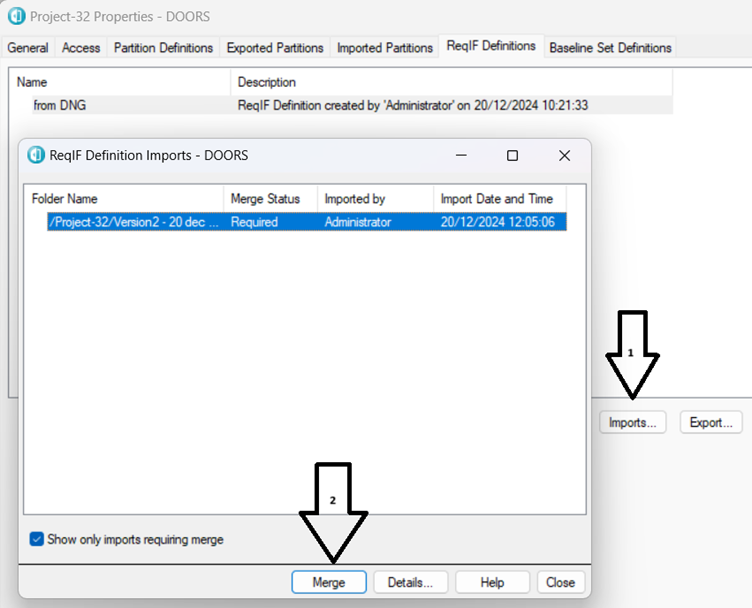
Click on Merge, if there is a required merge status.
Once done, the dialog box shows that it is completed:

Check the data in the main folder, the edited data in DOORS Next should have been merged:
You can see that the ReqIF locks have been removed.
They will be in place again after exporting a new ReqIF package.
Appendices
DXL script to convert DOORS 9 Object Picture in OLE object
Here is a sample script to do that:
/*begin*/
Module m = current
Object obj
string nPath = "C:/temp/"
for obj in m do {
bool isPicture = obj."Picture"
if(isPicture)
{
string ErrMess
string nFile = nPath "picture_obj_" identifier(obj) ".png"
ErrMess = exportPicture(obj,nFile ,formatPNG)
if(ErrMess == "")
{
deletePicture obj
oleInsert(obj,obj."Object Text",nFile ,false)
}
}
}
/*end*/
Contributions are governed by our Terms of Use. Please read the following disclaimer.
Dashboards and work items are no longer publicly available, so some links may be invalid. We now provide similar information through other means. Learn more here.