Configuring Enterprise CLM Reverse Proxies: WebSphere and IHS Plugin method Separating JTS and CCM where the JTS and CCM were originally deployed using different ports
This article will explain how to setup and configure an example CLM environment using WebSphere Application Server (WAS), IBM HTTP Server (IHS) and the WAS web server plugins for IHS, when the JTS and CCM are collocated and want to be redeployed such that JTS and CCM are on different servers.
In our example, we have RQM on a different server sharing the same JTS.
Table of Contents
Configuring the WebSphere and HTTP Server plugin methodPrerequisites and Assumptions
Setup SSL on the IHS Server with a self-signed certificate
Enable SSL directives within the IBM HTTP Server’s configuration file (httpd.conf)
Setup SSL Handshake Between the WAS profiles and IHS
Force WAS To Honor Host Headers
Single Sign-On(SSO) with WAS
Part II: Setup JTS, QM and CCM for SSO and import CCM keys
Configure WAS IHS Plug-in for QM applications (Server 2)
Configure WAS IHS Plug-in for the JTS application (Server 3)
About the author
Configuring the WebSphere and HTTP Server plugin method
There are two methods used to deploy the WAS Web Server plugins depending on whether IHS and the WAS profiles are local or remote. To demonstrate both methods, we will assume that the JTS and CCM application server profiles are co-located with the IHS server (local), with the QM application on it’s own server (remote). We will be moving JTS off of the local server onto a third server.
The user accessible Public URIs (and the actual servers they redirect to) will be:
https://jazzjts/qm (https://jazzrqm:9443/qm)
https://jazzjts/jts (https://jazznewjts:9443/jts)
https://jazzjts/ccm (https://jazzjts::9444/ccm)
We will also configure single sign-on with WAS such that a user only needs to log into one of the products and subsequent access to the other applications will not require re-authentication. The configuration will use an LDAP directory. Experienced WAS administrators will be aware that the WAS configuration steps in this guide can be carried out in different ways using “wsadmin” or the WAS Integrated Solutions console.
Example server configuration
For the purposes of this article we use two separate Windows 2008 servers configured as follows:
- Server 1 (Host-name: jazzjts):
WAS profile with CCM WAR deployed (HTTPS port : 9444)
LDAP Server
- Server 2 (Host-name: jazzrqm):
Server 3 (Host-name: jazznewjts):
WAS profile hosting JTS (HTTPS port: 9443)
Server 4 (Host-name: jazzapacheds):
LDAP and Database Server
Prerequisites and Assumptions
- Use the instructions provided in the CLM Infocenter to deploy the different applications
- Each of the WAS profiles is configured to use LDAP domain “jazzapacheds” for authentication
- IBM WebSphere plugin installation media is available
- Administrative console access to each WAS profile is available
- Username and password available for access to IHS Administrative console
- Setup SSL on the IHS Server with a self-signed certificate
- Enable SSL directives within the IBM HTTP Server’s configuration file (httpd.conf)
- Setup SSL Handshake Between the WAS profiles and IHS
- Login to the WAS Integration Solutions Console for the CCM profile.
- Navigate to Security -> SSL certificate and key management -> Key Stores and Certificates, create a new Key store with the following values:
Name: ccmwaskeys
Path: ccmwaskeys.kdb
Type: CMSKS
Password:secret
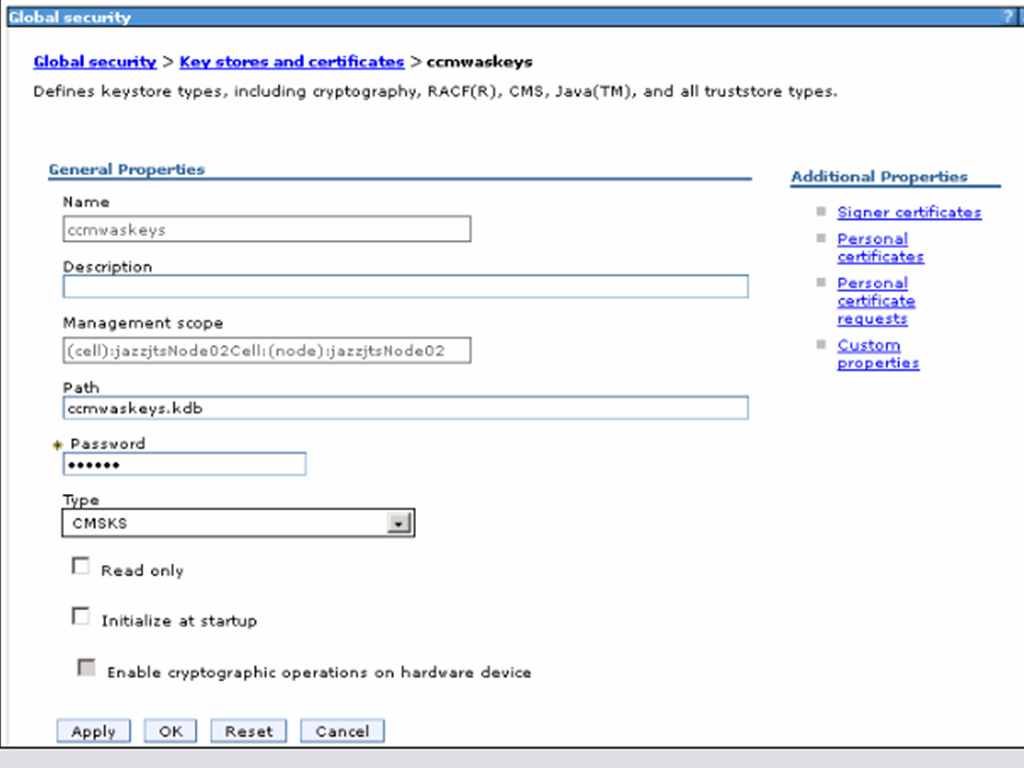
- Click OK then Save. This will create the file <jtswasprofileroot>/etc/jtswaskeys.kdb.
- Navigate to SSL certificate and key management -> Key stores and certificates -> NodeDefaultKeyStore
- Choose “Personal certificates” from the right sidebar
- Check the default certificate and click Export.
- Specify the following values in the Export certificates pane:
Key Store Password: WebAS (unless this has been changed)
Select the “Key Store File” radio button
Key File Name ccm:waskeys.kdb (note: You may have to enter the full path to the Key File)
Type: CMSKS
Password: secret
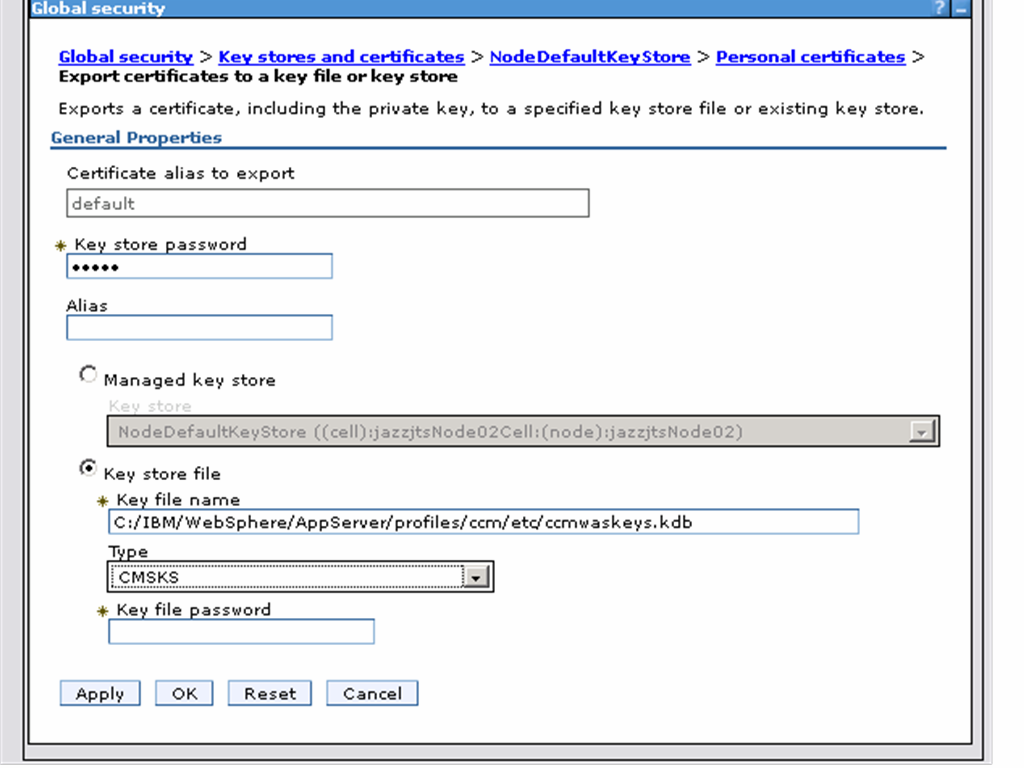
- Click OK.
- Add the certificates from the exported keystore (jtswaskeys.kdb) into the previously created IHS keystore(ihskeys.kdb).
Make sure the IHS Server is stopped
Run the “gsk7cmd” utility to create a new keystore database (ihskeys.kdb) and password stash file (ihskeys.sth)
gsk7cmd.bat -keydb -create -db ihskeys.kdb -pw secret -expire 365 -stash -type cms
Create a self-signed certificate and add it to the the new keystore db
gsk7cmd.bat -cert -create -db ihskeys.kdb -label clm.example.org -expire 365 -dn "CN=clm.example.org" -default_cert yes -pw secret
Add (or uncomment) the following lines in httpd.conf, making sure that the values for the KeyFile and SSLStashFile directives match the names of the files generated in the previous section:
LoadModule ibm_ssl_module modules/mod_ibm_ssl.so

Listen 0.0.0.0:443
## Uncomment for IPv6 support:
#Listen [::]:443
<VirtualHost *:443>
SSLEnable
</VirtualHost>
KeyFile C:/IBM/HTTPServer/bin/ihskeys.kdb
SSLStashFile C:/IBM/HTTPServer/bin/ihskeys.sth
SSLDisable
gsk7cmd -cert -import -db <ccmwasprofileroot>/etc/ccmwaskeys.kdb -pw secret -type cms -target ihskeys.kdb -target_pw secret -target_type cms -label default -new_label default_ccmwas
gsk7cmd -cert -import -db <ccmwasprofileroot>/etc/jtswaskeys.kdb -pw secret -type cms -target ihskeys.kdb -target_pw secret -target_type cms -label default -new_label default_jtswas
gsk7cmd -cert -import -db <ccmwasprofileroot>/etc/qmwaskeys.kdb -pw secret -type cms -target ihskeys.kdb -target_pw secret -target_type cms -label default -new_label default_qmwas
- Force WAS To Honor Host Headers
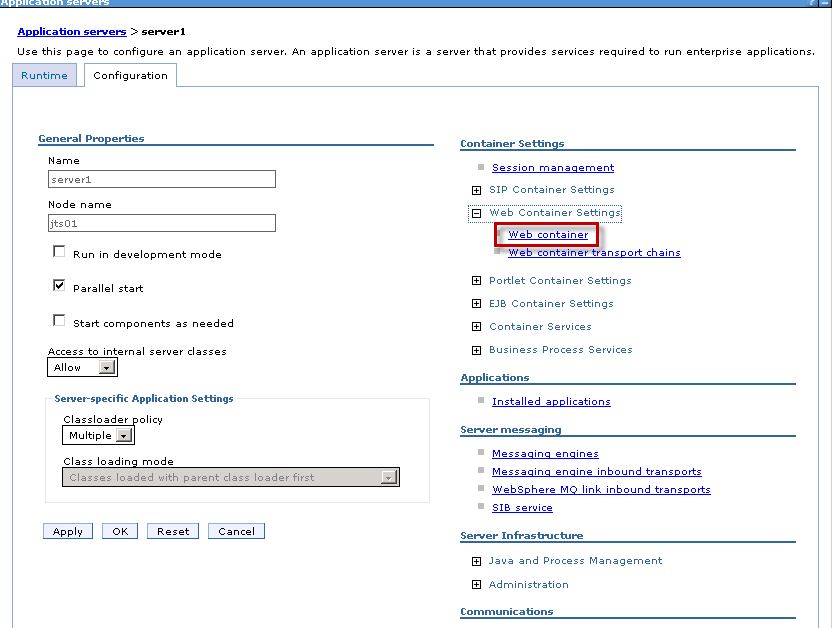
- Login to the WAS Integration Solutions Console for each WAS profile and navigate to Servers -> Server Types -> WebSphere application servers -> server1
- Under “Container Settings” expand Web Container Settings. Choose “Web Container”.
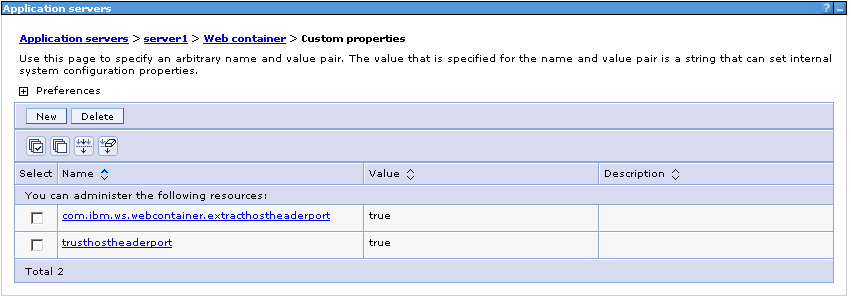
- Add the following custom properties:
- Single Sign-On(SSO) with WAS
trusthostheaderport = true com.ibm.ws.webcontainer.extracthostheaderport = true
Part I: Setup CCM profile for SSO and export keys
- Login to the WAS Integration Solutions Console for the JTS WAS profile.
- Navigate to Global Security -> Web and SIP Security -> Single sign-on (SSO) and set the following properties:
Enabled
Domain name: jazzapacheds
Requires SSL
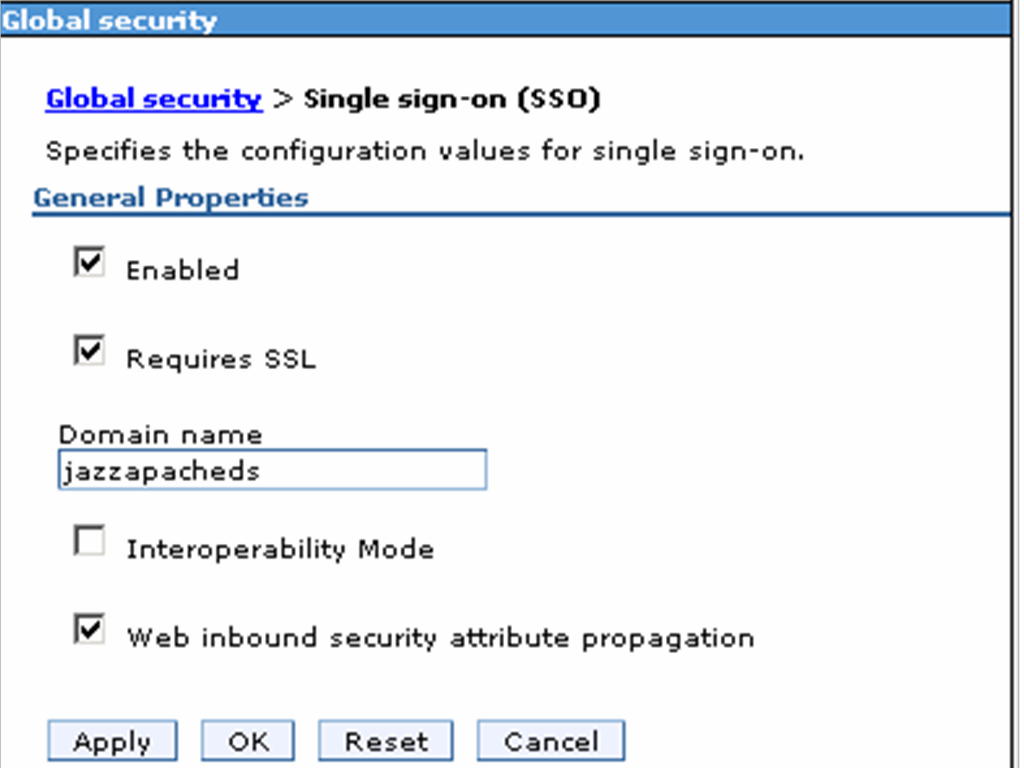
- Click OK then Save.
- Navigate to Global Security,select LTPA and enter the following values:
Password : secret
Confirm Password : secret
Fully qualified key file name : ccmssokey - Click Export keys.
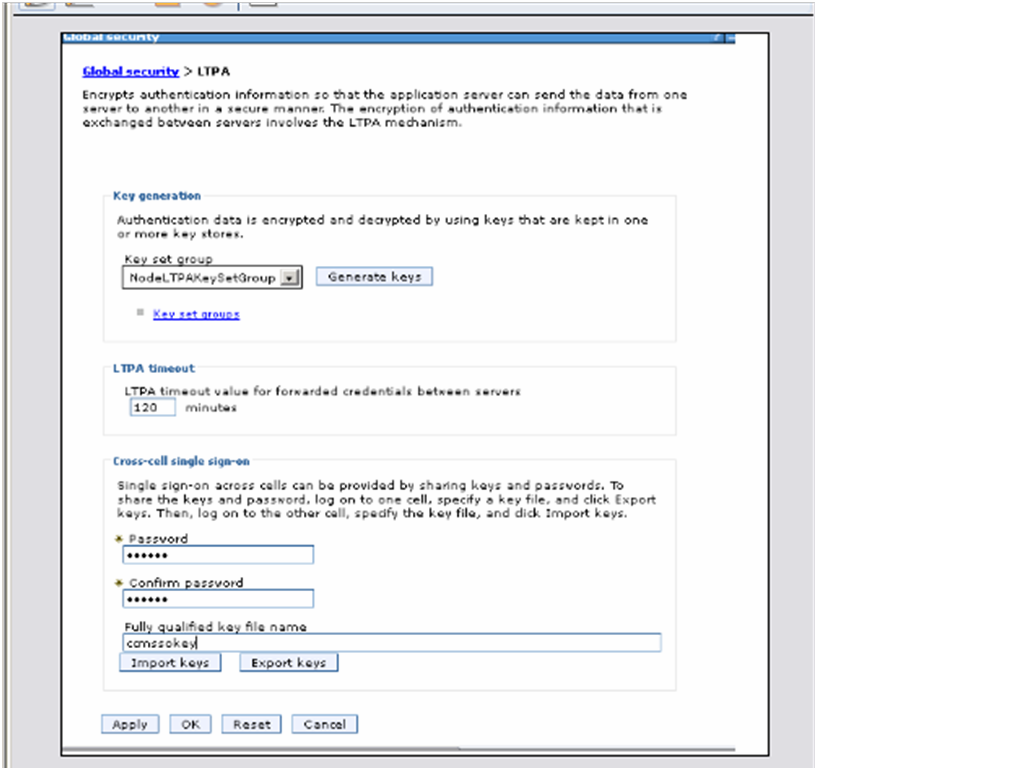
- Click OK then Save. This will create a file <ccmwasprofileroot>/ccmssokey
- Stop and restart the JTS profile.
Part II: Setup JTS, QM and CCM for SSO and import CCM keys
- Copy the ccmsokey generated above from <ccmwasprofileroot> to each of the other two servers (JTS and RQM) <jtswasprofileroot>/ccmssokey
- Login to the WAS Integration Solutions Console for the JTS WAS profile.
- Navigate to Global Security -> Web and SIP Security -> Single sign-on (SSO) and set the following properties:
Enabled
Domain name : jazzapacheds
Requires SSL
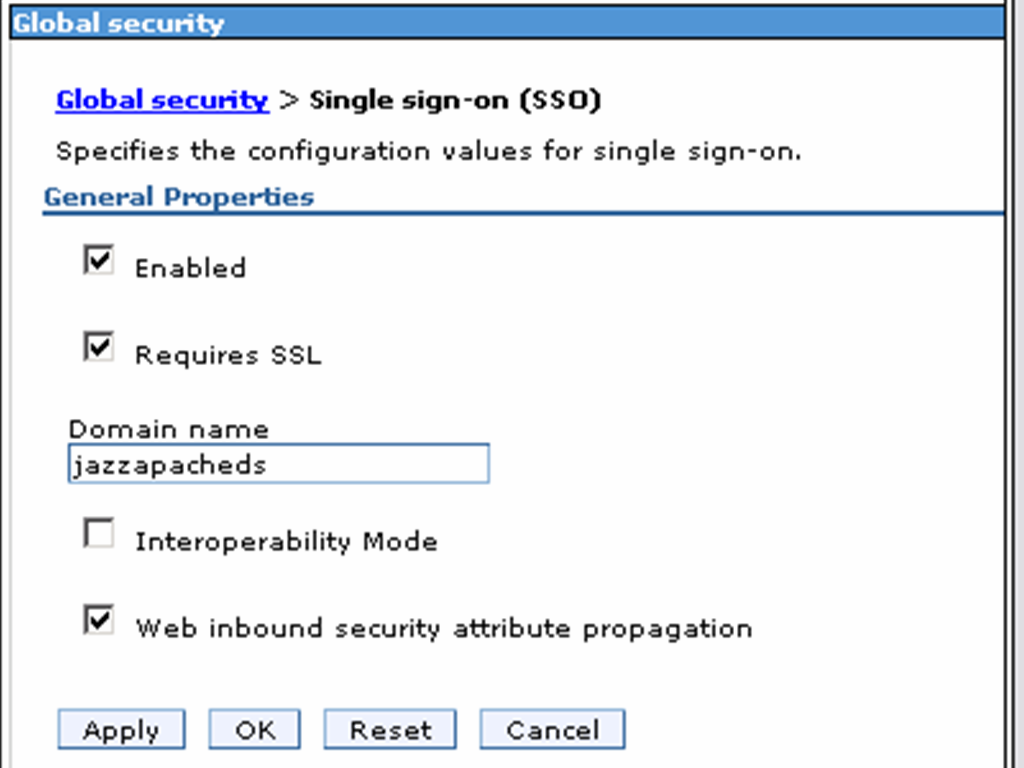
- Click OK then Save.
- Navigate to Global Security,select LTPA and enter the following values:
Password : secret
Confirm Password : secret
Fully qualified key file name : ccmssokey - Click Import keys.
- Click OK then Save.
- Stop and restart the JTS profile.
Repeat for the RQM server QM Profile
- Configure WAS IHS Plug-in for CCM (Server 1 jazzjts) We will now use the WAS Web Server Plugin install wizard to configure IHS such that all requests to https://jazzjts/ccm, is redirected to https://jazzjts:9444/jts. As noted before, for the purposes of this example, the WAS profile to which the CCM application has been deployed is co-located on the same server as IHS. We therefore use the procedure described in Configuring a Web server and an application server profile on the same machine.
-
Generate the plugin configuration file
- Stop the CCM WAS profile.
- Stop IHS.
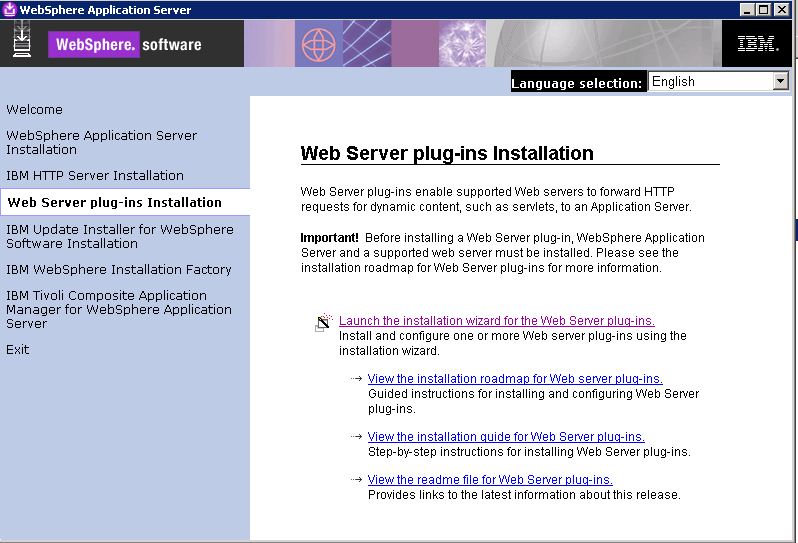
- Launch the Plug-ins installation wizard
.
- Clear the check box for the roadmaps and click Next.
- Read the license agreement and accept the agreement it if you agree to its terms. Click Next.
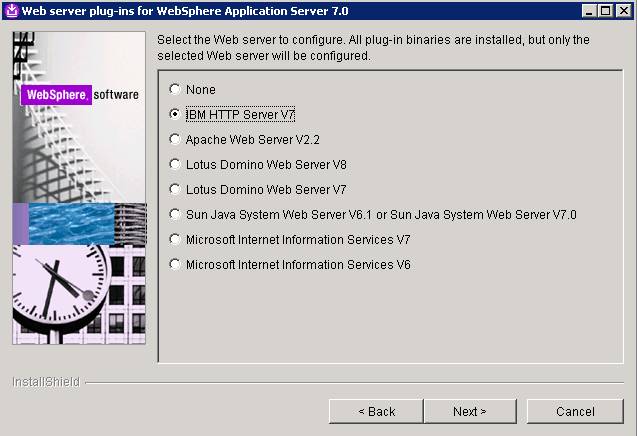
- Select “IBM HTTP Server V7” for Web server type and click Next
.
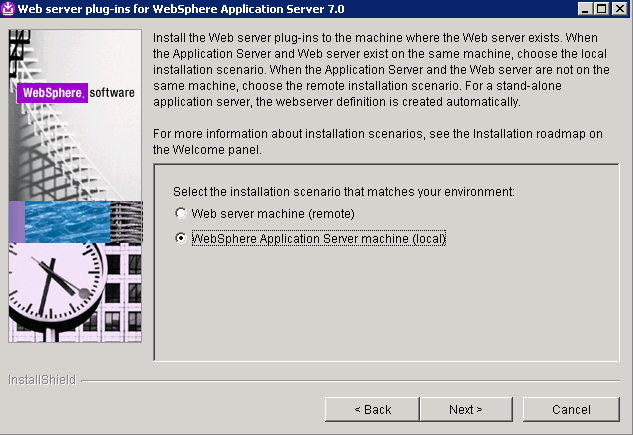
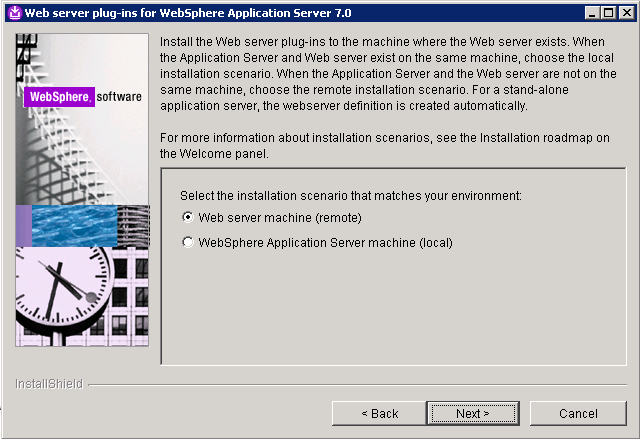
- Select WebSphere Application Server machine (local) and click Next
.
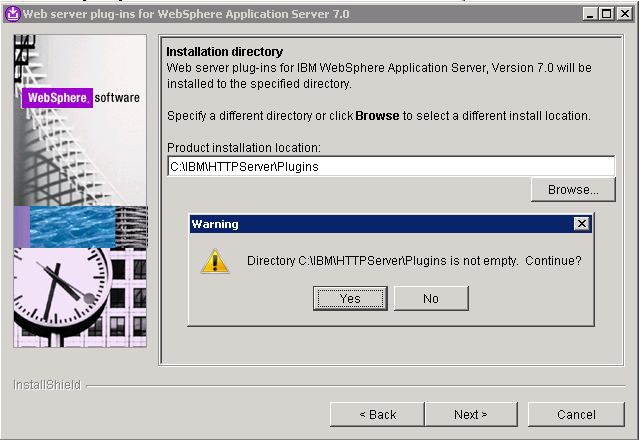
- Specify a location for the installation root directory for the plug-ins. Click Next. (Click Yes if prompted with a warning that the directory is not empty).
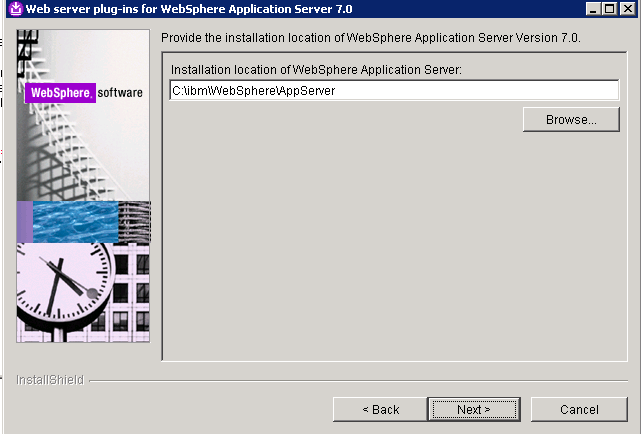
- Specify the Application Server Installation Location root directory and click Next.
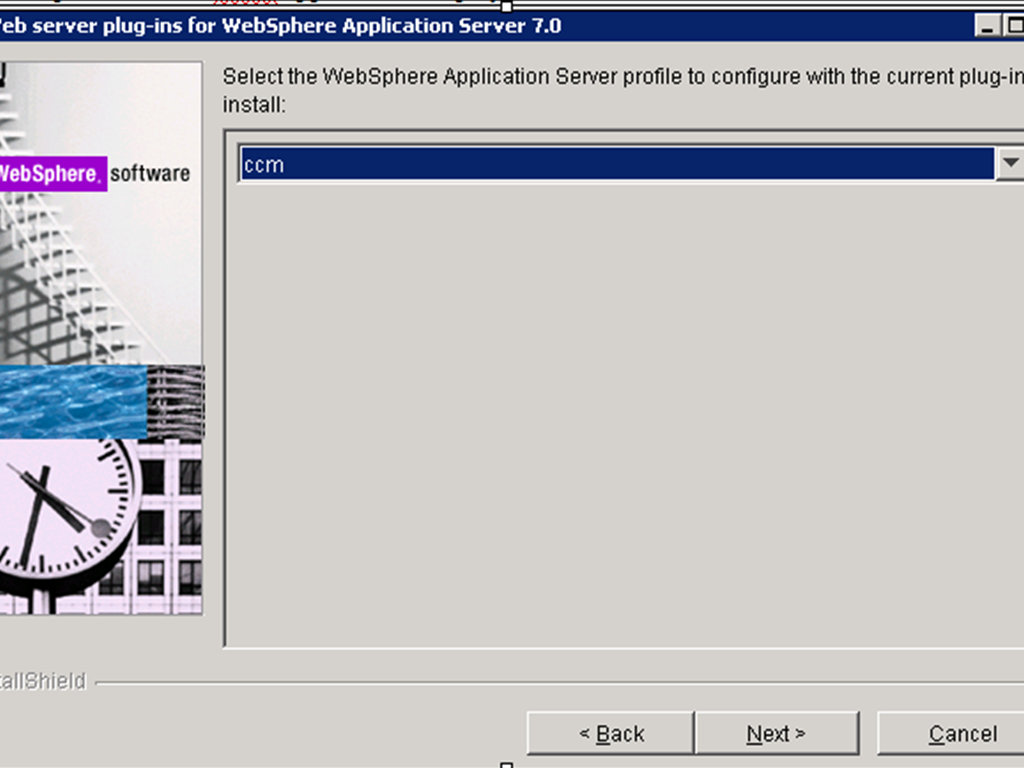
- Select the profile that the CCM application is deployed to and click Next.
- Click Browse to select the configuration file for IHS, verify that the Web server port is correct, and then click Next when you are finished
.
- Specify a unique nickname for the Web server. Click Next when you are finished.

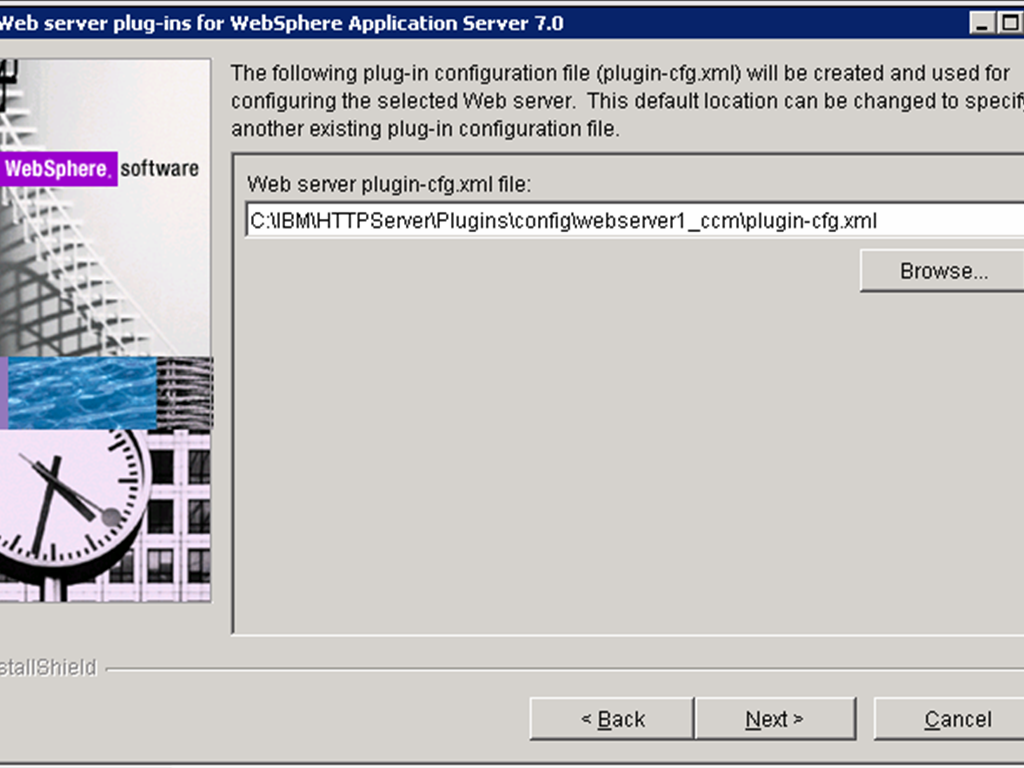
- Specify the location for the plugin-cfg.xml file to be generated and click Next.
- Click Next on the pre-installation summary panel to begin the installation. The wizard begins installing the plug-ins and configuring the Web server and the application server. Not the path of the Plug-in configuration file, which we will use later
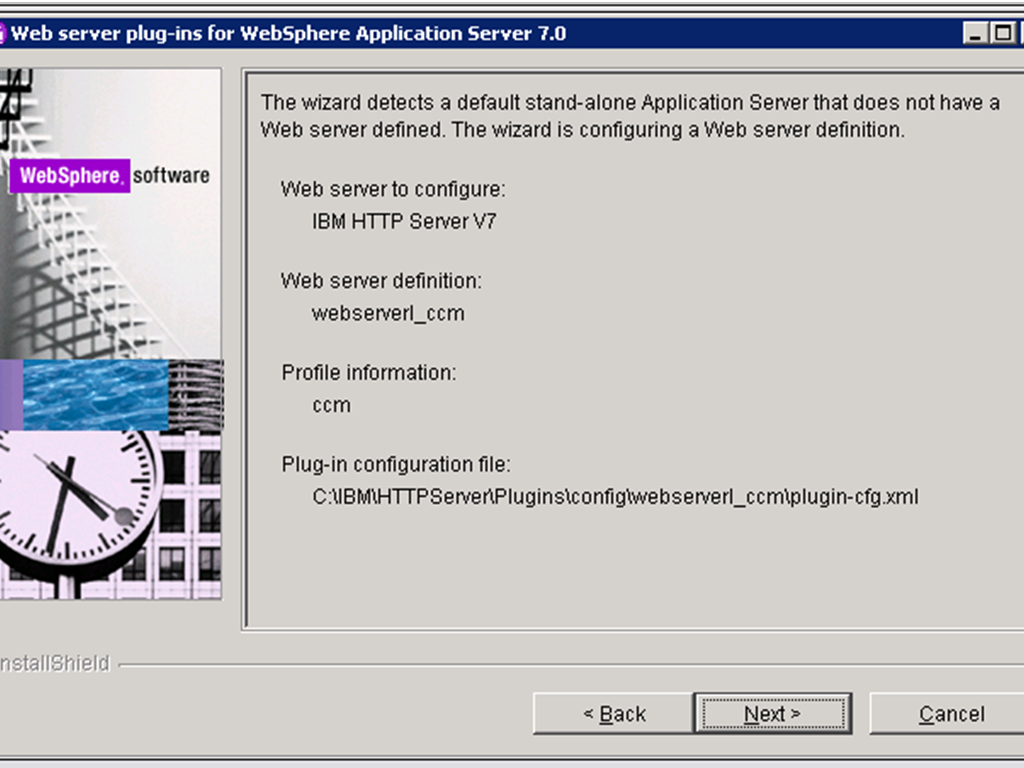 .
.
- Verify the success of the installation on the Installation summary panel and click Finish to exit the wizard.
-
Edit httpd.conf
- Open the IHS httpd.conf file in a text editor and verify that the following two lines have been added to the end of it.
- Open the generated plugin configuration file (C:IBMHTTPServerPluginsconfigwebserver1plugin-cfg.xml in this case) and modify the keyring and stashfile properties of the HTTPS Transport attributes to use the IHS keyfile and SSLStashfile.
- Start IHS and the CCM WAS profile.
- Configure WAS IHS Plug-in for the QM application (Server 2 jazzrqm)
We will now use the WAS Web Server Plugin install wizard to configure IHS such that all requests to https://clm.example.org/qm are redirected to https://qmserver01.example.org:9443/qm and. As noted before, for the purposes of this example, the WAS profile to which the QM application has been deployed is *not* co-located on the same server as IHS. We therefore use the procedure in Configuring a Web server and an application server on separate machines (remote). This is similar to the procedure used for the RM and CCM applications with the exception that we will use the IHS Admin console from the QM WAS profile to propagate the plugin configuration file to the IHS server.
LoadModule was_ap22_module "C:IBMHTTPServerPluginsbin32bitsmod_was_ap22_http.dll"
WebSpherePluginConfig "C:IBMHTTPServerPluginsconfigwebserver1_ccmplugin-cfg.xml"
<Transport Hostname="clm.example.org" Port="9447" Protocol="https">
	<Property Name="keyring" Value="C:/IBM/HTTPServer/ihskeys.kdb"/>
	<Property Name="stashfile" Value="C:/IBM/HTTPServer/ihskeys.sth"/>
</Transport>
-
Generate manual plugin configuration script
- Stop IHS.
- Launch the Plug-ins installation wizard on the server where IHS is installed (Server 1).
- Clear the check box for the roadmaps and click Next.
- Read the license agreement and accept the agreement it if you agree to its terms. Click Next.
- Select “IBM HTTP Server V7” for Web server type click Next.
- Select Web Server machine (remote) and click Next.
- Specify the location for the installation root directory for the plug-ins. Click Next. (Click Yes if prompted with a warning that the directory is not empty)
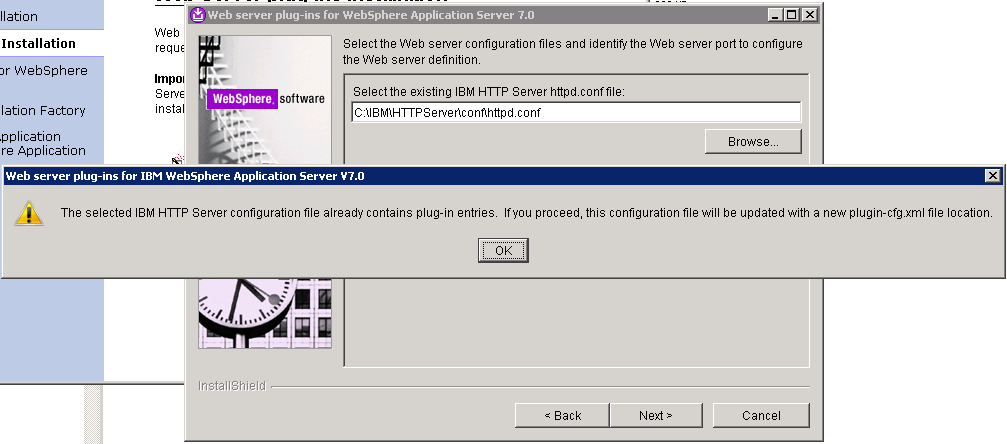
. - Click Browse to select the configuration file for IHS, and then click Next. Click OK when prompted that the HTTP Server configuration file already contains plugin entries.
- Specify a unique nickname for the Web server. Click Next when you are finished.

- Specify the location for the plugin-cfg.xml file and click Next.
Note that the location for this should be different to that of the plugin configuration file previously generated for the CCM.

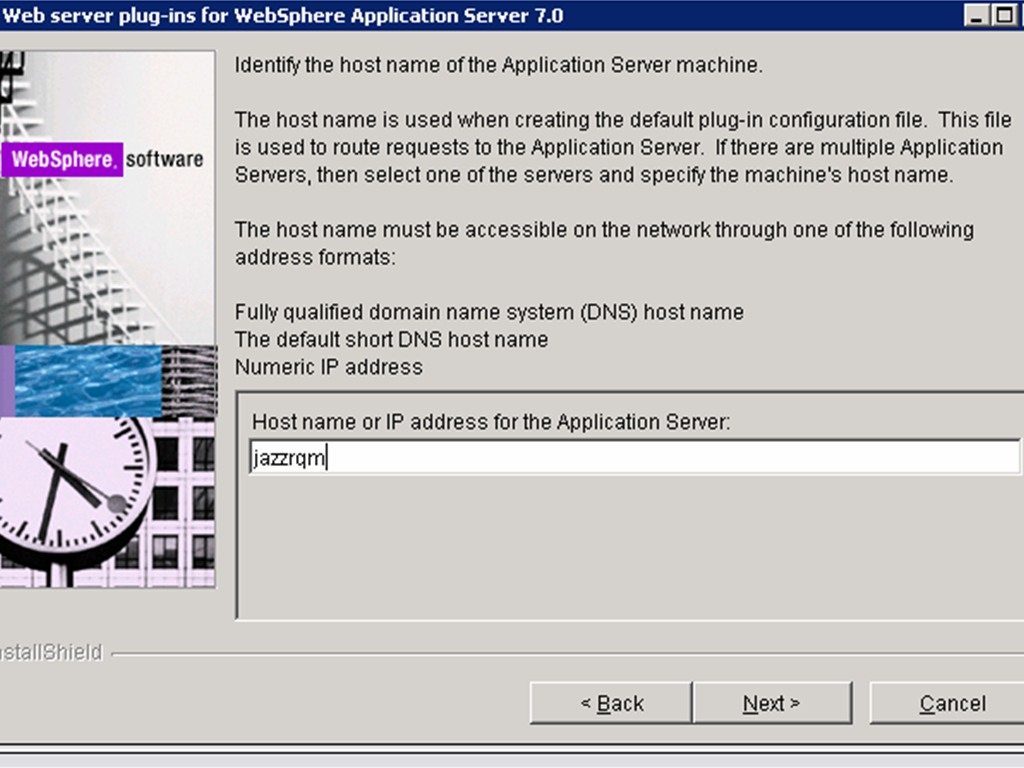
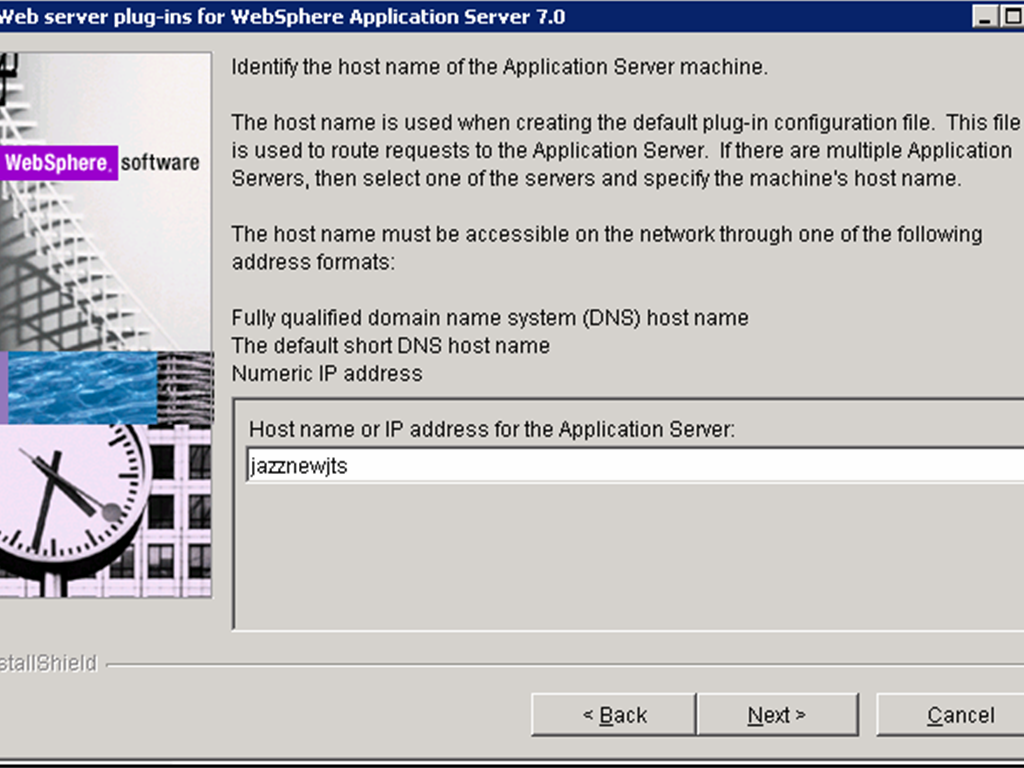
- Specify the host-name (qmserver01.example.org) of the server hosting the QM WAS profile.
- Click Next on the pre-installation summary panel to begin the installation. The wizard begins installing the plug-ins and configuring the Web server and the application server.
Note the path of the Plug-in configuration file, which we will use later
.
- Once the installation completes, the wizard generates a manual configuration script which must be run on the QM server. The path to the script is displayed in the installation summary panel.

- Verify the success of the installation on the Installation summary panel and click Finish to exit the wizard.
-
Edit httpd.conf
We pointed the wizard to the same httpd.conf file as when we configured the JTS profile and it will have modified it to use the new plugin configuration file generated for the QM profile. -
Run manual configuration script on Server 2
We now copy the manual configuration script generated above (C:ibmHTTPServerPluginsbinconfigurewebserver_qm.bat) to the <was_install_root> /bin directory on Server 2. -
Propagate the QM plugin configuration file to the IHS server
Login to the WAS Integration Solutions Console for the QM WAS profile.
We need to edit it to revert it to the previous configuration where it uses the plugin configuration generated for the JTS.
Open the IHS httpd.conf file, uncomment the following two lines.
LoadModule was_ap22_module "C:IBMHTTPServerPluginsbin32bitsmod_was_ap22_http.dll"and remove the following two lines:
WebSpherePluginConfig "C:IBMHTTPServerPluginsconfigwebserver1plugin-cfg.xml"
LoadModule was_ap22_module "C:IBMHTTPServerPluginsbin32bitsmod_was_ap22_http.dll"Save the httpd.conf file.
WebSpherePluginConfig "C:IBMHTTPServerPluginsconfigwebserver1_qmplugin-cfg.xml"
If the WAS profile hosting the QM application isn’t already running start it.
Run the configurewebserver_qm.bat script:
C:ibmWebSphereAppServerbin>configurewebserver_qm.bat  -profileName qm -user wasadminuser -password wasadminpassword
Using the profile qm
Using WebSphere admin userID wasadminuser
WASX7209I: Connected to process "server1" on node qm using SOAP connector;
The type of process is: UnManagedProcess
WASX7303I: The following options are passed to the scripting environment and are
available as arguments that are stored in the argv variable: "[webserverqm, IHS, C:IBMHTTPServer, C:IBMHTTPServerconfhttpd.conf,
80, MAP_ALL, C:IBMWebSpherePlugins, unmanaged, clm.example.org-node, clm.example.org, windows]"
Input parameters:
	Web server name             - webserverqm
	Web server type             - IHS
	Web server install location - C:IBMHTTPServer
	Web server config location  - C:IBMHTTPServerconfhttpd.conf
	Web server port             - 80
	Map Applications            - MAP_ALL
	Plugin install location     - C:IBMWebSpherePlugins
	Web server node type        - unmanaged
	Web server node name        - clm.example.org-node
	Web server host name        - clm.example.org
	Web server operating system - windows
	IHS Admin port              - 8008
	IHS Admin user ID           - ""
	IHS Admin password          - ""
	IHS service name            - ""
....

Start saving the configuration.

Configuration save is complete.
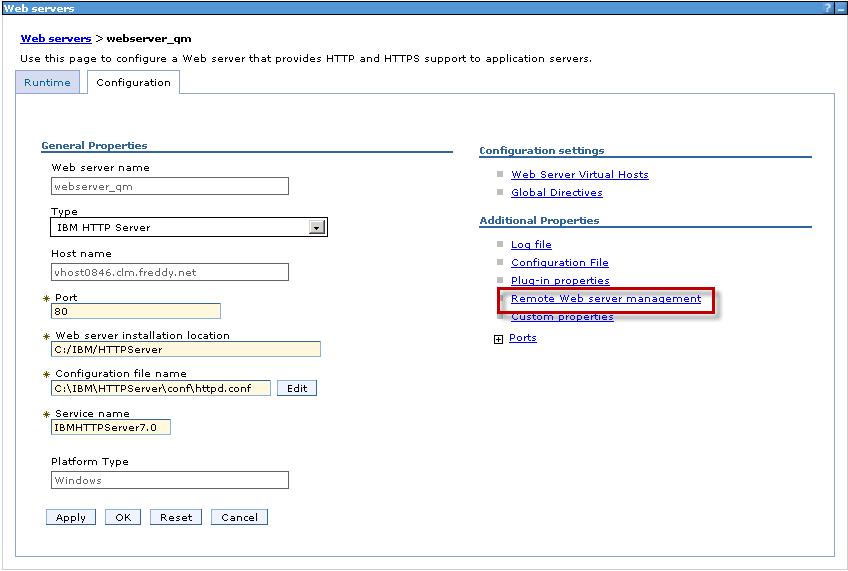
Navigate to Servers -> Server Types -> Web Servers
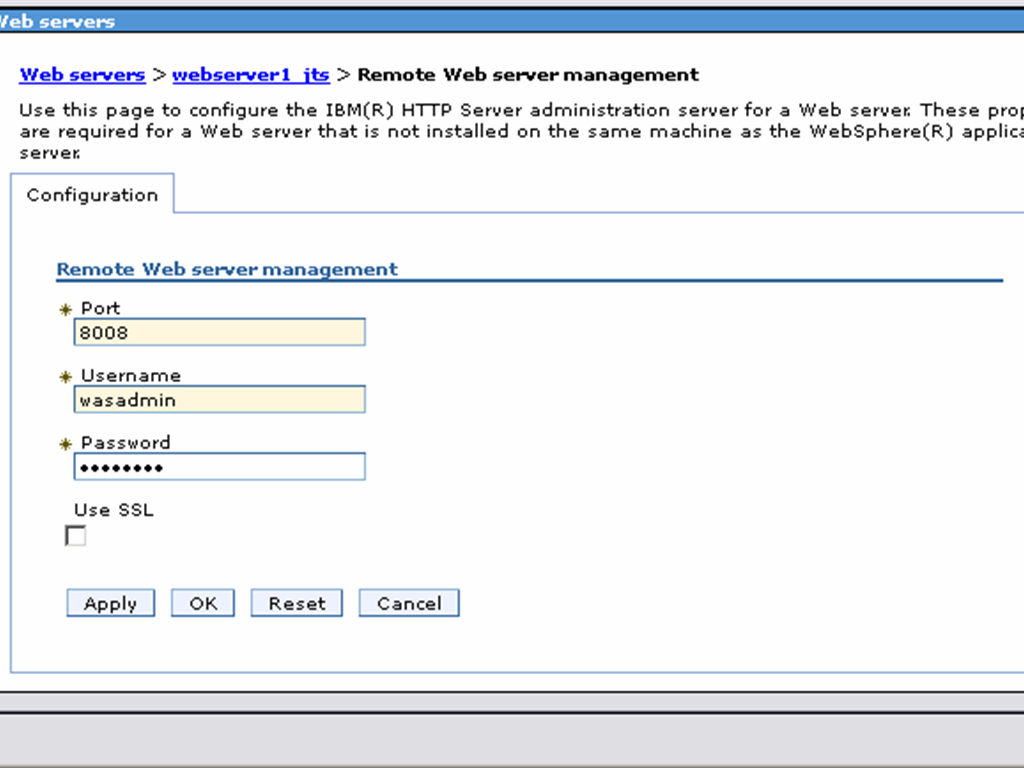
Click “webserver_qm” and click “Remote web server management”
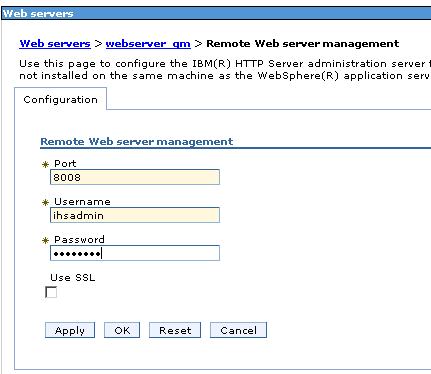
Specify the Port, Username and password to allow WAS to connect to the IHS Admin console. Click OK and Save.
Select “webserver_qm” and click “Generate Plug-in”.
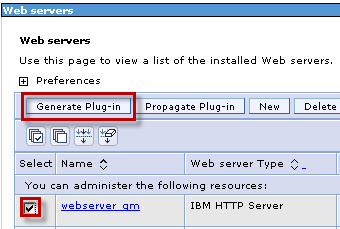
Once the plugin file has been generated, select select “webserver_qm” and click “Propagate Plug-in”.

If successful WAS will generate a message such as:
InformationPLGC0062I: The plug-in configuration file is propagated fromNote the path displayed for the generated plugin configuration file on Server 1 which is the IHS Server:
C:ibmWebSphereAppServerprofilesqmconfigcellsqmnodesjazzjts-nodeserverswebserver_qmplugin-cfg.xml
to C:IBMHTTPServerPlugins/config/webserver_qm/plugin-cfg.xml on the Web server computer.
InformationPLGC0048I: The propagation of the plug-in configuration file is complete for the Web server.
jazzjts-node.webserver_qm.
C:IBMHTTPServerPlugins/config/webserver_qm/plugin-cfg.xml
- We will now use the WAS Web Server Plugin install wizard to configure IHS such that all requests to https://clm.example.org/qm are redirected to https://qmserver01.example.org:9443/qm and. As noted before, for the purposes of this example, the WAS profile to which the QM application has been deployed is *not* co-located on the same server as IHS. We therefore use the procedure in Configuring a Web server and an application server on separate machines (remote). This is similar to the procedure used for the RM and CCM applications with the exception that we will use the IHS Admin console from the QM WAS profile to propagate the plugin configuration file to the IHS server.
-
Generate manual plugin configuration script
- Stop IHS.
- Launch the Plug-ins installation wizard on the server where IHS is installed (Server 1)
. - Clear the check box for the roadmaps and click Next.
- Read the license agreement and accept the agreement it if you agree to its terms. Click Next.
- Select “IBM HTTP Server V7” for Web server type click Next.
- Select Web Server machine (remote) and click Next
. - Specify the location for the installation root directory for the plug-ins. Click Next. (Click Yes if prompted with a warning that the directory is not empty)
. - Click Browse to select the configuration file for IHS, and then click Next. Click OK when prompted that the HTTP Server configuration file already contains plugin entries.
- Specify a unique nickname for the Web server. Click Next when you are finished.
- Specify the location for the plugin-cfg.xml file and click Next.

Note that the location for this should be different to that of the plugin configuration file previously generated for the CCM. - Specify the host-name (qmserver01.example.org) of the server hosting the JTS WAS profile.
- Click Next on the pre-installation summary panel to begin the installation. The wizard begins installing the plug-ins and configuring the Web server and the application server. Note the path of the Plug-in configuration file, which we will use later.
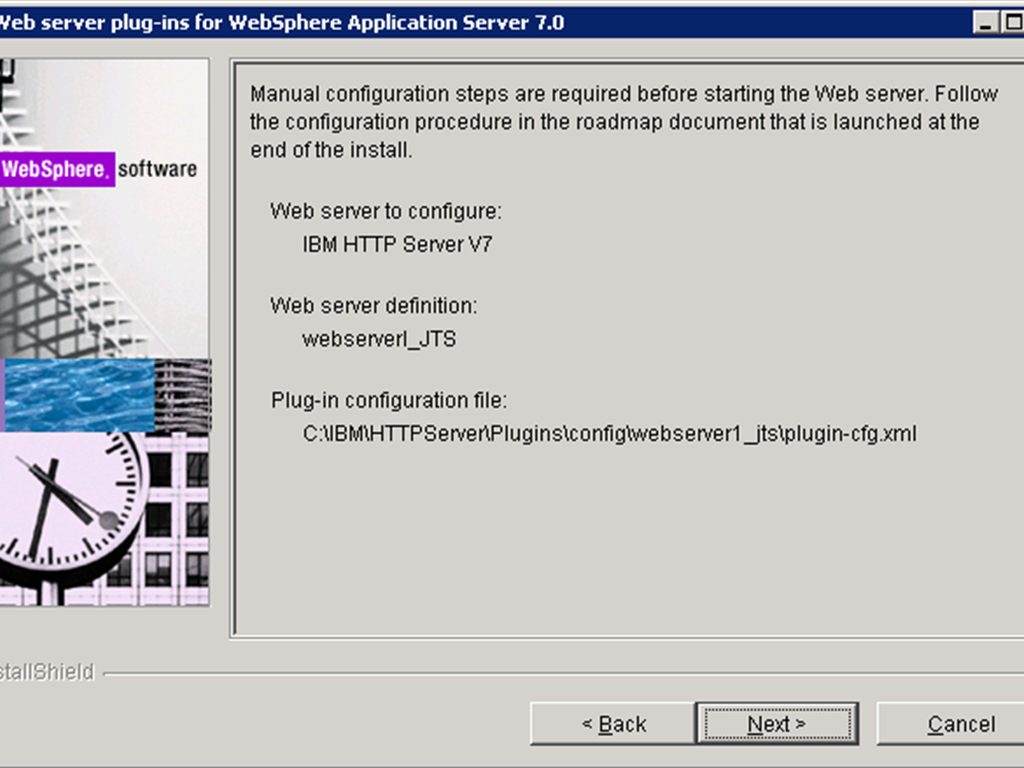
- Once the installation completes, the wizard generates a manual configuration script which must be run on the JTS server. The path to the script is displayed in the installation summary panel.

- Verify the success of the installation on the Installation summary panel and click Finish to exit the wizard.
2. Edit httpd.conf
- We pointed the wizard to the same httpd.conf file as when we configured the JTS profile and it will have modified it to use the new plugin configuration file generated for the QM profile. We need to edit it to revert it to the previous configuration where it uses the plugin configuration generated for the JTS.
Open the IHS httpd.conf file, uncomment the following two lines.
LoadModule was_ap22_module "C:IBMHTTPServerPluginsbin32bitsmod_was_ap22_http.dll"
and remove the following two lines:
WebSpherePluginConfig "C:IBMHTTPServerPluginsconfigwebserver1plugin-cfg.xml"
LoadModule was_ap22_module "C:IBMHTTPServerPluginsbin32bitsmod_was_ap22_http.dll"
Save the httpd.conf file
WebSpherePluginConfig "C:IBMHTTPServerPluginsconfigwebserver1_jtsplugin-cfg.xml"
3. Run manual configuration script on Server 2
-
We now copy the manual configuration script generated above (C:ibmHTTPServerPluginsbinconfigurewebserver_qm.bat) to the <was_install_root> /bin directory on Server 3.
If the WAS profile hosting the QM application isn’t already running start it.
Run the configurewebserver_qm.bat script:
C:ibmWebSphereAppServerbin>configurewebserver_jts.bat  -profileName jts -user wasadminuser -password wasadminpassword
Using the profile jts
Using WebSphere admin userID wasadminuser
WASX7209I: Connected to process "server1" on node jts using SOAP connector;
The type of process is: UnManagedProcess
WASX7303I: The following options are passed to the scripting environment and are
available as arguments that are stored in the argv variable: "[webserverqm, IHS, C:IBMHTTPServer, C:IBMHTTPServerconfhttpd.conf,
80, MAP_ALL, C:IBMWebSpherePlugins, unmanaged, jazzjts-node, jazzjts, windows]"
Input parameters:
	Web server name             - webserverqm
	Web server type             - IHS
	Web server install location - C:IBMHTTPServer
	Web server config location  - C:IBMHTTPServerconfhttpd.conf
	Web server port             - 80
	Map Applications            - MAP_ALL
	Plugin install location     - C:IBMWebSpherePlugins
	Web server node type        - unmanaged
	Web server node name        - jazzjts-node
	Web server host name        - jazzjts
	Web server operating system - windows
	IHS Admin port              - 8008
	IHS Admin user ID           - ""
	IHS Admin password          - ""
	IHS service name            - ""
....

Start saving the configuration.

Configuration save is complete.
4. Propagate the JTS plugin configuration file to the IHS server
Login to the WAS Integration Solutions Console for the JTS WAS profile.
Navigate to Servers -> Server Types -> Web Servers
Click “webserver_jts” and click “Remote web server management”

Specify the Port, Username and password to allow WAS to connect to the IHS Admin console. Click OK and Save.
Select “webserver_jts” and click “Generate Plug-in”.
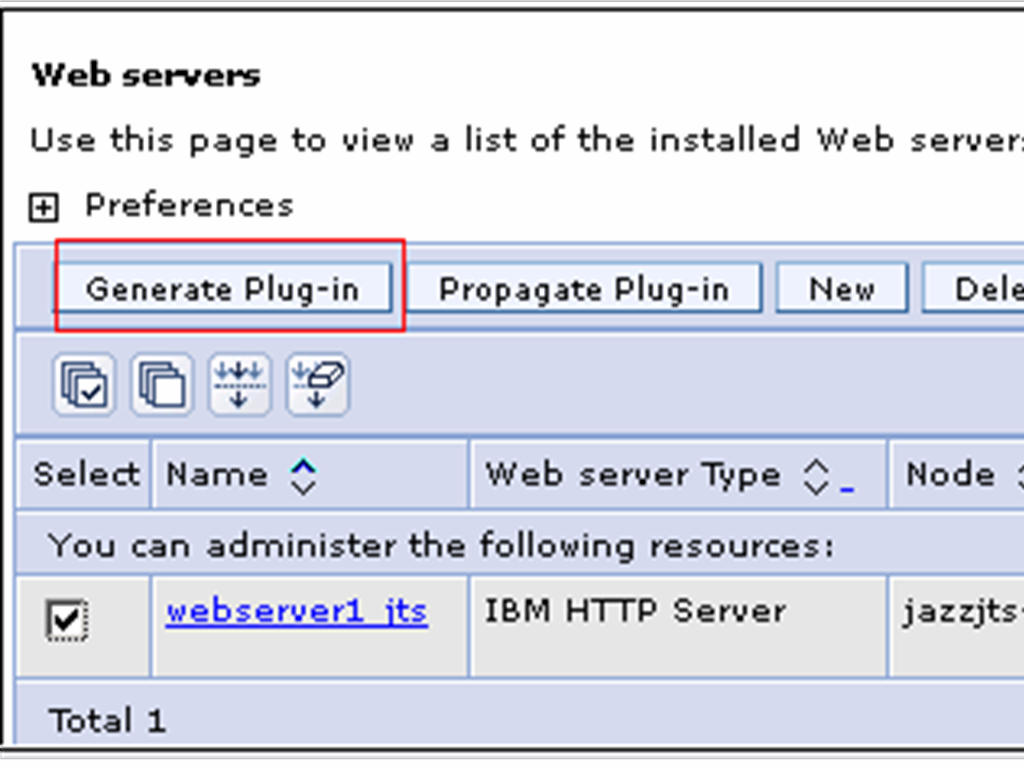
Once the plugin file has been generated, select select “webserver_qm” and click “Propagate Plug-in”.

If successful WAS will generate a message such as:
InformationPLGC0062I: The plug-in configuration file is propagated from
Note the path displayed for the generated plugin configuration file on Server 1 which is the IHS Server:
C:ibmWebSphereAppServerprofilesjtsconfigcellsqmnodesjazzjts-nodeserverswebserver_jtsplugin-cfg.xml
to C:IBMHTTPServerPlugins/config/webserver_jts/plugin-cfg.xml on the Web server computer.
InformationPLGC0048I: The propagation of the plug-in configuration file is complete for the Web server.
jazzjts-node.webserver_jts.
C:IBMHTTPServerPlugins/config/webserver_jts/plugin-cfg.xml
5. The following steps are performed on “Server 1′ which hosts IHS.
-
Merge plugin directives
Open the plugin configuration file generated when configuring the JTS profile (C:IBMHTTPServerPluginsconfigwebserver1plugin-cfg.xml in this case) in a text editor. Also open the plugin configuration file generated when configuring the QM profile (C:IBMHTTPServerPluginsconfigwebserver_qmplugin-cfg.xml in this case) in a separate text editor window.
Copy and paste the following lines
<VirtualHost Name="*:9080"/>from the webserver_qmplugin-cfg.xml to the <VirtualHostGroup> element in webserver1plugin-cfg.xml, so that the <VirtualHostGroup> element now looks like
<VirtualHost Name="*:9443"/>
<VirtualHost Name="*:5061"/>
<VirtualHost Name="*:5060"/>
<VirtualHostGroup Name="default_host">Next copy over the <ServerCluster>, <UriGroup> and <Route> elements from the webserver1_qmplugin-cfg.xml to the webserver1_ccmplugin-cfg.xml, pasting them before the closing </config> tag.
<VirtualHost Name="*:9084"/>
<VirtualHost Name="*:80"/>
<VirtualHost Name="*:9447"/>
<VirtualHost Name="*:5069"/>
<VirtualHost Name="*:5068"/>
<VirtualHost Name="*:443"/>
<VirtualHost Name="*:9085"/>
<VirtualHost Name="*:9448"/>
<VirtualHost Name="*:5071"/>
<VirtualHost Name="*:5070"/>
<VirtualHost Name="*:9086"/>
<VirtualHost Name="*:9449"/>
<VirtualHost Name="*:5073"/>
<VirtualHost Name="*:5072"/>
<VirtualHost Name="*:9080"/>
<VirtualHost Name="*:9443"/>
<VirtualHost Name="*:5060"/>
<VirtualHost Name="*:5061"/>
</VirtualHostGroup>
Also modify the keyring and stashfile properties of the HTTPS Transport attributes for port 9443 to use the IHS keyfile and SSLStashfile.
<Transport Hostname="jazzrqm" Port="9443" Protocol="https">
	<Property Name="keyring" Value="C:/IBM/HTTPServer/ihskeys.kdb"/>
	<Property Name="stashfile" Value="C:/IBM/HTTPServer/ihskeys.sth"/>
</Transport>

Repeat for the webserver1_jtsplugin-cfg.xml to the  webserver1_ccmplugin-cfg.xml
Save the webserver1_ccmplugin-cfg.xml.
Start IHS.
First verify that you can still access the JTS page using the IHS URL https://jazz/jts.
Also verify that you can still access the QM and CCM pages using the IHS URLs https://jazz/qm and https://jazzjts/ccm respectively.
Next verify that you can access the QM page using the “internal” URL: https://qmserver01.example.org:9443/qm. and then verify that the IHS URL https://clm.example.org/qm displays the same page.
modify the httpd.cnf file so that IHS listens on port 9443 (note: your origianl jts web profile on jazzjts (the original server) cannot be running)
(note: your origianl jts web profile on jazzjts (the original server) cannot be running)
Change the line:
Listen 0.0.0.0:443 so that it looks like this:  Listen 0.0.0.0:9443

and the line
<VirtualHost *:443>  so that it looks like this:    <VirtualHost *:9443>

This section should now look like this:
LoadModule ibm_ssl_module modules/mod_ibm_ssl.so

Listen 0.0.0.0:9443
## Uncomment for IPv6 support:
#Listen [::]:443
<VirtualHost *:9443>
SSLEnable
</VirtualHost>
KeyFile C:/IBM/HTTPServer/bin/ihskeys.kdb
SSLStashFile C:/IBM/HTTPServer/bin/ihskeys.sth
SSLDisable
Copy the original JTS files
On the original server (jazzjts) go to the <jazz team server install dir> serverconf and copy the following directories and files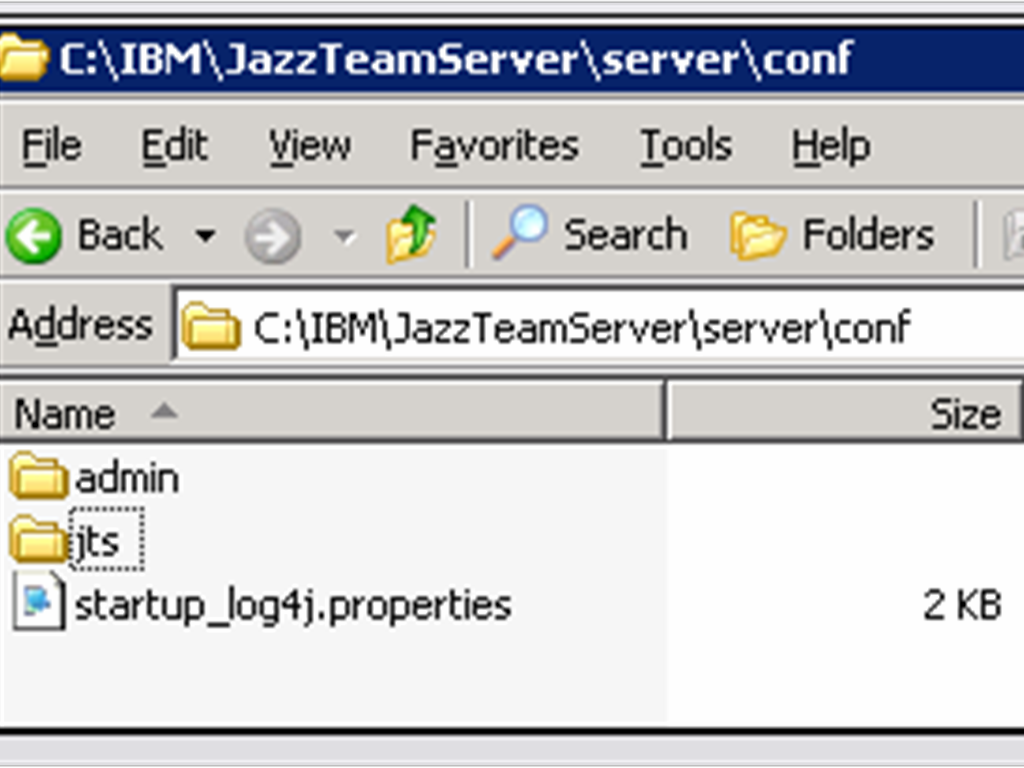
Replace the existing directories and file on the newjazzjts server (the new JTS server) with these copied versions
Running the JTS Setup wizard
Now that we have URLs that are server agnostic we can run the JTS setup wizard and use these URLs when registering the applications. Here are the discovery URLs that will be used:Requirements Management: https://clm.example.org/rm/scr
Quality Management: https://clm.example.org/qm/scr
Change and Configuration Management: https://clm.example.org/ccm/scr
Lifecycle Project Administration: https://clm.example.org/admin/scr
References
- Collaborative Lifecycle Management 3.0.1 Information Center: Fully distributed CLM enterprise topology example
- jazz.net: Moving Jazz Servers and URI Stability with CLM 2011
- Collaborative Lifecycle Management 3.0.1 Information Center: Using a reverse proxy in your topology
- Rational Team Concert 3.0.1 English License Agreement
- WebSphere 7 Information Center
- Using content caching proxies for Jazz Source Control
- Automating SSL configurations using scripting
- Tip: Single Sign-on using WebSphere Application Server
Acknowledgement
Many thanks to Sudhaker Frederick from the JumpStart team who wrote the original “Part 2: Configuring Enterprise CLM Reverse Proxies: WebSphere and IHS Plugin method” paper from which this paper was derived.
About the authors
Mike Delargy is a member of the Global Response Team (GRT) living outside of Denver, Colorado. The IBM Rational Support Global Response Team assists customers with complex solution planning and resolution.
Please direct feedback and comments to msdelarg@us.ibm.com
Sudhakar is the Sydney, Australia based member of the the Jazz Jumpstart team which is a worldwide group of development specialists who bring new and advanced Jazz-based technologies to customers.
Copyright © 2012 IBM Rational