Tip: Single Sign-on using WebSphere Application Server
Last Updated: February 8, 2010Author: Jason Wagner
Summary
This article will explain how to setup Single sign-on using WebSphere Application Server. This will allow users to share authentication tokens across multiple Jazz-based products installed on different servers within the same domain.
More Information
Prerequisite: This article assumes that you have two or more Jazz-based products installed, each on a separate instance of WebSphere Application Server.
- First, make sure each instance of WAS is using the same user registry (ideally LDAP). The user registry settings should be identical on all servers.
- From the WAS Integration Solutions Console:
- Open the Global Security section from the Security menu in the left sidebar.
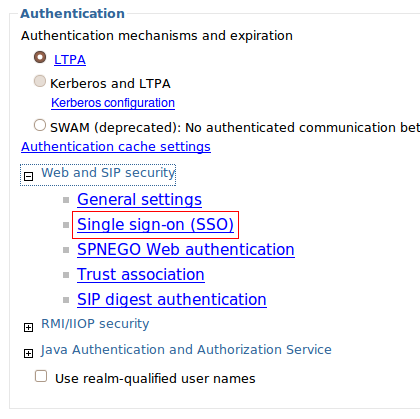
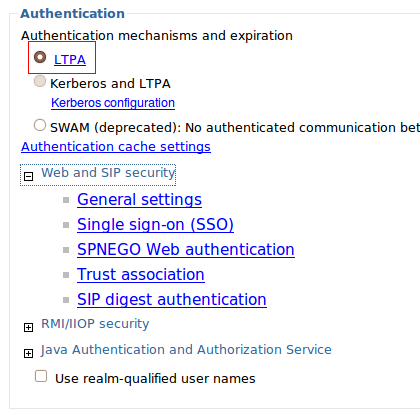
- In the Authentication section, select the LTPA option.
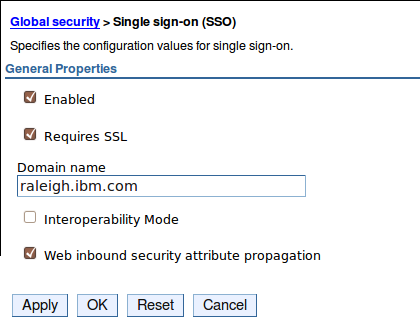
- Expand ‘Web and SIP Security’ and click on Single sign-on (SSO). – Enter domain name. This is the domain containing the participating servers. (e.g. raleigh.ibm.com, yourcompany.org, etc.)

– Check “Requires SSL”.
– Click OK then Save.
- On the Global Security page, click on LTPA. – Create a password and confirm it.

– Enter a name for the LTPA keys
– Click Export Keys to export them to the filesystem.
– Click OK then Save.
- Next, move these keys over to the other server(s) participating in Single sign-on.
- Find the exported keys (from the above server) in: /opt/IBM/WebSphere/AppServer/profiles/AppSrv01/.
- Upload the keyfile to each of the other severs you want in the SSO group. The file needs to be placed in the same directory as above on each of the other servers.
- Next, setup each of the other servers to use SSO, completing the same steps as above, except IMPORT the keys from the file above instead of exporting them.

- Restart each WebSphere Application Server after making all of the changes.
- To verify that the changes were successful, navigate to one of the servers (using the fully qualified host name) and authenticate. Now, try going to the second server and you should be authenticated automatically without a login prompt.
Related Information
The following links point to related information: