| Description | |
|---|---|
| Clustering |
Distributed Cache Microservice for clustered applications For Collaborative Lifecycle Management (CLM) applications that support clustering, such as Rational Team Concert, the distributed data is now managed by a standalone web application known as the Distributed Cache Microservice. The Distributed Cache Microservice is a small Java application that consists of a main JAR file (distributedCache.jar) and its dependencies in the lib directory. The microservice provides a centralized management and storage location for distributed data for clustered CLM applications. Setup considerations The microservice must be installed and run on a machine that is accessible by all nodes of the clustered application. By default, the microservice is installed on Jazz Team Server and is started as part of the Jazz Team Server startup sequence. Specifically, a clustered application calls Jazz Team Server to discover the status of the microservice. Jazz Team Server attempts to locate a running process, and starts the microservice if it is not running. This sequence only happens if the clustered application uses the default host name and port to access the microservice; otherwise, the microservice must be started another way. In the default setup, the startup script uses the JRE from the Jazz Team Server installation to run the Distributed Cache Microservice. If you copy the microservice to a new location, you must provide a path to the JRE bin folder as an argument to the startup script. If the Jazz Team Server machine is behind a proxy, such as IBM HTTP Server, the default setup will not work. Configuration properties The configuration properties and their documentation are stored in the distributedCache.cfg file. If you install the microservice in a read-only location, you must change the logDir property to point to a writable location. By default, the logs folder is created in the cache folder, which is where the startup script is located. If you plan to monitor the performance counters that the microservice publishes, you must enable counters and counter publishing in the configuration file, and also point the broker to an MQTT broker URL. Alternatively, when counters are enabled in the configuration file, the following URL displays counter data on demand: http://<machine>:10001/dcm/counters If the CLM environment uses an LDAP user registry, you must also configure the user registry settings in the .cfg file. Running the Distributed Cache Microservice To run the microservice, the JVM version must be 1.7 or later. You can start the microservice by using the included script, or you can start it directly by using this command: > java -jar distributedCache.jar For the best performance, copy the Distributed Cache Microservice from the Jazz Team Server location and run it on a separate machine that is independent from Jazz Team Server. |
| Documentation |
Interactive Upgrade Guide now includes entries for custom context roots The Interactive Upgrade Guide now includes extra entries where you can add custom context roots, and those entries are used in the guide where appropriate. When you provide this information in the form, your guide is dynamically generated according to your custom context roots. The root affects your unique repository tools (repotools) commands, installation paths, server URLs, and so on. To simplify the upgrade process, you can copy the customized command syntax from the guide and use it at the command prompt. |
|
New Interactive Backup and Restore Guide A new interactive guide is available that enables you to generate customized instructions for backing up databases, indexes, and configuration files for the Collaborative Lifecycle Management (CLM) and Continuous Engineering (CE) applications. You can find the guide in IBM Knowledge Center on the landing page for interactive guides, and in the Administering section of the help. |
|
| Global Configuration Management |
1. Edit attributes and tags for multiple configurations and components With this release you can edit attributes and assign and remove tags for more than one global configuration or global component at a time. Editing attributes:
Image of editing attributes for components: 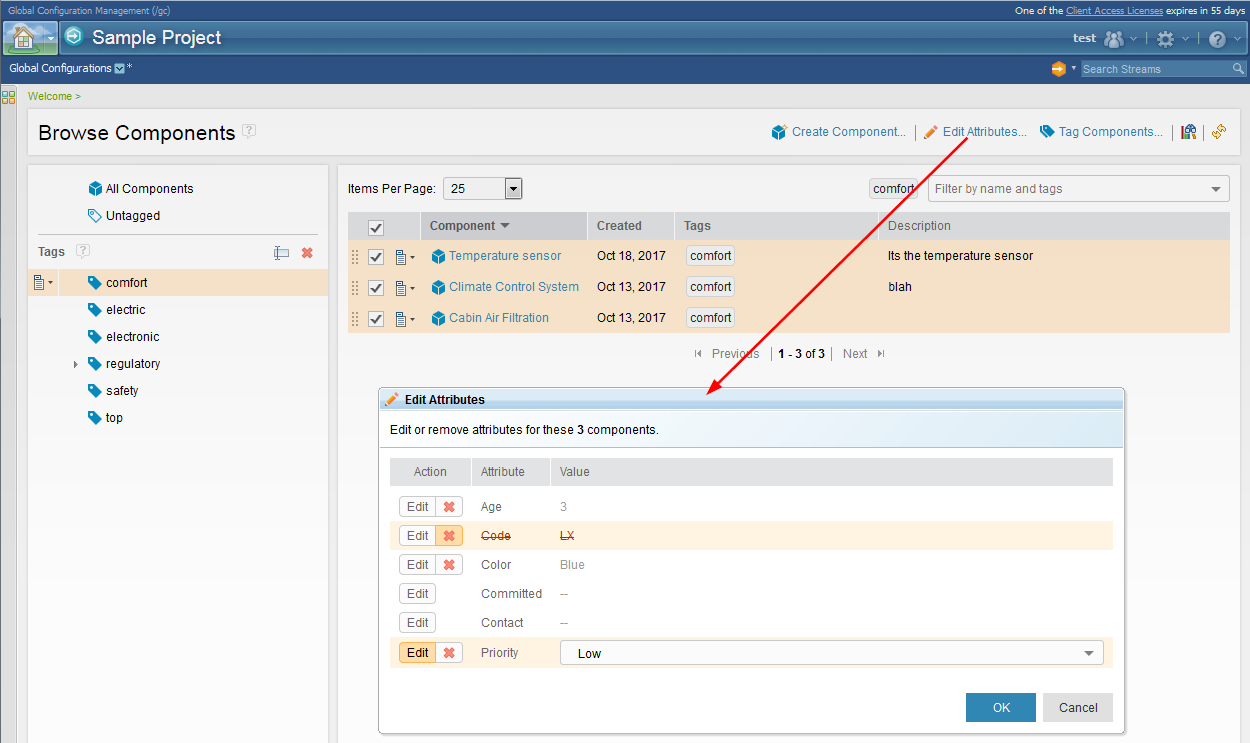
o The selected configurations are grouped by project area, since attributes are specific to a project area. o You can select a mix of streams and baselines. For baseline attributes, you must select Allow editing for baselines in the attribute type definition. Image of editing attributes for configurations across project areas:  Editing tags:
Image of tagging multiple components: 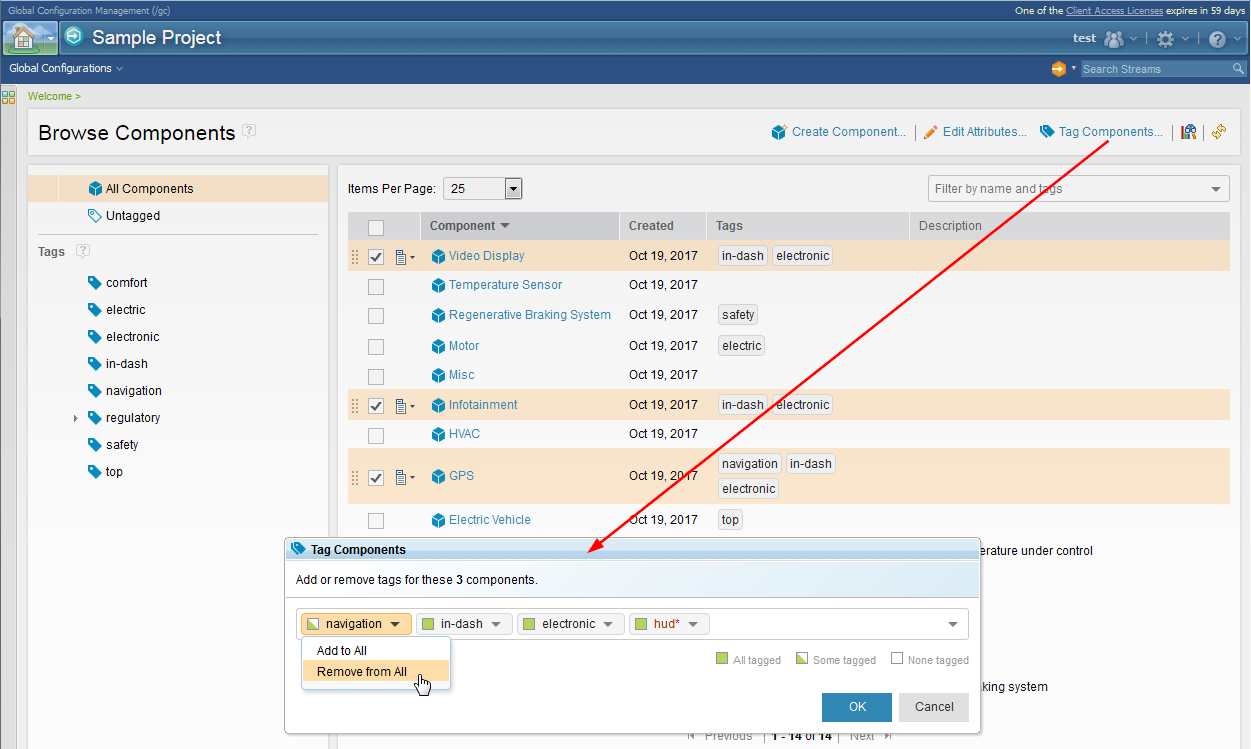
Image of tagging multiple configurations: 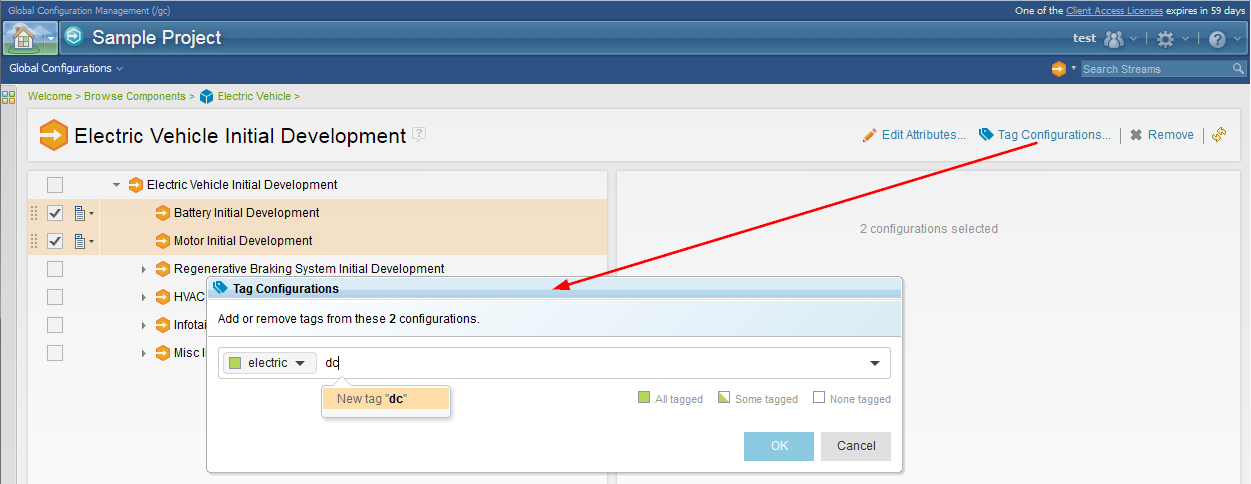
|
|
2. Project Properties have been renamed to Type Definitions and are visible to all team members Before, you worked with artifact types, attributes, data types, and link types on the Manage Project Properties page. That page is now called Manage Type Definitions because not all the elements are actually properties. The following tasks and permissions now refer to type definitions to better convey their purpose:
To open this page, click the Administration gear menu on the banner. Image of the Manage Type Definitions menu item and page: 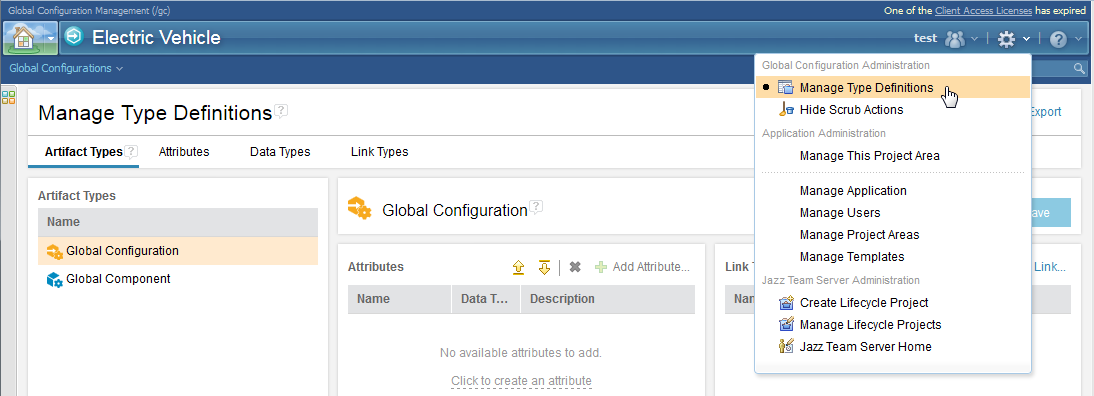 To change type definitions, you still need the Create and modify type definitions privilege. Image of the permissions that apply to type definitions: 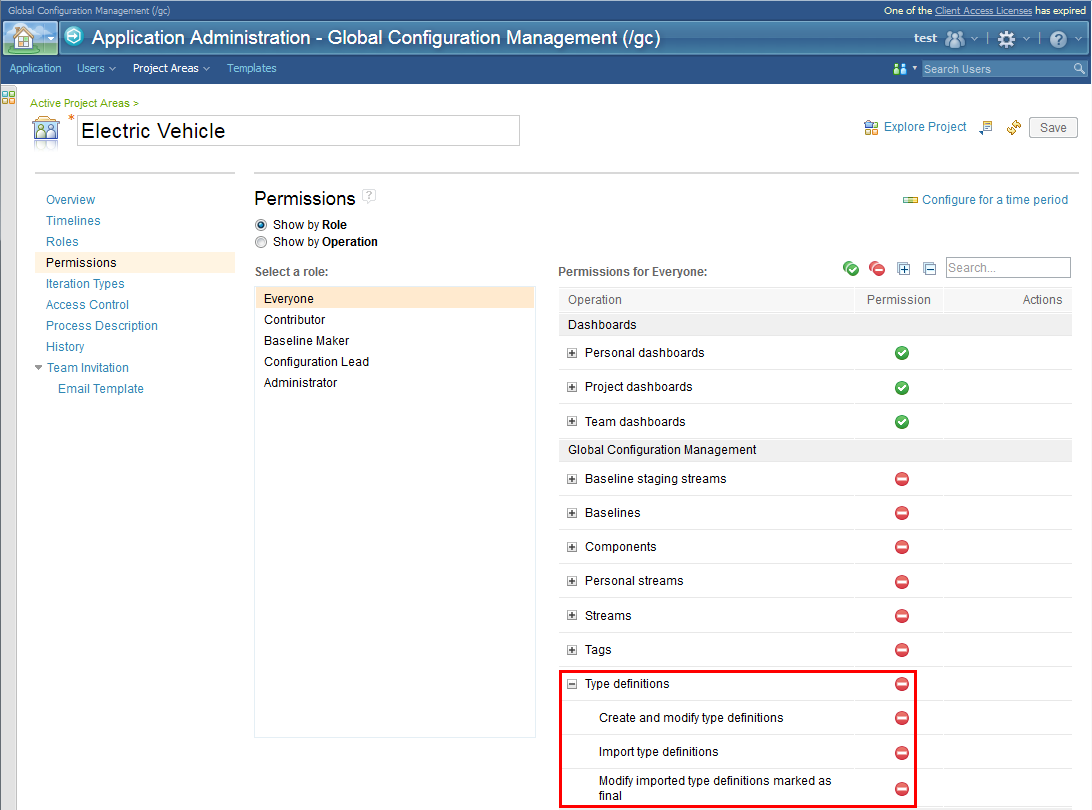 Image of the page as seen by team members who can't change type definitions: 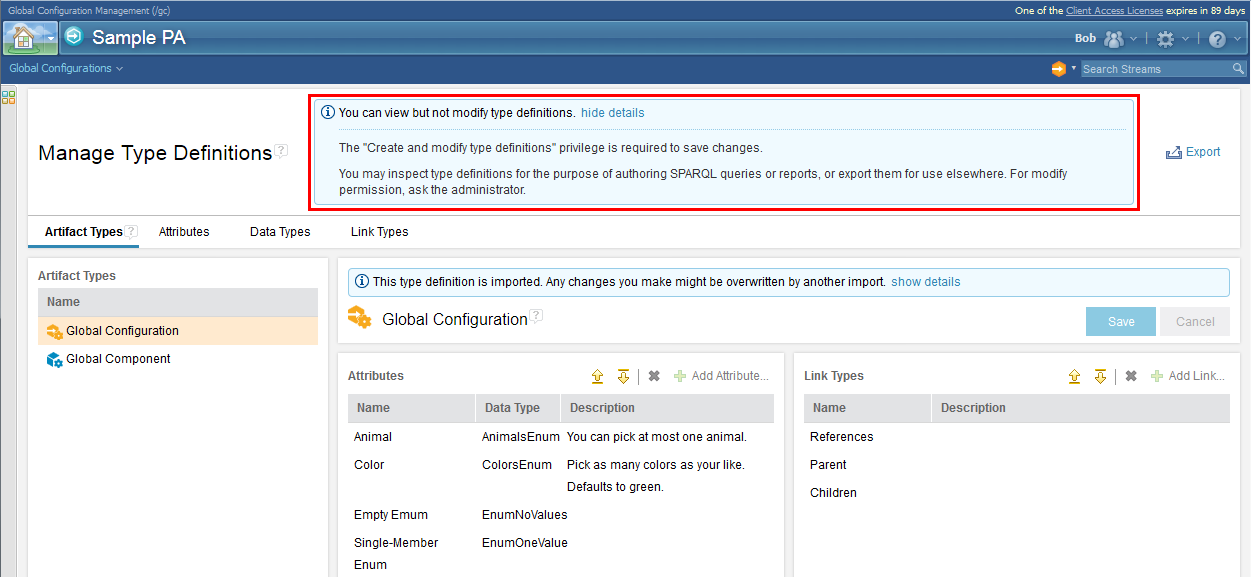
|
|
|
3. Import and export type definitions Share type definitions (artifact types, attributes, data types, and link types) across GCM project areas by exporting them to a file and importing them into other GCM projects, including those on other servers. You can centrally manage type definitions and prevent further changes to them by checking Mark as final when you export or import. Export: Before you export, assign URIs to all type definitions to facilitate querying and reporting, and to ensure type definitions are not duplicated. Do these tasks on the Manage Type Definitions page. Two permissions were added to the Type definitions permission group to support this feature. By default, they are part of the Administrator role:
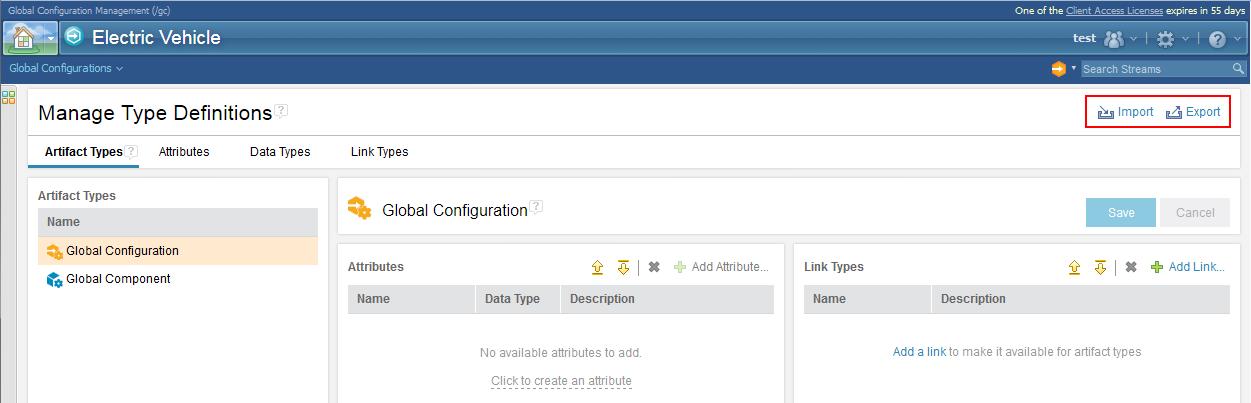 Image of the Export Type Definitions window:  Import: When you import type definitions into a project area, preview the changes to make sure they’re what you expect. Each tab in the preview corresponds to a kind of type definition (an artifact type, attribute, data type, or link type), and shows the number of changes. Warning or error icons, if any, indicate items you might need to check or fix:
Image of the Import Type Definitions window:  Image of the import preview: 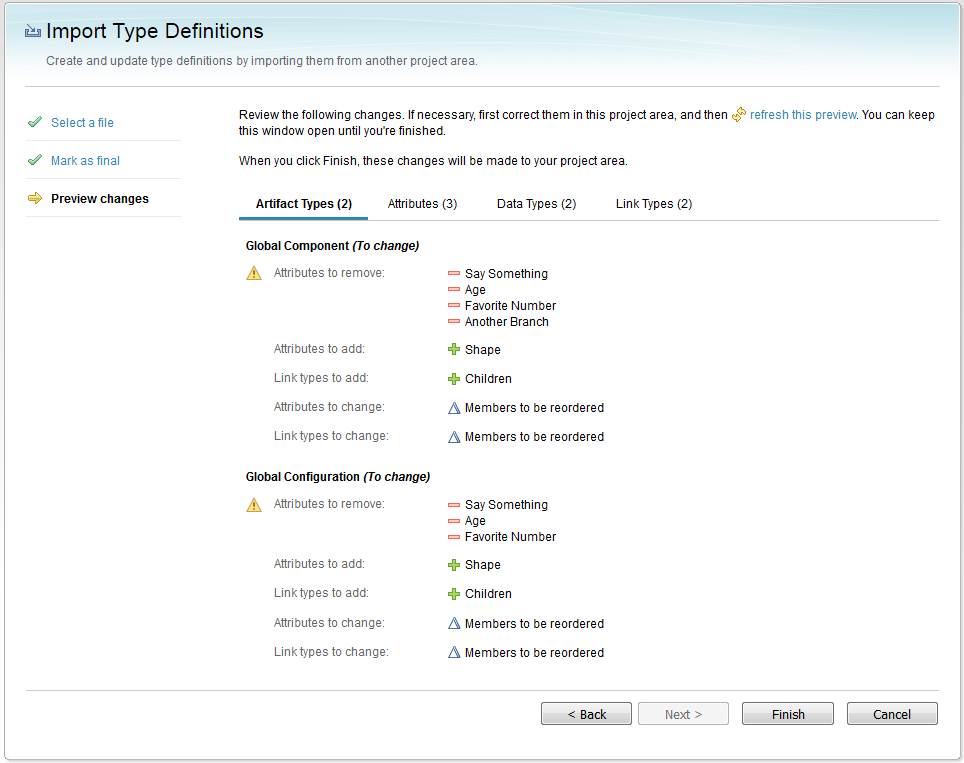
|
|
|
4. New locking mechanism for shared type definitions When you export or import type definitions, you can mark them as final to prevent accidental changes and ensure consistency across projects that share them. Type definitions include artifact types, attributes, data types, and link types. When the type definitions are imported, you see a lock icon in the details on the right side of the page if they were marked as final. Only users who have the Modify imported type definitions marked as final privilege (such as someone assigned the Administrator role) can unlock and then edit these type definitions. Example: An attribute called Geo might have a data type of Country. The Country data type is set with an enumerated list of values, which include England, Japan, and United States. If these type definitions are exported from Project_1 and marked as final, when they are imported into Project_2, you cannot change them without permission. Image of a locked attribute: 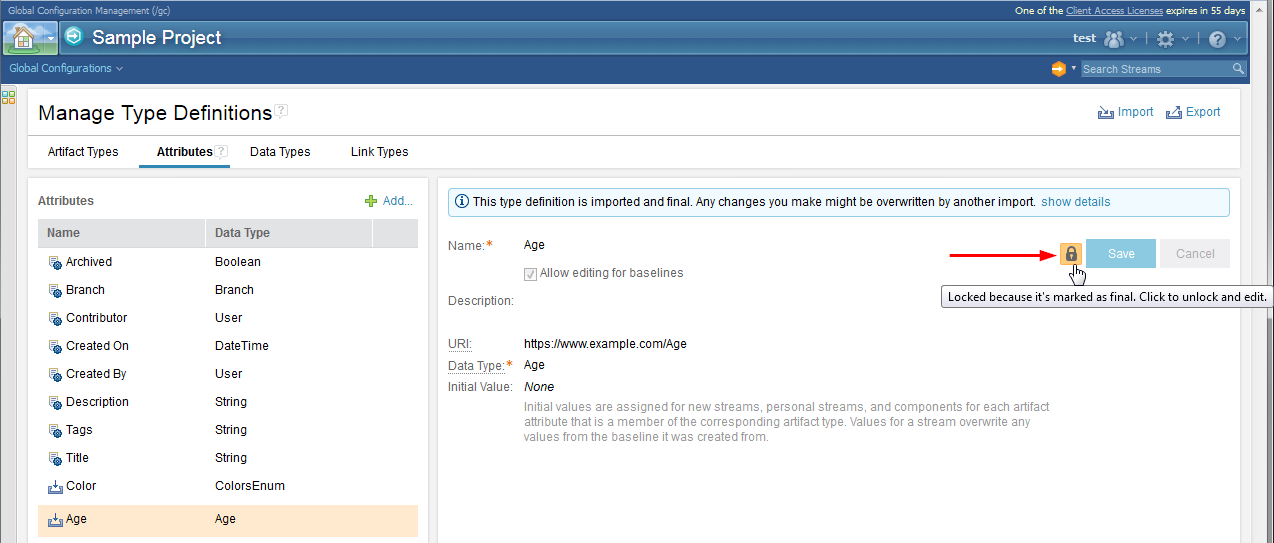 Image of an unlocked attribute: 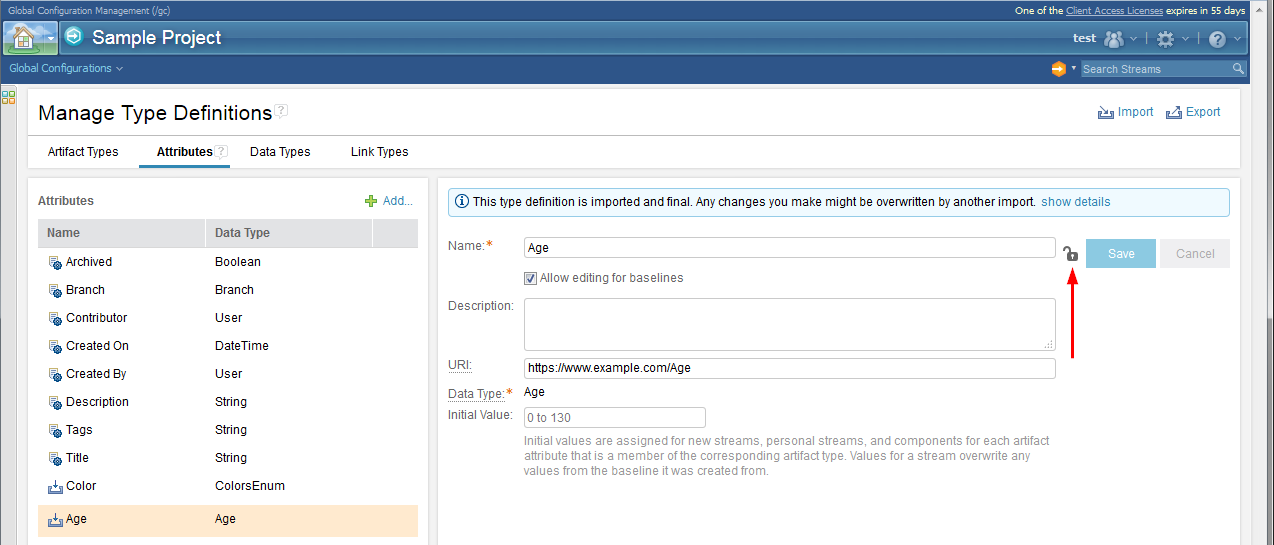
|
|
|
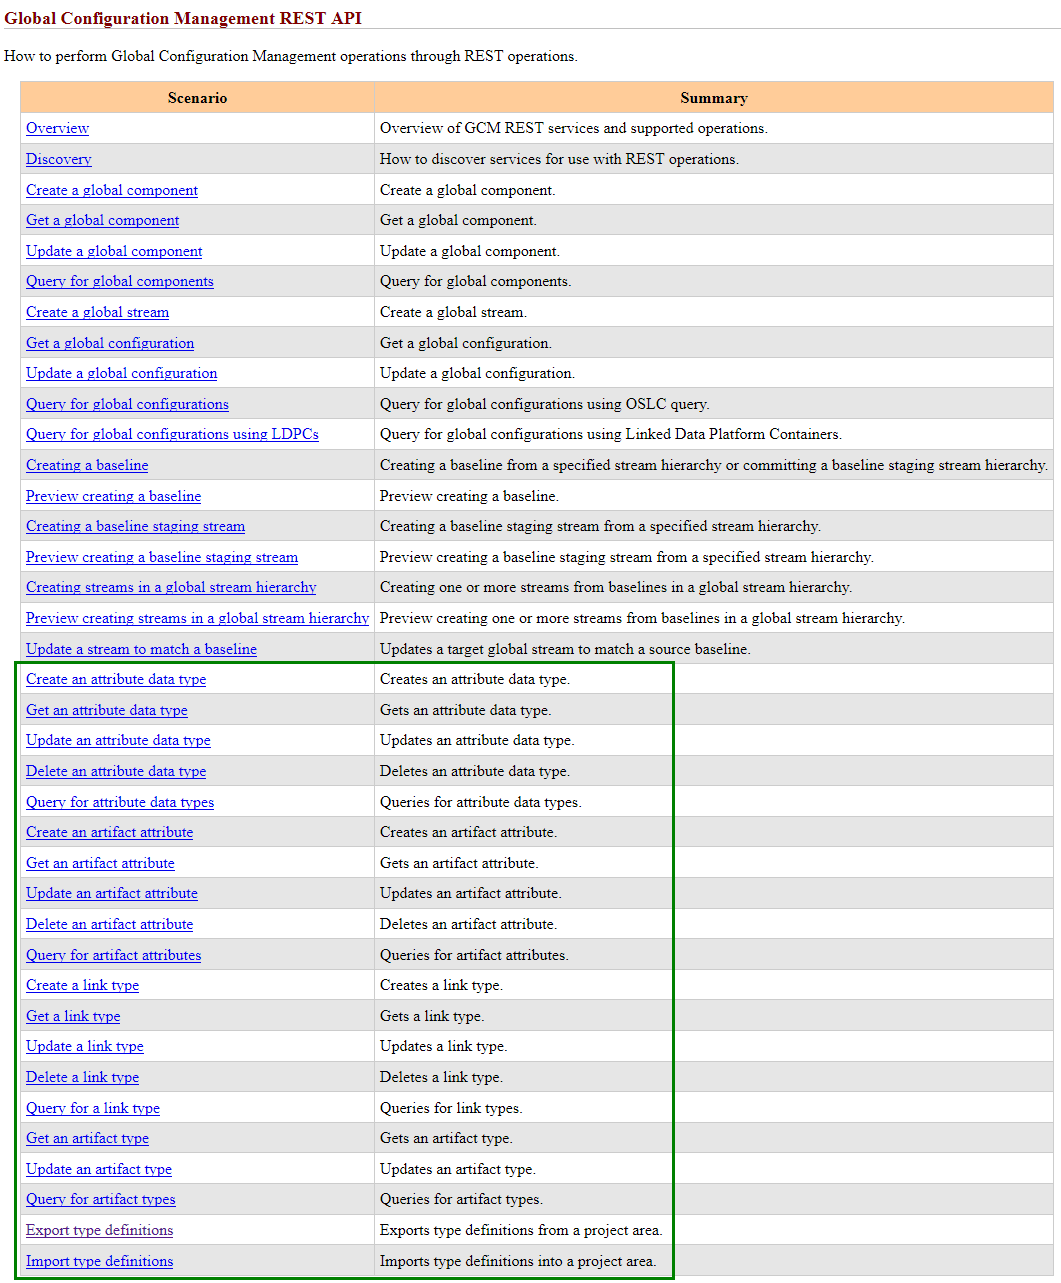
5. Automate type system changes with REST APIs You can now use REST APIs to manage the GCM type system:
To see examples of calling the API from Python and Curl, see the export and import type definitions APIs:
|
|
|
6. Quickly expand or collapse the configuration tree Expand or collapse the nested configurations in the tree by clicking Expand All or Collapse All. You no longer have to expand each node in the tree separately. Image of expanding the configuration tree (1) and the results (2): 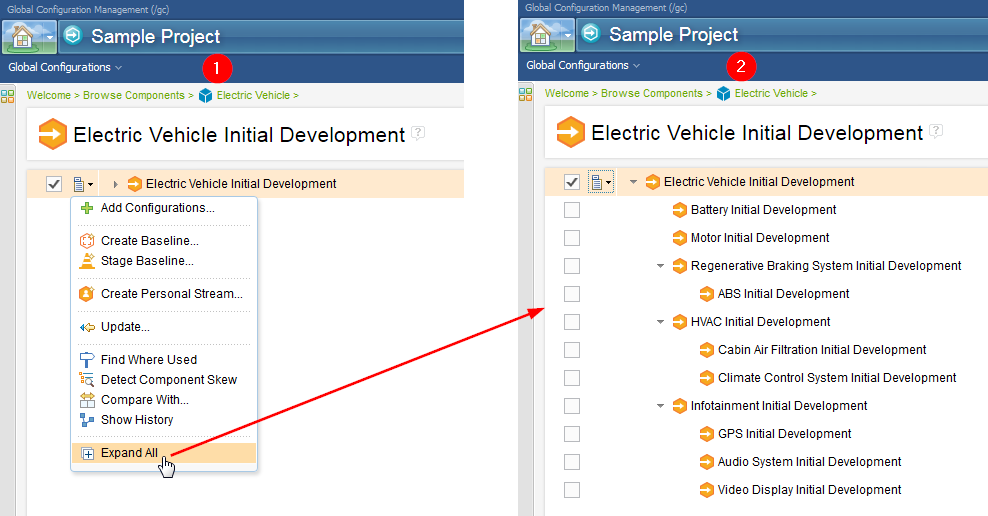
|
|
|
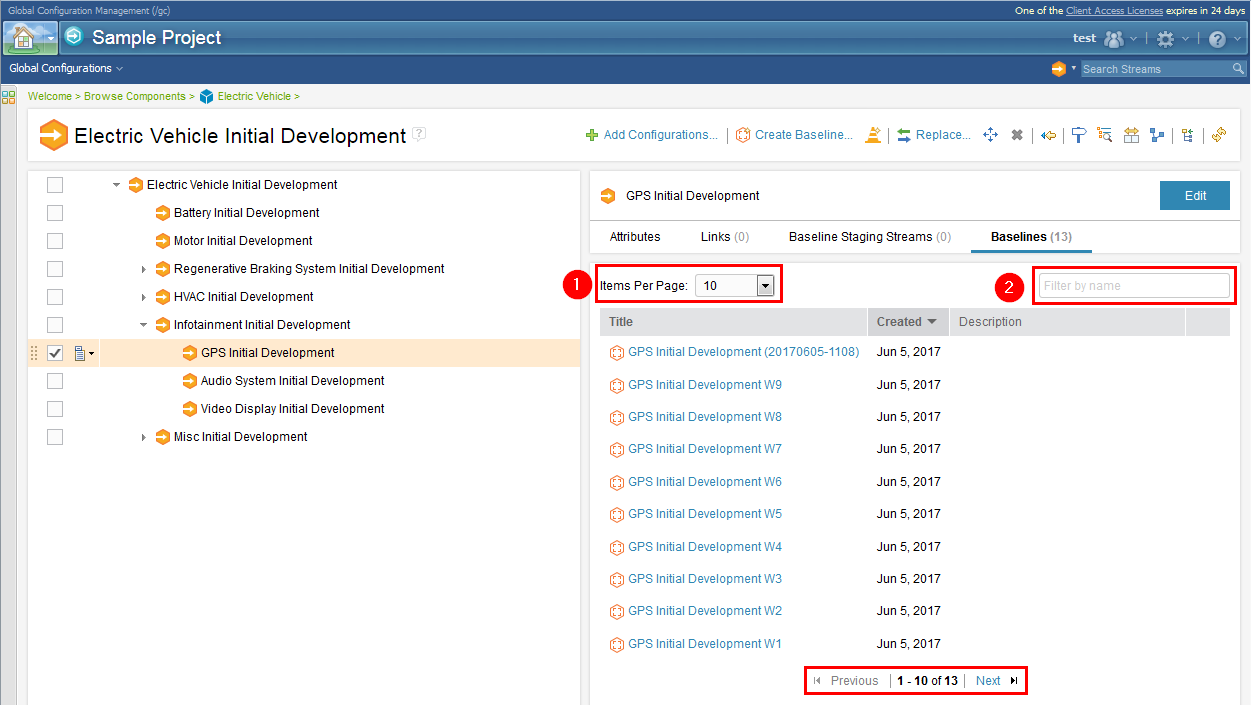
7. Find baselines quickly Now you can find baselines more quickly on the enhanced Baselines tab:
|
|
| Dashboards and work items are no longer publicly available, so some links may be invalid. We now provide similar information through other means. Learn more here. |