Upgrading from IBM Rational Reporting for Development Intelligence (RRDI) to the ALM Cognos Connector
This article goes through the different steps that were required to upgrade RRDI to a full Cognos Business Intelligence (BI) configured with the ALM Cognos Connector for Collaborative Lifecycle Managmenet (CLM) 6.0. This is in the form of a case study, provided as guidance for users who would like to upgrade an existing RRDI installation.
Some of the steps are marked as optional, they depend on how much from the RRDI installation / configuration you want to reuse. For this case study, We are working on a Windows server with Websphere and DB2.
Finally, please refer to the related products for specific support
Table of Content
- Installing Cognos
- DB2 Drivers
- Websphere Configuration
- Prepare for Building Cognos EAR file
- Building Cognos EAR file
- Deploy EAR file
- Deploy and Configure the ALM Cognos Connector
- Install CLM Archives
- Set up RQM Live Reporting
- Troubleshooting
I- Installing Cognos ^
- Download Cognos BI 10.2.1 (Part Number: CIM1TML) and 10.2.1 Fix Pack 2 (10.2.1.2) from IBM Fix Central. http://www-933.ibm.com/support/fixcentral/ Use the “Select a product” as below, Browse for Fixes, (NOT 10.2.1 Interim Fix 2).
- Extract both .tar.gz files for BI and the fix pack 2 into separate folders.
- Run the /winx64h/issetup.exe for Cognos 10.2.1.
NOTE: we will be refering to the cognos installation root path as <COGNOS Install location> for example
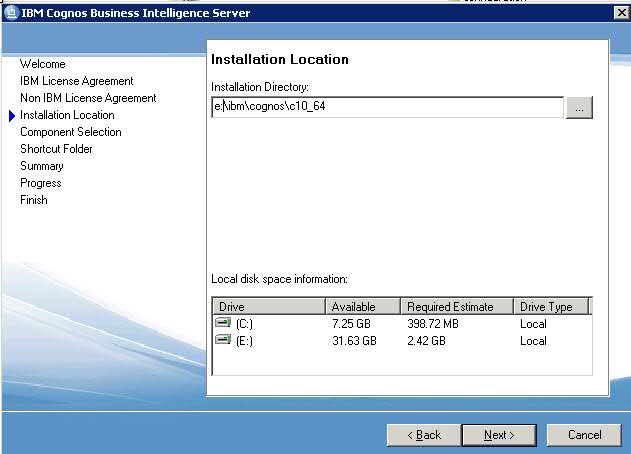
Specify <COGNOS Install location>c10_64 for the installation directory. Do not start Cognos configuration at the end of the install.
<COGNOS Install location>c10_64
would be replaced with
<COGNOS Install location>c10_64


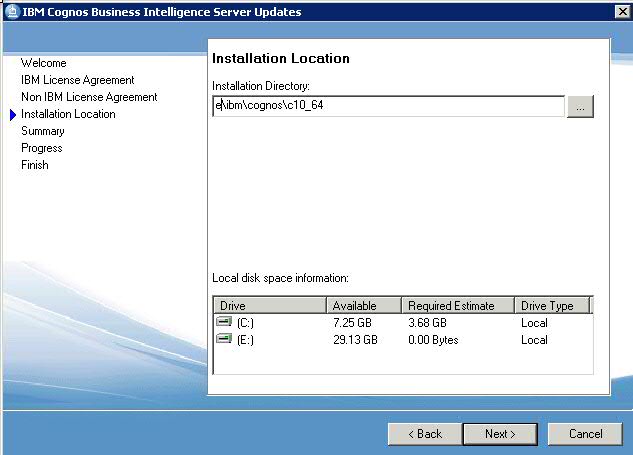
- Run the /winx64h/issetup.exe for Cognos 10.2.1.2. Specify the same directory (<COGNOS Install location>c10_64) for the installation directory.
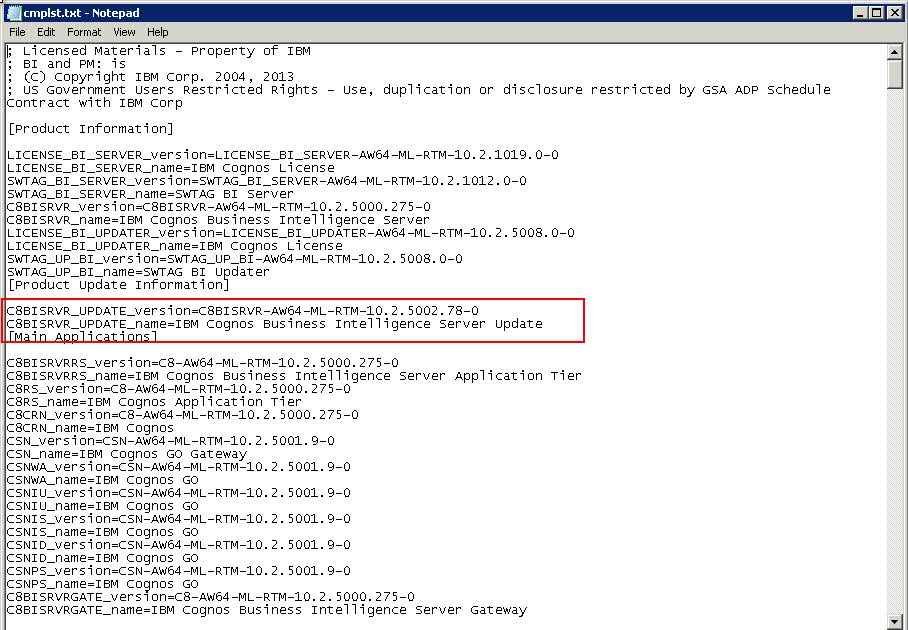
- To check if you have the correct version of Cognos installed, you can look in the <COGNOS Install location>c10_64cmplst.txt file and under [Product Update Information], check for: C8BISRVR_UPDATE_version=C8BISRVR-AW64-ML-RTM-10.2.5002.78-0 C8BISRVR_UPDATE_name=IBM Cognos Business Intelligence Server Update
II- DB2 Drivers^
- Copy the following DB2 drivers from the <DB2 Install Location>/java/ directory to the <COGNOS Install location>/c10_64/webapps/p2pd/WEB-INF/lib directory:
db2java.jar or db2java.zip
db2jcc*.jar
db2policy.jar

- If the db2java.jar file is missing and db2java.zip is present, rename db2java.zip to db2java.jar.
OPTIONAL: If you not want to reuse the existing content store, you will need to create a new database and later in the document refer to this database whenever we talk about the content store
- Create a DB2 database called RICM with the settings:
db2 create database ricm using codeset UTF-8 territory en PAGESIZE 16384
- Set up the RICM database with buffer pools and tablespaces, through the command line:
db2 UPDATE DB CFG FOR RICM USING APPLHEAPSZ 1024

  db2 UPDATE DB CFG FOR RICM USING LOCKTIMEOUT 240

  db2 CONNECT TO RICM

  db2 CREATE BUFFERPOOL BP4K IMMEDIATE SIZE 250 PAGESIZE 4 K

  db2 CREATE BUFFERPOOL BP32K IMMEDIATE SIZE 250 PAGESIZE 32 K

  db2 CREATE SYSTEM TEMPORARY TABLESPACE ST32 PAGESIZE 32 K MANAGED BY AUTOMATIC STORAGE EXTENTSIZE 16 OVERHEAD 10.5 PREFETCHSIZE 16 TRANSFERRATE 0.14 BUFFERPOOL BP32K

  db2 CREATE USER TEMPORARY TABLESPACE UT4K PAGESIZE 4 K MANAGED BY AUTOMATIC STORAGE EXTENTSIZE 16 OVERHEAD 10.5 PREFETCHSIZE 16 TRANSFERRATE 0.14 BUFFERPOOL BP4K

  db2 CREATE REGULAR TABLESPACE R4K PAGESIZE 4 K MANAGED BY AUTOMATIC STORAGE EXTENTSIZE 16 OVERHEAD 10.5 PREFETCHSIZE 16 TRANSFERRATE 0.14 BUFFERPOOL BP4K DROPPED TABLE RECOVERY ON

db2 CONNECT RESET - Restart DB2:
  db2 force applications all

  db2 db2stop force

  db2 db2start
III- Websphere Configuration^
Create New Profile
OPTIONAL: You may want to create a new Websphere profile, instead of reusing the one create for RRDI, in this case, follow the following steps:
NOTE: The default ports for HTTP* (9080, 9443) may conflict with the CLM server if it’s on the same machine. An easy workaround for this is to create 2 WAS profiles (AppSrv01 on port 9443, AppSrv2 on port 9444). Then delete the first profile. You will be left with a profile using port 9444, which does not conflict with CLM.
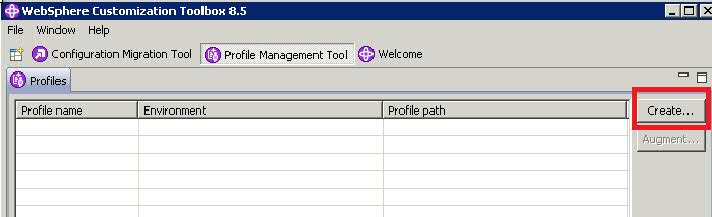
- Open the Websphere Customization Toolbox. Click Create button.
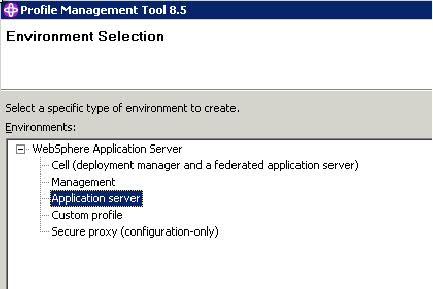
- Choose Application Server, click Next.
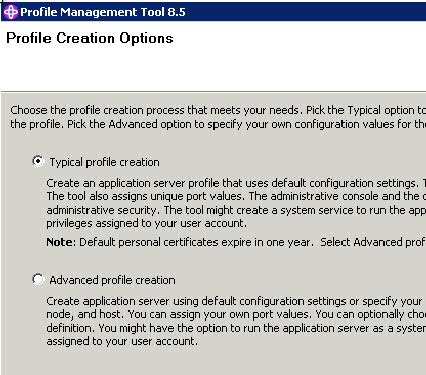
- Choose Typical profile creation, click Next
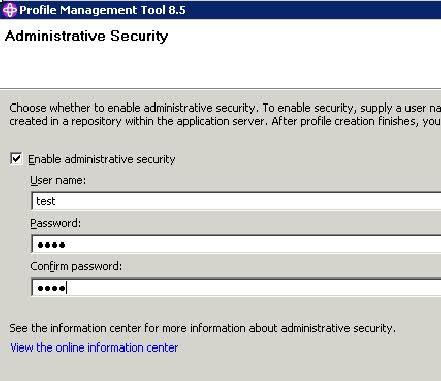
- Enter a new user/password for the administrative security, click on Next, then Create.
- Choose to launch the first steps console, click on Finish.
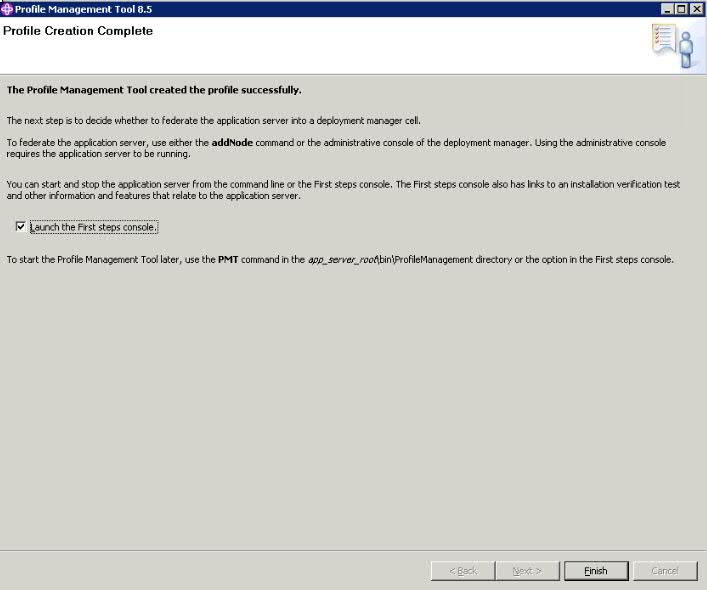
- (optional) As mentioned above, the WAS profile ports may conflict with the CLM ports if CLM is running on tomcat on the same machine. An easy workaround is to choose NOT to launch the first steps console at this point, and click on Finish here on step 6. Run through steps 1-5 again to create a second WAS profile (which will automatically use port 9444 instead of 9443). Then delete the first profile, leaving you with the second profile with ports that do not conflict.
First Profile, and second profile: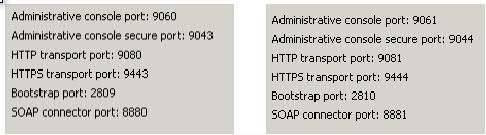
To delete a WAS profile, in a command prompt go to <WAS install dir>WebSphereAppServerbin and run: manageprofiles -delete -profileName AppSrv01
- Click on Installation Verification. This will start up the server for the first time and run some diagnostics.
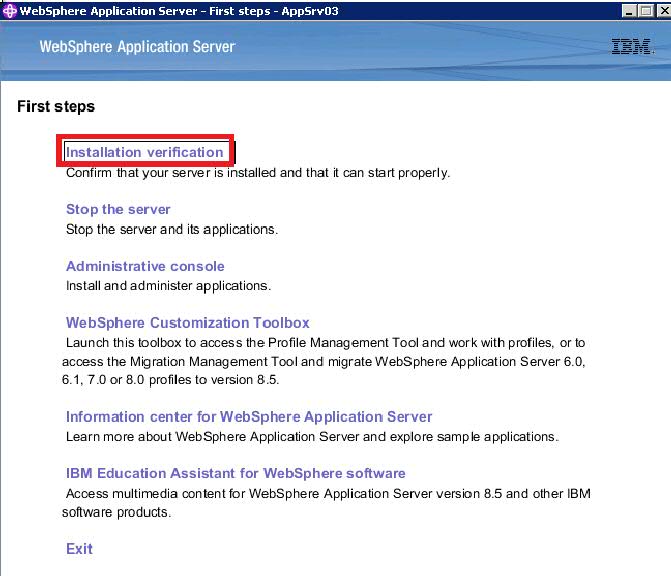
After the verification completes, close all of the WAS windows.
Configure Profile
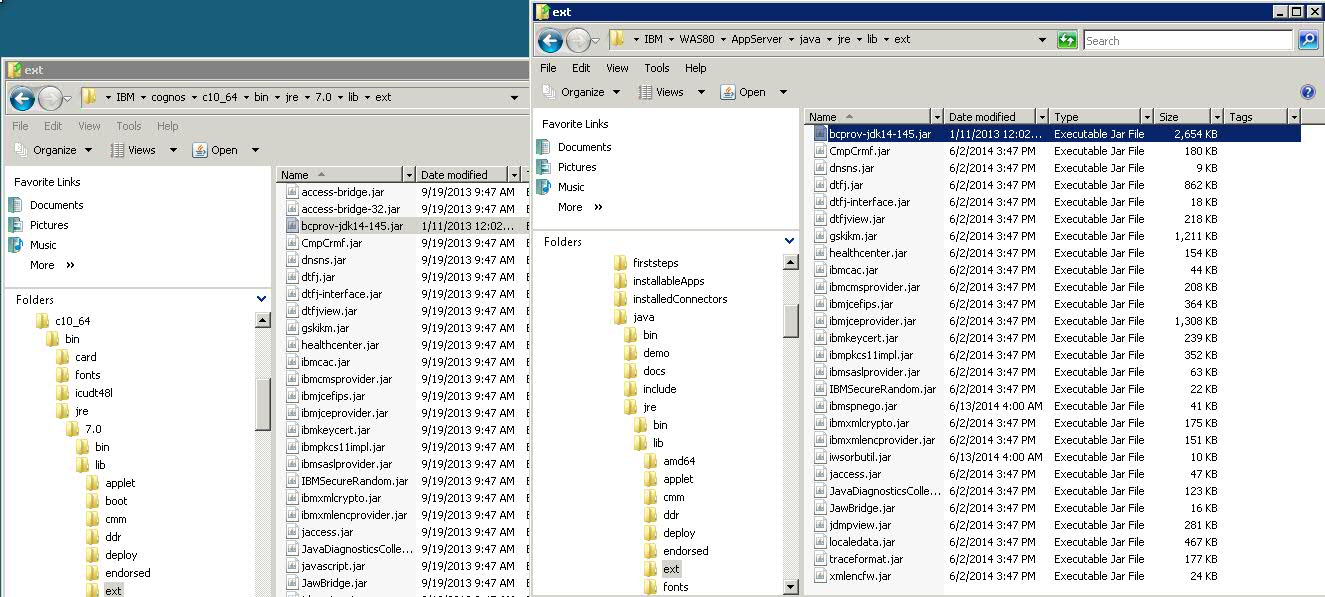
- Copy the <COGNOS Install location>c10_64binjre7.0libextbcprov-jdk14-145.jar file (Cognos data encryption file) to the <WAS Install Location>AppServerjavajrelibext directory
- Get the Content Store (RICM) connection information from RRDI cognos configuration.
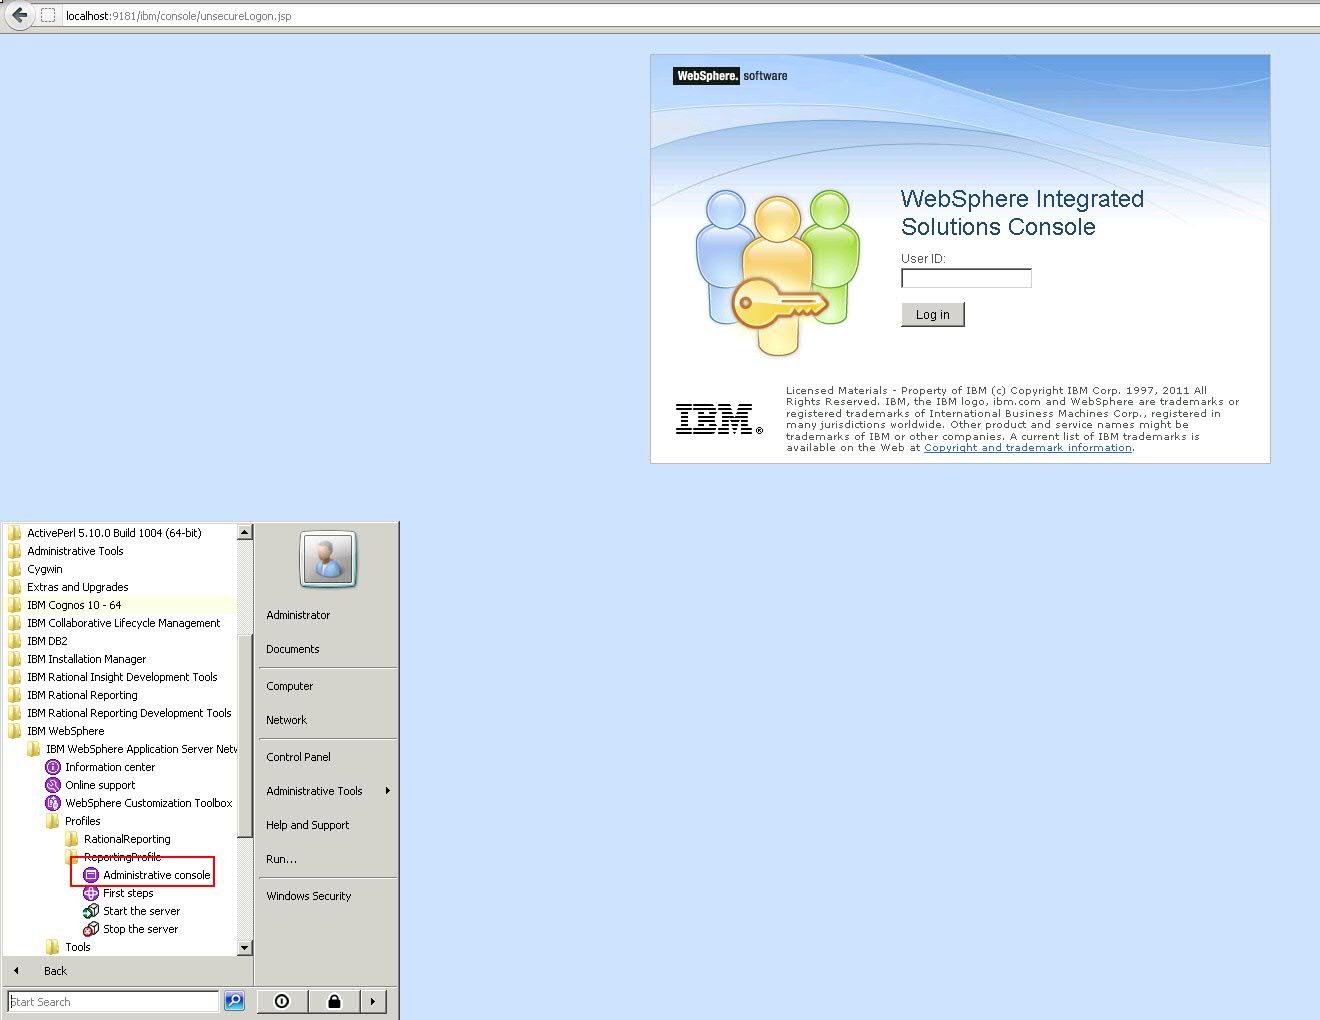
- Open the Websphere Administrative console (Start menu or https://localhost:9044/ibm/console), login as the administrative user.
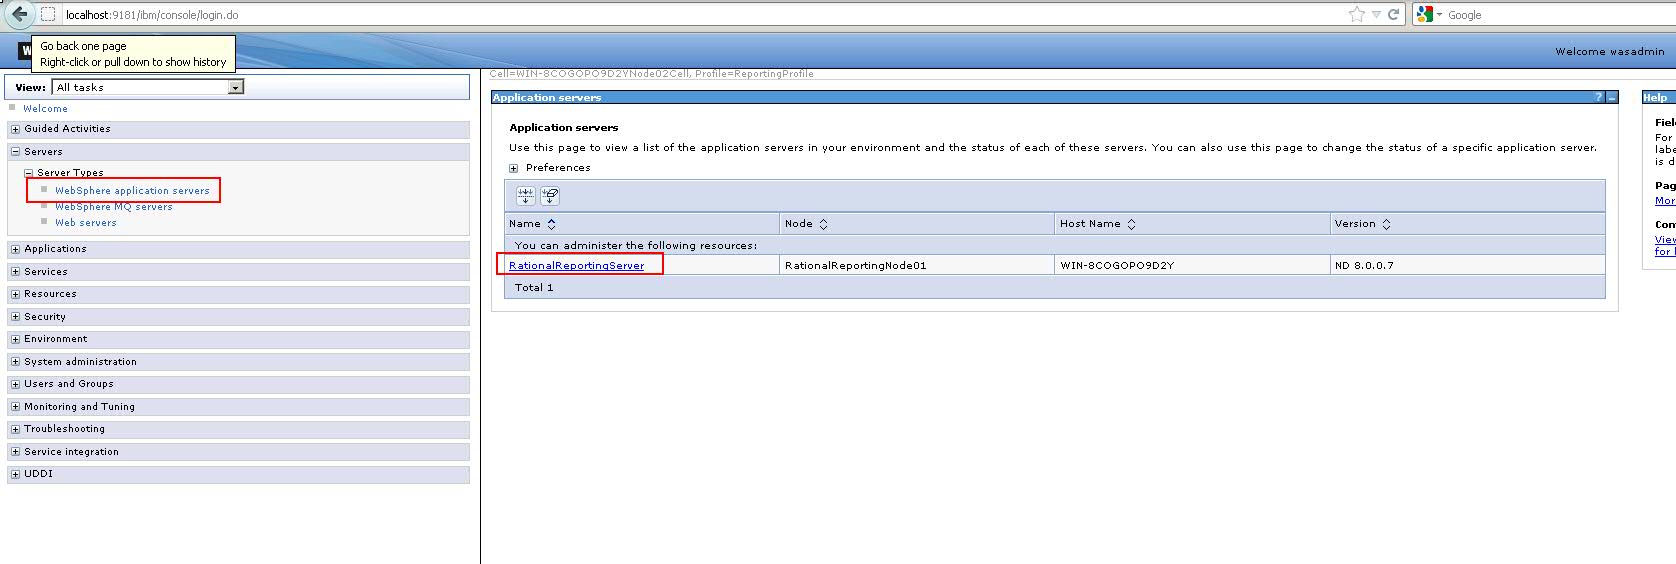
- Click on Servers>Server Types>WebSphere application servers>server1
- Click on Java and Process Management>Process definition, then Additional Properties>Java Virtual Machine.
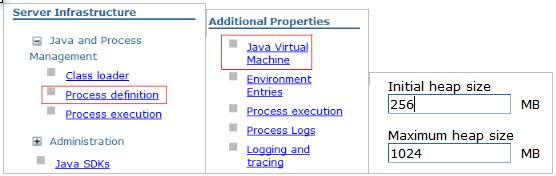
- Enter 256 for Initial heap size, 1024 for Maximum heap size and click Apply button (at bottom of page). Then click the “Save” link (at the top of the page).
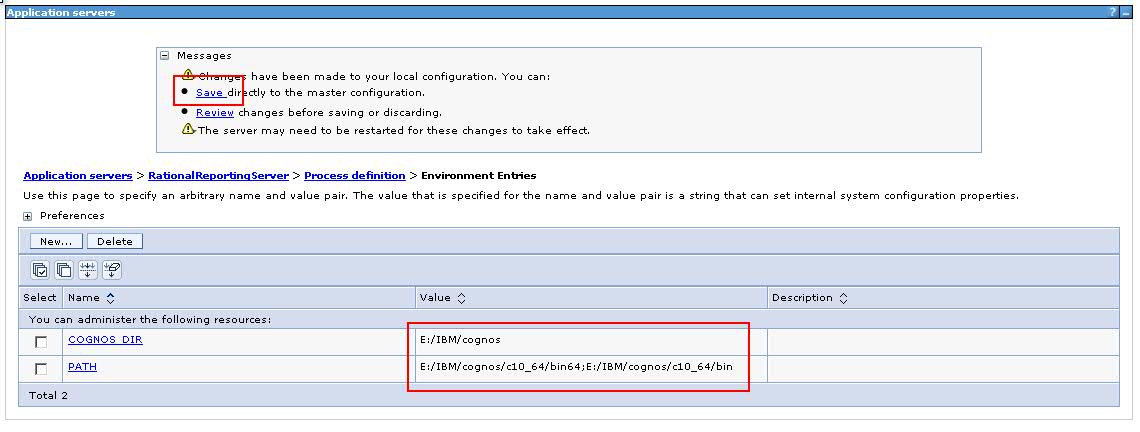
- Update COGNOS_DIR and PATH variable with the value of cognos root folder path and bin folder path (both bin64 and bin directories). Note that COGNOS_DIR has to end with cognos, even if BI is installed in cognosc10_64.
NOTE: this is specific to version 6.0 of the ALM Cognos Connector. This was fixed in version 6.0.1 and later of the ALM Cognos Connector, so that COGNOS_DIR should be set to the full install path of cognosc10_64 instead in those versions.
- (Optional: IPv6 only) If you are testing on an Ipv6 machine, go to Servers>Websphere Application Servers>server1>Process Definition>Java Virtual Machine>Custom Properties and click on New. Add the property: java.net.preferIPv6Addresses and set the value to true.
IV- Prepare for Building Cognos EAR file^
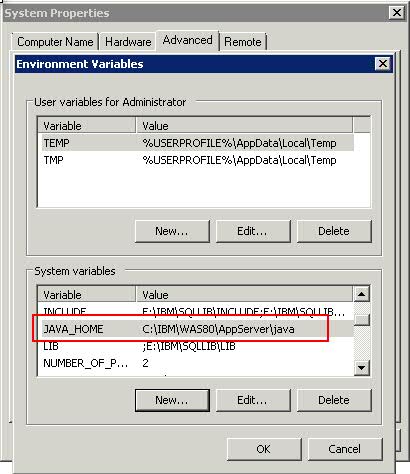
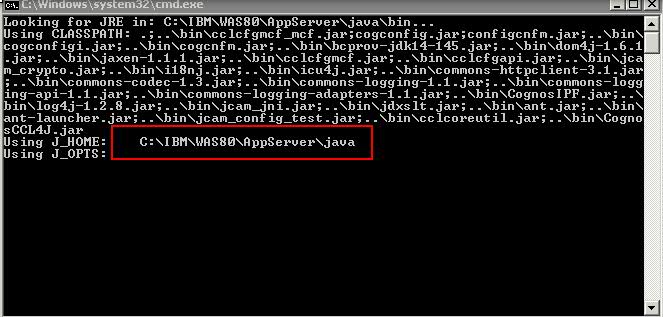
- Before we build and deploy the cognos EAR file to the websphere profile, make sure that the websphere jvm is used. One way of checking this is run the cogconfig.bat in a command prompt from the <COGNOS Install location>c10_64bin64 directory and check the output on the console (such as the J_HOME variable should show the path under WAS install folder). If it is not then we need to set JAVA_HOME to <WAS Install Location>AppServerjava
Update Cognos Configuration
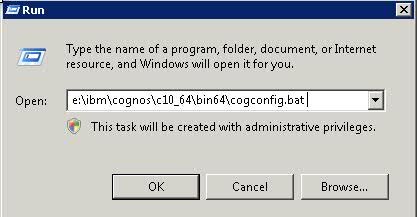
- In a new command window, run <COGNOS Install location>c10_64bin64cogconfig.bat
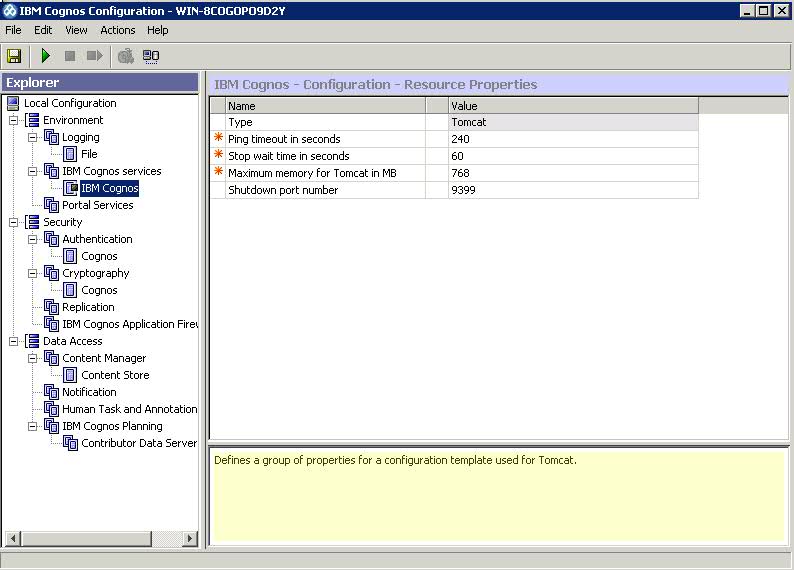
- In the “IBM Cognos Configuration” window, delete the node “Local Configuration > Environment > IBM Cognos Services > IBM Cognos. This node is for tomcat deployment only. So, we do not need it.
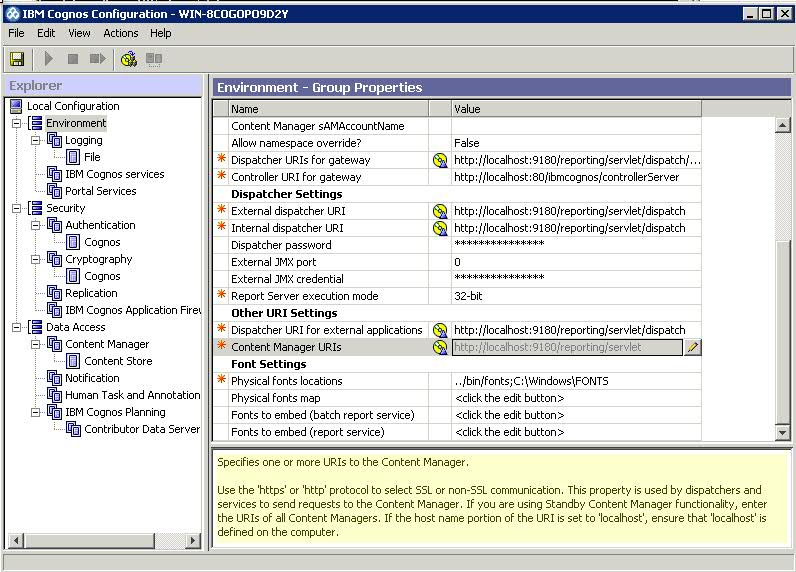
- Replace port 9300 with the “HTTP transport port” for WAS (which is 9081 in this machine, or 9080 by default) in “Local Configuration > Environment” (5 URLs).
NOTE on the URLs:
– A default Cognos install will use p2pd as the context root. Your previous installation of RRDI was set with a context root “reporting”, you can either choose to keep it or change it to the Cognos default.
– If you decide to keep rhw context root as reporting, you will need to update all the urls in Cognos configuration and replace p2pd with reporting
– If you decide to use p2pd, you will later need to update references to the BI server such as in your IHS configuration or all CLM report configurations.
– In this example we will keep the reporting context root, and therefore replace /p2pd with /reporting
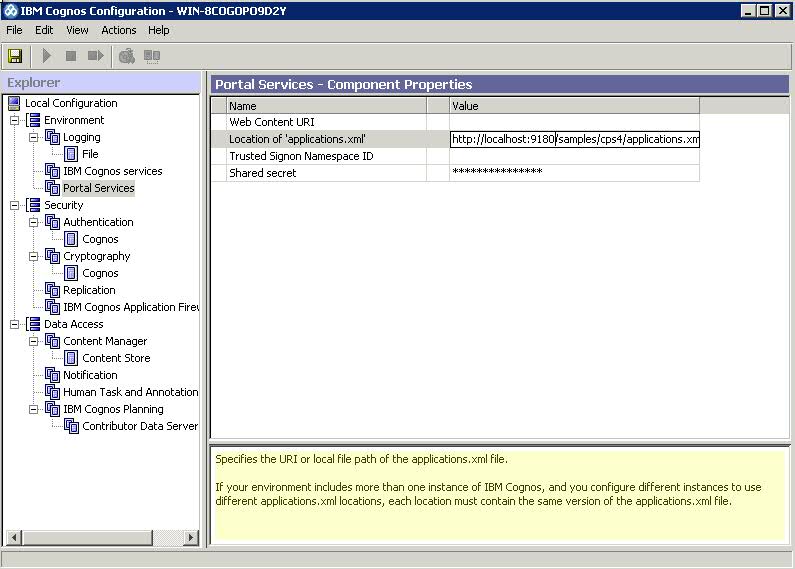
- Replace port 9300 with 9081 in “Local Configuration > Environment > Portal Services” (1 URLs).
- (Optional: IPv6 only) If installing on a IPv6 machine, you need to set the property: Local Configuration>Environment>IP Version for Host Name Resolution to Use IPv6 addresses.
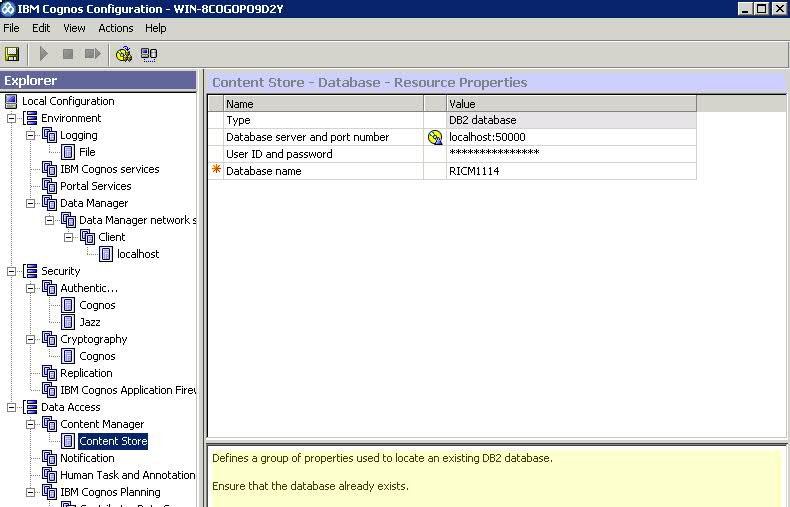
- In “Local Configuration > Data Access > Content Manager > Content Store” and set it with the database server value, for example: localhost:50000. Enter the user id and password (db2admin). Make sure the database name is correct.Specify here the connection to the existing content store as you had it for RRDI

- Verify the Content Store is setup properly. (Right click on “Content Store” node and select “Test”.)
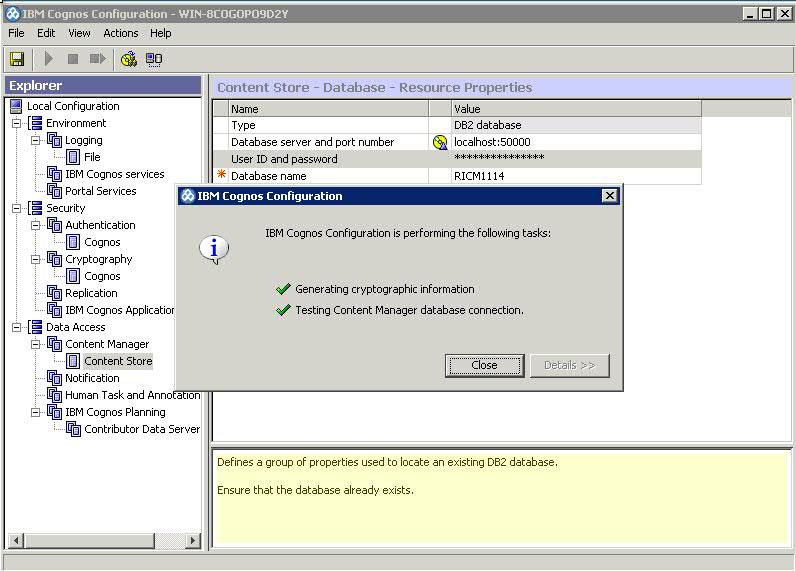
- Click Save.
NOTE: You may get a message that the content store will be updated next time the BI server start.
V – Building Cognos EAR file^
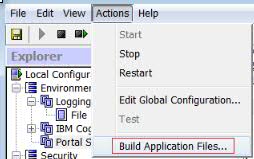
- Click “Actions > Build Application Files…”
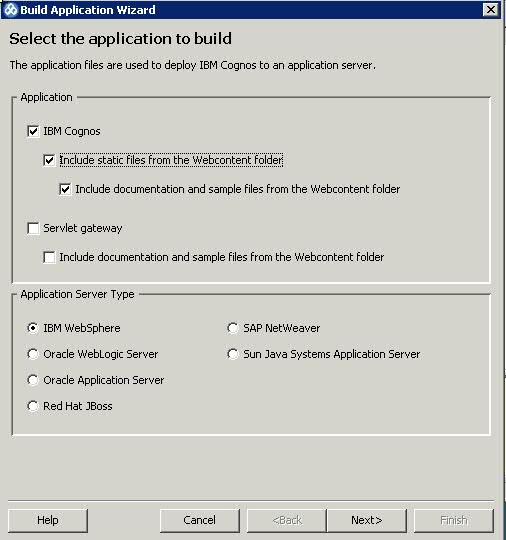
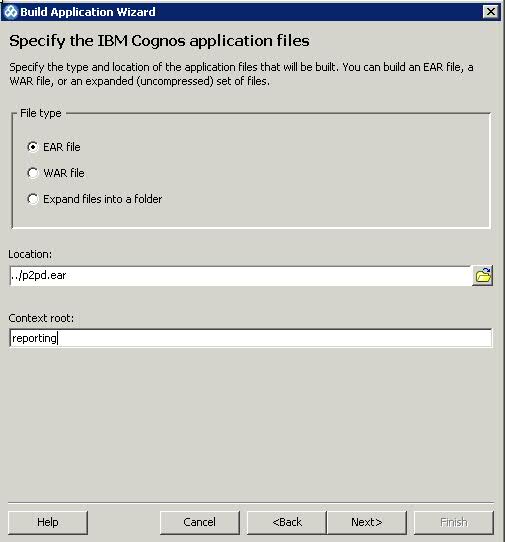
- Change the default context root from p2pd to reporting (you can leave the name of the ear file as p2pd.ear)
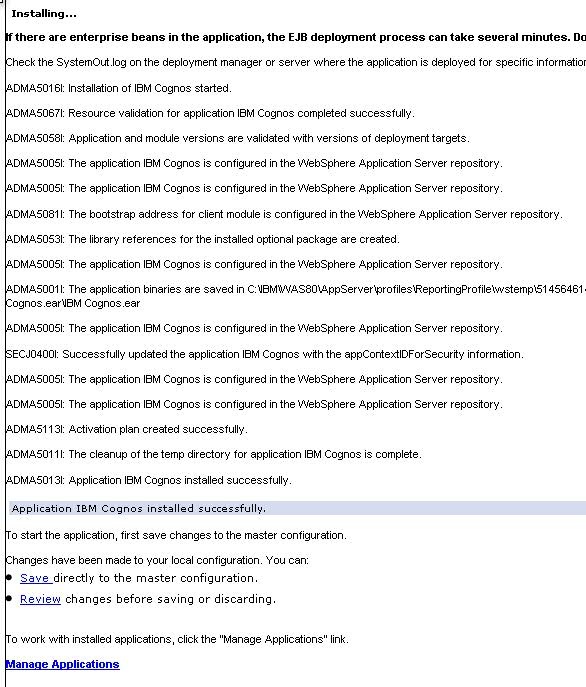
VI – Deploy EAR file^
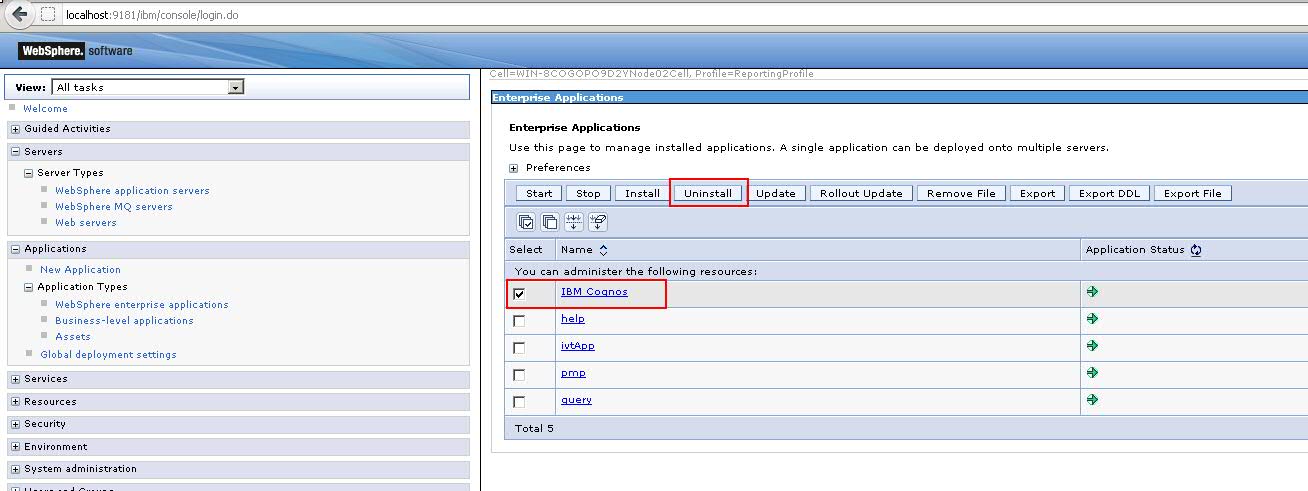
- Open the WAS Administrative console, click on Applications>….
select IBM Cognos application and click uninstall
- Stop the WAS server.
- Navigate to the profile directory and clear all the cache
- <WAS Install Location>AppServerprofilesReportingProfiletemp
- <WAS Install Location>AppServerprofilesReportingProfilewstemp
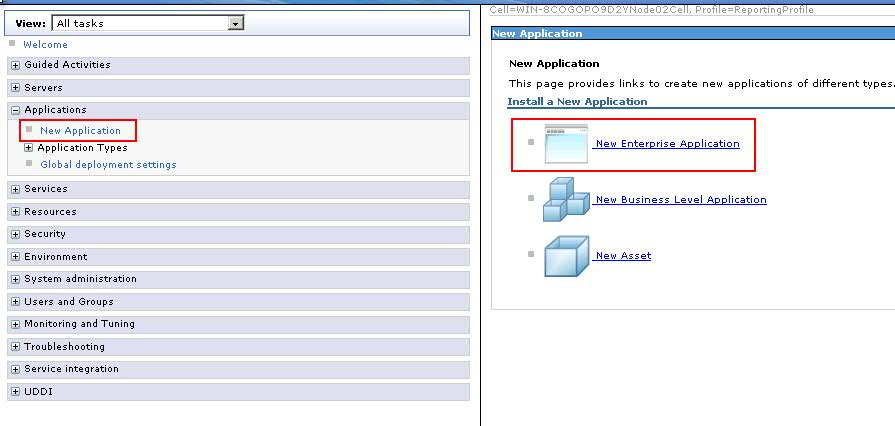
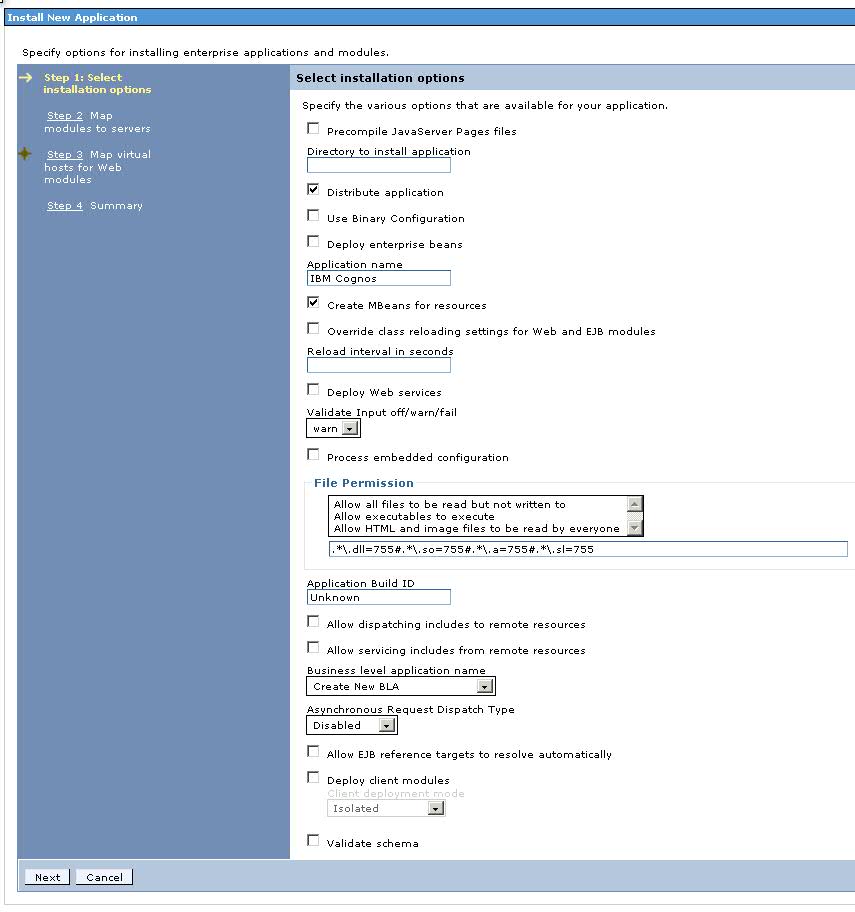
- Start the WAS server. Open the WAS Administrative console, click on Applications>New Application>New Enterprise Application.
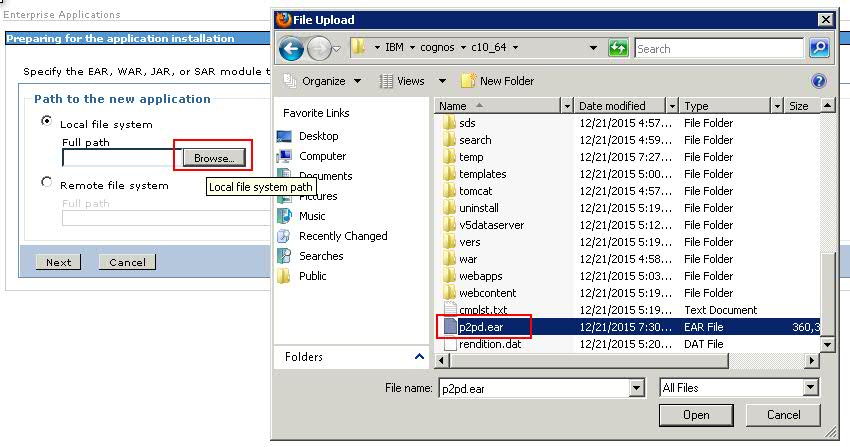
- Select “Local file system” and then click the Browse button. Navigate and select p2pd.ear file in <COGNOS Install location>c10_64 folder.
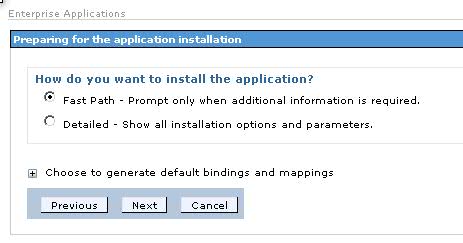
- Select Fast Path
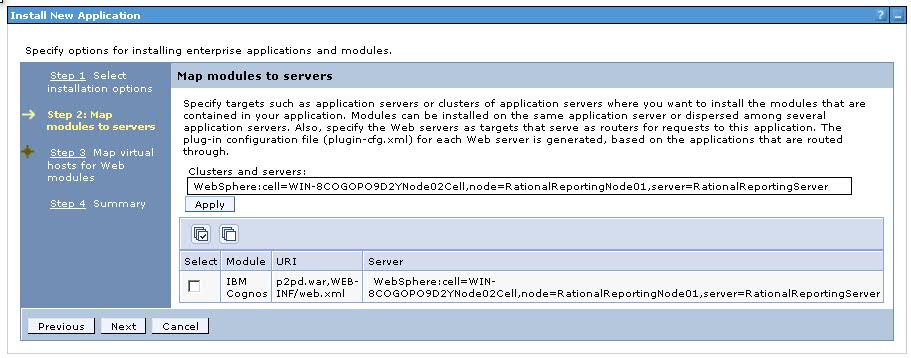
- Click Next, Next again and then check the Checkbox in “Map modules to servers”.
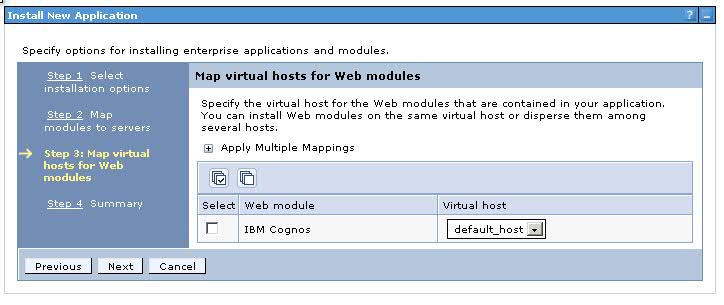
- Click Next again and check the checkbox in “Map virtual hosts for web models”.
 Click Next then click Finish button.
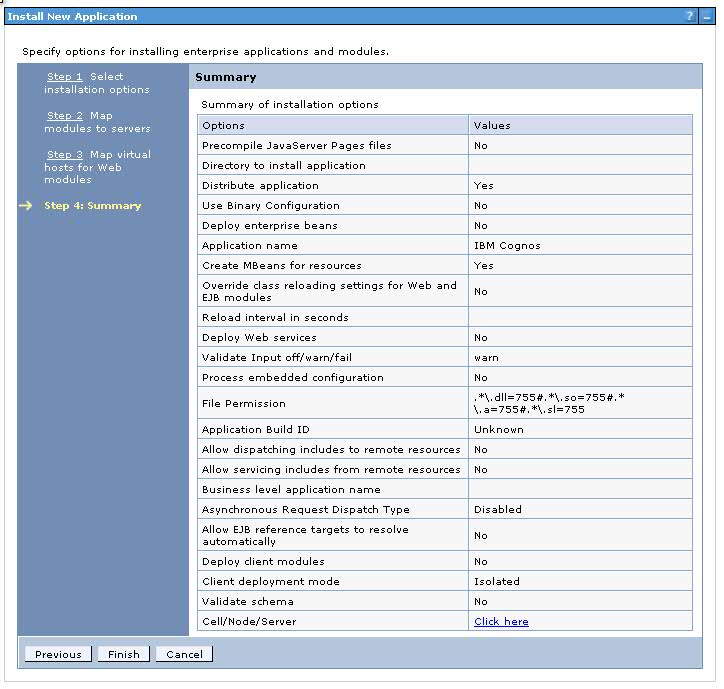
Click Save link.
- Due to a BUG of creating the folder in WAS profiles subfolder, we need to do copy the content of the webcontent folder in the cognos installation directory to the ../profiles/[profileName]/installedApps/[cellName]/IBM Cognos.earp2pd.war directory, for example:
- Stop the AppSrv02 server.
- Go to “<WAS Install Location>AppServerprofilesAppSrv02installedAppsMyServerNode02CellIBM Cognos.earp2pd.war” and delete all files and folders except for the “WEB-INF” directory.
- Copy all content of <COGNOS Install location>c10_64webcontent to <WAS Install Location>AppServerprofilesAppSrv02installedAppsMyServerNode02CellIBM Cognos.earp2pd.war
- Start the AppSrv02 server, and go to the Cognos BI server link to make sure that the install and setup worked on its own without any ALM Cognos Connector bits added in: http://<server:port>/reporting/servlet/dispatch
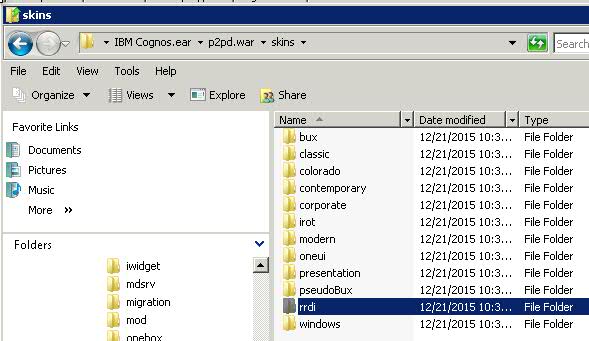
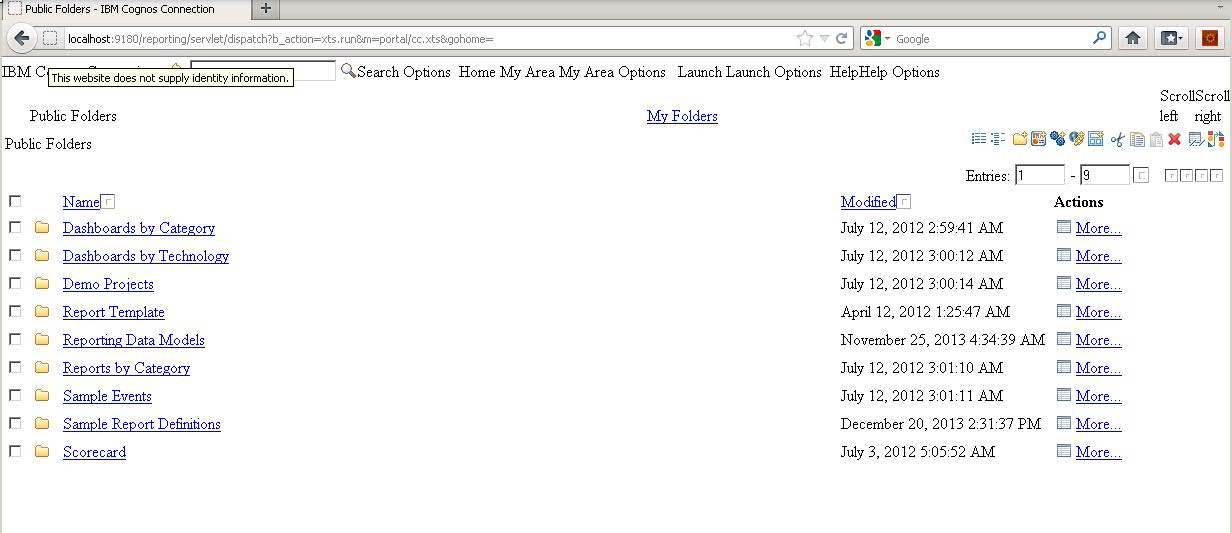 NOTE: The web UI appears with no theme because the old Rational theme no longer exists, each user will need to update their profile to change the theme. Alternatively, rename one of the style to “rrdi” in <WAS Install Location>AppServerprofilesReportingProfileinstalledAppsWIN-8COGOPO9D2YNode02CellIBM Cognos.earp2pd.warskins
Stop the server again afterwards.
NOTE: If your report server was configured with HTTPS, having make sure that the HTTP configuration works, you can change it at this point
- Web.xml needs to be manually changed to use DispatchServlet instead of PogoServlet. The file needs to be changed in 3 locations:
- Cognos: <COGNOS Install location>c10_64webappsp2pdWEB-INFweb.xml
- WAS profile: <WAS install Location>AppServerprofiles<profile name>installedAppsMyServerNode02CellIBM Cognos.earp2pd.warWEB-INFweb.xml
- WAS cache: <WAS install Location>AppServerprofiles<profile name>configcellsMyServerNode02CellapplicationsIBM Cognos.eardeploymentsIBM Cognosp2pd.warWEB-INFweb.xml
Search for PogoServlet in each file. Change the following entry(only occurs once in the file):
<param-value> com.cognos.pogo.transport.PogoServlet </param-value>
And replace it with:
<param-value> com.ibm.rational.reporting.servlet.DispatchServlet </param-value>
VII – Deploy and Configure the ALM Cognos Connector ^
Before proceeding with the following steps, you must have installed the ALM Cognos Connector , for use with CLM 6.0, you can can download it from jazz.net
- The following folders need to be copied from the ALM Cognos Connector:
- <ALM Cognos Connector Install Location>setuprrdicognoswebcontentcommon
- <ALM Cognos Connector Install Location>setuprrdicognoswebcontentmdsrv
- <ALM Cognos Connector Install Location>setuprrdicognoswebcontentreportstyles
- <ALM Cognos Connector Install Location>setuprrdicognoswebcontentschemas
And pasted into this location in the WAS profile that Cognos BI is running on:
[WAS Installation Directory]AppServerprofiles[profile name]installedAppsMyServerNode02CellIBM Cognos.earp2pd.war
The paste should merge with existing folders, and “copy and replace” over existing files. - Copy all jazz authentication jar files from ALM Cognos Connector install directory (<ALM Cognos Connector Install Location>setuprrdiclmcognoswebappsp2pdWEB-INFlib ) to cognos and WAS, then delete the older versions of any duplicated files in both of those locations (commons-codec-1.3.jar and commons-logging-1.1.jar)
- Cognos folder is <COGNOS Install location>c10_64webappsp2pdWEB-INFlib
- WAS folder is <WAS Installation Directory>AppServerprofiles<profile name>installedAppsmyServerNode02CellIBM Cognos.earp2pd.warWEB-INFlib
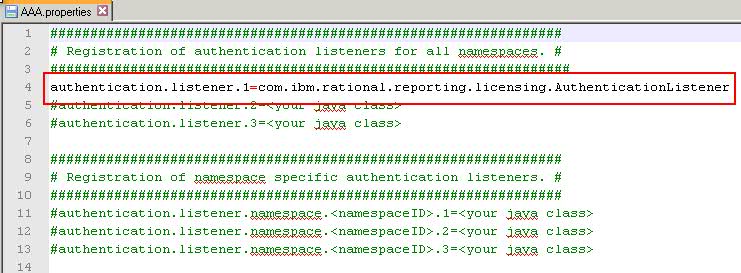
- Go to folder “<ALM Cognos Connector Install Location>setuprrdiclmcognosconfiguration”, make sure the AAA.properties contains the cognos authentication handler class name (authentication.listener.1=com.ibm.rational.reporting.licensing.AuthenticationListener).
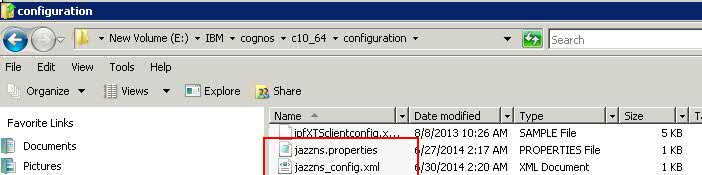
- In the same folder, there is another file called jazzns.properties.
This file contains the information about CLM authentication (consumer key and secret, url for both server CLM and cognos server itself) that Cognos BI server can used for connect to the CLM server.Replace jazzns_config.xml and jazzns.properties with the correspondingn files from your previous <RRDI installation folder>/cognos/configuration.
Your JTS already contains the key and we decided to reuse reporting context uri, so no change have to be made to the file.
OPTIONAL: If you have issue with the jazzns_config.xml file, you can recreate the key and secret and update it with the values. To do so:
- Go to https://clmserver:9443/jts/admin#action=com.ibm.team.repository.admin.configureOAuth
- In the “Register Consumer” section,
Enter com.ibm.rational.reporting in “Consumer Name” field.
Enter test in the “Consumer Secret” field.
Select the Trusted checkbox and click “Register”.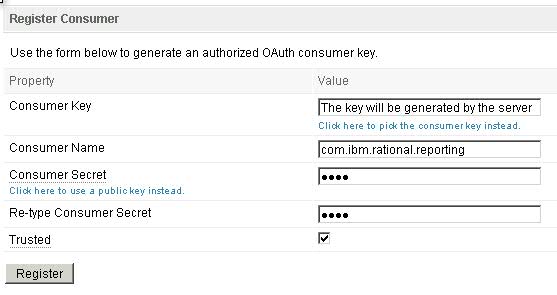
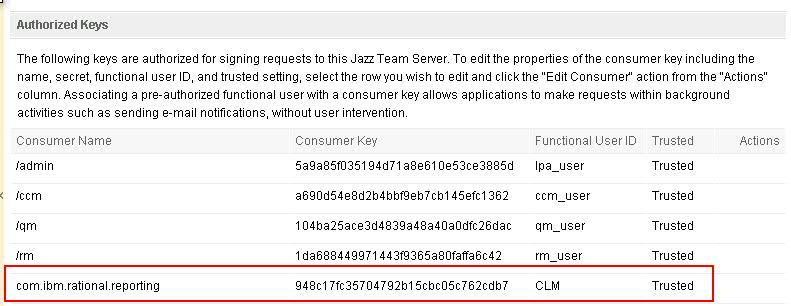
- A “com.ibm.rational.reporting” consumer name is added to the “Authorized keys” list.
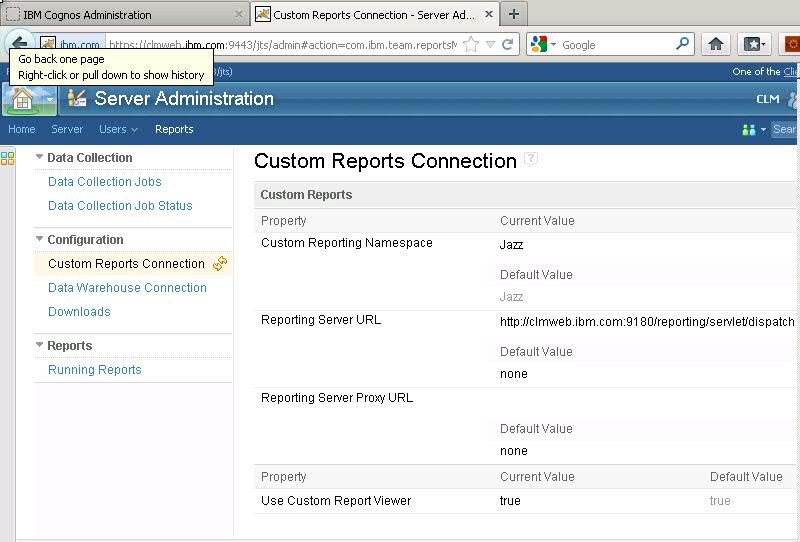
- go to the “Report” section and on the left pane, click “Custom Reports Connection”.
Make sure the “Custom Reporting Namespace” is Jazz
Set the “Reporting Server URL” to “http://<server:port>/reporting/servlet/dispatch” or “https://<server:securePort>/reporting/servlet/dispatch” (https is needed for SSO)
- Go to Server > Advanced Properties, search for trusted. Then enter “http://<server:port>/reporting” into the “Trusted URIs for client authentication and redirection” field. Then click Save button at the top of the page
- Repeat step 4 for RM, CCM, and QM.
- Open the file jazzns_config.xml in <ALM Cognos Connector Install Location>setuprrdiclmcognosconfiguration in a text editor
- Fill in the fields of the jazzns_config.xml file to make it look like: (NOTE: make sure the jazz URL is https and the report server URL is http. The Oauth-key and secret are those created above in step 2-3.
<jazz-namespace encrypted="false"> <jazz-server url="https://<CLMServer>:9443/jts" oauth-key="948c17fc35704792b15cbc05c762cdb7" oauth-secret="test"/> <report-server url="http://<CognosServer:Port>/reporting/servlet/dispatch"/> </jazz-namespace>
Note the encrypted=”false”
Then save the file.
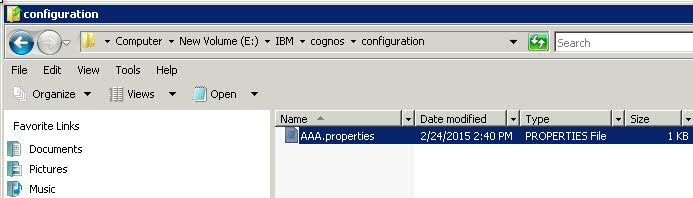
- Copy AAA.properties from “<ALM Cognos Connector Install Location>setuprrdiclmcognosconfiguration” to “<COGNOS Install location>configuration”.
NOTE: In 6.0, you will need to create the directory; this is due to COGNOS_DIR having to be set as <COGNOS Install location> instead of <COGNOS Install location>c10_64.
- Copy the rest of the files (other than AAA.properties) from “<ALM Cognos Connector Install Location>setuprrdiclmcognosconfiguration” to “<COGNOS Install location>c10_64configuration”
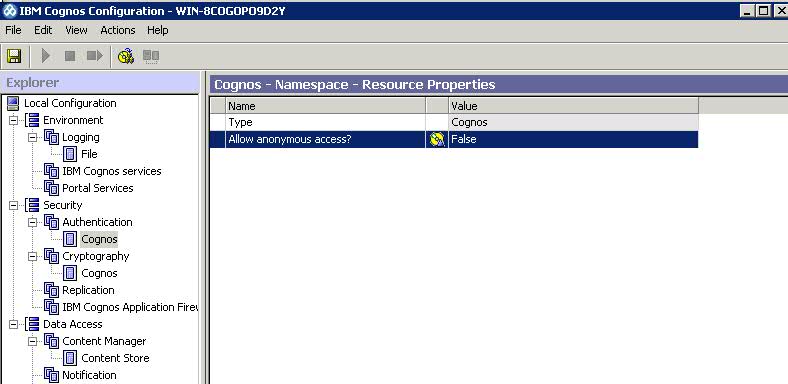
- In <COGNOS Install location>c10_64bin64, run cogconfig.bat. In “Local Configuration >Security > Authentication > Cognos”, set the “Allow anonymous access” to false.
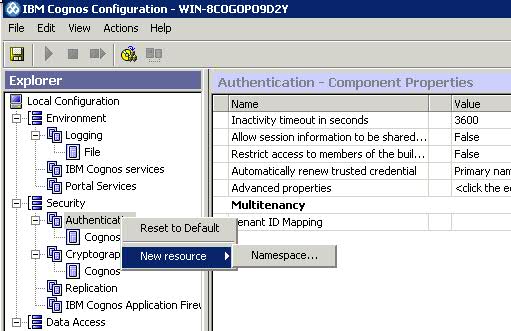
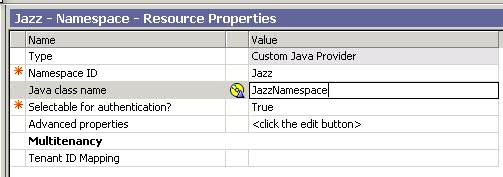
- Right click on the Local Configuration>Security>Authentication node and select “New resource > Namespace…”.
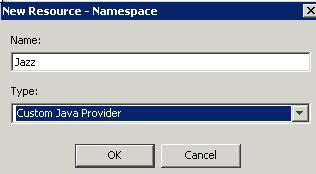
- Enter “Jazz” in Name field. Select “Custom Java Provider” in Type field, click on Ok.
- Then select the new “Jazz” node, enter “Jazz” in NameSpaceID field. Enter “JazzNamespace” in “Java class name” field.
- Save and close the Cognos Configuration window.
- Now stop and restart the WAS so that it can load all the new authentication library files (*.jar) that we have copied into WAS previously.
- Open a web browser and enter the report server url to check that it’s working(will need to wait a few minutes for it to initialize):
http://localhost:9081/reporting/servlet/dispatch NOTE: Cognos startup log: <COGNOS Install location>c10_64logscogserver.log
VIII – Install CLM Archives^
Download CLM Archives
The following steps may not be required since you are upgrading from an existing content store, you may already have the out of the box CLM reports.
- Download the Archive Files for Rational Reporting from each of the CLM apps (JTS, CCM, RM, QM). Go to jts/admin, click on Reports, click on Downloads, click on Archive Files for Rational Reporting.
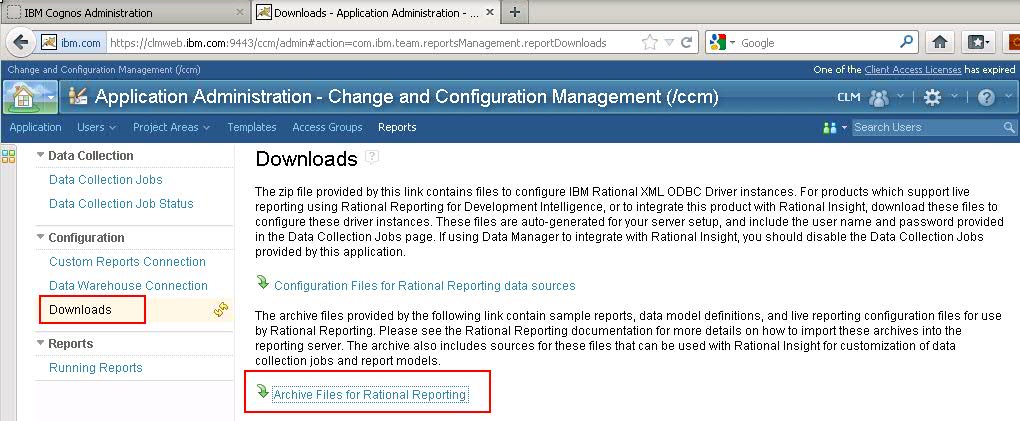
Unzip the downloaded “Cognos_Report_Server_Archive_Files.zip” file and copy the following files from inside the Rational Reporting Install directory that gets extracted (there are zip files within the zip file) to the cognos deployment folder:
- CCM: Cognos Change and Configuration Management Reports.zip
- JTS: Rational Reporting Data Model (DW + CALM).zip
- QM: Cognos Quality Management Reports.zip
- RM: Cognos Requirements Management Reports.zip
The Cognos deployment folder is <COGNOS Install location>c10_64deployment.
Deploy the Archives
- Open a web browser and enter the link below:
http://<server:port>/reporting/servlet/dispatch
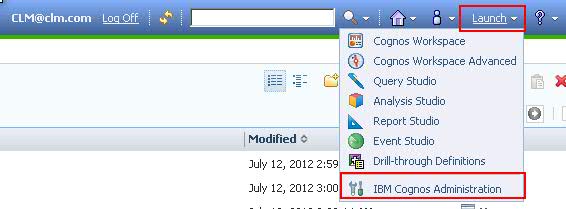
- Click on Launch in the top right corner, then click on IBM Cognos Administration.
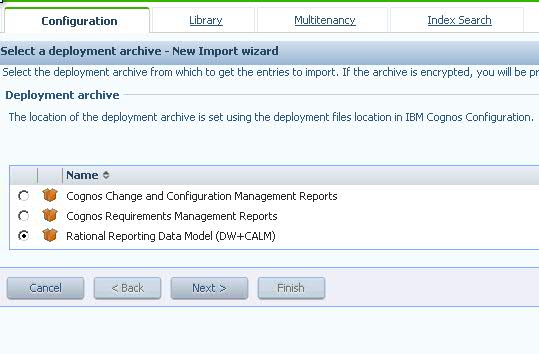
- Select “Content Administration link (left of screen). Click “New Import” tool button.
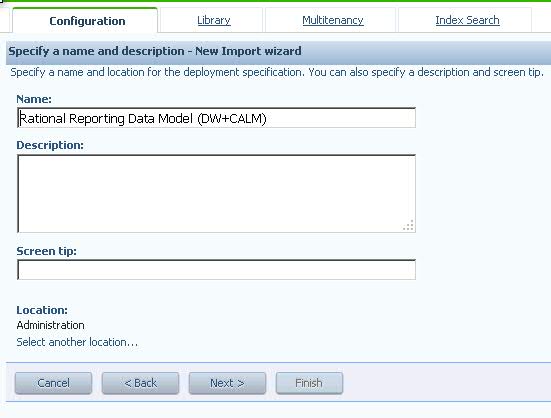
- First, select the “Rational Reporting Data Model (DW+CALM) and then click Next and Next again.
If you already have a task with this name, you can give it another name, otherwise at the end of the wizard, you will be prompted to change it.
- Select the checkbox in front of the package name and then click Next.
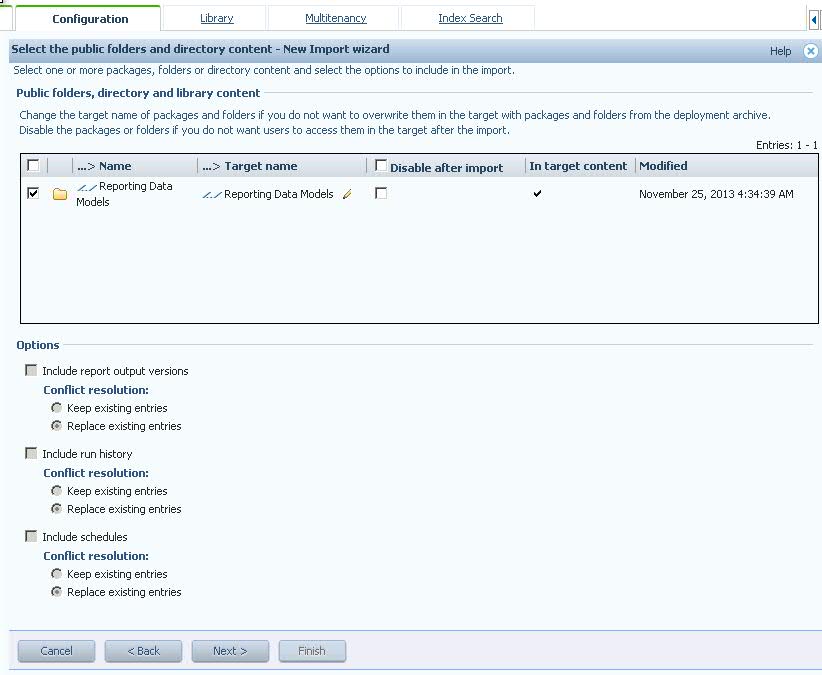
- Make sure the following checkbox and radio buttons are selected if you want to overwrite the old package, otherwise, in the previous step, you should create a new folder.
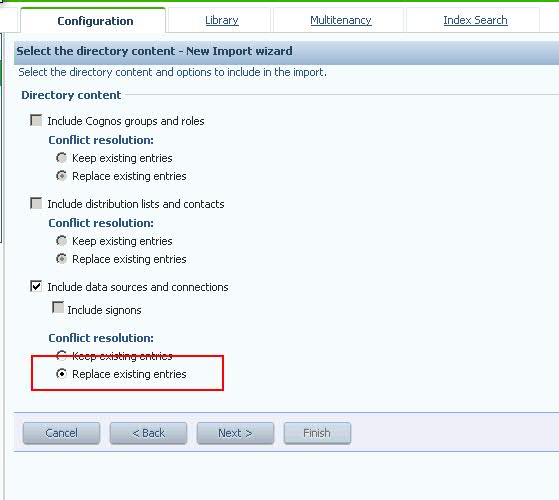
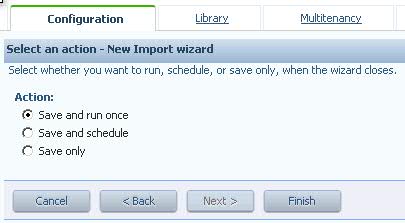
- Continue clicking Next button until the last page and then click Finish and then Run.

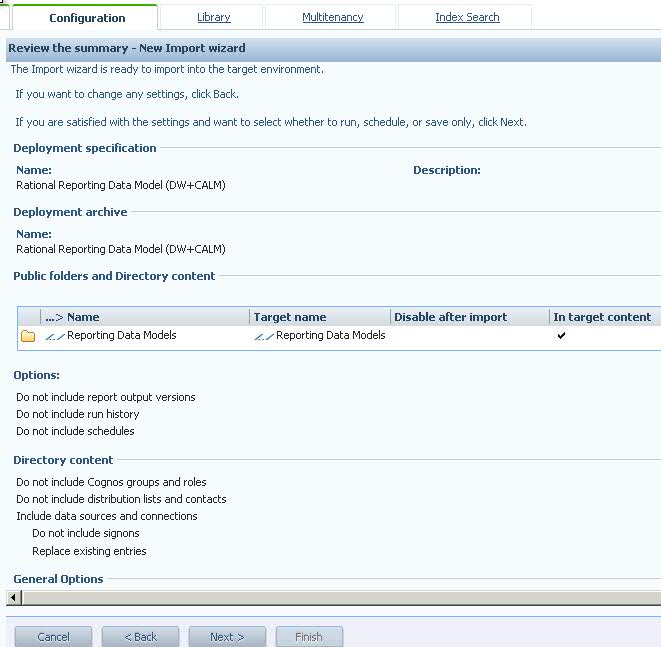
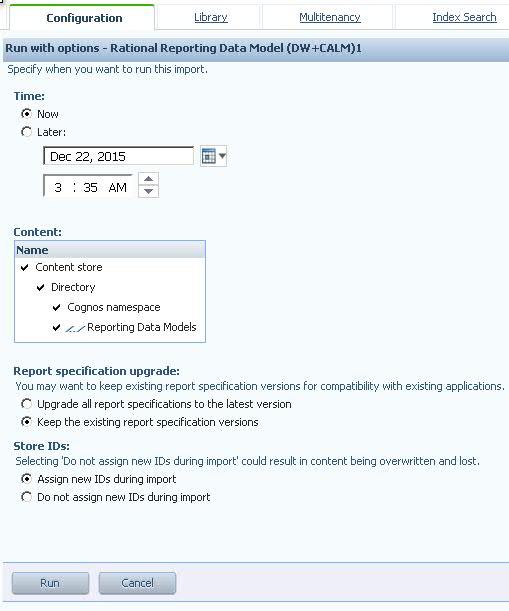
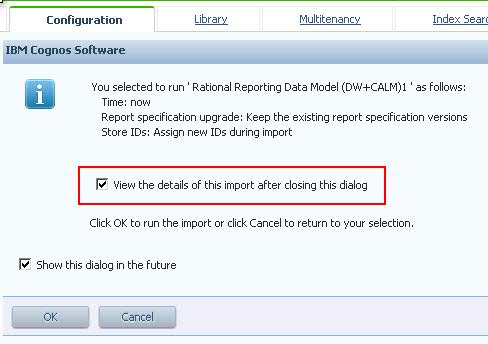
Check the option to view the details of the import.
- Verify that the import is successfully imported (NOTE: Few warnings should be fine)
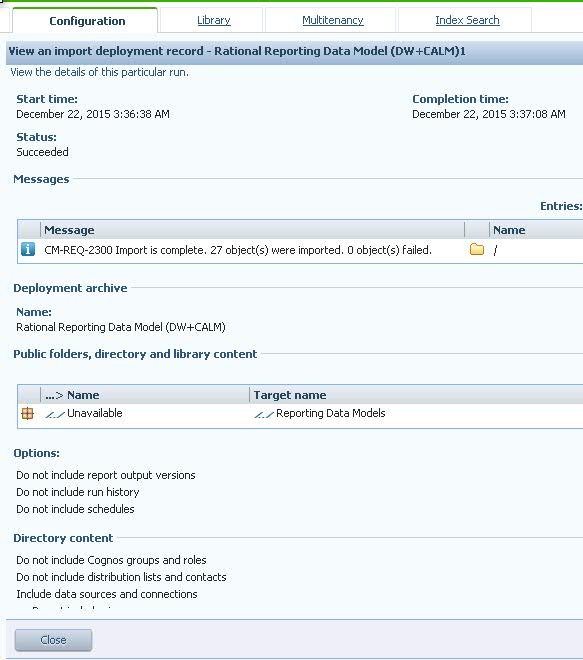
- Repeat this step for importing the CCM, QM and RM zip files.
- After all reports are imported, click the Home button ().
Data Source setup^
- Click the Launch drop down and select “IBM Cognos Administration”
- Click on Data Source Connections.
NOTE: Because we are reusing the RRDI content store, the connection details to the data warehouse should already be there with the signon. Let’s check it

- Navigate to Directory>Cognos>RIDW , then click the Set Properties tool button on the right of the RIDW entry.
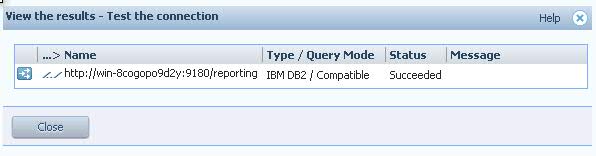
- Select the Connection tab. Click the “Test the connection…” link

- Verify the signon and click “test”

- Verify that the connection Data source is succeeded.Verify that the connection Data source is succeeded.
IX – Set up RQM Live Reporting^
In order to set up RQM Live Reporting, You can refer to : http://www-01.ibm.com/support/knowledgecenter/SSYMRC_6.0.0/com.ibm.rational.rrdi.admin.doc/topics/t_setup_live_reporting.html
X – Troubleshooting^
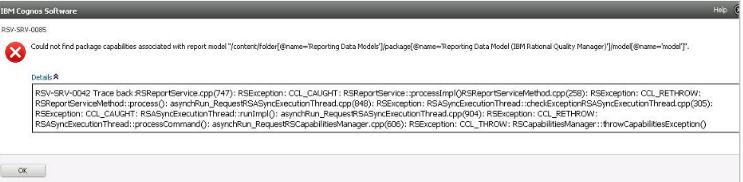
- If you get this during an RQM Live report, you need to import the Rational Reporting Data Model (RQM).zip into Cognos BI:
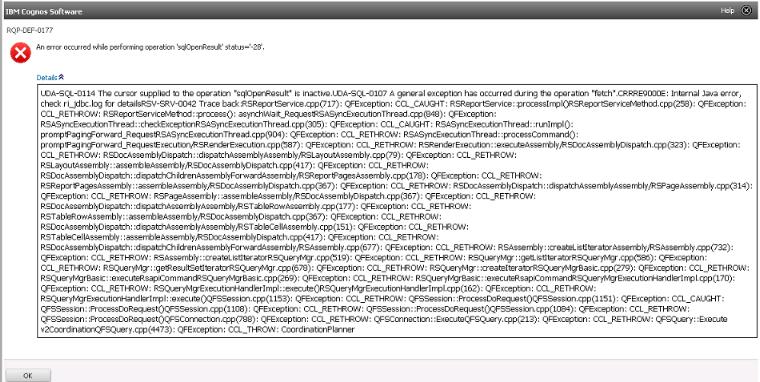
- If you get this during an RQM Live report, you need to check to make sure that the authentication type used by RQM matches the authentication type used by WAS. By default, RQM uses Form and WAS uses Basic. You need to change the Data Warehouse Connection>XDC Authentication type to Basic, then re-download the .xdc file again.
- Any time you need to change the client-id and client-secret in the jazzns_config.xml, you need to set the “jazz-namespace encrypted” to false, and restart the server.

- If you receive an error message that the JTS server and the report server do not have synchronized clocks, you need to set up both machines to use the same NTP time service. On Windows, perform the “Let me fix it myself” from here: https://support.microsoft.com/en-us/kb/816042 You also should set the “NTP Server address” in the jts/admin Advanced Properties to use the same NTP server. For example, time.nrc.ca.
- Unknown problems: Enable finer logging in WAS. Log in to the WebSphere Application Server administration console.
- Click Troubleshooting > Logs and Trace > RationalReportingServer > Change Log Detail Levels.
- Find the default *=info: setting and append the following string to it: com.ibm.rational.reporting.licensing=fine: JazzNamespace=fine
- Click Apply and then save your changes.
- Restart the WAS server
Copyright © 2016 – IBM Corporation