Setup Rational Engineering Lifecycle Manager, Lifecycle Query Engine, Jazz Team Server and Tracked Resource Set Provider for Bugzilla
Tracked Resource Set (TRS) is a protocol designed for servers to expose a set of resources in a way that allows clients to discover all additions, removals and modifications to the resource. Lifecycle Query Engine (LQE) utilizes this protocol to index lifecycle data and Rational Engineering Lifecycle Manager (RELM) provides the functions to visualize, analyze and organize such resources. Additionally Open Services Lifecycle Collaboration (OSLC) can be used to remotely view the lifecycle resource details and or navigate to them in a consistent regardless of where they are hosted. A TRS resource doesn’t have to be an OSLC provider in order to be indexed and searchable.
Eclipse Lyo provides the TRS Software Development Kit (SDK) which makes it easier to implement TRS provider. The TRS Workshop, which uses this SDK, provides the reference implementation of TRS Provider for Bugzilla. This workshop provides a foundation in the skills required for developing Tracked Resource Set Provider implementations, while this article serves as a supplement to the workshop to help explain:
- How to configure RELM, LQE and Jazz Team Server to connect to TRS Provider for Bugzilla
- Sample SPARQL query to search Bugzilla bugs
- Sample RELM View configuration to visualize Bugzilla bugs
Prerequisites
- Bugzilla v4.0.10 or later server and its administrator id and the password
- Completed the TRS Workshop on Eclipse.org
- TRS Adapter for Bugzilla
- RELM v1.0.0.1 or v4.0.3 server and its administrator id and the password.
The instruction to setup TRS Workshop is here, which has all necessary instruction to prepare TRS Adapter for Bugzilla. The instructions for installation RELM v 1.0.0.1 is here and for RELM v4.0.3 is here. To learn more about RELM, please read this technical article on Jazz.net. The contents of this articles are :
- Create a trusted OSLC consumer key for LQE
- Register TRS4JBugzilla adapter to LQE
- Register TRS4JBugzilla adapter to RELM for OSLC preview
- Create a RELM (v1.0.0.1 or v4.0.3 ) Query for Bugzilla
- Create a RELM v1.0.0.1 View for Bugzilla
- Create a RELM v4.0.3 View for Bugzilla
How to set up and configure RELM, LQE and Jazz Team Server
Create a trusted OSLC consumer key for LQE
- In order to make sura that TRS Adapter for Bugzilla is working, open the root service page ( http://<TRS adapter host name>:8085/OSLC4JBugzilla/rootservices ) by your browser.

- Open RELM JTS admin page ( https://<RELM host name>:<port number>/jts/admin )
- Click Manage Server in Manage Server pane, and then navigate to Friends (Outbound) in the left pane.
- Click Add… link at the right of the Friends List section title
- Fill the fields
- Name: TRS4JBugzilla
- Root Services URI: http://<TRS adapter host name>:8085/OSLC4JBugzilla/rootservices
- OAuth Secret: xyz
- Trusted: Checked
- Click Create Friend button

- Click Next
- Click Grant access for the provisional key link

- Fill the form using [[Bugzilla admin id (default root@localhost.here)]] and [[Bugzilla admin password (passw0rd)]], and then click Continue
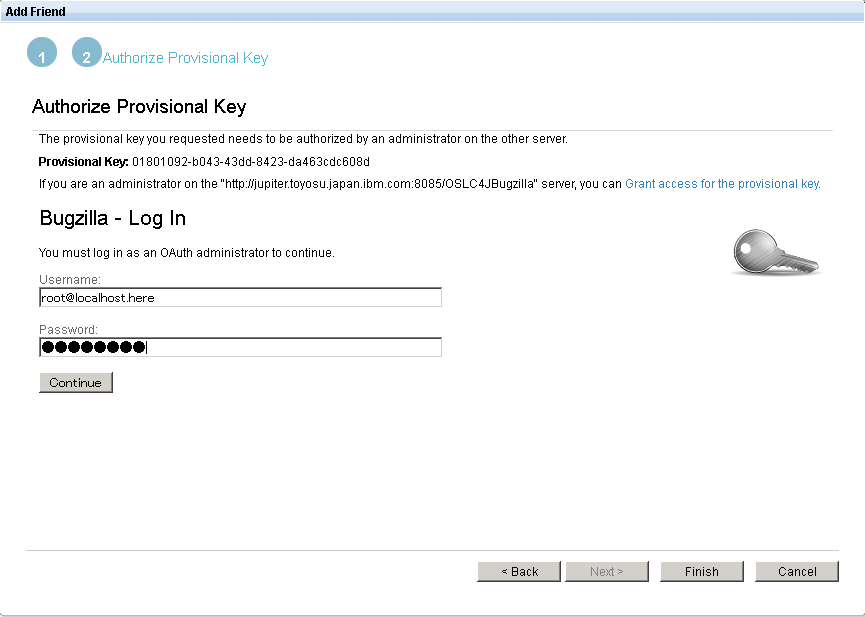
NOTE: You may not see the login message if you have already logged in to the TRS4JBugzilla adapter as the administrator. - Type LQE in Name field, check Trusted checkbox, and then click Allow button

- Click Finish

- Now you have TRS4JBugzilla friend definition

- Copy the OAuth Consumer Key for the next step.
Register TRS4JBugzilla adapter to LQE
- Open LQE Data Sources page ( https://<RELM host name>:<port number>/lqe/web/admin/data-sources)
- Click Add Data Source button at the right top
- Fill the dialog as follow:
- Data Source: Check Root Services document URL
- Put http://<TRS adapter host name>:8085/OSLC4JBugzilla/rootservices into the edit box
- Select http://<TRS adapter host name>:8085/OSLC4JBugzilla/services/trs radio button
- Label: TRS4JBugzilla

- Click Next, and then fill the form:
- OAuth Consumer Key: [one copied in Friends screen]
- OAuth Consumer Secret: xyz (in this document)
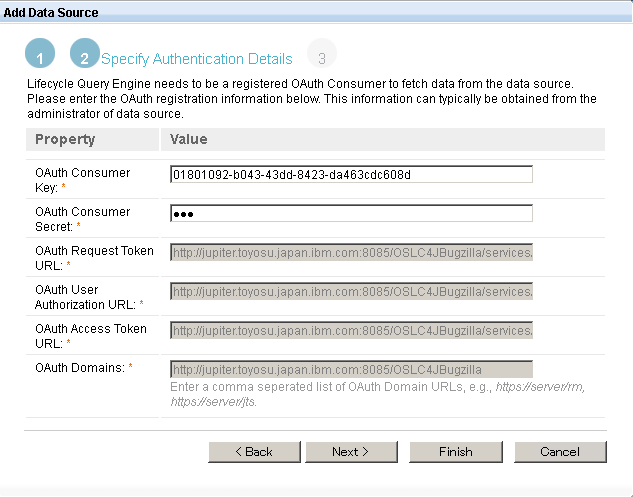
- Click Finish. Now the TRS4JBugzilla TRS is added to LQE

Register TRS4JBugzilla adapter to RELM for OSLC preview
- Open RELM admin page ( https://<RELM host name>:<port number>/relm/admin )
- Click Friends (Outbound) in the left pane
- Click Add… link at the right of the Friends List section title
- Fill the fields:
- Name: TRS4JBugzilla
- Root Services URI: http://<TRS adapter host name>:8085/OSLC4JBugzilla/rootservices
- OAuth Secret: xyz
- Trusted: Checked
- Click Create Friend, click Next
- Click Grant access for the provisional key link
- Fill the form using [[Bugzilla admin id (default root@localhost.here)]] and [[Bugzilla admin password (passw0rd)]], and then click Continue. (NOTE: You may not see the login message if you have already logged in to the TRS4JBugzilla adapter as the administrator. )
- Type RELM in Name field, check Trusted checkbox, and then click Allow button
- Click Finish
Note: If you will change the value of the property, adapter_host, in org.eclipse.lyo.oslc4j.bugzilla.trs/src/main/resources/bugz.properties, you need to remove the consumer keys.
- Open RELM JTS admin page ( https://<RELM host name>:<port number>/jts/admin )
- Click Manage Server in Manage Server pane, and then navigate to Friends (Outbound) in the left pane.
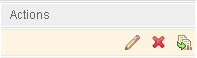
- Click a red X icon in Actions field for "TRS4JBugzilla" to remove it.
- Open RELM admin page ( https://<RELM host name>:<port number>/relm/admin )
- Click Friends (Outbound) in the left pane
- Click a red X icon in Actions field for "TRS4JBugzilla" to remove it.
- Remove org.eclipse.lyo.docs/org.eclipse.lyo.oslc4j.bugzilla.trs/bugzillaOAuthStore.xml file.
Try RELM Query and View
Before try RELM, please add several Bugzilla bugs. By default, Bugzilla requires Product, Component, Version and Summary fields to be filled in. At this moment, these fields are enough. For example,
After the bug is created, please fill in "See Also" field in Bugzilla bug. For example,
In this field, you need to type "http://<Bugzilla host name>:<port number>/<Bugzilla context root>/show_bug.cgi?id=XXX" where XXX is a Bugzilla Bug ID, and "http://<Bugzilla host name>:<port number>/<Bugzilla context root>" is the value of the property, bugzilla_uri, in org.eclipse.lyo.oslc4j.bugzilla.trs/src/main/resources/bugz.properties. So for example, See Also will look like :

Query
- Open https://<RELM host name>:<port number>/relm/web and navigate to one of your RELM project area
- From RELM menu bar, select Queries > Create – Create Query
- Type BugzillaQuery to Name
- Select My Queries in Folder
- Replace the SPARQL with the following query. It is to find all Bugzilla Bugs with their identifier, title, contributor and last modified time.
# Bugzilla resources : sample SPARQL PREFIX dcterms: <http://purl.org/dc/terms/> PREFIX oslc_cm: <http://open-services.net/ns/cm#> SELECT ?uri ?id ?title ?contributor ?modified WHERE { ?uri a oslc_cm:ChangeRequest; dcterms:identifier ?id; dcterms:title ?title; dcterms:contributor ?contributor; dcterms:modified ?modified. FILTER regex (str(?uri), "Bugzilla") } ORDER BY ASC (?id) # end of the query - Click Create button.

- Click Run button
- If you will see User Authentication window, click all Authorize links and type the appropriate user id and its password.

- For TRS4JBugzilla, if you will see the following dialog, type Bugzilla’s user id and its password. ( for example, user : bugs@localhost.here password : bugs4me )

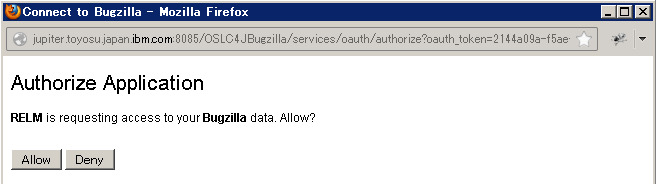
- Or if you will see the following dialog, click Allow button.
- After the authorization is completed, close the following windows

- If you don’t see any result, click on Refresh button in the query result page.
- Confirm that the bugs in your Bugzilla bugs are listed:

- Try to move the cursor on "uri" column. If you will see the following small window, click "Log in".

- You will see "Connect to Bugzilla" dialog, type Bugzilla’s user id and its password. Or if you will see "Authorize Application" dialog, click Allow button. Try to move the cursor on "uri" again.
- OSLC preview windows brings up.

View (for RELM 1.0.0.1)
- Open https://<RELM host name>:<port number>/relm/web and navigate to one of your RELM project area
- From RELM menu bar, select Views > Create – Create View
- Type BugzillaView to View name.
- Select Simple Sample in View template
- Select My Views in Folder

- Click Finish
- Click a pencil icon in Actions column of "BugzillaView" row to edit it
- Type "BugzilaView" in ID field.

- Click Query in the left pane.
- Replace the SPARQL in SPARQL Definition with the following query. This query is used to find out Bugzilla Bugs which are visualized in this view.
PREFIX dcterms: <http://purl.org/dc/terms/> PREFIX oslc_cm: <http://open-services.net/ns/cm#> SELECT * WHERE { ?resource dcterms:identifier ?identifier ; dcterms:title ?title ; oslc_cm:status ?status . FILTER regex (str(?resource ), "Bugzilla") } ORDER BY ${order}(?title) LIMIT 20 - Click Resource in the left pane.
- Remove rtc_cm:com.ibm.team.workitem.linktype.relatedworkitem.related in Link types for Status.
- Remove the following definitions from Hover Definition.
- Description
- Related tasks
- Follow-on tasks
- Add the following definition to Hover Definition
- Name: Related Bugs
- Layout: Vertical
- Query: Default Query
- Property Name : oslc_cm:relatedChangeRequest
- Change PrpertyName of "ID" in Hover Definition
- dcterms:identifier
- Hover Definition defines the content of the preview window, so Bugzilla Bug’s ID, its title, its status and "See Also" bugs will be displayed in the preview window.
- Remove the following actions from Actions
- Open Resource with Children
- Open Traceability View

- Click Connection in the left pane
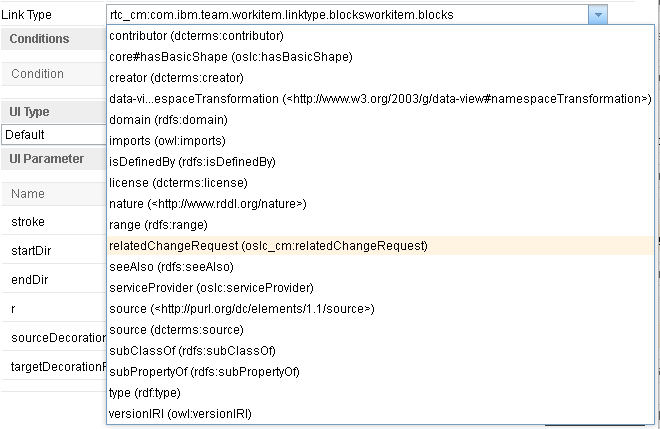
- Change Link Type to oslc_cm:relatedChangeRequest because Bugzilla’s "See Also" is mapped to this OSLC resource type.
- Click Component Info in the left pane
- Replace the current content with the following. This defines what will be displayed in the view. In this case, Bugzilla’s ID and its title are displayed.
[{"name":"summary","value":"${title}"}, {"name":"uri","value":"${resource}"}, {"name":"fill","value":"{type:'linear',x1:0,y1:0,x2:0,y2:100,colors:[{offset:0,color:'white'},{offset:1,color:'#d7d7d7'}]}"}, {"name":"width","value":120}, {"name":"height","value":30}, {"name":"summary","value":"${title:/^(.{1,20}[ ])(.*)$/$1/}"}, {"name":"summary2","value":"${title:/^(.{1,20}[ ])(.{0,20})(.*)$/$2/}"}, {"name":"status","value":"${status}"}, {"name":"identifier","value":"${identifier}"}, {"name":"targetShapes","value":[ {"fill":"${fill}","height":"${height}","r":10,"stroke":"#d7d7d7","type":"rect","width":"${width}"}, {"dojoAttachPoint":"identifier","fill":"black","font":{"family":"normal","size":"8pt"},"text":"${identifier}","type":"text","x":2,"y":15}, {"dojoAttachPoint":"summaryShape","fill":"black","font":{"family":"normal","size":"8pt"},"text":"${summary}","type":"text","x":20,"y":15}, {"dojoAttachPoint":"summaryShape2","fill":"black","font":{"family":"normal","size":"8pt"},"text":"${summary2}","type":"text","x":5,"y":25} ]} ] - Click Save and Close buttons
- Click BugzillaView in My Views’s list
- You will see some Bugzilla bugs are displayed with the connections (arrows). For example,

- Try to move the rectangles, which stand for Bugzilla’s bugs, to anywhere. For example,

The "arrow" stands for Bugzilla’s "See Also" relation. So from this view, Bug "1 Improve the usability" has two "See Also" relations. ( to "2 Improve the login panel" and "3 Improve the installer usability" bugs ) - Try to move the cursor on the rectangle. If you will see the following "Authentication Required" dialog, type Bugzilla’s user id and its password.

- OSLC preview brings up

- Click the rectangle so that the down arrow icon brings up. Click it.

- Try to select "Open Artifact". You will see Bugzilla’s bug.

View (for RELM 4.0.3)
- Open https://<RELM host name>:<port number>/relm/web and navigate to one of your RELM project area
- From RELM menu bar, select Views > Create – Create View
- Type BugzillaView to View name.
- Select Simple Sample in View template
- Select My Views in Folder
- Click Finish
- Click a pencil icon in Actions column of "BugzillaView" row to edit it.

- Type "BugzillaView" to ID field in General section.

- Click a pencil icon in Actions column of "allcm" row in Queries section to edit it.

- Replace the SPARQL in SPARQL with the following query. This query is used to find out Bugzilla Bugs which are visualized in this view.
PREFIX dcterms: <http://purl.org/dc/terms/> PREFIX oslc_cm: <http://open-services.net/ns/cm#> SELECT * WHERE { ?resource dcterms:identifier ?identifier ; dcterms:title ?title ; oslc_cm:status ?status . FILTER regex (str(?resource ), "Bugzilla") } ORDER BY $order$(?title) LIMIT 20 - You can try this query when Preview Query Result link is clicked.

- Click Cancel button on Query Result dialog, and click OK button.
- Click Edit UI Types… link in UI Types section.

- Click Duplicate… button in UI Type ID field

- Type resourceNodeBugzilla in Component Info ID field, and click OK button.
- Click Add… link at the right of Attributes row.

- Type identifier for Name field
- Type ${identifier} for Value field.
- Click OK button.
- Click Value column of title field, then type the following code.
${title:/^(.{1,20}[ ])(.*)$/$1/} - Click Value column of summary filed, then type the following code
${title:/^(.{1,20}[ ])(.{0,20})(.*)$/$2/}so that you will see the following Values for title and summary fields.
- Remove two "image" rows in Shapes area by clicking X icon in Actions column.

- Click OK button if being asked to remove it.
- Click Add… link in at the right of Shapes row.

- Select Text in Shape Type list box.
- Click OK button.
- Click the newly created text row.

- Type the following code
{"dojoAttachPoint":"identifier","fill":"black","font":{"family":"normal","size":"8pt"},"text":"${identifier}","type":"text","x":2,"y":15}
- Click OK button in UI Types dialog.
- Click a pencil icon in Actions column of "Default" row in Nodes section to edit it.

- Click Duplicate… button in Node field
- Type BugzillaNode in Name field.

- Select resourceNodeBugzilla in UI Type list box.

- Remove the following definitions from Hover Definition by clicking X icon in Actions column.
- Description
- Related tasks
- Follow-on tasks
- Click Add… link in at the right of Hover Definition row.
- Add the following definition to Hover Definition
- Label: Related Bugs
- Layout: Vertical
- Check Property Value
- Property Name : oslc_cm:relatedChangeRequest
- Click OK Button.
- Change PropertyName of "ID" in Hover Definition
- dcterms:identifier
- Hover Definition defines the content of the preview window, so Bugzilla Bug’s ID, its title, its status and "See Also" bugs will be displayed in the preview window

- Remove rtc_cm:com.ibm.team.workitem.linktype.relatedworkitem.related in Link types for Status Calculation..
- Remove the following actions from Actions
- Open Resource with Children
- Open Traceability View

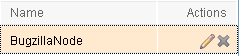
- Click OK button in Nodes dialog.
- Click X icon in Actions column of "Default" row in Nodes section to delete it so that you will see the BugzillaNode instead.
- Click a pencil icon in Actions column of "Blocks" row in Connections section to edit it.
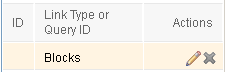
- Change Link Type to oslc_cm:relatedChangeRequest because Bugzilla’s "See Also" is mapped to this OSLC resource type.
- Click OK button in Connections dialog.
- Click Save button at the top right of BugizllaView.
- You will see some Bugzilla bugs are displayed with the connections (arrows). For example,

- Try to move the rectangles, which stand for Bugzilla’s bugs, to anywhere. For example,

The "arrow" stands for Bugzilla’s "See Also" relation. So from this view, Bug "1 Improve the usability" has two "See Also" relations. ( to "2 Improve the login panel" and "3 Improve the installer usability" bugs ) - Try to move the cursor on the rectangle. If you will see the following "Authentication Required" dialog, type Bugzilla’s user id and its password.
- OSLC preview brings up

- Right click the rectangle so that the its context menu is opened.

- Try to select "Open Artifact". You will see Bugzilla’s bug.
Learn More
Eclipse LyoJazz.net
About the author
Hirotaka Matsumoto is the member of Systems and Software Engineering Jumpstart Program team. He works in Tokyo Software Development Laboratory in IBM Japan. He can be contacted at jljlmatu@jp.ibm.com
Copyright © 2013 IBM Corporation