Compare Word Documents with RTC
Michael Valenta, IBM Canada
Last updated: November 16th, 2010
Build basis: Rational Team Concert 1.0, 2.0, 3.0
In this article, we describe the Word Compare bundle that is available for Windows users.
Comparing Word Documents
Using the Word Comparison support is fairly straight forward since the compare merge viewer is associated with the *.doc file type. Any time a word document appears in the Pending Changes view, the History view or another view that supports comparisons, the Word merge viewer will be used when the files being compared are Word documents.

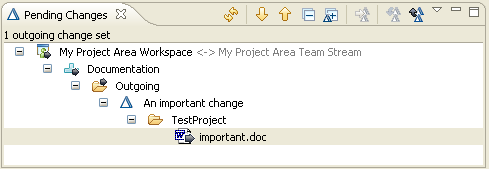
Figure 1 – A modified Word document appearing in the Pending Changes view
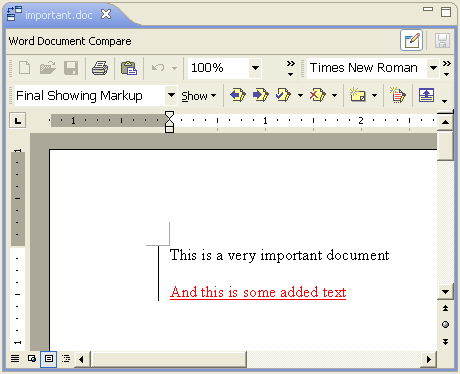
Figure 1 shows a modified Word document in the Pending Changes view. Opening the document will result in the compare editor shown in Figure 2.

Figure 2 – A Word document comparison appearing inside the compare editor
Once the editor is open, you can do all the usual things you can do in word when comparing documents (i.e. accept or reject changes or make additional edits). Saving the editor will save any changes you have made to your local copy of the file. Note that the document is saved as is so if you have not resolved all the differences, they will remain in the saved copy. It is also worthwhile to note that CTRL-S doesn’t work when comparing Word documents because of the use of OLE to embed the document.
In some cases, you may not want to edit the Word document in-place but instead would like to open the comparison in a separate window. This is supported by the In-place toggle button available in the toolbar above the Word document. Pressing the toggle will open the comparison in a separate window as shown in Figure 3.

Figure 3 – A Word document comparison appearing n a separate window
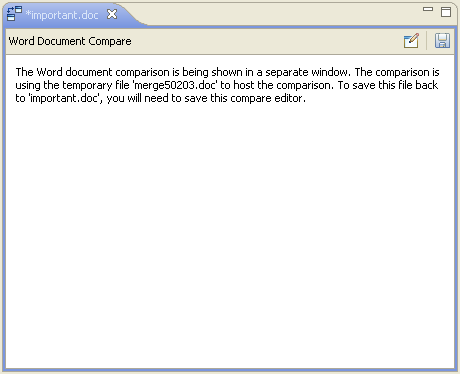
If you perform edits in the separate window, the compare editor still tracks the dirty state of the document as shown in Figure 4. The editor is dirty because we have made changes using the Word application. Even though the document is shown in a separate window, we are still keeping a link to the document so we know when it has been modified. Saving in the compare editor will still work (as indicated by the text that appears in the compare viewer). Note that the name of the document in the window (mergeXXXXX.doc) differs from the document in RTC (important.doc). When the compare editor is saved, it saves the temporary document and then copies the results into the local workspace file.

Figure 4 – Compare editor can still be saved when Word open in separate window
Here are a few other things to be aware of:
- A limitation of the viewer is that it doesn’t offer the ability to save if neither or both sides of the comparison are editable. For the “both editable” case, we didn’t feel we could adequately present the save options in the UI. The workaround is to open the comparison in a separate window so you can then save any changes to any location on disk using the Word Save As menu action.
- This compare viewer only works on Windows as it relies on Windows OLE support. You will also need to have the Word application installed on your machine.
Installing the Bundle into RTC 1.0
The Word Compare bundle was not available in RTC 1.0 and Eclipse 3.4 but ships as part of Eclipse 3.5 and RTC 1.0.1.1 and RTC 2.0. If you are not using RTC 1.0.1.1 or RTC 2.0, you can install the bundle manually by following these steps:
- Download the zipped update site from http://www.eclipse.org/eclipse/platform-team/patches/wordcompare.zip and unzip it.
- Choose Help/Software Updates/Find and Install from the main menu of RTC.
- Select Search for new features to install and click Next.
- Click New Local Site and browse to where you unzipped the update site from step 1. Click OK
- Make sure the local update site is checked and click Finish
- In the dialog that appears, check off the Eclipse Compare Word Documents feature and click Next
- Read the license. To continue, you will need to indicate that you accept the license and click Next
- On the final page, click Finish and, when prompted, click Install.
- You will be asked to restart RTC when the install is complete
About the author
Michael Valenta is an employee of IBM Canada Ltd and is a member of the Jazz Source Control team. He is also a committer on the Eclipse Platform.
© Copyright 2008, 2010 IBM Corporation
 Yes
Yes