Tip: Updating existing Rational Team Concert project areas with the Project Area Updater Tool
Published/Last Updated: February 17, 2010Author: Martha Andrews
Summary
Rational Team Concert (RTC) 2.0 shipped with new versions of the Scrum and OpenUP process templates. The new versions offer some new features, such as new work item types and plan types. If you want to use the new features in project areas that were created with a previous version of the templates, you can install and use the project area updater tool. The project area updater tool allows you to use selected features from the latest version of the templates without affecting your existing data.
This article explains what the project area updater tool will add to existing project areas; tells you how to obtain, install, and use the project area updater; and suggests some follow up you may want to do after running the project area updater.
More Information
Contents:
- Why should I use the project area updater tool?
- What does the Project Area Updater Tool do?
- What are the prerequisites for the Project Area Updater Tool?
- How do I get the Project Area Updater Tool?
- How do I install the Project Area Updater Tool?
- How do I use the Project Area Update Tool?
Why should I use the project area updater tool?
Use the project area updater tool if you want to use the features that were added in the latest version of the Scrum or OpenUP template in a project area created with RTC 1.0.x.
Rational Team Concert (RTC) 2.0 and 2.0.0.x shipped with new versions of the Scrum and OpenUP process templates. The new versions offer some new features, such as new work item types and plans. To see a list of the changes and new features in the Scrum and OpenUP process templates in RTC 2.0, read this technote. To see the features added in releases since then, see the New and Noteworthy documents for RTC 2.0.0.1 and RTC 2.0.0.2.
If you have migrated a repository from RTC 1.0.x, your repository contains the old versions of the process templates. To get the new versions of the templates in your repository you must deploy them. Your existing project areas are not affected when you deploy new versions of templates.
Your existing project areas use the version of the process template that was in the repository when they were created. Features that have been added in the new version of the templates are not available to project areas that were created with a previous version of the template. The project area updater tool will add features from the new versions of the templates to existing project areas.
For instance, say that you created a project area based on the Scrum process that shipped with RTC 1.0.1.1. Then, you upgraded to RTC 2.0 and noticed that the Scrum process has new work item types you would like to use in the project area you created with RTC 1.0.1.1. However, you are unable to create work items of the new type because your project area was created with the older version of the Scrum process. You can use the project area updater tool to make work item types available in your older project.
What does the Project Area Updater Tool do?
The project area updater tool adds selected features from the latest versions of the OpenUP and Scrum template to project areas created with earlier versions of those templates. It does not update the project area with all of the changes from the latest version of the template; it adds only features that will not affect your existing work items, plans, dashboards, streams, etc.
The project area updater tool will not add any features to project areas created with the OpenUP and Scrum templates that ship with RTC 2.0.0.2. However, it may re-arrange the process configuration source of those project areas. The changes are not syntactical; they are merely formatting changes.
The project area updater tool will not add any reports to your existing project areas. If you want to add reports from the latest version of the Scrum template to your project area, follow the instructions in the Adding Reports to a Project Area section
The following table shows what the project area updater tool will do when run against various project areas.
| If you created the project area with | Project Area Updater will add |
|---|---|
| OpenUP from RTC 1.0, RTC 1.0 iFix 1, RTC 1.0.1.1 |
|
| OpenUP from RTC 2.0, RTC 2.0.0.1, RTC 2.0.0.2 |
|
| Scrum from RTC 1.0, RTC 1.0 iFix 1, RTC 1.0.1.1 |
|
| Scrum from RTC 2.0, RTC 2.0.0.1 |
|
| Scrum from RTC 2.0.0.2 |
|
What are the prerequisites for the Project Area Updater Tool?
The project area updater tool is packaged as an update-site for the Rational Team Concert 2.0.0.2 Client for the Eclipse IDE. To use the tool, you must have Rational Team Concert 2.0.0.2 Client for Eclipse IDE. You must also have Jazz Team Process permissions to save the project area you are updating.
How do I get the Project Area Updater Tool?
The project area updater tool is available as a download from jazz.net:
- Go to the Rational Team Concert 2.0.0.2 “All Downloads” page.
- Download the Project Area Updater Tool (project_area_updater_update_site.zip), found in the Incubators section.
How do I install the Project Area Updater Tool?
The project area updater tool is packaged as an update-site for the Rational Team Concert 2.0.0.2 Client for the Eclipse IDE. To install the tool once you have downloaded it from jazz.net, follow these steps:
- Unzip the project_area_updater_update_site.zip file to a temporary directory on your local hard drive.
- Start the Rational Team Concert 2.0.0.2 Client for the Eclipse IDE.
- Select Help > Software Updates from the main menu.
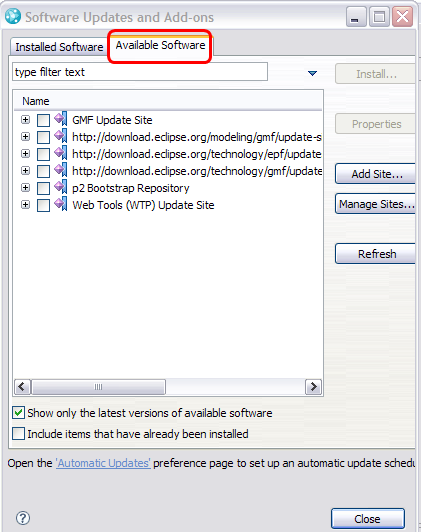
- Click the Available Software tab in the Software Updates and Add-ons window.
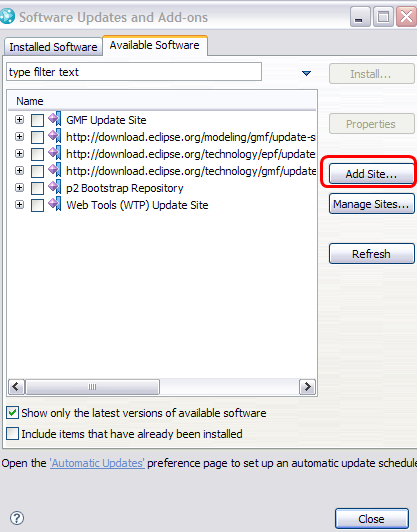
- Click the Add Site button.
- Click the Local button.
- Browse to the directory where you unzipped the file in step 1.
- Click OK in the Browse for Folder window.
- Click OK in the Add Site window.
- Select the new entry on the Available Software tab.
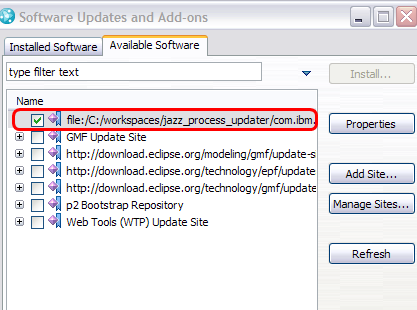
- Click the Install button.

- Click Next on the Install window that appears.
- Read and accept the license.
- Click Finish.
- Restart the Rational Team Concert client when prompted.

How do I use the Project Area Update Tool?
The project area update tool can update one project area or multiple project areas. If you want to update only one project area, follow the instructions in the Updating a Single Project Area section. If you want to update multiple project areas in a repository, follow the instructions in the Updating Multiple Project Areas section.
Updating a single project area
If you want to update a single project area, follow the instructions in this section. Before you start, make sure you have permissions to save the project area you will be updating.
- Start the RTC Eclipse Client.
- Log in to the repository that has the project area you want to update.
- Connect to the project area you want to update.
- Show the Team Organization view. You can use Window > Show View > Other > Team > Team Organization to show the view.
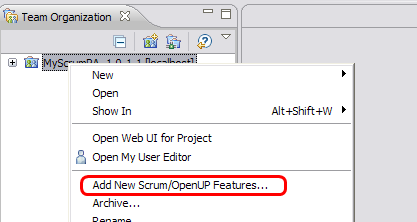
- Right-click the project area you want to update.
- Select Add New Scrum/OpenUP Features.
- Click OK in the Confirm Update window.
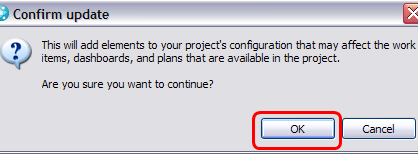
The project area will be updated with new features. You may see a progress dialog as the update takes place.
There are some optional steps you can take if you like. If you want to update the Report templates that are available for your project area, follow the steps in the Adding Reports to a Project Area section. If you want to review the changes, follow the steps in the How to View Changes in Process Configuration Source section.
Updating Multiple Project Areas
If you want to update multiple project areas in a repository, follow the instructions in this section. Before you start, make sure you have permissions to save the project areas you will be updating.
- Start the RTC Eclipse Client.
- Log in to the repository that has the project areas you want to update.
- Connect to all of the project areas you want to update.
- Show the Team Artifacts view. You can use Window > Show View > Other > Team > Team Artifacts to show the view.
- Right-click the repository that contains the project areas you want to update.
- Select Administer > Add New Scrum/OpenUP Features from the context menu.
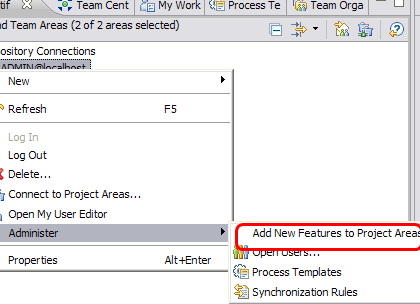
A window will open showing the project areas that can be updated. Only project areas that were created with the OpenUP or Scrum templates can be updated.
- Select the project areas you want to update and click OK.
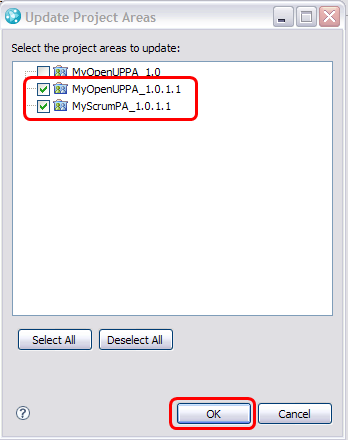
The project areas will be updated with new features. You may see a progress dialog as the update takes place.
There are some optional steps you can take if you like. If you want to update the Report templates that are available for your project area, follow the steps in the Adding Reports to a Project Area section. If you want to review the changes, follow the steps in the How to View Changes in Process Configuration Source section.
Sidebar: How to view changes in Process Configuration source
The project area updater tool manipulates the process configuration XML source for a project area. If you want to see exactly what the tool changed, you can use the built-in support RTC has for comparing process configuration source. The steps in this section tell you how to compare process configuration source.
Note that the process configuration XML source changes do not map one to one to the features that the updater adds. For instance, adding a new work item type requires changes in multiple sections of the process configuration XML source. You will see many changes in the XML that relate to each feature the project area updater added.
Note also that the project area updater may re-arrange elements in the XML source even if it did not add any features. So, if you ran the project area updater on a project area from RTC 2.0, for example, you would see many changes in the XML source even though you would not see any new features or behavior changes in your project.
To compare a project area’s process configuration source with an earlier version, follow these steps:- Open the project area in the project area editor.
- Click the Process Configuration Source tab.
- Choose Show History from the context menu in the editor.
The History view opens and is populated with versions of the process configuration, from most recent to oldest.
- Choose the version that was created by the update.
- Select Compare from the context menu in the History view.
The compare editor is opened with the version created by the update and the previous version.
Sidebar: Adding Reports to a Project Area
The versions of the Scrum template that ships with RTC 2.0 and RTC 2.0.0.1 added several reports that were not available in previous versions of the template. To use these reports in a project area that was created with a previous version of Scrum, you must deploy the report templates and create new reports. Some of the reports also have “Micro” versions that are used on dashboards. If you deploy a template that has a corresponding “Micro” version, you should deploy the “Micro” version, too. You will not need to create a report from the “Micro” version of the template.You can choose the set of reports that you want to see and deploy only the corresponding report templates; you do not have to deploy all the report templates. Once you have decided what reports you want to use, you can follow the directions below to add them to your project area.
Here are the report templates that were added to Scrum in RTC 2.0:
- Release Burndown (and Micro Release Burndown)
- Estimated vs Actual Work (and Micro Estimated vs. Actual Work)
- Team Velocity by Team
- Work Items Tag Cloud
- Work Item Comparison by Project Area
- Defect Backlog by Project Area
- Story Points by Iteration (and Micro Story Points by Iteration)
Here are the report templates that were added to Scrum in RTC 2.0.0.1:
- Burnup
- Estimate Changes
- Actual as Percentage of Estimated Work
The following steps walk you through adding a report to an existing project area.
- Log in to the RTC Eclipse UI as a user who belongs to the JazzAdmins group
- Connect to the project area to which you want to add a report so that it shows in the Team Artifacts view.
- Select Deploy New Templates from the context menu of the Reports > Report Templates node under your project area in the Team Artifacts view.
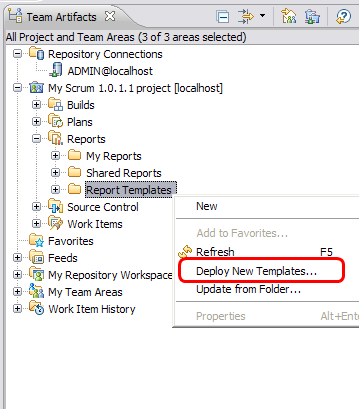
- In the Select a Project Area or Team Area window, select the project area to which you are adding the report.
- Click OK.
- In the Report templates to deploy window, select the report template that you want to add to your project area.
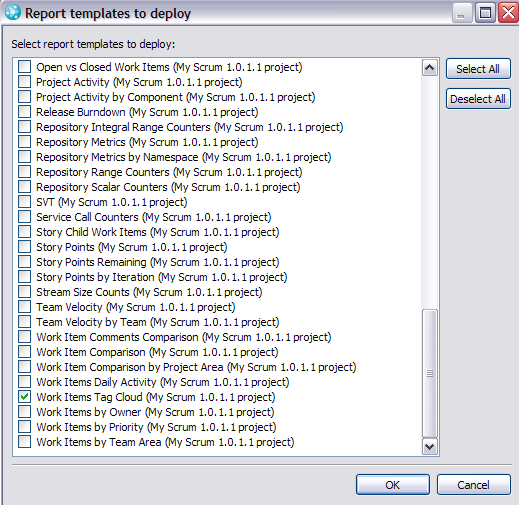
- OPTIONAL: If there is a corresponding “Micro” template for the report template you chose in the previous step, select the “Micro” template, too.
- Click OK.
- Select Create Report from the context menu of the report template in the Team Artifacts view.
- Select the Shared Reports > Work Items folder in the Select a Folder dialog.
- Click OK.
The report will show up under the Shared Reports > Work Items node in the Team Artifacts view. You can use the report as you would any report in your project area.
Related Information
The following links point to related information: