
Exporting from Rational DOORS and importing to Rational DOORS Next Generation by using ReqIF
- Introduction
- Before you begin
- For the initial release of Rational DOORS Next Generation, version 4.0.1, the Rational Development team established these performance recommendations:
- Each module has no more than 5,000 objects.
- The total number of objects is about 200,000.
- Rational DOORS Next Generation takes a project-wide approach with respect to attribute and type definitions. In releases of Rational DOORS 9, these definitions are created in each individual module. You can consolidate data types as this paper describes, but to do so, you must annotate the type definitions in Rational DOORS with more information. If you cannot annotate the type definitions in your environment, archive all of the data that you want to export and restore it into a different area of your Rational DOORS database.
- The example in this article uses a Rational DOORS instance that was exclusively created for ReqIF export so that changes could be made without affecting a production Rational DOORS instance.
- When you create a separate instance of Rational DOORS, identify the minimum set of formal and link modules that must be exported from Rational DOORS.
- Decide on a common set of attributes that you want to see in Rational DOORS Next Generation. This task is challenging, so you might decide on a few sets of attributes that are common for some modules. For example:
- Three modules that represent customer requirements, with one set of attributes.
- Five modules that represent high-level feature requirements, with a second set of attributes.
- Five modules that represent functional requirements, with third set of attributes.
- If system attributes from a release of Rational DOORS 9 are required in Rational DOORS Next Generation, create custom attributes for each system attribute and create DXL scripts to populate the values of the custom attributes with values from system attributes in each of these modules. Alternatively, you can use the DXL attribute wizard. For example, for audit purposes, you might need to carry over the created by, created on, and other attributes to Rational DOORS Next Generation. For more information, see Creating custom attributes for system attributes by using the DXL Attribute wizard section below.
- For each Rational DOORS custom attribute that is in more than one module, additional attributes with same name and a numeric suffix are created in Rational DOORS Next Generation. For example, if three modules have the Priority custom attribute, the attributes are listed as follows in Rational DOORS Next Generation: Priority, Priority 2, and Priority 3. To avoid this behavior, you can use any of these suggestions:
- Before you create the ReqIF definition and export, create a DXL script to combine objects from various similar modules into one Rational DOORS module. This will eliminate or at least minimize duplicate attributes in Rational DOORS Next Generation.
- Make sure that all data types are consistent. Generally the list of values for enumerated data types are different. For attributes that are used in multiple modules, create type URIs for those attributes. For more information, see Creating type URIs. For each ReqIF definition, Rational DOORS Next Generation will create this attribute only once.
- If you have remaining duplicate attributes, eliminate them by following the process that is described in Removing duplicate attributes after a ReqIF import.
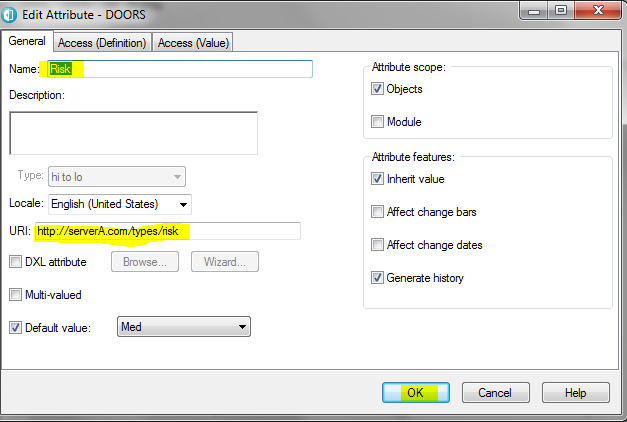
- For this article, the type URI for the Risk attribute was created by using the steps that are described in Creating type URIs.
- Exporting the ReqIF File by using Rational DOORS 9.5 and later
- In each of the required modules in Rational DOORS, create a view that displays these attributes and ensure that all of the access controls on the other views are defined appropriately. All of the views with public read access will be attempted to be taken over into Rational DOORS Next Generation.
- Create ReqIF definition by using the view for these formal modules, and include link modules in the definition:
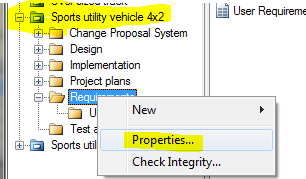
- In the project view, right-click a database name or project name and select Properties .
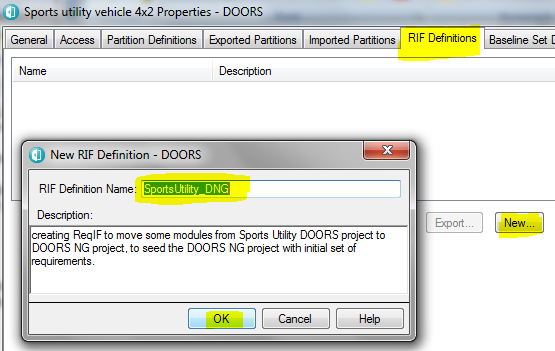
- Click the RIF Definitions tab and click New . Type a name and description for the new definition, and click OK.
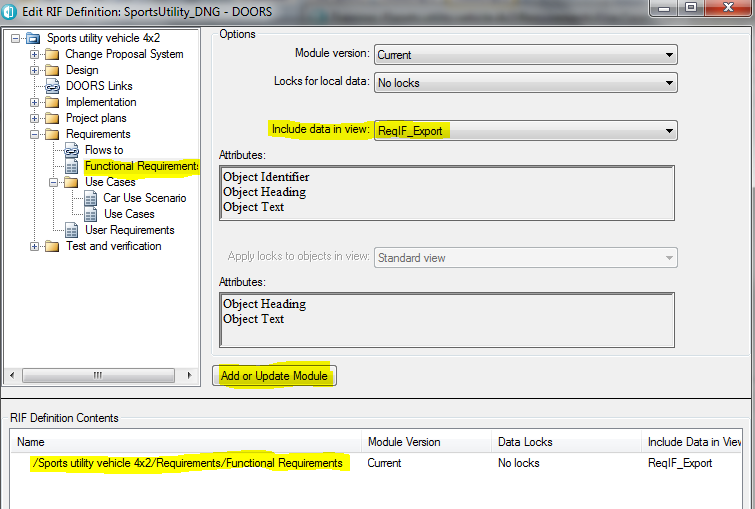
- In the Add RIF Definition: SportsUtility_DNG – DOORS window, select a module, such as the Functional Requirements module. From the Include data in view list, select ReqIF_Export, or any view that was created for the purpose of ReqIF export. Click Add or Update Module. The module will be added to the list.
- If you want links to be included in the ReqIF export, select the link module. To select the link module, locate the link module, e.g. “Flows to”, in the left browser and click Add or Update Module , accepting all default values.
- Select the other modules and add them to the list.
- Click OK.
- In the project view, right-click a database name or project name and select Properties.
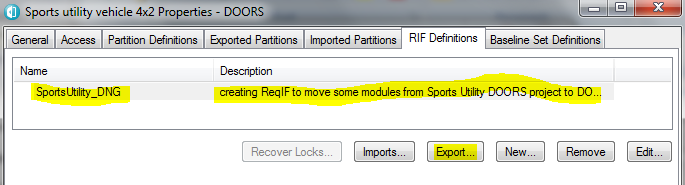
- In the Rational DOORS properties window, select the newly created RIF definition and click Export.
- Browse to the empty folder on your hard disk to save the exported file to and select ReqIF (v1.0). Click OK, and
- When the export is finished, click OK in the confirmation window.
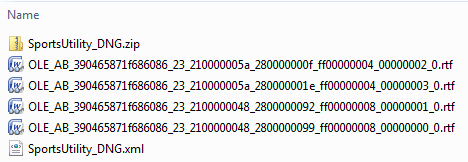
- If the modules that are exported contain many OLEs, one .rtf file per OLE will be created and one .xml file that represents the ReqIF file will be created. If no OLEs exist, only one .xml file will be created. In later versions of Rational DOORS, the extension of this file is .reqif.
- If multiple files are created, compress all of the files into a .zip file.
- All four of the formal modules (User Requirements, Functional Requirements, Use Case Scenario, and Use Case) have two common custom attributes: Criticality and Risk.
- For this exercise, you create a public URI for the Risk attribute so that only one attribute is created in Rational DOORS Next Generation after the ReqIF file is imported. You do not create a public URI for the Criticality attribute.
- Because four modules have the Criticality attribute, Rational DOORS Next Generation will have four attributes defined: Criticality , Criticality 2, Criticality 3, and Criticality 4. These attributes should be eliminated by the technique described in “Removing duplicate attributes after a ReqIF import” section below.
- Repeating data types also result in duplicate data types in Rational DOORS Next Generation. For example, if a Boolean data type is used in multiple modules, multiple Boolean types with suffixes, such as BOOLEAN 2 and BOOLEAN 3, will be created in Rational DOORS Next Generation. To eliminate duplicate data types, you should use procedure described in Creating type URIs section.
- In the example in this article, each of the four modules has a view named ReqIF_Export, which has public access. This view displayed the required attributes as columns.
- Importing the exported ReqIF file into Rational DOORS Next Generation
- If possible, create a new project area in Rational DOORS Next Generation and do not base the project area on any process template or project template, as a project template adds artifact types, attribute types, and other content that clutter the project when requirements are imported from the .zip file. However an exported ReqIF file can be imported into an existing Rational DOORS Next Generation project area.
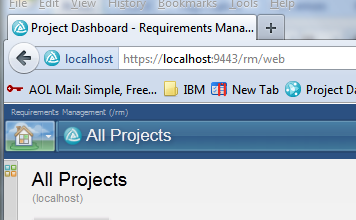
- Log in to https:/server:port/rm/web.
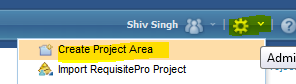
- Click Create Project Area. The New Project wizard opens.
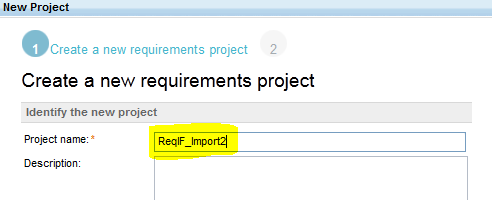
- On the “Create a new requirements project” page, enter the project name and an optional description. Click Next.
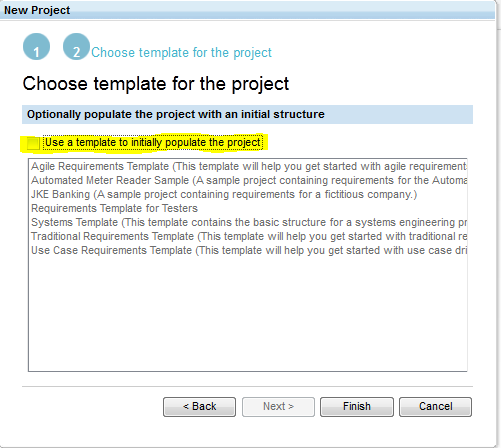
- On the “Choose template for the project” page, make sure that the Use a template to initially populate the project check box cleared. Then, click Finish.
- Import the ReqIF exported requirements, which are compressed in the .zip file.
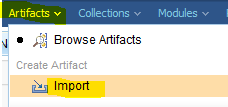
- Click Artifacts > Import .
- Click Import requirements from a ReqIF file , and then click Next .
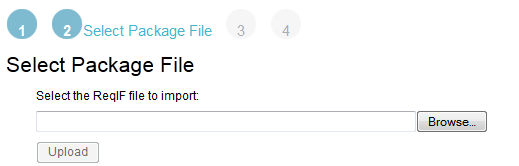
- Click Browse , navigate to the exported .zip file, and then click Upload. The file will be uploaded to the server.
- Click Next to import the requirements. Depending on size, this can take long time. However, the process runs in the background, even if you start using Rational DOORS Next Generation for other purposes.
- Reviewing the Rational DOORS Next Generation project area
- Click Artifacts > Browse Artifacts.
- Verify that the following information exists:
- Four folders, one for each imported module.
- Four modules, each of the “Car Use Scenario module” type. In fact, this has been fixed and each module should be created as its own type. For instance, in this case, you should have four types: one for each formal module.
- Two OLE objects, which are saved under the parent folder. The type of the parent folder is “Use Case” because these OLE objects belonged to the Use Cases module.
- System generated values for “modified by” and “modified on.” These values are for the current logged in user and current time.
- Review the project properties to see what else has been generated as a result of the import. To review the project properties, click Manage Project Properties.
- Review the Artifact Types tab, and verify that each imported module is its own artifact type with its own set of attributes. For repeating data types, which exist in various Rational DOORS modules, new data types are defined with numeric suffixes, such as String 2, Boolean 2, and so on.
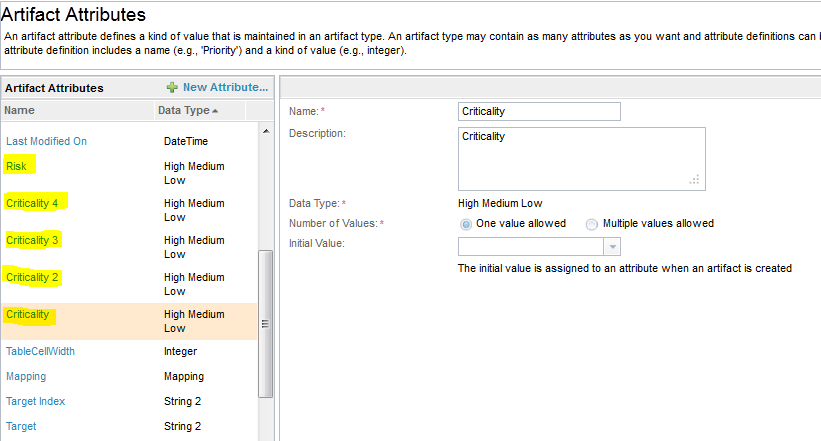
- Review the Artifact Attributes tab.
- Note the data types that have numeric suffixes. These data types exist because the attributes are scoped at the module level in Rational DOORS and at the project level in Rational DOORS Next Generation.
- Note that only one Risk attribute and four Criticality attributes are displayed. Only one Risk attribute exists because you created the URI type for the Risk attribute.
- Review the Attribute Data Types tab, and verify that multiple data types are coming from different Rational DOORS modules. “High Medium Low” data type is only one, since I added URI to this data type in all the four modules that were including in the export.
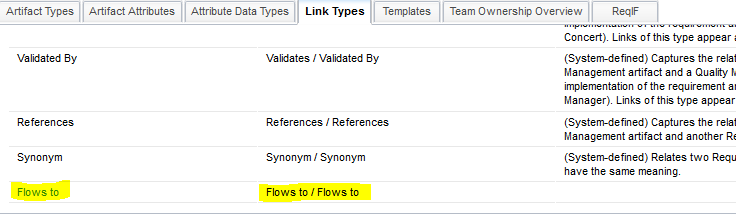
- Review the Link Types tab to view the link types that were imported from Rational DOORS, in terms of link modules.
- Known issues and workarounds
- Attributes:
- Rational DOORS Next Generation always creates system [DOORS NG] defined properties, such as created by, created on, modified by, and last modified on. Rational DOORS Next Generation will not bring in such attributes from Rational DOORS. Therefore, be sure to create custom attributes for Rational DOORS system attributes and populate the custom attributes by using DXL scripts or by using DXL Attribute wizard to populate the attributes.
- To remove any attributes with the same name and a numeric suffix, e.g. “Criticality” & “Criticality 2” attributes, in the example, follow the process described in Removing duplicate attributes after a ReqIF import.
- Rational DOORS Next Generation creates link types for relationships that are defined in Rational DOORS link modules.
- OLE objects: After the import, all of the OLE objects are saved as .rtf files, and links are placed with objects in context. When you click a link, the following information is displayed:
- Links: If both ends of the links and the link modules are imported, all of the links are carried over and recreated. To see these links, you must open the requirement. The links are shown on the right side. The links are not as arrows in a collection or module view with all of the requirements visible in a list, as they are shown in Rational DOORS. To see the links in a list format, you can create a tree view with these relationships.
- Artifact types: After an import, Rational DOORS Next Generation creates a new artifact type. One artifact type with a base type of Module is created for each module. This behavior might not be an issue. However, if you are importing multiple ReqIF files and must know which modules have been imported from which ReqIF definitions, import into different folders.
- Tips for exporting and importing
- Synchronize module level attributes by eliminating varying attributes for a set of common modules.
- Create a DXL script that can merge similar modules, keeping the links intact.
- Export this merged module to keep the minimum number of attributes in Rational DOORS Next Generation.
- Ensure that enumerated types of attributes have unique values.
- After the import, if you want to embed the OLE object, do so. Embedding the OLE object can be a time-consuming process.
- Create a separate folder for each ReqIF import so that you can identify modules based on the ReqIF file name.
- After the import, if needed, edit the artifact type of the imported modules.
- Creating type URIs
- Open first module and click Edit > Attributes.
- Ensure that you are on the Attributes tab, and select the Risk attribute.
- Click Edit, and type the URI.
- Click OK, and then click Close.
- Open the attribute definition on the second module and enter the same URI for the Risk attribute. This URI identifies the attribute as being semantically identical to other attributes that have that URI. The attribute names do not need to match.
- Edit the Risk attribute for other two modules: User Requirements and Functional Requirements.
- If these modules are part of an exported ReqIF file and that file is imported into Rational DOORS Next Generation, only the Risk attribute will be created. Attributes that have the same name and numeric suffixes, such as Risk 2, Risk 3, or Risk 4, will not be created.
- Similarly add a URI for the underlying user created data types e.g. if Risk attribute was of user created data type called “High Medium Low”, in all the modules, a URI called “http://serverA.com/types/riskdatatype” was added to the type in all four modules.
- If needed, add a URI for all common attributes and their data types, especially if these are user created data type.
- Removing duplicate attributes after a ReqIF import
- Log in as an administrator, and then click Manage Project Properties.
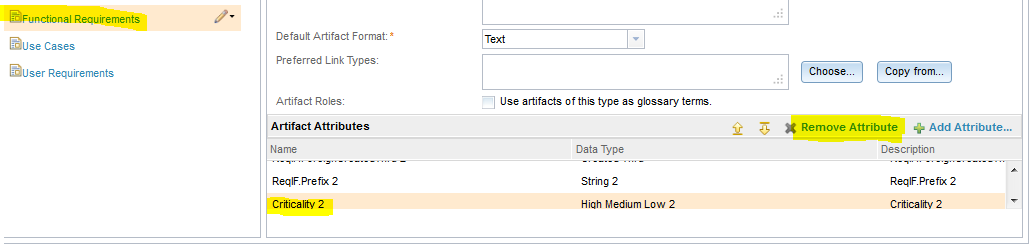
- On the Artifact Types tab, select the artifact that has attributes with numeric suffixes, which in this case is Functional Requirements.
- In the Artifact Attributes section, click Add Attributes, and then select the attribute without numeric prefix that you want to add, such as Criticality. This attribute will be added to the list of attributes. Be sure to click Save in the upper-right corner.
- Click Artifacts, right-click Browse Artifacts, and select Open Link in New Tab.
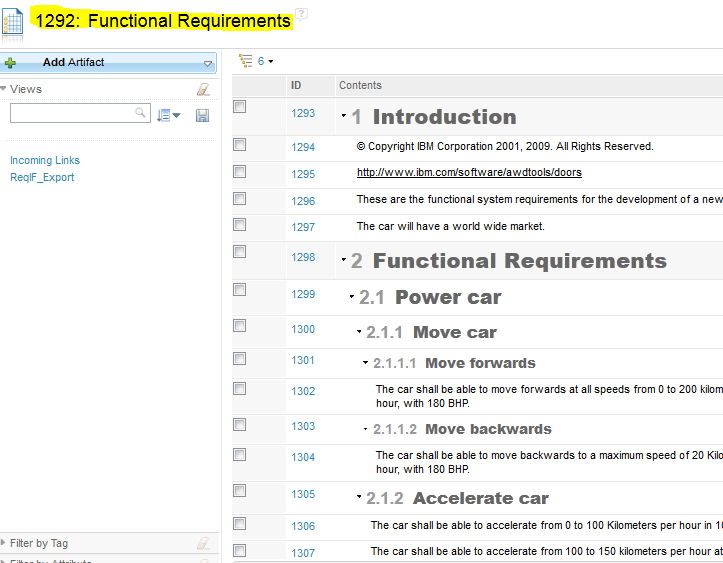
- On the new tab, double click the Functional Requirements module to view all of the requirements in that module.
- Modify this view to display the attributes that you need to replace and the replacement attribute, such as Criticality and Criticality 2:
- Hover your cursor to the left of the ID column, click the Add or Remove columns icon, and click More.
- In the Change Column Display Settings window, from the Select attributes or link types list, select Criticality, and then click Add. Also select Criticality 2 and then click Add.
- Click OK. The view displays the Criticality and Criticality 2 columns, as shown in the next image.
- Sort all of the requirements based on value of the Criticality 2 attribute, note its first value, and then select all of the requirements that have this value.
- Assuming that you selected seven requirements, click the Edit icon for a requirement and select Edit the attributes for 7 Artifacts.
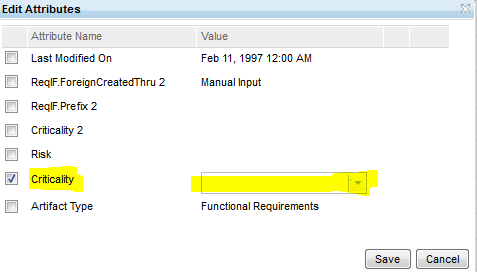
- In the Edit Attributes window, select Criticality expand the list in the Value column, select the appropriate value, and click Save.
- Select the next set of requirements that have the same value, change the value for the Criticality attribute, and then click Save. Similarly, change the values for the Criticality attribute for all of the requirements.
- Remove the Criticality 2 attribute by returning to the Artifact Types tab, selecting the Criticality 2 attribute, and then clicking Remove Attribute. Be sure to click Save in the upper-right corner.
- Remove the Criticality 3 and Criticality 4 attributes for other modules by following the same procedure that you followed to remove the Criticality 2 attribute.
- After all of the duplicate attributes are removed from all of the modules, delete the attribute definitions, one by one, from the Artifact Attributes tab:
- For each attribute, click the Edit icon and click Delete. When prompted to confirm the deletion, click Yes.
- In all modules, replace all attributes that have numeric suffixes.
- Remove the attribute data type, which in this case is High Medium Low 2:
- Click the Attribute Data Type tab, and select the attribute data type to delete: High Medium Low 2.
- Click the Edit icon for that attribute data type, and then select Delete.
- Follow the latter steps to remove any other unwanted attribute data types.
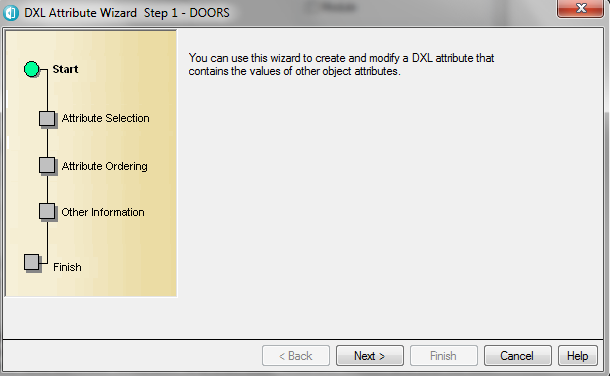
- Creating custom attributes for system attributes by using the DXL Attribute wizard
- Open the DOORS module in exclusive edit mode.
- Click Edit > Attributes and click New. The New Attribute window opens.
- Enter a name, such as DXL_CreatedBy or DXL_CreatedOn.
- Make sure that the selected type is Text.
- Select the DXL attribute check box, and then click Wizard. The DXL Attribute wizard opens.
- Click Next and select the system attribute that you want to copy. Because only one system attribute is to be copied for each custom attribute, in step 3 in the wizard, click Next.
- In step 4 of the wizard, clear the Show attribute/ property name check box, and then click Next.
- In step 5 of the wizard, click Finish. An attribute is created and populated with the value from the system attribute, as the next image shows:
This paper is for users of IBM Rational DOORS 9.5 and later who want to adopt either IBM Rational DOORS Next Generation 4.0.1 and later or IBM Rational Requirements Composer 4.0.1 and later for selected new projects.
For certain projects, you might want to seed a Rational DOORS Next Generation or Rational Requirements Composer project with information from a Rational DOORS project. To do so, you can export modules from Rational DOORS to Rational DOORS Next Generation or Rational Requirements Composer by using Requirements Interchange Format (ReqIF).
Before you export and import, plan by using this information.


Notes: For the sample ReqIF export and import, note this information:
Note: There is only one way to create a non-template based project in Rational DOORS Next Generation. If you use other ways to create project areas, you must use a process template.

Review the Rational DOORS Next Generation project to see the results of the import. 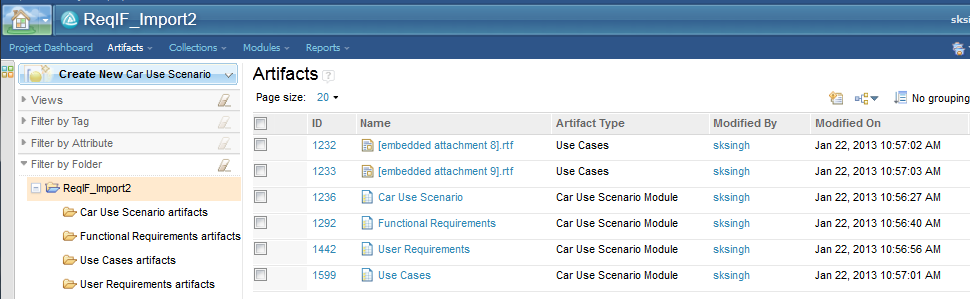


None of these options are good. It would be better to see the OLE expanded and placed in the context of the requirement. IBM development is looking at this request.
This activity is another approach to minimize the vast number of attributes that are created for the user-defined attributes in Rational DOORS Next Generation during a ReqIF import. This feature is available in Rational DOORS 9.4.0.1 and Rational DOORS 9.5 only. After this feature is defined, it identifies equivalent types across modules.
The custom property, Risk, exists in all four of the formal modules, with the values High, Medium, and Low. If you do not create a URI for this attribute, after the import, you will have four attributes in Rational DOORS Next Generation: Risk, Risk 2, Risk 3, and Risk 4. In this task, you create the URI for this attribute and therefore should see this attribute only once.
To define the URI for an attribute that is used in different modules, follow these steps:

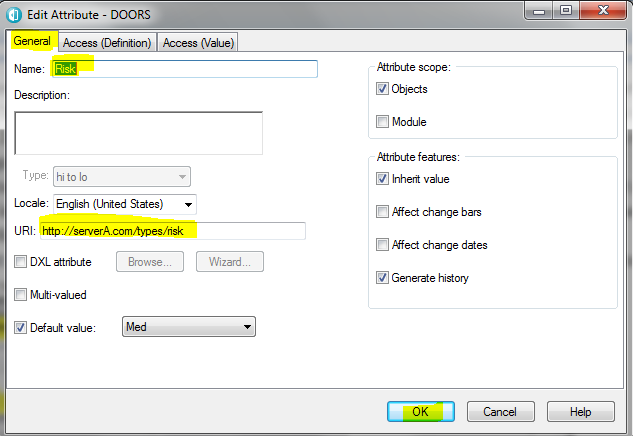
Notes: The “http://serverA.com/types/risk” is no real URL. There is no webserver at ServerA. In fact, no server named serverA is accessible from this computer.
Replace the Criticality 2 attribute, which is a duplicate of the Criticality attribute.


Notes: In this case, the values are blank for criticality and criticality 2 has only “High” as value. In general, there may be different values.


Applicability
You can use this technique to seed a Rational DOORS Next Generation project or Rational Requirements Composer project with requirements from Rational DOORS. The supported versions for this activity are Rational Requirements Composer and Rational DOORS Next Generation 4.0.1 and Rational DOORS 9.5.
About the author
Shiv Kumar Singh is a member of the SSE Jump Start Team, and leads the early adoption program for Rational DOORS Next Generation. The SSE Jump Start Team assists ISSR, CTPs, and IBM partners and customers with PoC and PoT related to SSE Solutions, including the Rational solution for Collaborative Lifecycle Management (CLM) products, Rational DOORS, Rational DOORS Next Generation and Rational Engineering Lifecycle Manager. Prior to this role, he helped several IBM customers adopt many SDLC processes and IBM Rational tools. He can be contacted at sksingh@us.ibm.com
© Copyright 2013 IBM