
Install RTC Eclipse Client 4.0 into an existing Eclipse 3.6.2 using Installation Manager
Summary
Rational Team Concert (RTC) Eclipse Client 4.0 is built on top of Eclipse 3.6.2, and the full installation of RTC includes an instance of Eclipse 3.6.2. Alternatively, it is possible to install the RTC 4.0 features into an existing Eclipse 3.6.2 environment using Installation Manager (IM).
More Information
This following procedure shows you how to install the RTC Eclipse Client 4.0 into an existing Eclipse 3.6.2 instance, and it provides links to the required features and patches that need to be installed.
Determine how you will complete this procedure. There are two paths through the steps in this guide:
- If you want to use the web installer to start the installation, complete the whole procedure, starting with step 1.
- If you want to use a Local Repository instead of the Web installer, first complete the following steps:
- Install the features that your Eclipse package is missing. Use the instructions in the Required Features in the Eclipse environment section.
- Install the required set of Eclipse patches. Use the instructions and information in the Required Patches in the Eclipse environment section.
Considerations
- If a different Rational product has been installed and you want to share the RTC functionality in the same Eclipse shell, this is not the correct guide; for that case you need to install RTC in the same package group where your other Rational product is installed.
- The steps in this procedure were tested in Windows 7 with the “Eclipse Classic 3.6.2” 32 bits package and Installation Manager 1.5.2 (included in the RTC 4.0 Web Install).
- We provide the instructions to install the features that you need to include into your Eclipse environment.
Pre-reqs:
- You are using a win32 or linux32 Eclipse package. Installation Manager 1.5.2 cannot install RTC into an existing Eclipse package working in a 64 bits mode.
- Your existing Eclipse environment has a valid JVM that is ready to use (indicated in the eclipse.ini file or a JVM is set in the environment). Check https://jazz.net/wiki/bin/view/Main/CLMWorkbenchSystemRequirements to verify that you have a supported JVM.
Steps
- Required Features in the Eclipse Environment
- “EMF & XSD”
- “PDE”
- “JDT”
- Download the(se) zip(s) corresponding to your Eclipse package and extract the content to a temporary location.
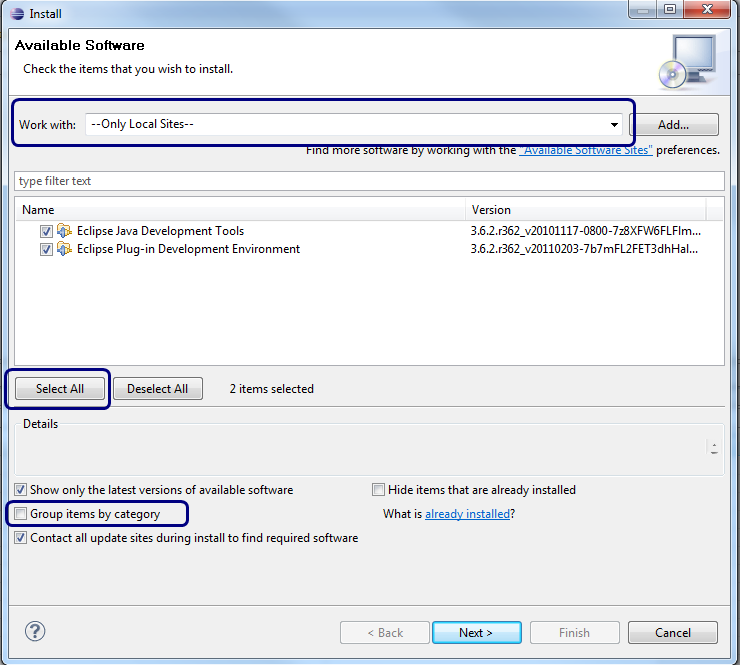
- Start your Eclipse package. Click in Help > Install New Software.
- Click Add.
- Select each directory containing the update sites that you created in step 1.
- After you have added all the local folders, unmark the checkbox “Group items by category” select to “Work with –OnlyLocal Sites–“, press on the button “Select all”.
- Proceed with the install of the new features and restart eclipse when prompted.
- Proceed with the installation of RTC using IM.
- Required Patches in the Eclipse environment The Eclipse version that is included with RTC 4.0 has some patches from Eclipse to correct some defects found during development. It is required that you have these fixes in your Eclipse environment in order to proceed with the installation of RTC. If your Eclipse environment has the required patches, skip to Get the Web Installer and start Installation Manager.
- Navigate to IBM Fix Central and download the zip file labeled as Fix Pack : 4.0.0.0-Rational-RTC-Eclipse-IDE-groupfixpack to get the patches.
- Extract the content of the zip to a temporary location.
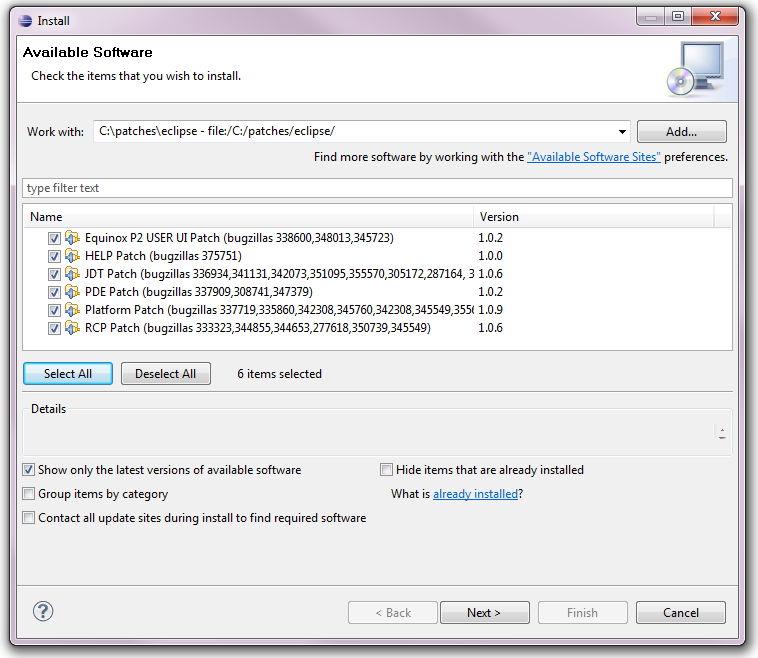
- Start your Eclipse package. Click Help > Install New Software.
- Click Add and select the Local… button.
- Select the temporary location that was created previously. Press OK twice.
- After you have added the folder, clear the two checkboxes “Group items by category” and “Contact all update sites during install to find required software”. See the image for an example.
- Proceed with the installation of the new features, and restart Eclipse when prompted.
- Proceed with the installation of RTC using IM in step 3 or step 4 if you have a local repository and IM installed into your machine.
- Get the Web Installer and start Installation Manager
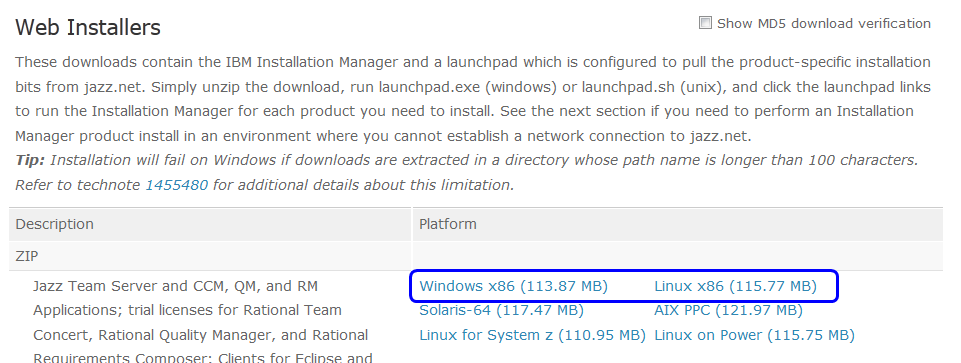
- Get the RTC Web Installer zip from https://jazz.net/downloads/rational-team-concert/releases/4.0?p=allDownloads for your platform (Windows or Linux are supported by the RTC Eclipse client).
- Extract the content of the zip into your preferred location.
- Go to the location where you extracted the content.
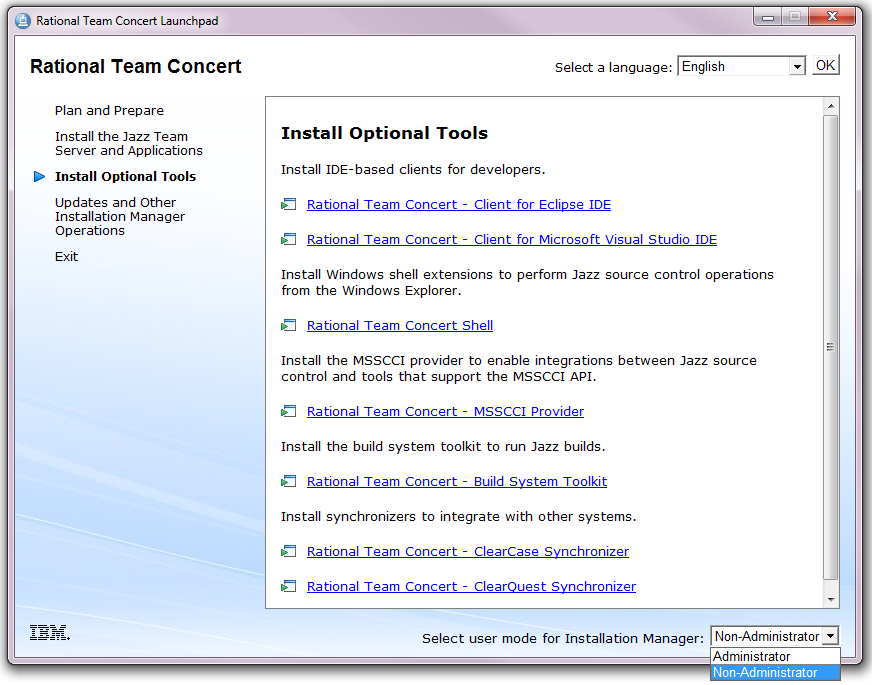
- Start the Launchpad with launchpad.exe or launchpad.sh, the RTC Launchpad should appear.
- Select “Install Optional Tools” in the left side of the Launchpad.
- You can install RTC in a shared location (administrator privileges are required). According to your needs (or privileges) use the combobox in the bottom of the Launchpad to start or install IM with administrative privileges.
- To start IM, in the “Install Optional Tools” section in the Launchpad, click the link “Rational Team Concert – Client for Eclipse IDE”.
- Use your jazz.net account if credentials are requested.
- Install into an Existing Eclipse
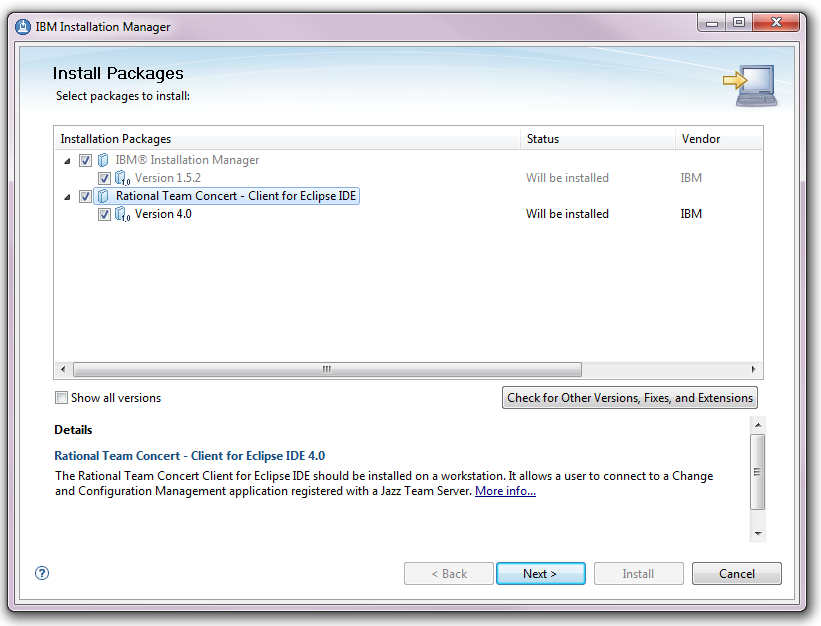
- The first Install Packages panel shows the products that are going to be installed. If IM needs to be updated or installed, it is displayed on this page. Click the “Next” button.
- Accept the license and click “Next”. If IM is going to be installed for the first time, accept the defaults in the next panel and click “Next”.
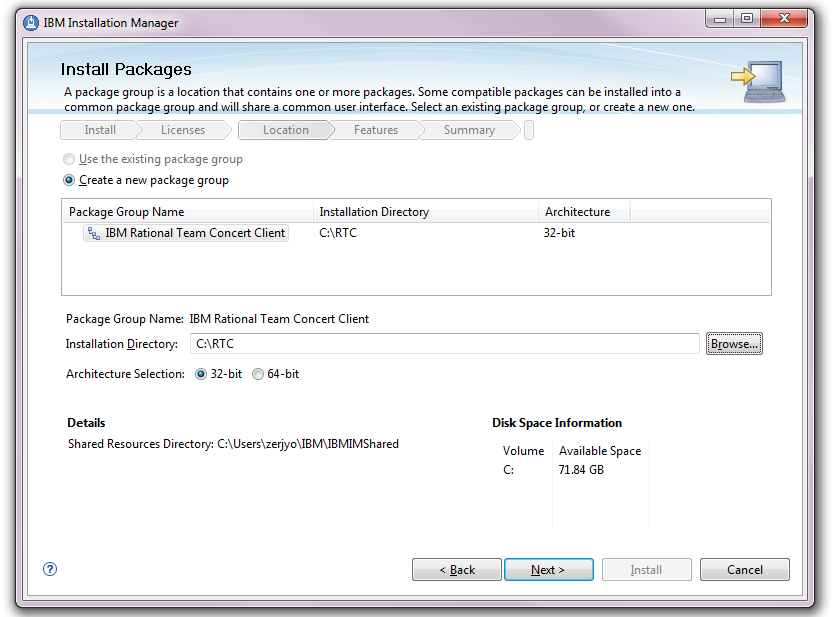
- A panel with explanations about the “Package group” appears. If it is not selected, choose “Create a new package group” and “32-bit” in the Architecture Selection section. To continue click “Next”.
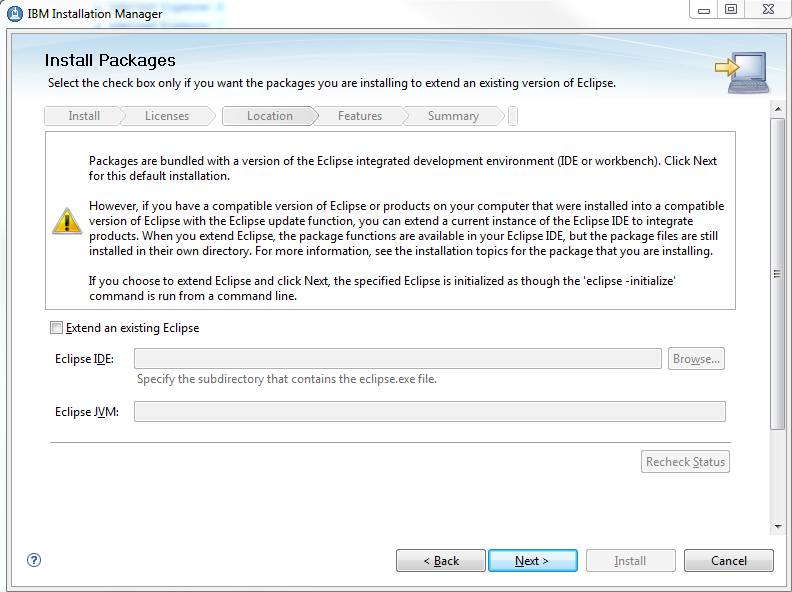
- The panel that allows you to Install RTC into an existing Eclipse opens.
- Check the checkbox “Extend an existing Eclipse”.
- Click “Browse…” and locate the folder on you system that contains the Eclipse executable file.
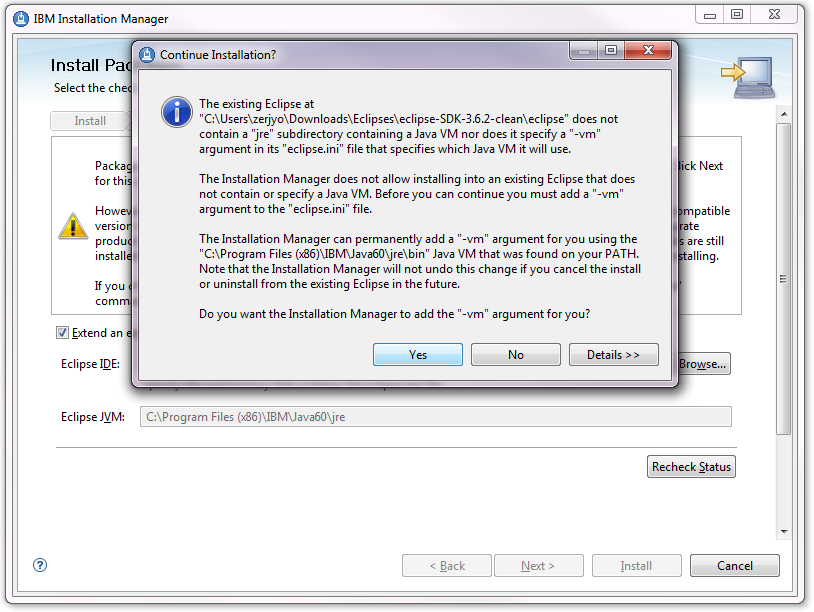
- IM will search for the JVM used by this Eclipse environment. As indicated in the pre-reqs, your Eclipse environment must have a valid JVM available. If the folder does not contain a valid Eclipse environment or the JVM is incompatible, IM displays a notification. If a compatible JVM is available in your system but it is not set in the eclipse.ini file, IM will offer to make the change. If this happens and you want IM to move the file for you, click Accept. Press “Next” if the validation completed successfully.
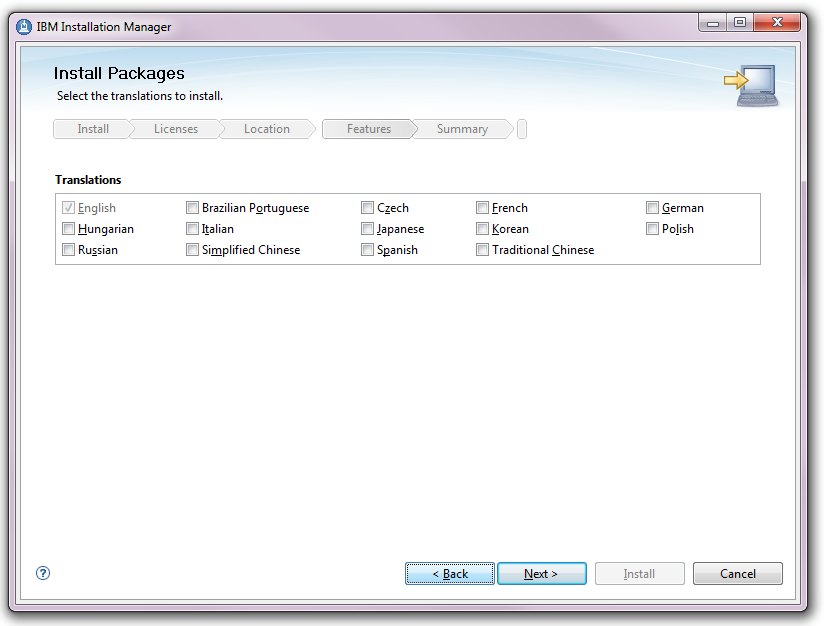
- Do not select to install other languages; native Eclipse does not include language packs and the installation will fail if any language content is selected. Click “Next”.
- Select to install the “Sametime Integration” if you need it. Click “Next”.
- Select the method by which you want to access the Help system, then click “Next”.
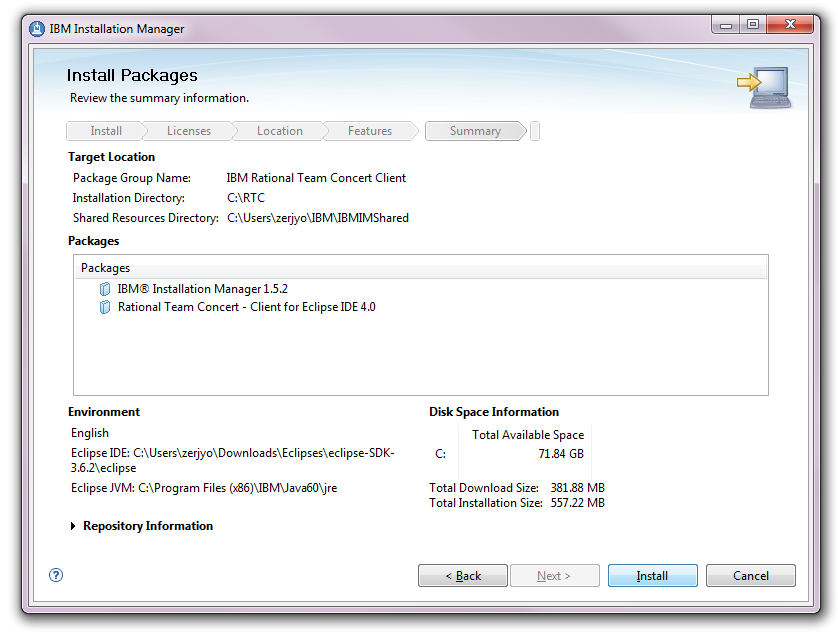
- Start the installation by clicking “Install”.
- Once the installation ends, close IM and the Launchpad. Start your Eclipse environment and verify that the Work Items perspective is available.
Packages (Eclipse editions) like the CPP or JEE will need to install extra Eclipse features in order to accept the RTC requirements. Please note that all the Eclipse 3.6.2 packages do not contain the feature patches required by RTC. These patches are discussed in the next step, but you must install some Eclipse features first.
The 3 packages that must be available in Eclipse are:
Below you can find the links to the zips containing the required features according to your Eclipse package.
Identify and Install the Eclipse features:
Package: JEE and RCP
Features to install for 3.6.2: Eclipse Modeling Framework SDK Update (EMF) 2.6.1
Package: CPP
Features to install for 3.6.2: Eclipse Plug-in Development Environment (PDE) 3.6.2 and Eclipse Java Development Tools (JDT) 3.6.2
Package: Java
Features to install for 3.6.2: Eclipse Modeling Framework SDK Update (EMF) 2.6.1 and Eclipse Plug-in Development Environment (PDE) 3.6.2
Identify and Install the Eclipse patches:

Related Links
The following links point to related information:- Install the Rational Team Concert client for Eclipse 3.0.1 into an existing Eclipse 3.6.x using Installation Manager
- Install RTC Eclipse Client 2.x into Eclipse 3.4.2
- Installing Rational Eclipse-based (7.5 and 8.0) products within an existing Eclipse
- Our technote to install RTC 3.0.x over Eclipse 3.6.x
About the author
Sergio Jose Deras Arreola is a Jazz developer in the Install team in charge of the Ratonal Team Concert offerings based in the Installation Manager install technologies. He can be contacted at sderas@mx1.ibm.com.
© Copyright 2012 IBM