
Using Rational Team Concert on Mac with Xcode (Part 2)
Overview
In the first part of this series of articles you learned about the Jazz SCM CLI and how it can be used on Mac with the Xcode IDE. There were some steps that you took to set up your environment. You shared your code with an RTC server in a repository workspace. The repository workspace keeps track of your change sets and history so that you can look at the history later on to track down the causes of bugs or to understand why you wrote a specific piece of code. Change sets can be discarded, suspended and resumed from your repository workspace.
Although RTC can be used to backup your own work and keep your own history it is designed to enable you to collaborate with other contributors, stakeholders and customers. Jazz SCM has streams to allow you and other contributors to flow your changes. RTC has Work Items to manage tasks such as defects and enhancements where discussions can be followed through work item comments.
This article is the second part of a series of articles focusing mainly on team collaboration in an RTC, Mac and Xcode IDE environment. The third and final part will cover how to automate your build and tests, which helps your team to continuously keep on top of compile errors and test failures.
Setting up your team environment
In the previous article the section "setting up your environment" described how to get Jazz SCM installed on our Mac with some special scripts and some important changes to your settings. You will need to run through these steps if you haven’t already in order to prepare your system to work in a team environment. Any new contributors in your team should follow the same steps so that you have a consistent configuration.
Project areas were not necessary before because all of your work was kept in your own private repository workspace. However, streams and work items require a project area to define the necessary permissions and schemas for your team. Creating project areas is beyond the scope of this article and it is assumed that a project area exists with the necessary permissions and licenses for you and your team members to do your work.
Repository workspaces primarily exist for your to manage your own work separately from the rest of the team. Streams are the places where teams deliver their change sets so that other team members can consume them in their own repository workspaces. Both streams and repository workspaces are stored on the Jazz SCM server so that they are be safely backed up in case of disasters. This two-tiered approach is somewhat unique and it can take some time to adjust to it.
If your team already has a stream set up then you can skip to the next section.
To create a team stream in your project area you can use the create stream command. Once the stream is created it is empty but you can make your repository workspace flow into that stream and deliver your component and its history into the stream.
$ cd /Users/Chris/sandbox/MyXcodeProject $ lscm create stream MacTeamStream --projectarea ChrisProjectArea1 Stream (1183) "MacTeamStream" successfully created. $ lscm workspace change-target MyMacWorkspace MacTeamStream Target changed. $ lscm deliver Delivering changes: Repository: https://myserver:9443/jazz/ Workspace: (1183) "MacTeamStream" Component: (1136) "CoolXcodeProject" Deliver command successfully completed.
The above commands created a stream called MacTeamStream in the project area ChrisProjectArea1, changed your repository workspace to flow with this stream and delivered the CoolXcodeProject component along with all of its history into the MacTeamStream. The stream is almost ready to be used by the rest of your team. The next step is to give your team members access permission to see the CoolXcodeProject component.
At the time of writing there is no way to change the ownership of a component using the Jazz SCM CLI. The eclipse client must be used to perform this task. Launch the eclipse client in the jazz/client/eclipse directory of your full client zip install. If you downloaded only the CLI then you will need to download the full client zip from jazz.net.
The eclipse client prompts for a workspace directory on startup. Choose a workspace directory. It doesn’t really matter where in this case. Once the workbench finishes loading go to Window > Show View > Team Artifacts. Click on the "Create repository connection" link and fill in the server URL, username and password. Right-click on the new repository connection and pick Manage Connected Project Areas. Pick your project area in the dialog and click Finish.
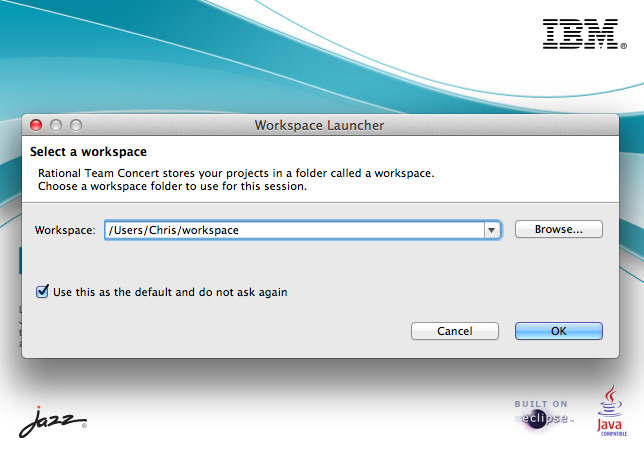 Eclipse choose workspace dialog | 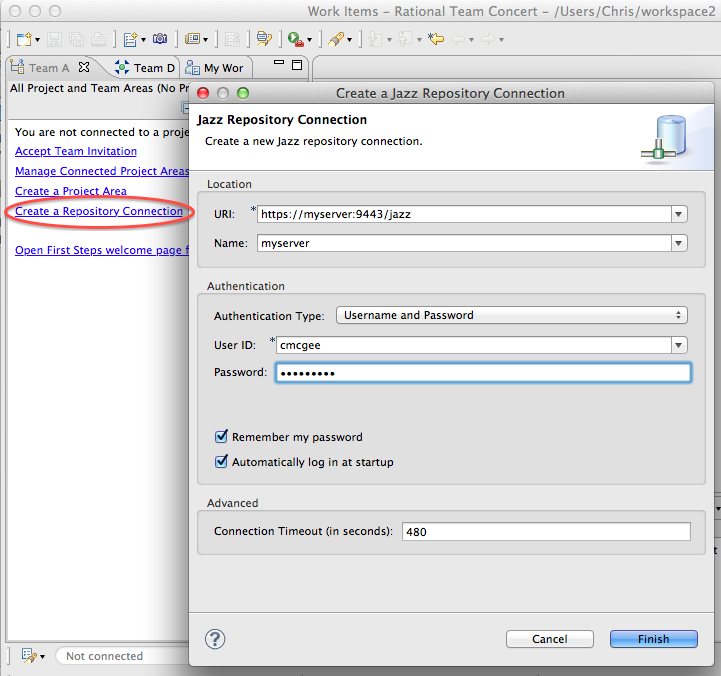 Eclipse client team artifacts view |
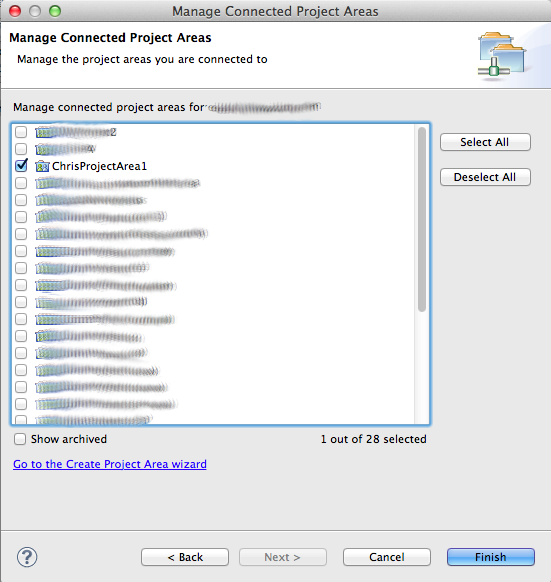 Eclipse client manage connected project areas dialog | |
Once connected to the server and project area find the My Repository Workspaces folder and double-click on your repository workspace. Choose your component from the list and click "Change Owner." In the dialog choose your project area as the new owner and click ok. Once back in your repository workspace pane click save.
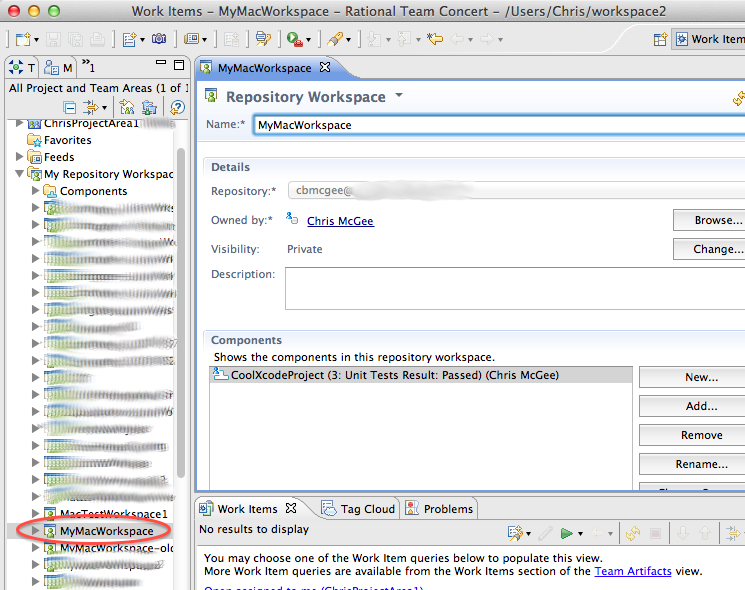 Repository workspace editor | 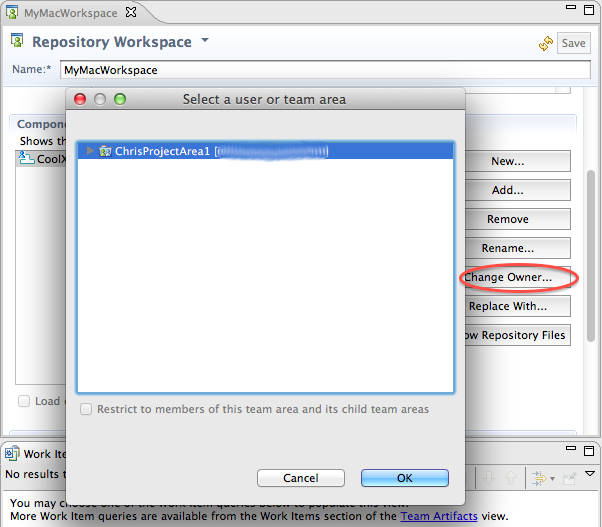 Change component owner dialog |
Now that the stream is ready and the component is accessible to everyone in the project area you can begin collaborating on the development of your application. Other team members can create their own repository workspaces from the stream so that change sets can flow between their repository workspace and the stream. More details are available in the next section.
Flowing with the stream
In the first part in this series of articles you learned how to create repository workspaces, change sets and snapshots. Also, you learned how to manage your change sets and dig into the history. When you work in a team environment there are some differences in the way that you work with Jazz SCM.
Repository workspaces can be created from a stream, which replicates the components and history from the stream at that point in time. Also, the new repository workspace flows with the stream. Change sets are delivered from the repository workspace to the stream and change sets are accepted from the stream to your repository workspace. To create a repository workspace that flows from the stream you use the following command:
$ lscm create workspace -s MacTeamStream -r myserver MyWorkspace
Once the repository workspace is created it can be loaded into a sandbox on your computer. Once it is loaded you can open up the Xcode project to begin working with the code.
$ cd /Users/Chris $ mkdir sandbox $ cd sandbox $ lscm load -r myserver MyWorkspace Successfully loaded items into the sandbox. $ lscm status Workspace: (1184) "MyWorkspace" <-> (1183) "MacTeamStream" Component: (1136) "CoolXcodeProject" Baseline: (1179) 3 "Unit Tests Result: Passed"
Notice that the first line of the status shows a double-arrow between the repository workspace and the stream. The repository workspace flows with the team stream. Your completed change sets will no longer disappear from the outgoing section of your status until you deliver them to the stream. When you deliver a change set it is automatically complete. The deliver command either delivers all of your outgoing change sets or allows you to deliver a single change set using its alias number.
$ lscm deliver ... OR ... $ lscm deliver 1190
Your delivered change sets show up when your team members run their status command. Incoming changes can be accepted into your repository workspace, which updates the files in your sandbox as well. Whenever you accept changes there is the possibility of conflicts with your change sets. For simple conflicts involving content changes there is the scm-merge script mentioned in the previous article, which brings up an Xcode diff merge tool to enable you to pick the changes you want. Once you resolve the conflict you can use the scm-resolve script to check-in the merges into your own change set and mark the conflict as resolved.
$ lscm status Workspace: (1135) "MyMacWorkspace" <-> (1183) "MacTeamStream" Component: (1136) "CoolXcodeProject" Baseline: (1179) 3 "Unit Tests Result: Passed" Outgoing: Change sets: (1187) *--@ "Output something to see when the app starts up" 06-Jun-20> Incoming: Change sets: (1186) ---$ "Add tracing when the app first starts up" 06-Jun-2012 11:> $ lscm accept Conflict autoresolution failed in workspace "MyMacWorkspace" Repository: https://myserver:9443/jazz/ Workspace: (1135) "MyMacWorkspace" Component: (1136) "CoolXcodeProject" Change sets: (1186) --#$ "Add tracing when the app first starts up" 06-Jun-2012 11:21 AM Changes: -#-c- /MyXcodeProject/MyXcodeProject/MyXcodeProjectAppDelegate.m Following workspaces still have conflicts after accept: MyMacWorkspace Run 'lscm resolve' or 'lscm conflicts' or 'lscm status' for help in resolving the conflicts. $ scm-merge MyXcodeProject/MyXcodeProjectAppDelegate.m Run scm-resolve <file> after done merging ... <Merge the changes using the Xcode merge GUI> ... $ scm-resolve MyXcodeProject/MyXcodeProjectAppDelegate.m Workspace: (1135) "MyMacWorkspace" <-> (1183) "MacTeamStream" Component: (1136) "CoolXcodeProject" Baseline: (1179) 3 "Unit Tests Result: Passed" Outgoing: Change sets: (1187) *-#@ "Output something to see when the app starts up" 06-Jun-2012 11:26 AM Changes: -#-c- /MyXcodeProject/MyXcodeProject/MyXcodeProjectAppDelegate.m Conflicted items have been successfully resolved.
You won’t always have conflicts when accepting other change sets. If there are content changes sometimes the CLI will be able to automatically merge them as long as all changes occur on separate lines in the file.
Sometimes certain files are not easily merged when there are conflicts. Xcode has some file types that fall into this category: xib, nib and pbxproj. There are times when you need to make large changes to a file and do not want anyone else to touch the file until you are finished with your changes. In these cases you need to lock the file, make the changes, check in the changes into a change set and deliver. This prevents others from checking in changes to that file until you are finished and unlock the file.
$ lscm lock acquire MyXcodeProject/MyXcodeProjectAppDelegate.m Locks successfully acquired. $ lscm lock list L (1188) "/MyXcodeProject/MyXcodeProject/MyXcodeProjectAppDelegate.m" cbmcgee (1136) "CoolXcodeProject" (1183) "MacTeamStream" $ lscm lock release MyXcodeProject/MyXcodeProjectAppDelegate.m Locks successfully released.
Don’t forget to release all of your locks when you are done. You can use the lock list command as shown above to check if you have any unreleased locks or check for locks acquired by other team members.
Working with work items
Work Items are accessed via your web browser. The entry point to your project area is through the server URL you have been using all along. You can navigate to this address in your web browser and log in using your credentials.
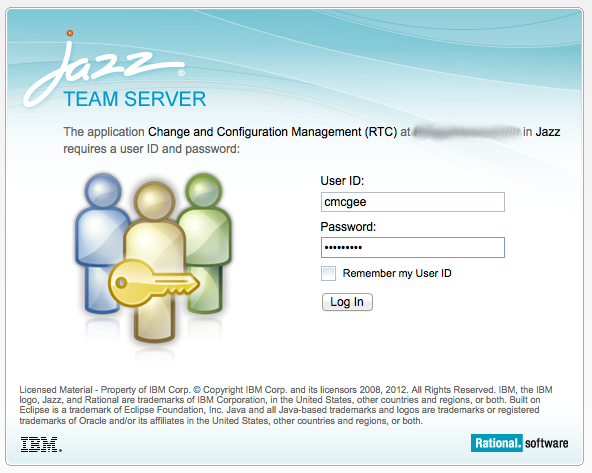 Login page |
After logging into the server you are shown all of the project areas for which you are a member. Most activities on the server are done inside project areas. Click on your project area to continue.
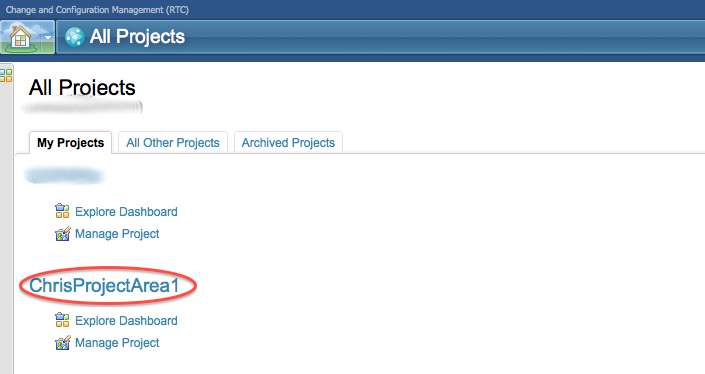 Project areas |
The project area contains a dashboard for your team. You can customize this dashboard to suit the needs of your team: work item changes, build results, reports and more. The server provides a customizable personal dashboard as well. Dashboards are beyond the scope of this article but can be configured to help you and your team see what’s happening in your project.
The work items section of the project area lets you create, open and find your assigned work items including defects, tasks and enhancements. To access the work items page click on the work items section at the top of the dashboard page.
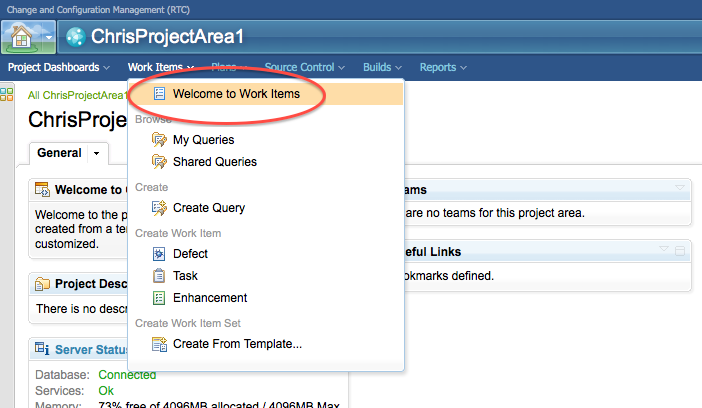 Navigate to work items page | 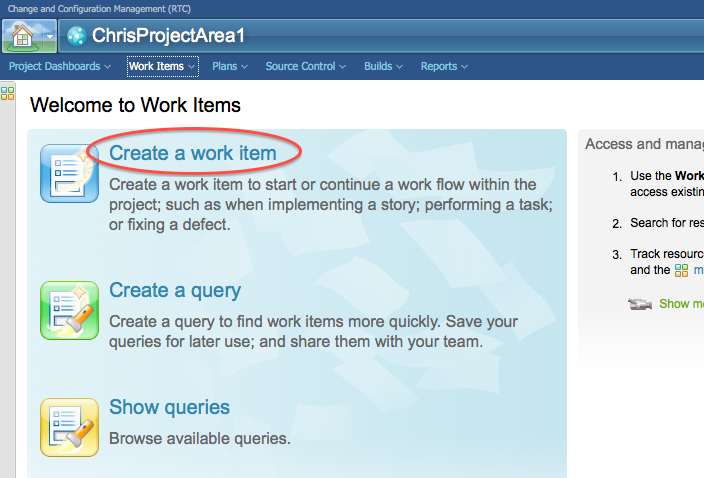 Work items page |
Create work item
To create a new work item click on the Create Work Item link on the work items page. The type of work item (e.g. defect, task, enhancement) is chosen in the work item form, which affects the available fields. For the most part work items all have description, planned for and owned by fields. At the bottom there is a comment section where discussions are held.
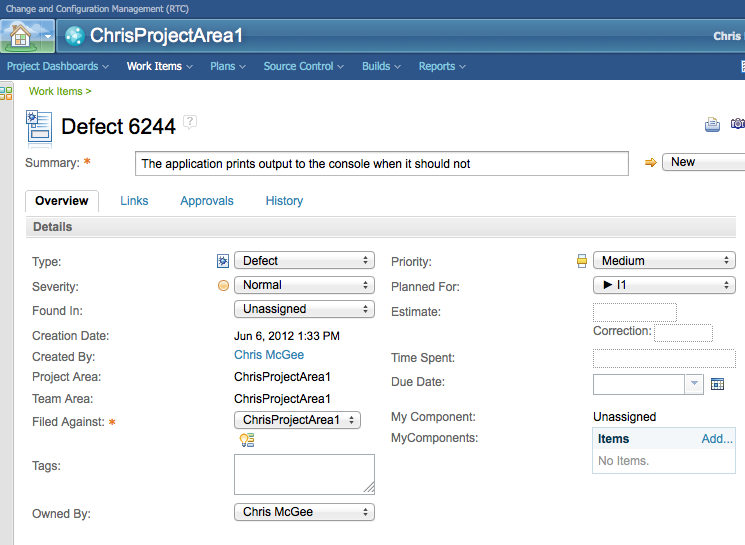 Create new defect |
Current work
Project areas come with some useful work item queries. For instance, there is a query called "My current work" that will display all the work items that are assigned to you and have not yet been resolved. You can access this query by going to the work items page and choosing Show queries > Shared queries > My current work.
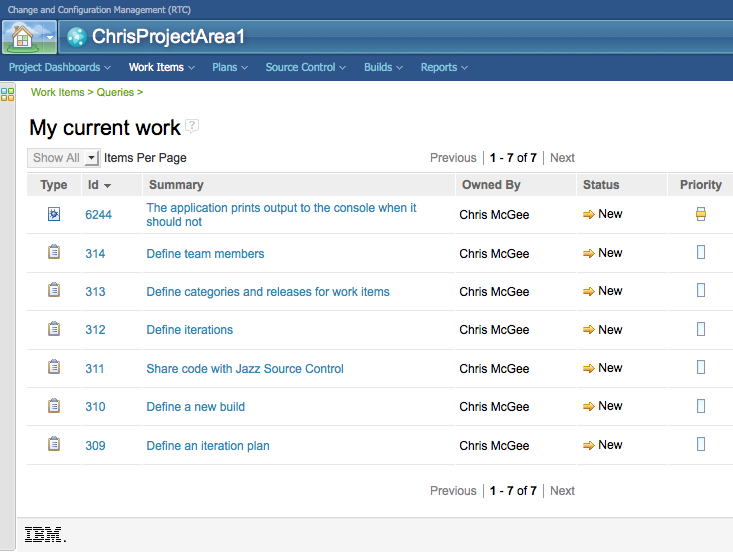 Current work |
Link change sets with work items
Work items can link to change sets in Jazz SCM enabling some very powerful workflows. A work item adds extra context to a change set such as whether it is a bug fix or a new feature. Also, the work item description and comments can provide a glimpse into the reasons for the change.
$ lscm checkin ./MyXcodeProject/MyXcodeProjectAppDelegate.m Workspace: (1135) "MyMacWorkspace" <-> (1183) "MacTeamStream" Component: (1136) "CoolXcodeProject" Baseline: (1179) 3 "Unit Tests Result: Passed" Outgoing: Change sets: (1189) *--@ "<No comment>" 06-Jun-2012 02:00 PM Changes: ---c- /MyXcodeProject/MyXcodeProject/MyXcodeProjectAppDelegate.m $ lscm changeset comment 1189 "Remove printfs from app delegate" Comment set. $ lscm changeset associate 1189 6244 Link created. $ lscm changeset complete 1189 Change set completed. $ lscm status Workspace: (1135) "MyMacWorkspace" <-> (1183) "MacTeamStream" Component: (1136) "CoolXcodeProject" Baseline: (1179) 3 "Unit Tests Result: Passed" Outgoing: Change sets: (1189) *--@ 6244 "The application prints output to the console when it shou..." - "Remove printfs from app delegate" 06-Jun-2012 02:00 PM
The change set is now associated with the work item. When you look at the work item in your web browser (refresh may be necessary) you will see your change set in the links tab. Once the change set is there other team members can look at your change set in their web browser. You can add an approval or review in the Approvals tab of the work item.
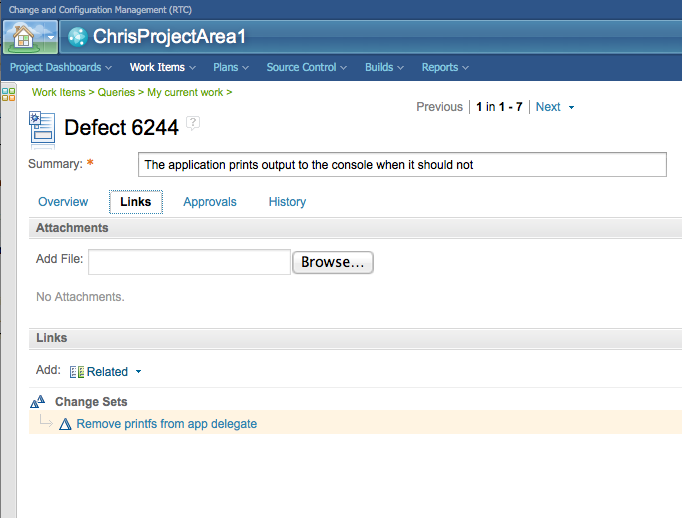 Attached change sets |
Use work items for code reviews
Work items provide a central place to discuss and propose changes to the code and to attach those changes once they are finished. It is also a good place to conduct a review. Reviews can be created in the Approvals tab of the work item.
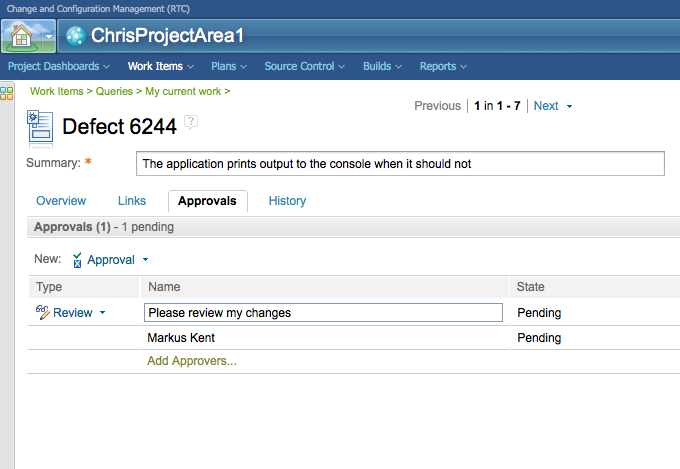 Create an approval |
If you review change sets you can view the differences directly in your web browser. The content differences are color coded and can be useful for reviewing small changes.
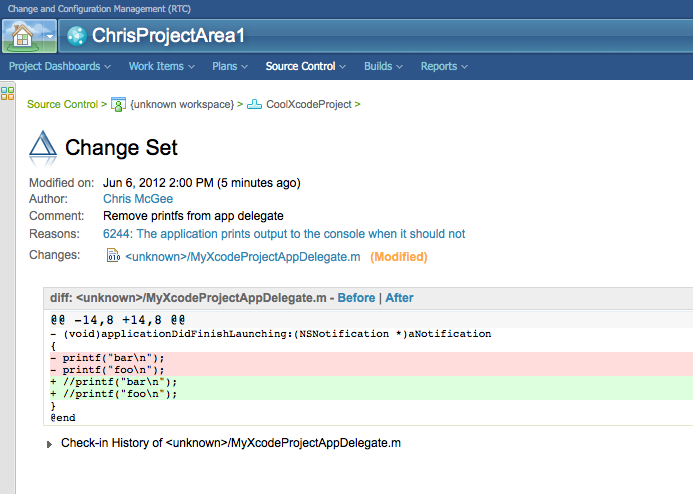 View change set |
Sometimes it is really helpful to try out someone else’s change while reviewing it. The change set aliases that you have been using so far are unique only to the current user. The Unique ID (UUID) of the change set is needed in order to share a change set with other users.
Reviewee
The reviewee finds the UUID of their change set and adds it to a comment on the work item for the reviewer.
$ lscm -u yes -a no status Workspace: (_0y2J4K5xEeGOwYY0KAk2eg) "MyMacWorkspace" <-> (_VyDcMK8-EeGOwYY0KAk2eg) "MacTeamStream" Component: (_EAUZoK5yEeGOwYY0KAk2eg) "CoolXcodeProject" Baseline: (_G9MFEK8PEeGOwYY0KAk2eg) 3 "Unit Tests Result: Passed" Outgoing: Change sets: (_dPUUYbABEeGOwYY0KAk2eg) ---@ 6244 "The application prints output to the console when it shou..." - "Remove printfs from app delegate" 06-Jun-2012 02:00 PM
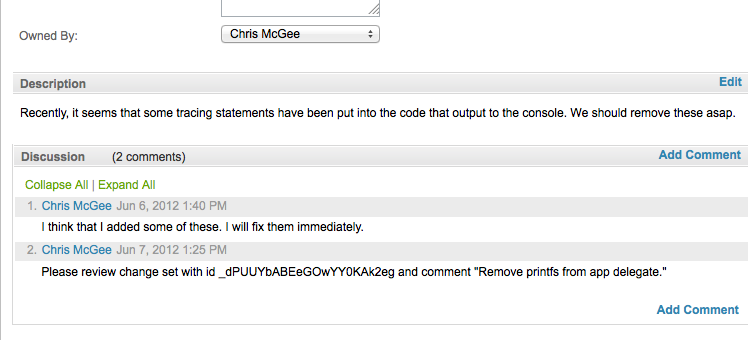 Comment with change set UUID |
Reviewer
The reviewer copy/pastes this UUID into their accept command to get the changes in their repository workspace and sandbox. When they are finished the review they can discard the change set or wait until it is delivered to the stream.
$ lscm accept _dPUUYbABEeGOwYY0KAk2eg Repository: https://myserver:9443/jazz/ Workspace: (1135) "MyMacWorkspace" Component: (1136) "CoolXcodeProject" Change sets: (1189) ---@ "Remove printfs from app delegate" 06-Jun-2012 02:00 PM Changes: ---c- /MyXcodeProject/MyXcodeProject/MyXcodeProjectAppDelegate.m Work items: (1223) 6244 "The application prints output to the console when it shou..." ... Review and test the changes ... $ lscm discard 1189 Change sets successfully discarded.
Summary
This time around you learned about how to move your project from single contributor to multiple contributors. You created a stream with the contents and history from your original repository workspace. Once a stream is created and the permissions are adjusted other team members can create their own repository workspaces from the stream and flow with it. When repository workspaces flow with a stream change sets can be delivered or accepted with the stream. Conflicts will happen more frequently while working in a team and either conflicts are merged or files are locked pre-emptively to avoid conflicts in the first place.
The project work is divided up into work items such as defects, tasks and enhancements. Change sets can be attached to work items providing a context for the change and a place where others can review the changes. When you provide the UUID for a change set other team members can easily accept the changes into their own sandbox to do their own testing and detailed review of the proposed changes.
The third and final part in this series of articles will look at integrating automated builds and unit tests into your project. With automated builds you are able to schedule builds to happen at specific times and allow your team to run their own builds to test the application or see the unit test results with their own changes. You can compare builds to see what changed from build to build.
For more information
- Stream strategies with Rational Team Concert 3.x
- Working with Work Items: Managing change using best practices
About the author
Chris McGee is a member of the Jazz Source Control team. Previously, he worked on modeling tools for the Rational Software Architect project.
Copyright© 2012 IBM Corporation