
Work Item Customization in Rational Team Concert 3.x
For IBM Rational Team Concert (RTC) 3.x, the interface for customizing work items has undergone significant usability and feature enhancements. A previous article covered customizing work items for Rational Team Concert 1.0 and 2.0. Most of the concepts explored in that article have not changed. This article is intended to highlight some of the biggest enhancements made in RTC 3.0. Please note that this article is not exhaustive!
The screenshots and examples assume you have set up the example JUnit Project project area.
Customizing Work Items
In RTC 3.0, you can now customize work items via the Web UI in addition to the Eclipse UI. As this is the first release containing a Work Item Customization Web UI, only the key capabilities available in the Eclipse UI have been implemented at this time. Some Web UI capabilties, such as the WYSIWYG Editor Presentation Editor, offer significant improvements over the Eclipse UI.
Web UI
The Web UI for configuring work items can be discovered on the Project Area editor. In this example, we can configure work items for the JUnit Project project area starting from the RTC Administration Web UI by selecting Project Areas > JUnit Project > Work Items. The Web UI currently supports customizing work item types, attributes, enumerations, change management type bindings, workflows, and editor presentations. Where the Web UI and Eclipse UIs have been designed to be as similar this article will alternate between using screenshots from each interface.

Eclipse UI
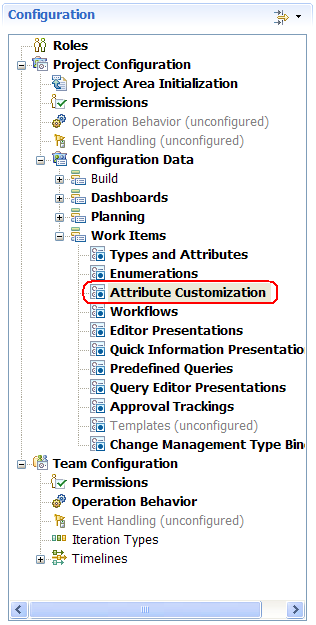
The Eclipse UI for configuring work items is accessible from the same place as in previous releases. You can right-click JUnit Project and select Open. Then select the Process Configuration tab in the editor that appears. The Eclipse UI supports additional configuration beyond what is currently available in the Web UI.

Work Item Types
The way work item types and attributes are created and managed has changed significantly. You manage your configuration in terms of work item types rather than type categories. This better matches the pattern that users were already using when customizing their work items.

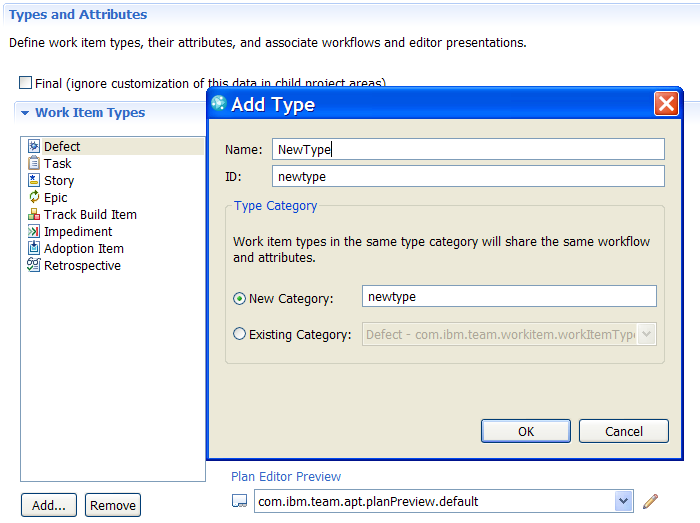
New work item types are created via the Add… button. Instead of creating work item types from type categories, you now create a work item type and choose the type category to associate with it. Work item types have many properties that can be changed including the name, icon, or aliases. Aliases are set using a comma separated list. Aliases allow for links to be easily created between work items. For example, if the term ‘defect’ is an alias for the Defect work item type then mentioning ‘defect 123’ in a work item will create a link from that item to Defect 123.
Work Item Attributes
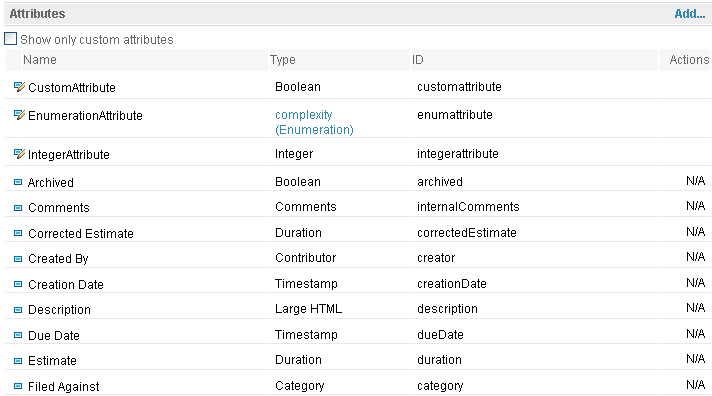
The attributes associated with the selected work item type are displayed in the Attributes table. In RTC 3.0, built-in attributes are shown in addition to custom attributes. Custom attributes are indicated by  icon and built-in attributes are indicated by
  icon. New attributes can be created using the Add… button. Built-in attributes and custom attributes are editable in both the Eclipse and Web UIs. The Web UI only supports renaming for built-in attributes. Also, in Web UI, Enumeration types are shown as links to allow direct navigation to the associated Enumeration.
The Eclipse UI supports renaming, setting attribute customizations, and dependencies for all attributes via an Edit… action. Note that modifying built-in attributes will affect all the work item types in the same project area.

In the Eclipse UI, you can also create a new attribute when adding a new presentation to an editor. From a presentation editor, select Add Presentation… or edit an existing presentation. In the dialog that appears, you will find the New Attribute… option at the bottom of the attribute combo box as seen below.
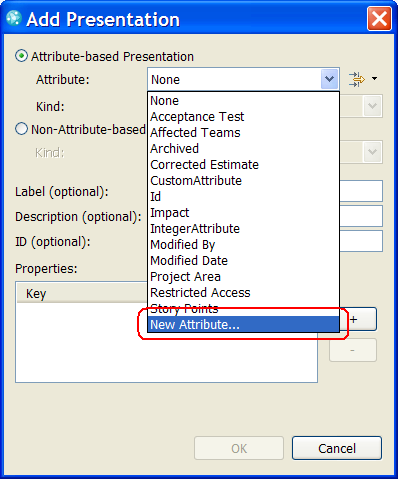
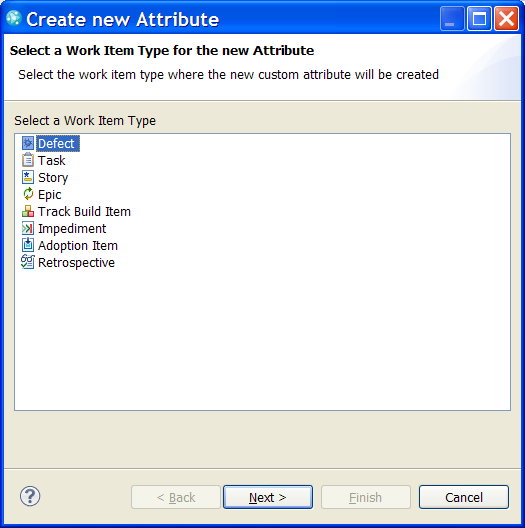
This will open the Create new Attribute wizard. The attribute created here will be used in your presentation. This is great when you want to quickly create a new attribute to appear on a work item editor you are busy modifying.
A note about Attributes and Type Categories
Changing a custom attribute will affect all work item types within the same work item type category as in previous releases. When other work item types would be affected by changes, the attributes table is decorated with a warning message.
Bindings
Bindings allow work item types to use different editor presentations and workflows. Bindings allow you to have multiple work item types use the same workflow or editor presentation without having to change them. In previous versions of IBM Rational Team Concert, the bindings between a work item types and categories and editor presentations and workflows were all configured in separate locations. Those bindings are now configured on the same page as the work item type. You can set them for the selected work item type through the available combo boxes. Pencil buttons have also been added to allow direct navigation from a work item type to the associated workflow or editor presentation for easier editing.

Icons
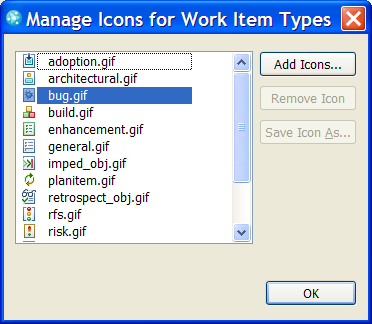
The Icon section which existed in many places in previous versions has been removed to save space. Icons are now managed where appropriate through a separate Manage Icons UI. For example in the Eclipse UI, there is a Manage Icons… option available in the work item type icon drop-down menu that opens a separate dialog.
WYSIWYG Editor Presentation Editor
The Web UI uses a WYSIWYG editor for customizing work item editor presentations. This allows you to preview your work item editors in the Web UI and get instant feedback as you modify them.
Work Item editors consists of tabs, sections and presentations (see Work Item Editor Presentations article for further details). Tabs can be added using button in the tab bar. To edit, remove, or to move position of a tab use the tab’s dropdown menu.
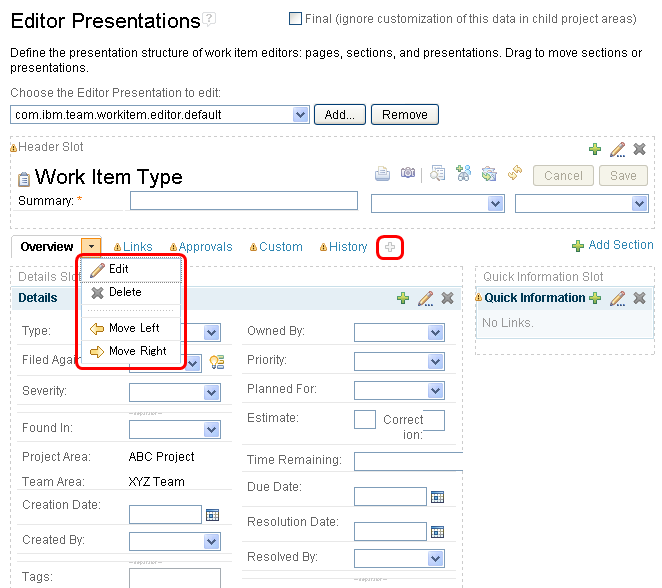
Sections can be added using Add Section link in the top-right of the page. To edit or remove sections, use the toolbar actions on the top-right of the section headers. Tabs and sections can be shared across multiple editors. Tabs or sections that share their contents across other editors are indicated by warning icons shown in the left of tab or section title.
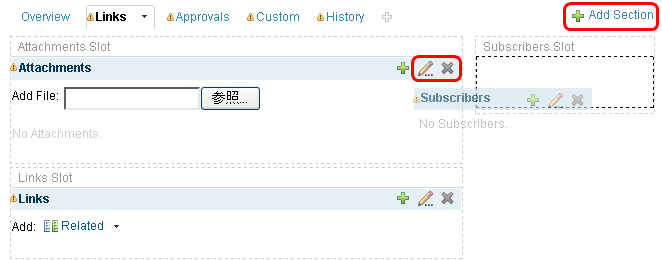
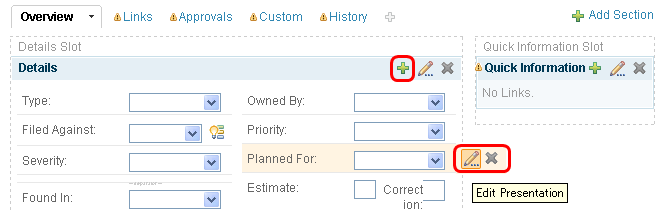
Presentations can be added using icon in the section header. To edit or remove a presentation, hover the mouse over the presentation that you want to edit or remove and action icons will be displayed that can be used for editing or removal. Presentations and sections can be positioned and arranged with the mouse using drag and drop.
Attribute Customization
Attribute customization is only currently supported from the Eclipse UI. Attribute customizations allow you to set default values, calculated values, value sets, and validators for work item attributes. Attribute customizations are designed separately and then applied to attributes. Attribute Customization is configured from the Attribute Customization section.
A variety of preconfigured customization types are available. For example the regular expression validator which allows for messages to be displayed if the attribute’s value matches a regular expression. Attribute customizations are added using the Add… button and can be configured once selected.
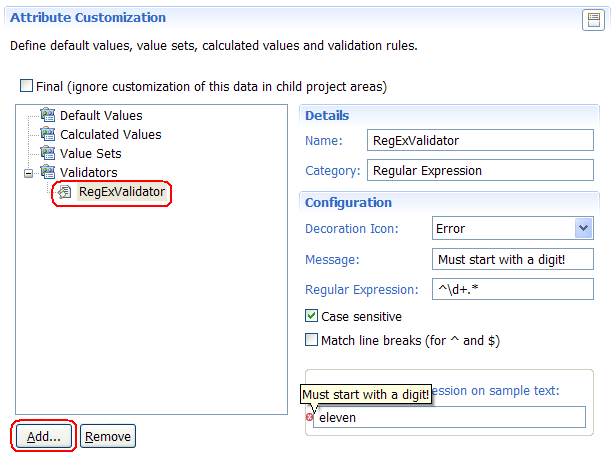
Once an attribute customization has been configured, it can then be associated with valid attributes. You can set them when creating or editing an attribute from the Types and Attributes section.

You can learn more about attribute customization by visiting the Customizing attributes in Rational Team Concert 3.0 article.
Enhanced Workflows
Action and Resolution order
Workflows are used to govern the process that your work items follow or in other words the state transition policy. Workflows are still configured in much the same way as before but there are a few new enhancements. For one, the order that workflow actions and resolutions appear in work item editors can now be changed. Using the Web UI, you hover the cursor over the workflow state you want to modify and click the Pencil button.
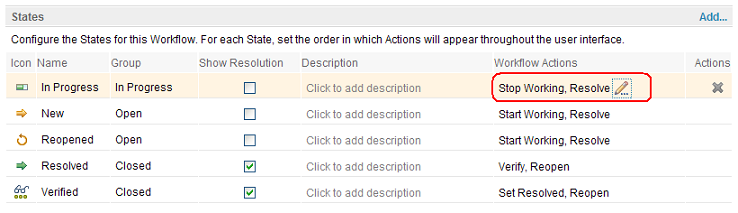
This will bring up a dialog you can use to modify the order that actions appear for this state.

For the Eclipse UI, action or resolution order can be set using drag and drop or the Move Up and Move Down buttons.
State Groups
A new capability for Workflows is the ability to create and modify State Groups. This is only currently supported from the Eclipse UI. In RTC 2.0, State groups allowed related workflow states to be associated with each other. Hard coded groups existed called In Progress, Open, and Closed. In RTC 3.0, In Progress, Open, and Closed are the default groups and are also the categories you associate with new state groups. Also, state groups can now be associated with workflow resolutions down to the action resolution. Additionally, State groups can get associated with OSLC Groups which are leveraged in Open Services for Lifecycle Collaboration (OSLC) based product integrations.
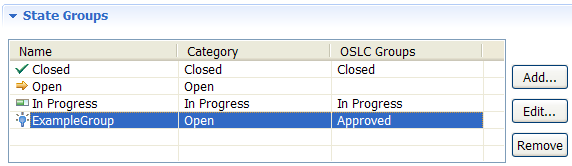
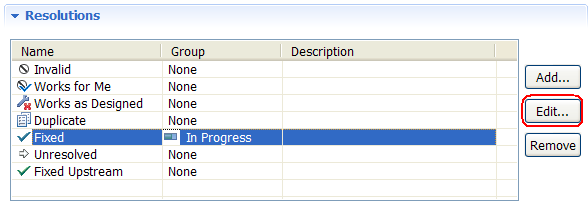
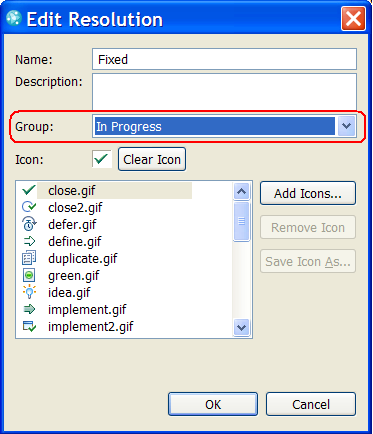
State groups are configured for states, resolutions, and action resolutions through their edit dialogs. For example, to set the state group for a workflow resolution you Edit… the workflow resolution and set it in the dialog.
State group precedence for a work item uses the following rules. A state group set on the action resolution takes precedence over any state group set on the current workflow resolution. Additionally, the resolution state group takes precedence over the state group set on current workflow state. Basically, Action Resolution overrides Resolution which overrides State.
Change Management Type Bindings
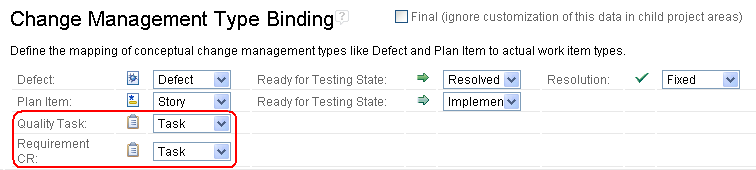
In RTC 3.0, two additional type bindings have been added for Quality Task and Requirement Change Request (Requirement CR). These bindings are used to configure integrations with other products such as Rational Quality Manager.
References
- Work Item Customization in Rational Team Concert
- Work Item Editor Presentations
- Customizing attributes in Rational Team Concert 3.0
- Open Services for Lifecycle Collaboration
© Copyright 2010 IBM Corporation