
Share and manage documents through the Rational Team Concert 4.0 Web UI
This article shows how to share and manage documents directly on a stream, in the Rational Team Concert 4.0 Web UI. This workflow is particularly well suited for team members who create documents with specialized applications such as graphic design tools, word processing tools, and spreadsheet editors. Documents can easily be loaded, edited locally and uploaded back via a web browser. This is a lightweight alternative to using a rich client IDE.
Table of Contents
- Getting started
- Adding documents to a stream
- Modify the content of existing documents
- Deleting resources
- How to manage your locks
- How to search artifacts
- Advanced – setting content type and encoding manually
- Conclusion
1. Getting started
a. Project area, team members and a stream
Before getting started you will need
- An installed and configured 4.0 server. See Running the setup wizard (Express setup).
- A project area, e.g. Docs.
- Users, e.g. Zoe and Mike who are members of Docs project area.
- A stream, e.g. Docs Stream including a component Docs Default Component.
b. Navigate to a stream
Zoe wants to add some documents to the Docs Stream. She needs to browse through that stream in the web UI.
- Navigate in a browser to
https://[fully qualified hostname]:9443/jazz/web. - Go to Project Areas and pick Docs.
- Go to Source Control menu and select Streams.
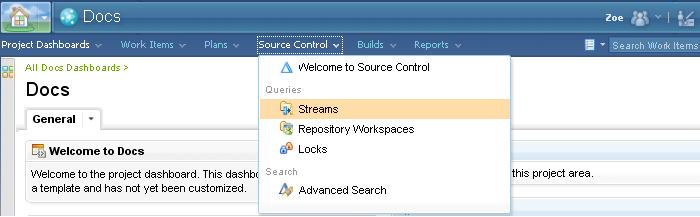
Zoe now sees all the streams that are currently in the project.
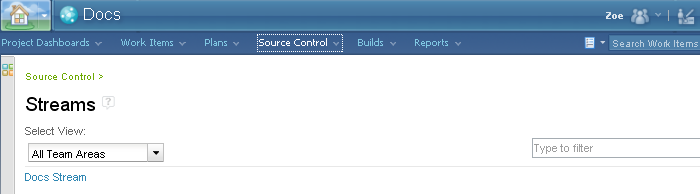
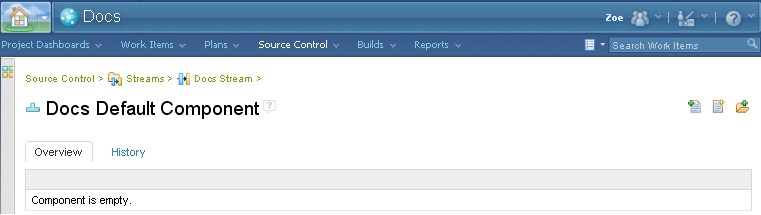
- Click on the Docs Stream link. This stream was created with a single component named Docs Default Component.
- Click on the Docs Default Component link. Component is empty, but not for long…
2. Adding documents to a stream
Zoe is browsing through the component in the stream named Docs Stream. Zoe can add folders and upload files into that component, directly into the stream.
Note. The rich client or command line interface client requires the user to check-in resources (files and folders) to a repository workspace before they can be delivered to a stream. The Web UI supports a unique lightweight way of creating and modifying resources directly in a stream.
a. Creating folders
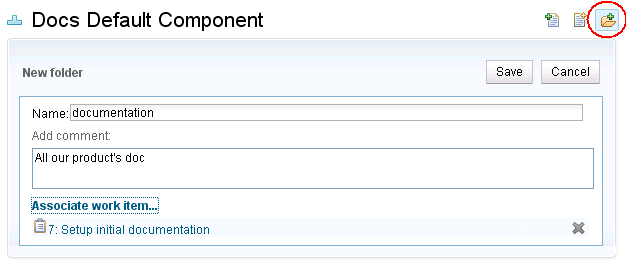
Zoe decides to add a few folders documentation, technotes and videos. She clicks on Add Folder. A resource editor shows up and Zoe enters the name of the folder. She enters a comment and picks an existing work item. Finally, Zoe hits Save and the folder gets created.
Zoe adds a few more folders. She follows the link to the newly created documentation folder. She is now ready to add new files into that folder.
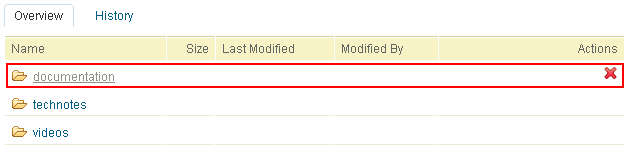
Note. When hovering over a folder, a Delete action shows up. Clicking on that action will delete that folder. See 4. Deleting resources for details.
b. Adding files
Zoe is now ready to add files into the folder documentation. She clicks on Add File. A resource editor comes up and Zoe can pick the file she needs to upload from her computer to the server.
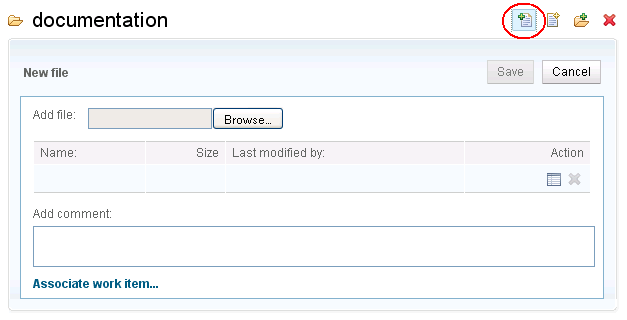
The content of the selected file is now being uploaded to the server. Upload time will vary with the size of the file and the speed of the network connection. If the wrong file was selected, Zoe can click on the Cancel link to cancel the upload. Zoe can enter a comment and associate work item(s) while waiting for the upload to complete. Once the upload is completed, the size of the file is displayed in the resource editor and Zoe just needs to hit Save to add the new file to the stream.
Zoe repeats those steps to add a total of four files into that folder documentation.
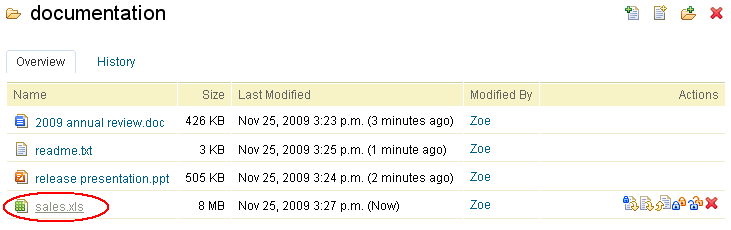
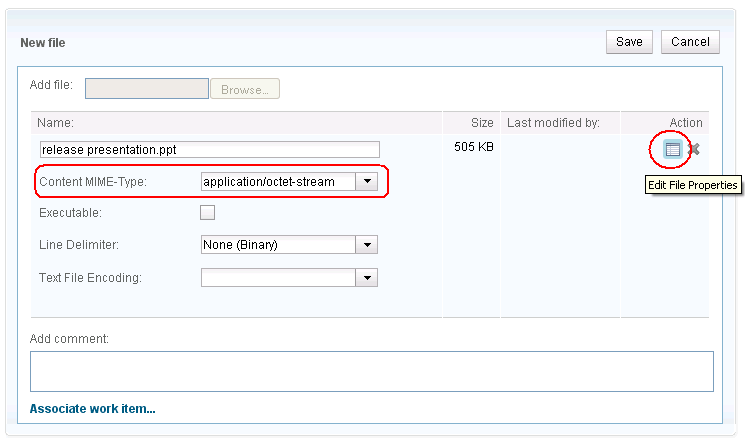
Note. The web browser auto-detects the content type of the new file. E.g. a text file will typically be reported as text/plain with a default encoding such as Cp1252. A gif image file will be uploaded with the image/gif content type. In some cases it is important to set the content type and encoding explicitly. A resource with an incorrect content type or encoding may not display correctly in the Web UI and may not be edited correctly by other team members. The resource editor has an ‘Edit File Properties’ action to manually set those settings and also rename the file or mark that file as executable. See 7. Advanced – setting content type and encoding manually for details.
Zoe has completed her part. She has setup a project area, added herself and Mike to that project area. Zoe created folders and populated the documentation folder with initial content. It is time for her teammate Mike to jump in and do some work… Zoe opens a work item for Mike, asking him to update the sales spreadsheet document. She pastes a link to that document into the work item, so it is easy for Mike to navigate directly to that document in the Docs Stream stream.
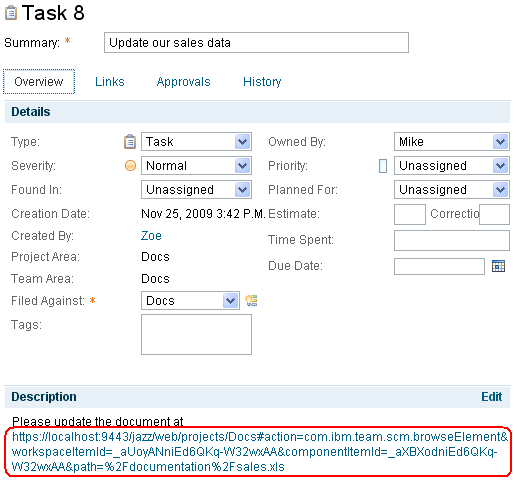
Note. The Work Item also contains a links tab that can hold Related Artifacts. This is also a good place to add a link to a particular document.
3. Modify the content of existing documents
Mike has received an email notification about the work item Zoe assigned to him. He clicked on the link to that work item in his email and the work item shows up in a web browser. Sure, Mike will be able to update the sales document. He follows through the link to that document that Zoe provided. This takes him to the Web UI showing information about that document on the same stream that Zoe is working on. The page includes actions to manage that resource and Mike is about to use the one named Lock and download.

a. Lock and download workflow
Mike wants to download the current version of the sales document onto his local machine to edit it with his spreadsheet application. But what if Zoe also decides to edit this document and upload it back before Mike? This could happen. To prevent that situation, Mike needs to lock this document in the stream Mike and Zoe are working on. Mike can click on the lock action then click on the download action. This is such a common gesture, the first action is actually a combined Lock and download action. This is the one Mike uses all the time, and the one that is strongly encouraged to avoid downloading a document for further editing without locking it.Note. On Internet Explorer 7 and Internet Explorer 8, security settings may block Lock and download. The information bar may come up and bring back the user to the default dashboard page. There are two possible workarounds. First workaround is to add the server to the list of trusted sites and set its security level to medium low. The second workaround is to avoid Lock and download and instead separately click on Lock and Download actions. This is because Internet Explorer has restrictions on download initiated from a javascript.
After Mike clicks on Lock and download the page shows the document is now locked by himself and the web browser asks Mike to either save the document locally or pick an application to open it. Mike can update the data through his favourite spreadsheet editor. Zoe cannot modify that file in the stream because it is locked by Mike. This is how things look like if Zoe attempts to modify this file.

Mike has now completed the editing of the document on his computer. He is ready to upload the new content into the stream. If Mike had closed the web browser used for the Lock and download, Mike would simply follow the link to that document found in Zoe’s workitem. Or Mike could simply login to the server’s web UI, pick the project area named Docs, select Locks in the Source Control menu, and find all the resources currently locked by Mike.
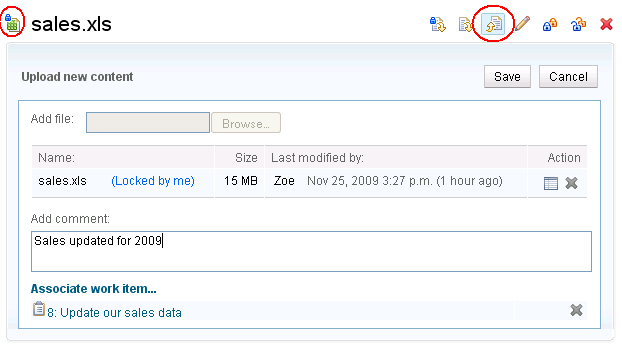
Mike clicks Upload. The resource editor comes up and Mike picks the file he modified on his machine. It is now a much bigger file. Mike adds a comment and associates the work item assigned to him. When the upload is completed, Mike hits Save. The document is automatically unlocked. Zoe can now download the new content (and lock the document if she needs to update Mike’s new version). Mike closes the work item. Mission accomplished!
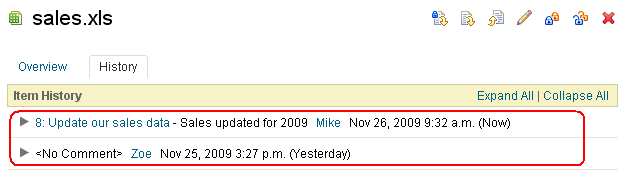
Note. Adding and modifying documents through the web UI on a stream creates the same change sets that a rich client or CLI client would create. This means all the usual Source Control operations related to change sets work indifferently with changes from the Web UI or from other clients. E.g. the history of the file shows it was added by Zoe first then modified by Mike.
b. Edit text documents
We have seen how new documents can be uploaded, and how existing documents can be locked and downloaded, edited in a desktop editor and uploaded back. Text documents can be created and/or edited directly within the Web UI. This is very convenient for quick editing of a readme.txt file, fixing the copyright notice or a string inside a java file, or for simple xml documents.
Again, changes are done directly on a stream so they are visible immediately to everyone in the team who has access to that stream.
Zoe decides to add a text file named dictionary.txt into the documentation folder. She clicks on the Create and edit a new text file action and a resource editor comes up. Zoe names the file and types in the textual content in the web editor itself. As usual, Zoe can add a comment and associate a work item. She hits Save and the new text file is created.
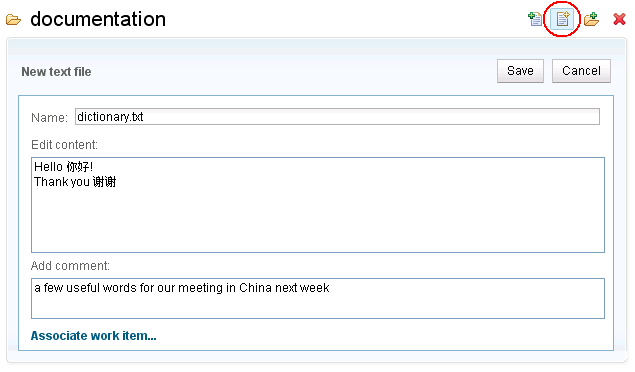
Note. The new text file is automatically created with the default content type text/plain and the encoding UTF-8.
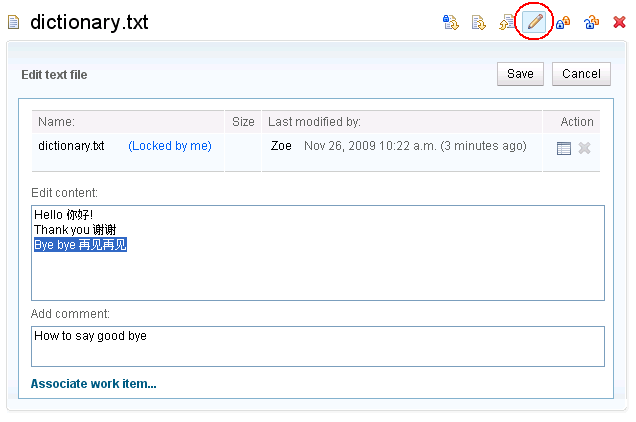
Zoe or Mike can further modify this text file from within the Web UI. Zoe clicks on the link to that file and clicks on Edit text file. The file is locked and its content loaded in the resource editor. This ensures Mike cannot modify that file in the stream at the same time. Zoe edits the content and hits Save. Done! The file is automatically unlocked and it no longer shows up in the My Locks view.
Note. Edit text file should only be used on valid text documents. E.g. documents with a content type such as text/plain. It should not be used on binary files since it would most likely result in corrupting the document. The user will be warned if the document does not appear to be a text file.

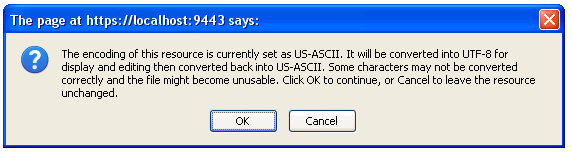
Note. Edit text file supports valid text files in UTF-8 encoding. It also works with text files that have a different encoding by implicitly converting the content to UTF-8 for editing in the Web Browser and converting back to the original encoding upon saving. That conversion may corrupt some characters with certain encodings. If that’s the case, the workaround is to lock and download the document and use a desktop editor that supports the document’s encoding, then upload it back. See 6. Advanced – setting content type and encoding manually for details.
4. Deleting resources
Mike and Zoe have been adding files and folders in a stream. Files and folders in a stream can also be deleted from the Web UI, with the Delete action. E.g. Zoe can delete the file readme.txt from the stream Docs Stream.

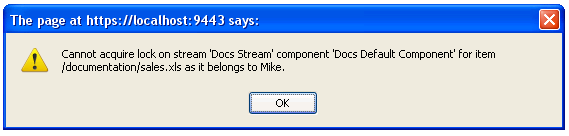
Note. A file cannot be deleted if it is locked by someone else. A folder cannot be deleted if any of its children (no matter how deep) is locked by someone else. E.g. Mike has locked the document sales.xls and Zoe is told she cannot delete the parent folder document because of that lock. Zoe must ask Mike to release his lock or keep the folder.
5. How to manage your locks
Mike and Zoe have collaborated and modified the same documents (e.g. sales.xls) in the same stream. Locking the document prior to downloading its content for editing ensures no one else will modify its content before you are ready to save your change in the stream (and unlock). No one can delete that resource nor any of its parent folders for as long as you keep it locked.
a. How to recognize resources locked by you and by others
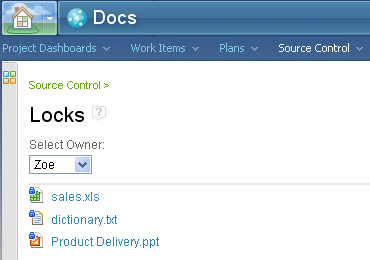
A resource that is locked by you is decorated with a blue lock icon. A resource locked by someone else is decorated with an orange lock icon. In the example below, Zoe locked the filedictionary.txt and Mike locked the file sales.xls. Zoe can easily see which files are locked by Mike in that folder on that stream, and vice-versa. In the folder view, a tooltip shows up when hovering over a locked resource, revealing the name of the person who owns the lock. 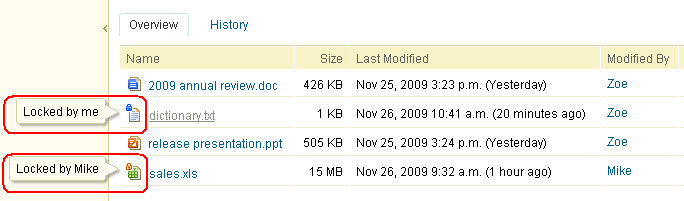
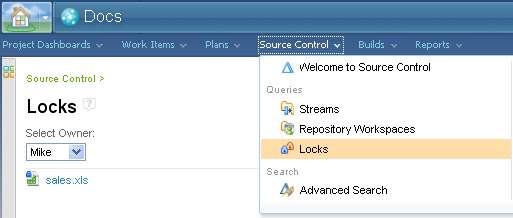
b. How to find all my locked resources
In the real world, a user will often work on files from different streams in different project areas. How can one keep track of the resources they have locked (e.g. through the lock and download gesture)? This is the purpose of the Locks page of the Source Control Web UI. The page can be accessed by either selecting Locks in the Source Control menu or clicking on Show Locks on the Source Control Welcome page. It lists all the resources locked by a user, in all the streams and project areas. Simply select a different user in the Select Owner: drop down to see resources locked by that user. Click on the resource and it will show up in the appropriate stream that it is locked in. From there, the user can upload (and unlock) new content, delete the resource or unlock it if no further change is needed.
6. How to search artifacts
As the Docs project grows bigger, the number of streams, components, change sets, etc. can increase significantly. How can you efficiently locate the resource you are looking for? You can use the quick search or the advanced search for the most special cases.
a. How to do quick search by name
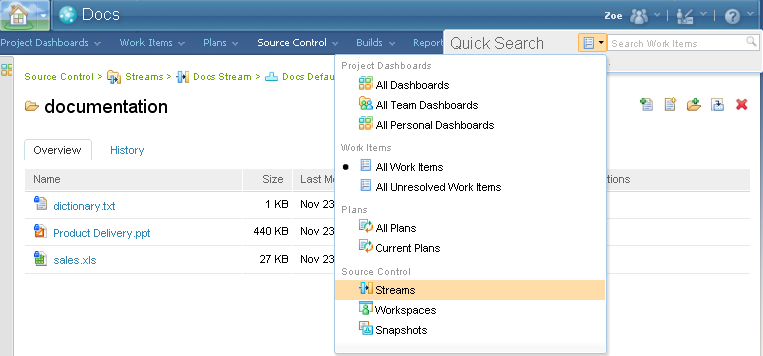
On the global navigation bar in the Rational Team Concert 4.0 web UI, there is a new quick search box on the top right corner. Click on the little down arrow in front of the search box shows a menu for all the different types of artifacts that are available for quick search. There are three types of resources under Source Control available for quick search: Streams, Workspaces and Snapshots. Click on Streams to enable the search for streams.
Then start typing the name of the stream you are looking for in the search box. As you type, all streams whose name starts with the string will show up in a drop down. You can simply click on one of the matches in the drop down to browse into that stream.
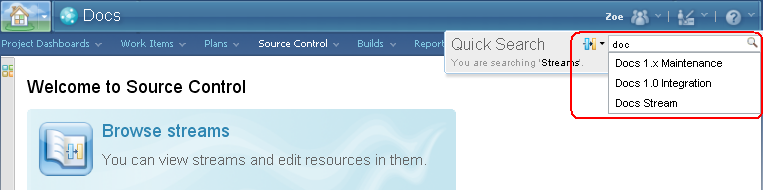
Alternatively, press enter after entering a search string will bring you to a new page with the search result. Click on a resource in the search result to open it
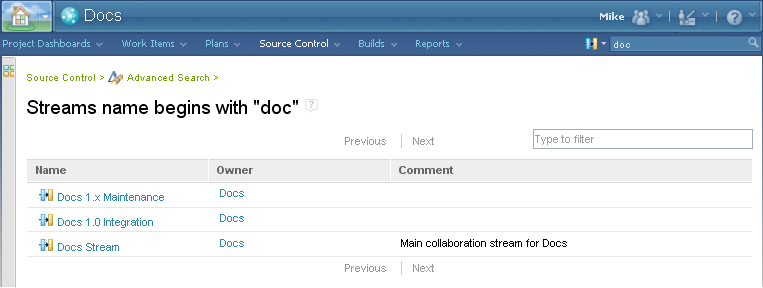
b. How to do more advanced search
If what you want to search for is not available from the quick search, or you want to search by more fine tuned criteria, you can use the advanced search. Open the Advanced Search page by either selecting Advanced Search from the Source Control menu, or clicking on Advanced search on Source Control Welcome page.
There has been a lot of changes in the Docs Stream since it was created. Zoe wants to find out what has been changed in the dictionary file for copyright and who made the change. She roughly knows the change was done sometime during the first week of November. So she opened the Advanced Search page, selected Change Sets to search for and entered what she knows about the change set as search criteria to narrow down the search.

Clicking the Search button brings up the search results.
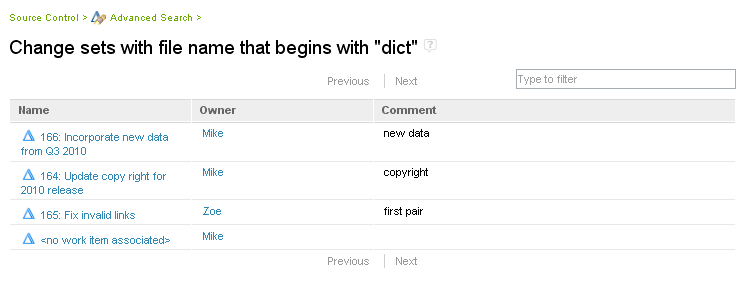
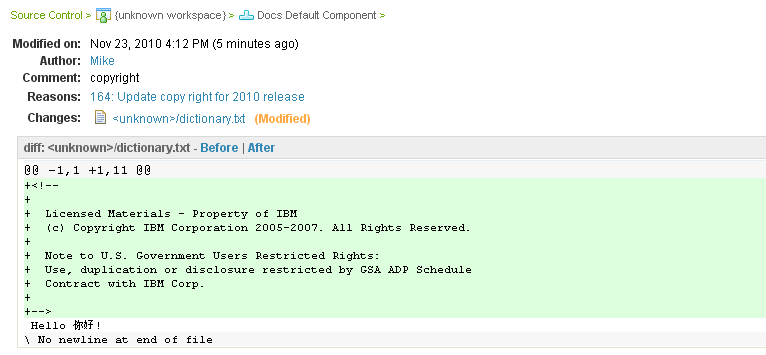
Zoe finds the desired entry in that list. She clicks on the change set made for work item “164: Update copy right for 2010 release” and sees the copyright was first added to the file dictionary.txt by Mike on November 23rd.
7. Advanced – setting content type and encoding manually
Zoe has been adding files representing word, spreadsheet and presentation documents. Their file formats are different. The content type also called Internet media type or MIME type is a property that identifies that file’s format. When a file is added through the Web UI, the content type is set to Auto Detect by default. This instructs the web browser to auto detect the content type. After the upload is completed, the user can click on the Edit file properties action to see the content type picked by the web browser. The content type can be manually overriden before hitting Save.
Text files are characterized by their content type and two other file properties. The text encoding specifies which set of characters is used in the file content and how it is stored. A popular format is the unicode format, in particular the UTF-8 encoding. The encoding can and should be set manually as it usually cannot be reliably detected by the web browser. The second property defines the line delimiter used in the text file. Windows platforms typically use 2 special characters CR LF, Linux, Unix default to LF, Mac uses CR. RTC Source Control can adjust the line delimiter automatically if requested with the PLATFORM value. This avoids developers on one platform having to deal with incompatible line delimiters introduced by developers working on a different platform – particularly annoying when merging changes in a compare editor in an IDE.
Note. The encoding property must be empty for non text documents. Line delimiter property is meaningless and ignored for non text documents (i.e. when the encoding property is empty).
Note. The name of the file and the executable property can also be modified in the Resource Editor. Setting the executable property will instruct a rich client or CLI client to load that resource with the native executable flag in the host filesystem. E.g. this is typically used for shell scripts and binary executables.
Zoe and Mike modified the content of existing files. In such case, the web browser is not asked to auto-detect the content type of the modified content. The resource editor reuses the existing properties of that file by default. Again, the user can click on the Edit file properties if the new content requires a different content type and/or encoding.
Example 1. Upload a word document and set its content type manually
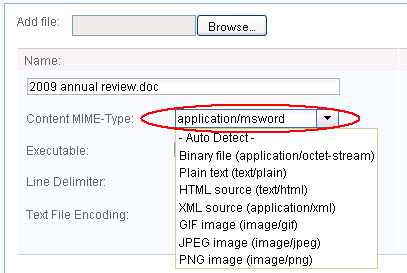
Zoe added a word processing document named 2009 annual review.doc through the Web UI. The content type was the default Auto Detect and her web browser picked application/octet-stream. Zoe can manually pick a more appropriate content type e.g. application/msword. Having the right content type allows web browsers and other clients downloading the document from the server to get the most appropriate viewer or editor. Zoe hits Save and the file is added to the stream with the application/msword content type.
Example 2. Upload a text file that uses the Japanese encoding EUC-JP
Mike needs to upload a translation file messages.properties specifically written in the encoding EUC-JP. He clicks on Edit file properties in the resource editor and manually picks the EUC-JP encoding. Mike hits Save.

Example 3. Upload an html document and set its encoding
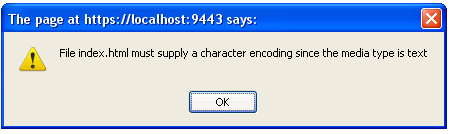
Zoe adds an html document index.html to the Docs Stream stream. When she hits Save in the resource editor, a prompt asks her to specify the encoding.
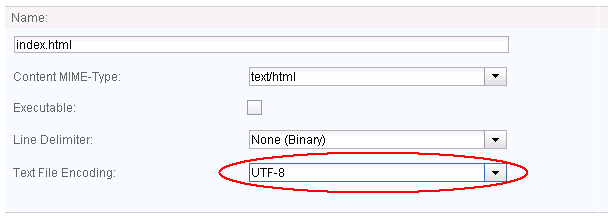
Zoe clicks on Edit file properties in the resource editor. The web browser auto-detected the content type text/html but the encoding property is left blank. HTML documents (and many XML documents) are an interesting case because unlike most raw text files they usually define their encoding in a special html tag <meta http-equiv=Content-Type content="text/html; charset=UTF-8">. Zoe searches this tag with a local editor and finds the encoding is UTF-8. She picks the UTF-8 encoding in the resource editor and hits Save. The file is added to the stream and shows up correctly in the Web UI.
8. Conclusion
Web UI offers a lightweight way for sharing and managing documents, directly on a stream. Any user with access to that stream can easily upload or download any document in that stream through their web browser. You can advertise a particular resource by copying its URL and pasting it into an email, a work item, etc. The recipient will be able to download its content, review the history of changes and maybe decide to lock and download the document and edit it further. As locking is required for modifying or deleting resources, no one can trample on your on-going changes.
About the authors
Christophe Cornu works for IBM and is an RTC Source Control committer. Prior to that, he was an Eclipse and SWT committer where he learned how to treat with respect all the widget toolkits that fill up our screens with great looking pixels (most of the time). He can be contacted at christophe_cornu@ca.ibm.com.
Scott Cowan is an RTC Source Control developer. He has been developing Eclipse client and server applications for IBM Rational for over 10 years, and can be contacted at scowan@ca.ibm.com.
Copyright © 2012 IBM